
CHAPTER 14
Distributing and Deploying Applications and Packages
IN THIS CHAPTER
![]() Creating and Managing Collections
Creating and Managing Collections
![]() Deploying Applications and Packages
Deploying Applications and Packages
Chapter 11, “Creating and Managing Applications,” Chapter 12, “Creating and Using Deployment Types,” and Chapter 13, “Creating and Managing Packages and Programs,” discuss applications with deployment types (DTs) and packages with programs; later chapters discuss software updates, mobile device management, endpoint protection, and operating system deployment (OSD). All these object types have at least three things in common:
![]() Deployable: All are objects you deploy to one or more systems or users. As you deploy, you also want to monitor the deployment’s status.
Deployable: All are objects you deploy to one or more systems or users. As you deploy, you also want to monitor the deployment’s status.
![]() Targeted Group: To leverage any of these objects, you must target a group of systems or users. In Configuration Manager (ConfigMgr) terminology, these target groups are called collections.
Targeted Group: To leverage any of these objects, you must target a group of systems or users. In Configuration Manager (ConfigMgr) terminology, these target groups are called collections.
![]() Content Availability: Almost everything you deploy has associated content that must be available for the ConfigMgr client to install.
Content Availability: Almost everything you deploy has associated content that must be available for the ConfigMgr client to install.
As an example, deploying Microsoft Office requires a package or ConfigMgr application with the associated content for the installation. This requires sending the content to desired distribution points (DPs), creating a collection of systems or users to target, and creating a deployment. After deployment, you move to monitoring. You may need to monitor the distribution status of content to the DPs, as well as the status of the deployment.
This chapter discusses the features of content distribution in ConfigMgr and using DTs or programs to control deployment behavior. It also discusses interaction with ConfigMgr from an end-user perspective, using the old Software Center, Application Catalog, and new Software Center. This chapter also discusses options for the end user to configure deployment behavior and troubleshooting deployments when something goes wrong.
Creating and Managing Collections
Collections may very well be the most important object type in ConfigMgr. They are used for software distribution, patching, settings management, client settings, power management, and more. ConfigMgr incorporates two distinct types of collections:
![]() Devices: Includes computers and mobile devices
Devices: Includes computers and mobile devices
![]() Users: Includes usernames and Active Directory user groups
Users: Includes usernames and Active Directory user groups
Collections may also be the most dangerous object type in ConfigMgr. If you modify the rules of a collection, you may significantly increase its number of devices or users. If the collection has mandatory software deployments, settings management configurations, or even OSD mandatory assignments, the ensuing chaos and churn could quickly create a “resume-generating event.” Always use extreme caution when modifying collection membership.
NOTE: COLLECTIONS AND DEPLOYMENTS REPLICATE ACROSS ALL PRIMARY SITES
If you have multiple primary sites, you may have noticed that each collection shows the membership information for its site plus a member count showing the total count of members, hierarchy-wide, for this collection. This information is important; when you create collections and target deployments at one site, the collection and rules are updated and evaluated at all primary sites, and the deployment is replicated.
The authors recommend using the central administration site (CAS) to create collections and target deployments. The CAS is the only site that displays complete collection membership.
Creating a Collection
All software deployments except task sequences and software updates can be targeted to user collections. Consider the following when targeting deployments:
![]() User-targeted deployments appear in the Application Catalog.
User-targeted deployments appear in the Application Catalog.
![]() User-targeted deployments appear in the new Software Center.
User-targeted deployments appear in the new Software Center.
![]() Device-targeted deployments appear in both the old and new Software Center.
Device-targeted deployments appear in both the old and new Software Center.
![]() Deployments that appear in Software Center are evaluated when the policy is downloaded from the management point (MP).
Deployments that appear in Software Center are evaluated when the policy is downloaded from the management point (MP).
![]() Deployments that appear in the Application Catalog are evaluated only when the user selects the application to be installed.
Deployments that appear in the Application Catalog are evaluated only when the user selects the application to be installed.
![]() Application approval requests can be enabled only with user-targeted deployments (through the Application Catalog).
Application approval requests can be enabled only with user-targeted deployments (through the Application Catalog).
Perform the following steps to create a new collection:
1. In the ConfigMgr console, navigate to Assets and Compliance, choose the Devices or Users collection node, and select Create Device Collection or Create User Collection from the ribbon bar.
2. On the General page of the Create Device Collection Wizard, specify the name of the collection and the limiting collection. (Every collection requires a limiting collection. Specifying a limiting collection filters the collection to ensure that only resources in the limiting collection are available to the current collection.) Click Next.
3. On the Membership Rules page, click Add Rule to add a collection membership rule. As discussed in the following sections, four types of collection rules are available: Direct, Query, Include, and Exclude. The Membership Rules page shows that you can add membership rules, use incremental updates, and schedule a full collection membership update. (The “Performing Incremental Updates” section, later in this chapter, discusses the difference between full and incremental updates.)
About Direct Rules
A direct rule (also called a static rule) is a rule that does not require a collection update schedule. Select Direct Rule to open the Create Direct Membership Rule Wizard.
Following is a brief description of each property on the Membership Rules page:
![]() Resource Class: For a device collection, select System Resource to find devices based on discovery and inventory information.
Resource Class: For a device collection, select System Resource to find devices based on discovery and inventory information.
![]() Attribute Name: Choose the desired attribute. For this example, choose Name.
Attribute Name: Choose the desired attribute. For this example, choose Name.
![]() Exclude Resources Marked as Obsolete: When rebuilding a system or reinstalling the client, you may encounter a duplicate record. This occurs when ConfigMgr marked the old record obsolete, meaning software cannot be deployed to it. Unless you plan to troubleshoot obsolete clients based on a collection, you should exclude obsolete records from your collections. Otherwise, you may see systems in your collection that are no longer valid, which creates extra work when troubleshooting software delivery.
Exclude Resources Marked as Obsolete: When rebuilding a system or reinstalling the client, you may encounter a duplicate record. This occurs when ConfigMgr marked the old record obsolete, meaning software cannot be deployed to it. Unless you plan to troubleshoot obsolete clients based on a collection, you should exclude obsolete records from your collections. Otherwise, you may see systems in your collection that are no longer valid, which creates extra work when troubleshooting software delivery.
![]() Exclude Resources That Do Not Have the Configuration Manager Client Installed: Devices in this category are devices discovered through Active Directory (AD) or some other means that do not appear to have the ConfigMgr client installed. Enable this check box as well.
Exclude Resources That Do Not Have the Configuration Manager Client Installed: Devices in this category are devices discovered through Active Directory (AD) or some other means that do not appear to have the ConfigMgr client installed. Enable this check box as well.
![]() Value: Enter a device name (usually a computer name) or a partial name. You can use the % sign as a wildcard, and you can use the % by itself for a full list of items from which to choose.
Value: Enter a device name (usually a computer name) or a partial name. You can use the % sign as a wildcard, and you can use the % by itself for a full list of items from which to choose.
Click Next to display resources that meet the criteria and then select one or more devices in the Select Resources page. Complete the wizard, and the collection membership appears in the console. You may have to refresh the view to see the new members.
TIP: MULTIPLE PRIMARY SITES CAUSE SLIGHT COLLECTION MEMBERSHIP DELAY
ConfigMgr uses its SQL replication feature to replicate data across a multi-site hierarchy. The collection membership rule is replicated from the CAS to all primary sites so each primary site can evaluate that rule. If the collection membership changes on a primary site (due to the new collection rule or any other reason), that information is replicated back to the CAS. In the authors’ experience, the delay in seeing the membership change on the CAS is generally four to five minutes.
Collection membership is not complete on the CAS until the primary sites evaluate the membership rule(s) and replicate the results back to the CAS.
Using Query Rules
A query rule (sometimes called a dynamic rule) is a rule requiring a collection update schedule (incremental, full, or both) to update the membership information automatically, based on the criteria of the rule. Selecting Select Query Rule opens a dialog where you can import a query statement from the Available Queries node or select Edit Query Statement to modify the default query rule (this selects all systems, limited to the collection). Chapter 20, “Configuration Manager Queries,” discusses queries.
Importing a query copies the query statement to the collection. This means the statement in the collection is not linked to the query rule. If you later modify the query rule (in the query), the query rule for the collection does not change. The example in this section walks through the process of creating a rule for all systems that have 7-Zip installed. Follow these steps:
1. Enter a query rule name and select Edit Query Statement to modify the default query.
2. On the Query Rule Properties dialog, select Criteria and click the starburst icon to create a new rule.
3. In the Criterion Properties dialog, select Simple value as the criterion type and click Select.
4. In the Select Attributes dialog, choose Add/Remove Programs for the attribute class and Display Name as the attribute. Click OK.
5. Back in the Criterion Properties dialog, change the Operator dropdown to is like.
6. For Value, enter 7-Zip%, as shown in Figure 14.1. Click OK.

If you have x64 systems, you may need to create an additional query-based rule, depending on whether the application has a native 64-bit installation or uses x86 installation files. For this example, create a second query rule but select Installed Applications (64) for the attribute class.
After saving the rule, the Query Statement Properties dialog displays both rules with an AND join. Select the AND join and press &| (the second icon from the right) to change it to an OR. You can also see additional actions and parameters you can add to the query criterion. For example, in addition to switching And to Or, you can group using parentheses or change to a Not query.
Using Include and Exclude Rules
ConfigMgr allows you to use include and exclude rules:
![]() Include Rules: An include rule includes all members of different collections. Say you have two collections: one for all New York systems, and one for all Los Angeles systems. You could create a third collection named All US Systems with two include rules, one for New York and one for Los Angeles and set All US Systems to dynamically update based on rules in the first two collections. The collection membership would update if an included collection’s membership changed.
Include Rules: An include rule includes all members of different collections. Say you have two collections: one for all New York systems, and one for all Los Angeles systems. You could create a third collection named All US Systems with two include rules, one for New York and one for Los Angeles and set All US Systems to dynamically update based on rules in the first two collections. The collection membership would update if an included collection’s membership changed.
![]() Exclude Rules: An exclude rule performs as you would expect, ensuring that systems defined in the desired exclude collection are never members of the collection. Membership of this collection is updated if the membership of the excluded collection changes.
Exclude Rules: An exclude rule performs as you would expect, ensuring that systems defined in the desired exclude collection are never members of the collection. Membership of this collection is updated if the membership of the excluded collection changes.
NOTE: EXCLUDE RULES ALWAYS WIN
If you have a collection with both include and exclude rules and a system is in both collections, the exclude collection takes precedence.
Updating Collections
Collections can have membership rules updated as full, manual, incremental, or cascading. Consider this when designing a collection structure, as the rules can negatively impact performance. The next sections discuss these updates.
Performing Full and Manual Updates
When you create a collection, the option Schedule a full update on this collection is enabled by default, and the update occurs every seven days, starting when you create the collection. This option causes the collection membership to be completely reevaluated at the specified interval. You can also select the collection and click Update Membership on the ribbon bar. Under the hood, ConfigMgr executes a SQL stored procedure. If a new entry is added during a manual or full collection evaluation, all collections that use the collection are also reevaluated and updated, if applicable (depending on the collection query being used). This occurs even if those collections do not have full or incremental updates enabled.
Performing Incremental Updates
Incremental updates allow you to add systems to a collection quickly, without a full collection membership update. The default is a collection interval update of every seven days with the Use incremental updates for this collection property disabled. The general idea is to use fewer collections and rely more on requirement rules for applications so rules are evaluated at the client. Use incremental updates on collections targeted with deployments to quickly deliver (or make available) software to the user or device. The following classes do not support incremental updates:
![]()
SMS_G_System_CollectedFile
![]()
SMS_G_System_LastSoftwareScan
![]()
SMS_G_System_AppClientState
![]()
SMS_G_System_DCMDeploymentState
![]()
SMS_G_System_DCMDeploymentErrorAssetDetails
![]()
SMS_G_System_DCMDeploymentCompliantAssetDetails
![]()
SMS_G_System_DCMDeploymentNonCompliantAssetDetails
![]()
SMS_G_User_DCMDeploymentCompliantAssetDetails (for collections of users only)
![]()
SMS_G_User_DCMDeploymentNonCompliantAssetDetails (for collections of users only)
![]()
SMS_G_System_SoftwareUsageData
![]()
SMS_G_System_CI_ComplianceState
![]()
SMS_G_System_EndpointProtectionStatus
![]()
SMS_GH_System_*
![]()
SMS_GEH_System_*
If you need to use any of these classes, configure the full collection membership update to occur on an interval that meets your requirements.
TIP: BE CONSERVATIVE WITH INCREMENTAL UPDATES
Incremental updates are intended for scenarios where updates need to roll through quickly, such as a collection with devices that were just deployed using OSD. You may encounter evaluation delays if this feature is enabled on a large number of collections. The suggested maximum is approximately 200 collections, but the exact number depends on multiple factors. See https://docs.microsoft.com/sccm/core/clients/manage/collections/best-practices-for-collections for additional information.
Cascading Updates
When a collection is updated, any collections with incremental updates enabled specifying that collection as a limiting collection are automatically reevaluated, and any collection using that collection as its limiting collection is reevaluated as well.
As reevaluations consume resources, the authors recommend minimizing the use of the All Systems collection as a limiting collection. Because the All Systems collection is updated regularly, its depending collections are re-evaluated each time it is updated.
TIP: MORE INFORMATION ABOUT CASCADING UPDATES
David O’Brien, Microsoft MVP for Cloud and Datacenter Management, provides additional information about how collection updates work. In his blog article at https://david-obrien.net/2014/05/configmgr-collection-updates/, he calls cascading updates “indirect updates” and explains why you should minimize using All Systems as a limiting collection. Scott Breen, a Microsoft Premier Field Engineer from Australia, provides an extensive article on update behavior of collections in different scenarios at https://blogs.technet.microsoft.com/scott/2017/09/13/collection-evaluation-overview-configuration-manager/.
Modifying Collection Properties
After creating a collection, you can modify its properties to further alter its behavior and view information belonging to the collection. Select the collection and click Properties in the ribbon bar. For device collections, the following configuration options and information are available:
![]() General Tab: View and modify the name and comment for the collection and modify its limiting collection. You can enable the All devices are part of the same server group option; for information about configuring this option, see Chapter 15, “Managing Software Updates.” The tab also shows when the collection was last updated, when the last update occurred, and its Collection ID.
General Tab: View and modify the name and comment for the collection and modify its limiting collection. You can enable the All devices are part of the same server group option; for information about configuring this option, see Chapter 15, “Managing Software Updates.” The tab also shows when the collection was last updated, when the last update occurred, and its Collection ID.
![]() Membership Rules Tab: Edit or delete membership rules. You can also enable incremental updates and configure the collection update schedule, as discussed in the previous section.
Membership Rules Tab: Edit or delete membership rules. You can also enable incremental updates and configure the collection update schedule, as discussed in the previous section.
![]() Power Management Tab: Specify or modify power management settings. Chapter 9, “Client Management,” discusses the options.
Power Management Tab: Specify or modify power management settings. Chapter 9, “Client Management,” discusses the options.
![]() Deployments Tab: View deployments assigned to this collection. If many deployments are targeted to the collection, filter as desired.
Deployments Tab: View deployments assigned to this collection. If many deployments are targeted to the collection, filter as desired.
![]() Maintenance Windows Tab: View and modify existing maintenance windows and create new windows. The next section discusses configuring maintenance windows.
Maintenance Windows Tab: View and modify existing maintenance windows and create new windows. The next section discusses configuring maintenance windows.
![]() Collection Variables Tab: Define collection variables. Chapter 22, “Operating System Deployment,” discusses collection variables.
Collection Variables Tab: Define collection variables. Chapter 22, “Operating System Deployment,” discusses collection variables.
![]() Distribution Point Groups Tab: View the associated DP and add distribution point groups to the collection. See the “Associating Collections with Distribution Point Groups” section, later in this chapter, for information about associating collections with distribution point groups.
Distribution Point Groups Tab: View the associated DP and add distribution point groups to the collection. See the “Associating Collections with Distribution Point Groups” section, later in this chapter, for information about associating collections with distribution point groups.
![]() Security Tab: View current administrative users with permissions on the collection. Chapter 23, “Security and Delegation in Configuration Manager,” discusses setting security permissions on collections.
Security Tab: View current administrative users with permissions on the collection. Chapter 23, “Security and Delegation in Configuration Manager,” discusses setting security permissions on collections.
![]() Alerts Tab: View and add alert thresholds set for endpoint protection (see Chapter 19, “Endpoint Protection”).
Alerts Tab: View and add alert thresholds set for endpoint protection (see Chapter 19, “Endpoint Protection”).
Using Maintenance Windows
You can use a maintenance window to define the time during which ConfigMgr can apply software deployments to devices in a collection. You can configure one or more maintenance window schedules on a collection.
To configure a maintenance window, open the collection’s properties and navigate to the Maintenance Window tab. Add a new maintenance window by clicking on the starburst icon to open the <new> Schedule dialog. This dialog has the following configurable options:
![]() Name: Provide a name for the schedule; the authors recommend including the purpose of the schedule in the name (for example, 01:00 - 04:00 - Weekly – every 1 weeks - Sunday - All Deployments).
Name: Provide a name for the schedule; the authors recommend including the purpose of the schedule in the name (for example, 01:00 - 04:00 - Weekly – every 1 weeks - Sunday - All Deployments).
![]() Time: Specify when the maintenance window should be effective by providing a start and end time. You can also enable the option to use Coordinated Universal Time (UTC).
Time: Specify when the maintenance window should be effective by providing a start and end time. You can also enable the option to use Coordinated Universal Time (UTC).
![]() Recurrence Pattern: Configure the recurrence pattern of the maintenance window. By default, this is weekly every 1 week on Sunday, but can be modified to the following:
Recurrence Pattern: Configure the recurrence pattern of the maintenance window. By default, this is weekly every 1 week on Sunday, but can be modified to the following:
![]() None: There is no recurrence; the maintenance window applies only once.
None: There is no recurrence; the maintenance window applies only once.
![]() Monthly: The monthly recurrence is 1 month by default and set to between 1 and 12 months. You can also configure the day of the month. This can be a specific day, the last day of the month, or the first, second, third, fourth, or last Sunday through Saturday.
Monthly: The monthly recurrence is 1 month by default and set to between 1 and 12 months. You can also configure the day of the month. This can be a specific day, the last day of the month, or the first, second, third, fourth, or last Sunday through Saturday.
![]() Weekly: The weekly recurrence is 1 week by default and set between 1 and 4 weeks. You can configure the day it should occur.
Weekly: The weekly recurrence is 1 week by default and set between 1 and 4 weeks. You can configure the day it should occur.
![]() Daily: The daily recurrence is 1 day by default. This can be set between 1 and 31 days.
Daily: The daily recurrence is 1 day by default. This can be set between 1 and 31 days.
![]() Apply This Schedule To: Set to All Deployments by default but can be modified to Software Updates or Task Sequences.
Apply This Schedule To: Set to All Deployments by default but can be modified to Software Updates or Task Sequences.
CAUTION: OVERLAPPING MAINTENANCE WINDOWS
When a device belongs to multiple collections with maintenance windows, the effective maintenance window is the cumulative window. Say the device is member of collection A with a maintenance window between 1:00 AM and 2:30 AM, and collection B with a window between 2:00 AM and 3:00 AM; the effective maintenance window for that device is 1:00 AM to 3:00 AM. The authors recommend using dedicated collections for maintenance windows and naming them so the defined maintenance window is reflected in the name. Place these collections in a separate folder so they are easy to see.
Using Distribution Points
DPs play a key role in the delivery of packages, programs, endpoint protection updates, applications, software updates, and OSD-related content. You use DPs to make content available to clients. To prevent clients from traversing networks in undesirable paths, leverage boundary groups to help specify the DP (or DPs) a client should use.
The following sections walk through the process of creating DPs and DP groups, sending content to DPs, monitoring DP status, advanced configuration, and troubleshooting.
Installing Distribution Points
Chapter 6, “Installing and Updating System Center Configuration Manager,” discusses DP role requirements and how to install and configure DPs with a primary or secondary site. This section describes the process of installing a DP on a remote server or workstation. Follow these steps to create a DP:
1. In the console, navigate to Administration -> Overview -> Site Configuration. Select Servers and Site Systems. Select Create Site System Server.
2. In the Create Site System Server Wizard, enter the fully qualified domain name (FQDN) of the new DP, as well as the site to manage it. (This is the standard wizard page for installing site systems, discussed in Chapter 6.) Click Next.
3. If the proxy page appears, provide details of the proxy server configuration for the site system to connect to the Internet. Click Next.
4. On the System Role Selection page, select Distribution Point and click Next.
5. On the Distribution Point page, configure the DP settings for your environment. A brief description of each property on this page follows:
![]() Install and Configure IIS if Required by Configuration Manager: Enable this option to install Windows components required for a DP automatically. Chapter 6 describes required components.
Install and Configure IIS if Required by Configuration Manager: Enable this option to install Windows components required for a DP automatically. Chapter 6 describes required components.
![]() Enable and Configure BranchCache for This Distribution Point: Enable this option to have ConfigMgr install and configure BranchCache on the server receiving the new distribution point site system role.
Enable and Configure BranchCache for This Distribution Point: Enable this option to have ConfigMgr install and configure BranchCache on the server receiving the new distribution point site system role.
![]() Description: This is available for later viewing in the properties of the DP in the Distribution Points view under the Administration pane.
Description: This is available for later viewing in the properties of the DP in the Distribution Points view under the Administration pane.
![]() Specify How Client Computers Communicate with the Distribution Point: Choose HTTP or HTTPS for client communication with the DP. Chapter 5, “Network Design,” discusses public key infrastructure (PKI) requirements.
Specify How Client Computers Communicate with the Distribution Point: Choose HTTP or HTTPS for client communication with the DP. Chapter 5, “Network Design,” discusses public key infrastructure (PKI) requirements.
![]() Allow Clients to Connect Anonymously: With HTTP, enable this option if you need anonymous connections. While the ConfigMgr client connects using the local system and network access accounts, there are scenarios in which you may need anonymous access, such as Windows Installer repair functionality on Windows XP and Windows 7, which attempt to connect as anonymous. This is no longer required if the KB2619572 update for Windows 7 is applied; Windows 8 and newer versions use user credentials. See https://docs.microsoft.com/sccm/core/servers/deploy/configure/install-and-configure-distribution-points to determine whether to enable anonymous access.
Allow Clients to Connect Anonymously: With HTTP, enable this option if you need anonymous connections. While the ConfigMgr client connects using the local system and network access accounts, there are scenarios in which you may need anonymous access, such as Windows Installer repair functionality on Windows XP and Windows 7, which attempt to connect as anonymous. This is no longer required if the KB2619572 update for Windows 7 is applied; Windows 8 and newer versions use user credentials. See https://docs.microsoft.com/sccm/core/servers/deploy/configure/install-and-configure-distribution-points to determine whether to enable anonymous access.
![]() HTTPS: Select the HTTPS radio button to enable a dropdown selection, which is set to Allow intranet-only connections by default. If managing Mac computers or mobile devices enrolled by ConfigMgr, select Allow Internet only connections if the DP will serve devices connecting to it over the Internet.
HTTPS: Select the HTTPS radio button to enable a dropdown selection, which is set to Allow intranet-only connections by default. If managing Mac computers or mobile devices enrolled by ConfigMgr, select Allow Internet only connections if the DP will serve devices connecting to it over the Internet.
![]() Allow Mobile Devices to Connect to This Distribution Point: If on-premise MDM is configured (discussed in Chapter 17, “Managing Mobile Devices”), this check box makes content on the DP available to mobile devices.
Allow Mobile Devices to Connect to This Distribution Point: If on-premise MDM is configured (discussed in Chapter 17, “Managing Mobile Devices”), this check box makes content on the DP available to mobile devices.
![]() Create a Self-Signed Certificate or Import a PKI Client Certificate: The certificate authenticates the DP to an MP so the DP can send status messages to the MP. Clients PXE booting to connect to the MP during OSD also use this certificate. If all your MPs use HTTP, create a self-signed certificate. If they use HTTPS, import a PKI certificate. See https://docs.microsoft.com/sccm/core/plan-design/network/pki-certificate-requirements for additional information about this certificate.
Create a Self-Signed Certificate or Import a PKI Client Certificate: The certificate authenticates the DP to an MP so the DP can send status messages to the MP. Clients PXE booting to connect to the MP during OSD also use this certificate. If all your MPs use HTTP, create a self-signed certificate. If they use HTTPS, import a PKI certificate. See https://docs.microsoft.com/sccm/core/plan-design/network/pki-certificate-requirements for additional information about this certificate.
![]() Enable This Distribution Point for Prestaged Content: Enable this check box for granular control when content can transfer over a wide area network (WAN) link on a per-content package basis (package, application, operating system image, and so on). Enabling this option lets you create prestaged content files, copy them to a remote location, and import them into the local DP. The “Using Prestaged Content” section, later in this chapter, provides additional information.
Enable This Distribution Point for Prestaged Content: Enable this check box for granular control when content can transfer over a wide area network (WAN) link on a per-content package basis (package, application, operating system image, and so on). Enabling this option lets you create prestaged content files, copy them to a remote location, and import them into the local DP. The “Using Prestaged Content” section, later in this chapter, provides additional information.
6. On the Drive Settings page, specify the amount of free space to reserve on the disk so the content will not completely fill the disks of the DP, as well as the preferred primary and secondary drive letter location for the content library and package share.
7. Use the Pull Distribution Point page to configure the DP to act as a pull DP, which pulls its content from another defined DP (as opposed to a standard DP, which receives its content from the site server). Enable the pull DP by selecting the option Enable this distribution point to pull content from other distribution points, which makes the option to add source DPs available. To add a source DP, click Add and select DPs from a list of available DPs. After adding source DPs, you can modify their priority so that those with the highest priority are used first rather than DPs with lower priority.
8. Configure the PXE Settings page, as described in Chapter 22.
9. Configure the Multicast page, as described in Chapter 22.
10. On the Content Validation page, enable content validation and configure a recurring schedule for when the server is at low utilization. The time is local to the site server. You can review the schedule on the DP from the Control Panel Task Scheduler applet. See the “Validating Content” section, later in this chapter, for additional information.
11. On the Boundary Groups page, create or add an existing boundary group that will be supported by this DP.
12. Complete the wizard to initiate installation of the DP.
Using and Configuring Cloud-Based Distribution Points
Cloud-based distribution points are hosted in Microsoft Azure. The main difference between installing a VM in Azure and configuring that VM as a DP is that Microsoft manages the VM for you. The article at https://docs.microsoft.com/sccm/core/plan-design/hierarchy/use-a-cloud-based-distribution-point discusses configuration of cloud-based DPs.
Distributing Content
After importing content on a definitive software library (DSL) into ConfigMgr, distribute it to DPs to make it available for clients. Content can be sent to DP groups or individual DPs. After it is sent, it can be validated on a regular schedule on the DPs to verify that it is still the same as its source. When content is updated, it must also be updated on the DPs.
Sending Content to Distribution Points
Several types of content exist in ConfigMgr, such as applications, packages, software updates, and several types of OSD packages (image package, driver package, and so on). Perform the following steps to send content to the DPs:
1. Navigate to the desired object (multi-select if desired), select it, and choose Distribute Content from the ribbon bar.
2. On the General page of the Distribute Content Wizard, enable the Detect associated content dependencies check box near the bottom of the page if the object has associated dependencies (such as dependent applications, programs configured to run another program first, and so on).
3. On the Content Distribution page, click Add and choose an option:
![]() Collections: Use this option to select a collection associated with a DP group. Note that you will only see collections associated with the group. Collections associated with DP groups automatically deploy content to those groups when targeted with a deployment, as demonstrated in the “Deploying Applications and Packages” section, later in this chapter.
Collections: Use this option to select a collection associated with a DP group. Note that you will only see collections associated with the group. Collections associated with DP groups automatically deploy content to those groups when targeted with a deployment, as demonstrated in the “Deploying Applications and Packages” section, later in this chapter.
![]() Distribution Point: Choose this option to selectively choose one or more DPs. Leverage DP groups when possible.
Distribution Point: Choose this option to selectively choose one or more DPs. Leverage DP groups when possible.
![]() Distribution Point Group: Use this option to choose one or more DP groups. If you later add a DP to an existing DP group, all content distributed to that group is automatically distributed to the new DP.
Distribution Point Group: Use this option to choose one or more DP groups. If you later add a DP to an existing DP group, all content distributed to that group is automatically distributed to the new DP.
4. Click Next on the remaining pages of the wizard to view summary and progress information.
Note that you can add new DPs for a task sequence (TS), which sends all task sequence–associated content to the DP.
Using Distribution Point Groups
DP group configurations are global data that you can manage with scopes to limit visibility of DP groups to different admin roles, if desired. Say you have multiple DPs in Europe and want to ensure that content is available on each DP. Create a DP group named All Europe DPs and add the DPs to the group. As this section discusses, you can send content to a DP group (recommended by the authors) rather than send to individual DPs. Six months later, you have a new DP in Europe. If you add the new DP to the All Europe DPs group, the new DP automatically receives all content previously sent to the group.
A DP can be in multiple DP groups. You may have a DP group called All DPs, which distributes content to all your DPs; and you may also have a group called All Europe DPs, which contains a subset of DPs for Europe. You could add a scope for each DP group to allow the Europe Admins security group to send content only to the All Europe DPs group.
Follow these steps in the ConfigMgr console to create a DP group:
1. Navigate to Administration -> Overview and select Distribution Point Group. Now select Create Group.
2. Enter a name and description in the Create New Distribution Point Group wizard.
3. On the Collections page, click Add and select a collection to associate with this DP group (if desired).
4. On the Members page, click Add and select DPs to add to the DP group.
5. Click OK to save the DP group.
Be aware of the following caveats regarding distribution point groups:
![]() If you distribute content to a DP group and later remove it from a member DP, the association for that content with the DP group is lost. This means that if you later decide to redistribute the content on the DP group, that DP will not get the content even though it is still a member of the group and receives content for new distributions. The only way to re-associate the content with all DPs in the group is to remove the content from the DP group and re-add it.
If you distribute content to a DP group and later remove it from a member DP, the association for that content with the DP group is lost. This means that if you later decide to redistribute the content on the DP group, that DP will not get the content even though it is still a member of the group and receives content for new distributions. The only way to re-associate the content with all DPs in the group is to remove the content from the DP group and re-add it.
![]() If you remove a DP from a DP group, the content stays on the DP.
If you remove a DP from a DP group, the content stays on the DP.
![]() Retired applications stay on the DP but are not distributed to any new DPs added to a DP group. This means that for this specific deployment, you will never reach a 100% success rate on the content status in the Monitoring workspace.
Retired applications stay on the DP but are not distributed to any new DPs added to a DP group. This means that for this specific deployment, you will never reach a 100% success rate on the content status in the Monitoring workspace.
![]() If a DP is a member of several DP groups and those DP groups have overlapping content, the content stays on the DP if you later decide to remove the DP from one of the DP groups.
If a DP is a member of several DP groups and those DP groups have overlapping content, the content stays on the DP if you later decide to remove the DP from one of the DP groups.
![]() If you deploy content to both a DP and a DP group and later remove the content from the DP group, it is removed from the members of that group.
If you deploy content to both a DP and a DP group and later remove the content from the DP group, it is removed from the members of that group.
Associating Collections with Distribution Point Groups
You can associate collections with DP groups. When distributing content, you can target a collection associated with a DP group (for example, targeting all DPs in the DP group with the content). Say you have an All Devices in Europe collection, which contains all devices in Europe. You also have a DP group for all DPs in Europe, associated with the All Devices in Europe collection. Next, you have an application you need to deploy to the All Devices in Europe collection. When you create the deployment, choose to deploy content automatically to the associated DP group for the target collection. Use this process to ensure that content is distributed to all DPs necessary for the deployment. Review DP and collection association by viewing the properties of the collection or DP.
To associate a DP, view properties for the desired collection and select the Distribution Point Groups tab. Click Add and choose the DPs you want to associate to the collection.
You can also view the properties of a DP from the Administration workspace and manage associations on the Group Relationship tab.
Refreshing and Removing Content on Distribution Points
You should not need to refresh content often in ConfigMgr, unless you receive a status message error about a hash value check failure (discussed in the “Validating Content” section, later in this chapter). To refresh, view the package properties, select Content Locations, highlight the desired DP, and click Redistribute.
Content from DPs is removed automatically when an object is deleted. To remove the content from a defined list of DPs, follow these steps:
1. Right-click the object containing the content (package, deployment type, and so on) and select Properties.
2. Click Content Locations.
3. Select the desired DP and click Remove.
To remove content from multiple DPs, you must follow this process to remove each DP, one at a time. If you deployed content to a DP group, choose the desired DP group and click Remove to remove the content from all DPs targeted through the DP group.
Content does not immediately disappear from each DP; ConfigMgr automatically cleans up excess content on a regular interval (approximately every four hours). Note that files from a package or DT may be used in a different package or DT due to the content library. ConfigMgr runs a process to remove content no longer needed by any package.
Validating Content
As Chapter 6 mentions, you can enable content validation on a weekly or daily basis or at multiple intervals. Content is validated by enumerating all content that should be on the DP, performing a hash check for each item on each required file, and comparing that with what is stored in ConfigMgr.
The information is reported to the site server as pass or fail. ConfigMgr only reports the data; there is no built-in method to automate the process to attempt to re-send to DPs or to revalidate. The time you configure for content validation is local to the site server; if your primary server is in Chicago, and you configure content validation for a server in Bangalore to be every day at 6:00 PM, that time is local to Chicago, so the actual run time is at 5:30 AM each day in Bangalore (due to the 12.5-hour time difference). The task is configured as a scheduled task on the DP, and modification of that task should occur from the primary site server through the Content Validation dialog.
Updating Content on Distribution Points
If you modify source content, you must update content on DPs to make it available to clients. A common misconception is that you also must update DPs if you modify metadata for the object. For example, if you modify the command-line arguments of a program or DT, you do not need to update DPs (unless the source was updated with new files.) Update content only if the content source is actually modified. Updating content in ConfigMgr distributes any new files. Recall that due to the content library, a unique binary file is distributed only once.
TIP: UPDATING DISTRIBUTION POINTS
When you create a package or deployment, the content (according to the content source path) is immediately copied into the content library on the CAS or primary site server. Remember to update DPs after making a change to content source, even when you haven’t sent content to DPs.
You can update DPs for the following types of objects: packages, DTs, driver packages, OS images, OS installers, and boot images. You cannot update DPs from any properties of an application, as the content source is defined on the DT. You can add DPs for an application. When you need to update a DP, choose the desired DT and click Update Content.
Configuring Network Bandwidth for Content Distribution
Configure scheduling and throttling to control when distribution occurs and the bandwidth used. You can configure scheduling and throttling for site-to-site communications if content needs to be transferred between sites or between a site server and a remote DP.
Configuring Network Bandwidth for Content on Distribution Points
Bandwidth settings on a DP are available only when that DP is installed on a server that is not also configured as a site server. The DP Properties page has two tabs you can configure:
![]() Schedule Tab: Select a time period and specify its availability settings:
Schedule Tab: Select a time period and specify its availability settings:
![]() Open for All Priorities: Data is sent to the DP without restrictions.
Open for All Priorities: Data is sent to the DP without restrictions.
![]() Allow Medium and High Priority: Only medium-priority and high-priority data is sent to the DP.
Allow Medium and High Priority: Only medium-priority and high-priority data is sent to the DP.
![]() Allow High Priority Only: Only high-priority data is sent.
Allow High Priority Only: Only high-priority data is sent.
![]() Closed: ConfigMgr does not send any data to the DP.
Closed: ConfigMgr does not send any data to the DP.
![]() Rate Limits Tab: Configure rate limits as follows:
Rate Limits Tab: Configure rate limits as follows:
![]() Unlimited When Sending to This Destination: Send content to the DP without rate limit restrictions.
Unlimited When Sending to This Destination: Send content to the DP without rate limit restrictions.
![]() Pulse Mode: Specify the size of the data blocks sent to the DP. You can specify a time delay between blocks; use this when sending data across a low-bandwidth network connection.
Pulse Mode: Specify the size of the data blocks sent to the DP. You can specify a time delay between blocks; use this when sending data across a low-bandwidth network connection.
![]() Limited to Specified Maximum Transfer Rates by Hour: Use this option to have a site send data to a DP using only the configured percentage of time. ConfigMgr will divide the time it can send data; it does not identify the network’s available bandwidth. Data is sent for a short block of time, followed by blocks of time when no data is sent. If the maximum rate is set to 50%, ConfigMgr will transmit data for a period of time followed by an equal period of time when no data is sent. The actual amount of data or size of the data block is not managed; only the amount of time is managed.
Limited to Specified Maximum Transfer Rates by Hour: Use this option to have a site send data to a DP using only the configured percentage of time. ConfigMgr will divide the time it can send data; it does not identify the network’s available bandwidth. Data is sent for a short block of time, followed by blocks of time when no data is sent. If the maximum rate is set to 50%, ConfigMgr will transmit data for a period of time followed by an equal period of time when no data is sent. The actual amount of data or size of the data block is not managed; only the amount of time is managed.
Configuring Network Bandwidth for Content Between Sites
File replication routes transfer data between sites when content must be sent from a CAS to a DP belonging to a primary site or from a primary site to a DP configured behind a secondary site.
When you create a primary or secondary site, file replication routes are created automatically. A route specifies how data is transferred between sites. Configure routes by navigating to Administration -> Hierarchy Configuration -> File Replication. If your hierarchy contains a CAS with primary sites and/or secondary sites, file replication routes should already be available. To create new file replication routes—say to optimize traffic flowing between a CAS and a secondary site behind a primary site—create a direct file replication route between the CAS and the secondary site.
Open file replication route properties to configure the file replication account, which by default is the computer account of the sending site server. You can also specify the schedule and rate limits used, which is similar to the schedule and rate limit settings on a DP, described in the previous section.
See Chapter 5 for more information about file replication routes, configuring the number of threads, and retry settings.
TIP: DISTRIBUTION POINT PROPERTIES ON A SITE SYSTEM
When a DP is installed on a site system, scheduling and throttling options are not available, as they can only be configured on the file replication route.
Monitoring Distribution Point Status
Content is a key element of ConfigMgr. You need to know that content is exactly where you want it to be. Three types of distribution status information are available in the ConfigMgr console:
![]() Content Status: Focuses on the actual content (a package, an application, a software update package, and so on). Use this information to verify the distribution of one piece of content.
Content Status: Focuses on the actual content (a package, an application, a software update package, and so on). Use this information to verify the distribution of one piece of content.
![]() Distribution Point Group Status: Focuses on the overall health of a DP group. Use this information to verify the status of all content associated with a DP group.
Distribution Point Group Status: Focuses on the overall health of a DP group. Use this information to verify the status of all content associated with a DP group.
![]() Distribution Point Configuration Status: Focuses on the individual DP. Use this information to verify the state of a single DP.
Distribution Point Configuration Status: Focuses on the individual DP. Use this information to verify the state of a single DP.
The following sections provide further information on these types of information.
Content Status Information
Content must be available for clients to install software. Use content status information to view DP status for a specific package, application, or other content. Perform the following steps:
1. In the console, navigate to Monitoring -> Distribution Status -> Content Status.
2. In the Details section, which lists all content that has been targeted to any DP, search for specific content or right-click the title bar, select Group By -> Type, right-click a type and select Collapse All to group content (see Figure 14.2).

FIGURE 14.2 Content status grouped by type.
3. After selecting the desired content, view the number of DPs targeted, computed size, and compliance for that content state on those DPs. The summary at the bottom shows more information; Figure 14.3 displays an example.

The Completion Statistics section in Figure 14.3 gives an overview of content status. The Last Update property displays the last time a status message was received for any DP for that content. Click View Status to view details; Figure 14.4 shows an example of the details that appear. Filter the Asset Details frame by entering a DP server name into the filter box in Figure 14.4. Following are brief descriptions for the various states:
![]() Success: This can be based on a couple conditions:
Success: This can be based on a couple conditions:
![]() Content has been distributed successfully to the DP.
Content has been distributed successfully to the DP.
![]() Content hash has been successfully verified. (If content validation is enabled, a new status message is generated for each validation success or failure.)
Content hash has been successfully verified. (If content validation is enabled, a new status message is generated for each validation success or failure.)
![]() In Progress: Content is currently being transferred to one or more DPs. (Review details for more information.)
In Progress: Content is currently being transferred to one or more DPs. (Review details for more information.)
![]() Error: Content distribution failed for one or more DPs. (Review details for more information.)
Error: Content distribution failed for one or more DPs. (Review details for more information.)
![]() Unknown: No status has been reported for one or more DPs.
Unknown: No status has been reported for one or more DPs.

4. Right-click an asset in the Asset Details section and select More Details from the context menu to view additional content status information.
Distribution Point Group Status
DP group status reports overall status for content targeted through a DP group, letting you view the status of all DPs in a group. Figure 14.5 shows group status for three DP groups. Notice that the All Non-Imaging Distribution Points group has eight DPs with 395 items (packages, application content, software update packages, task sequence information, and so on) assigned, and the overall distribution status for the group is Success for 393 items and Failed for 2 items. The Depot DP’s and Mac Client DP groups are also displayed.
As with DP status, View Status lets you drill down to identify issues.

Distribution Point Configuration Status
Review DP configuration status to review specific information for a single DP. Notice the timestamp associated with each message. If the DP is recently installed, you may find normal warnings/errors that occur during the installation process; these older status messages are eventually purged from the ConfigMgr database. You will find helpful information about hash validation and progress for content sent to DPs.
Using BranchCache and Peer Cache
BranchCache allows you to securely use a peer-to-peer model to share content between systems. This is a Windows OS feature and works for more than just ConfigMgr content, such as transferring huge files from a centrally provided file share. Peer Cache has similar functionality, does not require a BranchCache infrastructure, and works for ConfigMgr-related content only.
Using either cache type or combining both is particularly helpful when you have multiple systems in a remote office without a DP. Enabling BranchCache or Peer Cache reduces the number of systems crossing the WAN link to download source content.
Combine BranchCache and Peer Cache for a best-of-both-worlds scenario. BranchCache can use data deduplication techniques and works even with a local DP on the same subnet, while Peer Cache works over subnets, as it is limited to boundary groups. For information about these cache types and combining them, see http://deploymentresearch.com/Research/Post/608/A-Geek-rsquo-s-Guide-to-reduce-the-network-impact-of-Windows-10-Updates-and-other-packages-with-ConfigMgr. For information about BranchCache, see https://technet.microsoft.com/library/hh831696(v=ws.11).aspx.
After configuring and setting corresponding client settings, as discussed in Chapter 9, there is only one setting you should enable for each deployment. Under Distribution Settings, enable Allow clients to share content with other clients on the same subnet.
Using Preferred Distribution Points
Consider a scenario with a large number of DPs and a large amount of content to distribute. You might decide to send everything to all DPs to ensure that content is available when needed. Alternatively, you may have a limited amount of space and might be fairly certain that many packages (or other content) will not be required everywhere.
Say you have packaged all MUI language packs for Windows 7. Rather than distribute all European language MUIs to a Cleveland DP (where it is unlikely most of them would be needed), distribute the content to the parent site of the Cleveland DP and enable the check box Distribute the content for this package to preferred distribution points. When this option is enabled, if a client requests content and the content is not available in the boundaries of a DP, ConfigMgr distributes the content to the DP to make it available locally for all managed systems. If you configured the application to allow fallback to a remote DP, this takes precedence over the setting Distribute the content for this package to preferred distribution points.
Using Content
You can reuse content in other ConfigMgr environments by exporting it from one ConfigMgr environment and importing into another. You can also export content for backup purposes.
To distribute large content over low-bandwidth networks, you can use ConfigMgr’s prestaging capabilities to save the content on media such as an external hard drive or USB stick and then ship the media to the remote DP and import it. The following sections discuss importing and exporting content, using prestaged content, and using the content library.
Importing and Exporting Content
ConfigMgr allows exporting of objects from one ConfigMgr environment to another or for backup and archival purposes. You can choose to export only the object or the object and the package source.
Perform the following steps to create exported content:
1. Select one or more package objects and choose Export from the ribbon bar to start the Export Application Wizard.
2. On the General page, enter a file path for where to store the exported content. Enter the file extension .zip, as shown in Figure 14.6.
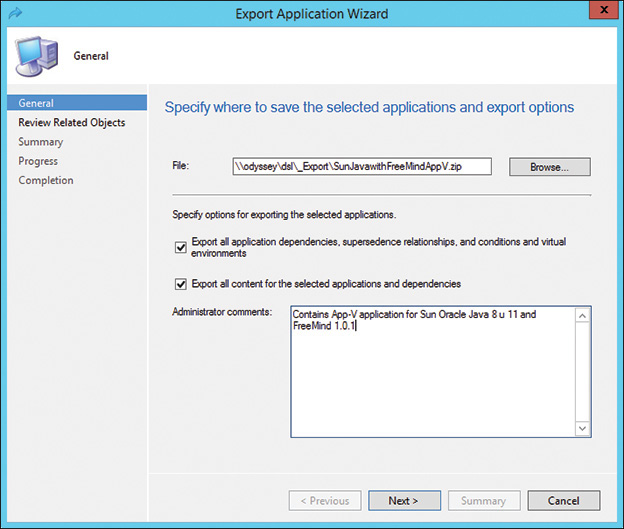
Following is a brief description of the other options in Figure 14.6:
![]() Export All Application Dependencies, Supersedence Relationships, and Conditions and Virtual Environments: When this option is selected, the export includes all dependence and supersedence information, global conditions, and defined virtual environments for Application Virtualization. For packages, this includes packages referenced with the Run another program first option. For task sequences, it includes all packages, applications, driver packages, and more referenced in a TS (that is, all objects that appear under the References area for a TS). If this check box is not enabled, you only export the selected object.
Export All Application Dependencies, Supersedence Relationships, and Conditions and Virtual Environments: When this option is selected, the export includes all dependence and supersedence information, global conditions, and defined virtual environments for Application Virtualization. For packages, this includes packages referenced with the Run another program first option. For task sequences, it includes all packages, applications, driver packages, and more referenced in a TS (that is, all objects that appear under the References area for a TS). If this check box is not enabled, you only export the selected object.
![]() Export All Content for the Selected Applications and Dependencies: This is specific to source files that are referenced by an object. Enabling this check box may significantly increase the size of the exported content.
Export All Content for the Selected Applications and Dependencies: This is specific to source files that are referenced by an object. Enabling this check box may significantly increase the size of the exported content.
3. Review the information on the Review Related Objects page and step through the rest of the wizard to completion.
Follow these steps to import content to a different ConfigMgr environment:
1. Select an object node and select Import (or Import Application, depending on your location) from the ribbon bar.
2. Select the UNC path to the exported content (for example, \<servername><sharename>myExportedApps.zip).
TIP: ENSURING THAT THE COMPRESSED .ZIP FILE IS IN THE PROPER LOCATION
When you import, content is extracted from the .zip file to the current folder, which becomes the package source location for the object (application, package, program, and so on). Be sure the .zip is in the proper location. Import using the UNC path you want for the content source location or plan to move content and change paths later.
3. Review the File Content page. If some content was previously imported, there may be additional options to skip or overwrite.
4. Complete the wizard.
Using Prestaged Content
You may have some locations with very slow connectivity, or even costly connectivity. ConfigMgr allows you to create a prestaged content file on one server, mail it to another server, and import the prestaged content. You can also copy content over the WAN, provided you have adequate throughput. To enable prestaged content, enable the Enable this distribution point for prestaged content setting on the properties of the DP. ConfigMgr then obeys the property configurations of the package or application.
Figure 14.7 displays the following package settings available for configuring how prestaged content will be managed:
![]() Automatically Download Content When Packages Are Assigned to Distribution Points: When this option is selected, a package works as normally expected. Software is distributed from the ConfigMgr console and arrives on the DPs.
Automatically Download Content When Packages Are Assigned to Distribution Points: When this option is selected, a package works as normally expected. Software is distributed from the ConfigMgr console and arrives on the DPs.
![]() Download Only Content Changes to the Distribution Point: When this option is selected, minor updates can occur to the DP, using standard content distribution processes. Say you deploy Office 2016 and later realize you have additional updates to deploy. Using this setting, you could deploy the base install (the largest size for content) of Office 2016 and require the initial package to be installed using prestaged content. Any subsequent changes could be sent using the normal DP process.
Download Only Content Changes to the Distribution Point: When this option is selected, minor updates can occur to the DP, using standard content distribution processes. Say you deploy Office 2016 and later realize you have additional updates to deploy. Using this setting, you could deploy the base install (the largest size for content) of Office 2016 and require the initial package to be installed using prestaged content. Any subsequent changes could be sent using the normal DP process.
![]() Manually Copy the Content in This Package to the Distribution Point: When this option is selected, ConfigMgr does not use any WAN for content transfer and relies completely on importing prestaged content.
Manually Copy the Content in This Package to the Distribution Point: When this option is selected, ConfigMgr does not use any WAN for content transfer and relies completely on importing prestaged content.

You can use prestaged content to export the package source from the content library. This allows you to manually transfer content from one location to a remote location, insert the media, and import that content into a new DP. Perform the following steps to create the prestaged content file:
1. Select one or more package objects and choose Create Prestaged Content File from the ribbon bar to start the Create Prestaged Content File Wizard.
2. On the General page, choose a path to store the compressed content, enable the check box to export all dependencies if desired, and add any additional administrator comments.
3. Review the Content page and confirm that the content you want to prestage is listed. If you need to add or remove content, cancel the wizard and return to step 1. If the content you want prestaged is selected, click Next.
4. On the Content Locations page, click Add and choose one or more DPs to use as the source for the prestaged content process, shown in Figure 14.8. Select DPs on your local network if possible.

Figure 14.8 shows Charon.odyssey.com, which has two of the three desired packages available, and Athena.odyssey.com, which has all three packages. The Charon DP is first in priority, so all content that is available from Charon is collected first, and Athena is used as needed. Click Next.
5. Review the Summary page and continue the wizard to completion.
To successfully import prestaged content, first target the desired DPs with the package, using one of the prestaged content settings for the package.
TIP: VERIFYING PRESTAGED CONFIGURATION
Before beginning the import process, verify that the ConfigMgr application properties are configured properly, as described earlier in this section. If an application is configured to automatically download content when packages are assigned to distribution points, the prestage process will not work as expected, as content is sent to the DP without prestaging.
After sending content to the DPs, you will see status messages (under Monitoring -> Distribution Status -> Content Status) that state the DP is waiting for prestaged content. Transport the prestaged content to the desired location by using a simple file copy over the WAN or copy the prestaged content to media and ship it to the remote location. Follow these steps on the DP to import prestaged content:
1. Copy the extracted content to c: emp.
2. Open a command prompt and navigate to SMS_DP$smsTools.
3. Run the following command:
extractcontent.exe /p:c: empmycontent.pkgx /i
4. Review the output (and run extractcontent.exe /? for more options).
About the Content Library
The content library, also informally referred to as the single-instance store, is a ConfigMgr feature that adds significant value to your DPs and reduces the need to send duplicate files across the WAN to support different packages. Kent Agerlund has an informative blog post explaining the content library at http://blog.coretech.dk/kea/understanding-the-new-content-library-store-in-5-minutes/.
Troubleshooting Content Distribution
Most content distribution troubleshooting occurs in the ConfigMgr console, as mentioned in the “Monitoring Distribution Point Status” section, earlier in this chapter. You should also review the Software Distribution - Package and Program Deployment and Software Distribution - Content reports for more information. You may need to check the logs to find more information; use the article at https://support.microsoft.com/help/4000401/content-distribution-in-mcm as a guide to find the log files used with content distribution.
Deploying Applications and Packages
Chapters 11 and 12 describe creating applications and DTs, and Chapter 13 discusses creating packages. This chapter discusses creating collections and distributing content to DPs. Now you are ready to deploy software. Both applications and packages use the Deploy Software Wizard. As shown in this section, some options are available only for one type or the other. Follow these steps to deploy a ConfigMgr package or application:
1. In the ConfigMgr console, navigate to Software Library -> Overview -> Application Management -> Applications and select an application. Alternatively, navigate to the Packages node and select a package.
2. Select Deploy from the ribbon bar to start the Deploy Software Wizard. Edit the following properties on the General page as required:
![]() Software: If deploying a package, click Browse and choose the program to deploy. (This is filtered to show only programs for the current package.) If deploying an application, the application name appears in the dialog.
Software: If deploying a package, click Browse and choose the program to deploy. (This is filtered to show only programs for the current package.) If deploying an application, the application name appears in the dialog.
![]() Collection: Choose the desired target collection. The Member Count property shows the total count of members in a collection. If you have multiple primary sites, you may not see all collection members from a primary site, although you will see them from the CAS. Thus, when deploying software, you will always see the total member count to know the number of systems impacted.
Collection: Choose the desired target collection. The Member Count property shows the total count of members in a collection. If you have multiple primary sites, you may not see all collection members from a primary site, although you will see them from the CAS. Thus, when deploying software, you will always see the total member count to know the number of systems impacted.
![]() Use Default Distribution Point Groups Associated to This Collection: This option is enabled if you associated a DP group to the targeted collection. Enable the check box to populate the content distribution information automatically on the next page of the wizard.
Use Default Distribution Point Groups Associated to This Collection: This option is enabled if you associated a DP group to the targeted collection. Enable the check box to populate the content distribution information automatically on the next page of the wizard.
![]() Automatically Distribute Content for Dependencies: Choose this option to distribute all packages required for the Run Another Program First feature for a program. If the program specified references a different package, enable this check box to ensure that the dependent package is distributed. If deploying an application, any dependent application (discussed in Chapter 12) is distributed with the check box enabled. This automatic process only occurs when the deployment is created. If the package is updated later, it must be updated using the Update Content Wizard.
Automatically Distribute Content for Dependencies: Choose this option to distribute all packages required for the Run Another Program First feature for a program. If the program specified references a different package, enable this check box to ensure that the dependent package is distributed. If deploying an application, any dependent application (discussed in Chapter 12) is distributed with the check box enabled. This automatic process only occurs when the deployment is created. If the package is updated later, it must be updated using the Update Content Wizard.
![]() Comments: You can optionally specify comments for administrators. Information entered here does not appear to the end user.
Comments: You can optionally specify comments for administrators. Information entered here does not appear to the end user.
3. On the Content page, add additional DPs and DP groups by clicking Add and browsing to a DP or DP group. The top frame of this page displays when content is currently distributed. The bottom frame shows any DPs you add. If associated to a collection, the DP group is shown.
4. Fill out the Deployment Settings page as needed. The information on this page varies depending on whether the application is targeted to users or devices, whether it is an application or a package, and whether the software is required or available. All options with explanations follow:
![]() Action: For packages, this option is always set to Install. For applications, you can choose Install or Uninstall.
Action: For packages, this option is always set to Install. For applications, you can choose Install or Uninstall.
NOTE: ABOUT THE UNINSTALL ACTION
Deploying an uninstall application is similar to deploying a normal application install. There are some differences important enough to document:
![]() Uninstall is only supported through the Application feature.
Uninstall is only supported through the Application feature.
![]() Uninstall actions can only be deployed as Required.
Uninstall actions can only be deployed as Required.
![]() Dependent applications are not uninstalled.
Dependent applications are not uninstalled.
![]() Requirement rules are not checked for an uninstall; if a detection rule determines that the software is installed, the uninstall rule is initiated, regardless of requirement rules.
Requirement rules are not checked for an uninstall; if a detection rule determines that the software is installed, the uninstall rule is initiated, regardless of requirement rules.
![]() If a system is targeted with a required deployment for both install and uninstall, the install occurs.
If a system is targeted with a required deployment for both install and uninstall, the install occurs.
![]() Purpose: Choose Required or Available. This cannot be changed after creating a deployment; if you need a change, you must delete it and create a new one.
Purpose: Choose Required or Available. This cannot be changed after creating a deployment; if you need a change, you must delete it and create a new one.
![]() Deploy Automatically According to Schedule Whether or Not a User Is Logged On: This option applies to required applications targeting a user-based collection and has no impact on packages. The setting instructs ConfigMgr to use the primary user device affinity (discussed in Chapter 12) to target the machine even if no user is logged on. ConfigMgr maps the user to the computer and deploys the required software. It allows you to deploy required software to a user collection, based on the user–primary device association.
Deploy Automatically According to Schedule Whether or Not a User Is Logged On: This option applies to required applications targeting a user-based collection and has no impact on packages. The setting instructs ConfigMgr to use the primary user device affinity (discussed in Chapter 12) to target the machine even if no user is logged on. ConfigMgr maps the user to the computer and deploys the required software. It allows you to deploy required software to a user collection, based on the user–primary device association.
![]() Send Wake-up Packets: This option is enabled for required deployments; when Wake on LAN is enabled and properly configured, ConfigMgr sends wake-up packets to wake sleeping systems at deployment start time.
Send Wake-up Packets: This option is enabled for required deployments; when Wake on LAN is enabled and properly configured, ConfigMgr sends wake-up packets to wake sleeping systems at deployment start time.
![]() Require Administrator Approval if Users Request This Application: This option is enabled for available applications that target a user-based collection; it allows the user to see the application in the Application Catalog and submit a request for approval to install. Once an administrator grants approval, the user can navigate to the Application Catalog to install the application.
Require Administrator Approval if Users Request This Application: This option is enabled for available applications that target a user-based collection; it allows the user to see the application in the Application Catalog and submit a request for approval to install. Once an administrator grants approval, the user can navigate to the Application Catalog to install the application.
5. Click Scheduling to define when the application should be available and when it will be required, if a required deployment. All times are UTC by default. When configuring this page for a package, you can specify an expiration time. You can select to delay enforcement of the installation deadline according to user-set preferences, up to the grace period defined in the client settings. The user can define this by setting business hours and by specifying that the deployment should occur outside those hours.
TIP: NO EXPIRATION TIME FOR APPLICATIONS
Recall that when you deploy a ConfigMgr application as a required deployment, the intent is for all targeted and applicable systems to have the software installed. Therefore, ConfigMgr applications do not have expiration times.
6. On the User Experience page, configure behavior outside maintenance windows and specify how or if the user is notified of an installation or required restart. These are the options:
![]() User Notifications: This option is available for applications. Its settings are self-describing; however, one setting can affect end-user notifications. If the Show notifications for new deployments client setting under Computer Agent (discussed in Chapter 5) is set to False, targeted clients do not receive a system tray notification for new software or system restarts for packages, applications, or software updates.
User Notifications: This option is available for applications. Its settings are self-describing; however, one setting can affect end-user notifications. If the Show notifications for new deployments client setting under Computer Agent (discussed in Chapter 5) is set to False, targeted clients do not receive a system tray notification for new software or system restarts for packages, applications, or software updates.
![]() Allow the User to Run the Program Independently of Assignments: This option displays only for packages. If enabled, it allows the deployment to appear in Software Center. To manage notifications for packages, configure a property on the program to deploy. The Advanced tab for the program has a property named Suppress program notifications, which prevents system tray notifications if checked. If unchecked, the end user receives notifications if the Show notifications for new deployments setting is set to True. This same configuration is required for task sequences to handle end-user notifications.
Allow the User to Run the Program Independently of Assignments: This option displays only for packages. If enabled, it allows the deployment to appear in Software Center. To manage notifications for packages, configure a property on the program to deploy. The Advanced tab for the program has a property named Suppress program notifications, which prevents system tray notifications if checked. If unchecked, the end user receives notifications if the Show notifications for new deployments setting is set to True. This same configuration is required for task sequences to handle end-user notifications.
The last two options have to do with managing software installations and system restarts. By default, packages and applications adhere to maintenance windows. Modify these settings to bypass maintenance windows.
7. The packages version of the Deploy Software Wizard has an additional property page for DPs. Use this page to specify how to run the content for the program according to the boundary to which the client is connected, as shown in Figure 14.9.

FIGURE 14.9 The Distribution Points tab of the Deploy Software Wizard.
Following is a brief description of each option on that page:
![]() Deployment Options (Current Boundary Group): When a system is on a network that can use a DP from its boundary group, the client uses the options defined for this property. By default, content is downloaded from the DP and run from the local cache. You have one additional option: Run program from distribution point. If this is chosen, you must enable the option Copy the content in this package to a package share on distribution points on the Data Access tab for the package, as discussed in Chapter 11. Enabling this option instructs all DPs to copy the required content from the single-instance store to a DP share.
Deployment Options (Current Boundary Group): When a system is on a network that can use a DP from its boundary group, the client uses the options defined for this property. By default, content is downloaded from the DP and run from the local cache. You have one additional option: Run program from distribution point. If this is chosen, you must enable the option Copy the content in this package to a package share on distribution points on the Data Access tab for the package, as discussed in Chapter 11. Enabling this option instructs all DPs to copy the required content from the single-instance store to a DP share.
![]() Deployment Options (Neighbor Boundary): Specify whether clients should download and install content from a neighbor boundary when no DP in its current boundary group is available or whether to not run the program.
Deployment Options (Neighbor Boundary): Specify whether clients should download and install content from a neighbor boundary when no DP in its current boundary group is available or whether to not run the program.
![]() Allow Clients to Share Content with Other Clients on the Same Subnet: Set this option to enable the deployment to support BranchCache or Peer Cache (discussed in Chapter 5).
Allow Clients to Share Content with Other Clients on the Same Subnet: Set this option to enable the deployment to support BranchCache or Peer Cache (discussed in Chapter 5).
![]() Allow Clients to Use Distribution Points from the Default Site Boundary Group: If a client cannot locate content for this deployment in its defined boundary group or a neighbor boundary group (if specified), this allows the client to use the Default-Site-Boundary-Group.
Allow Clients to Use Distribution Points from the Default Site Boundary Group: If a client cannot locate content for this deployment in its defined boundary group or a neighbor boundary group (if specified), this allows the client to use the Default-Site-Boundary-Group.
As previously mentioned, the Distribution Points page is available only for packages. DP configuration for applications is part of the application DT. Chapter 12 discusses settings specific to each DT.
8. Continue through the wizard, monitoring progress and viewing completion.
Dealing with High-Risk Deployments
High-risk deployments are deployments where the impact, should something go wrong, is considered high. In such situations, a deployment that is automatically installed could potentially cause unwanted results. To mitigate these types of issues, ConfigMgr offers some precautions to take for collections containing a certain number of clients or collections with site systems. An example of a high-risk deployment is a TS deploying Windows 10 to the All Desktop and Server Clients collection.
High-risk deployment behavior can be configured on the Deployment Verification section of the Site properties for the CAS and primary sites. Perform the following steps to modify settings for high-risk deployments:
1. Navigate to Administration -> Site Configuration -> Sites and select the site you want to configure.
2. Select Properties from the ribbon bar to open the Site properties. Select the Deployment Verification tab, shown in Figure 14.10.
3. On the Deployment Verification tab, set the following:
![]() Default Size: The default size is, by default, set to 100. Modify it to anything between 1 and 1,000,000 to hide collections with memberships that exceed the default size. When 0 is specified, the setting is ignored, meaning all collections are visible.
Default Size: The default size is, by default, set to 100. Modify it to anything between 1 and 1,000,000 to hide collections with memberships that exceed the default size. When 0 is specified, the setting is ignored, meaning all collections are visible.
![]() Maximum Size: Modify the maximum size to specify collections that are hidden if they have more members than the maximum size. This option is set to 0 by default, which means it is turned off. The setting can be from 1 to 1,000,000. The value of this setting must be 0 or more than the Default size setting.
Maximum Size: Modify the maximum size to specify collections that are hidden if they have more members than the maximum size. This option is set to 0 by default, which means it is turned off. The setting can be from 1 to 1,000,000. The value of this setting must be 0 or more than the Default size setting.
![]() Collections with Site System Servers: Specify how collections containing site system servers should be treated. You can block these collections, causing the deployment to not be created, or choose to warn, meaning a verification is required before the deployment is created.
Collections with Site System Servers: Specify how collections containing site system servers should be treated. You can block these collections, causing the deployment to not be created, or choose to warn, meaning a verification is required before the deployment is created.
After modifying these settings, click OK to apply your changes and close the Site Properties dialog.
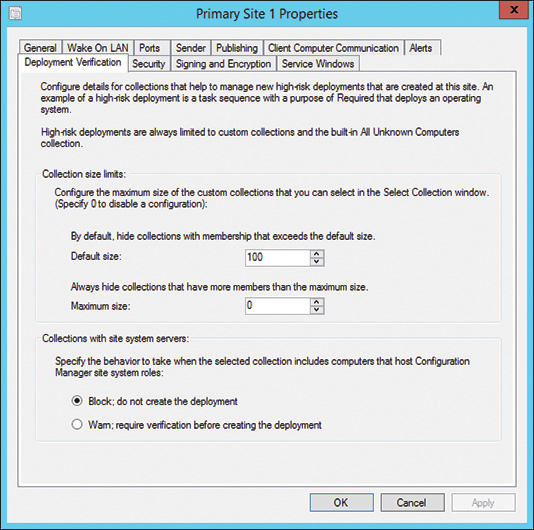
FIGURE 14.10 Deployment Verification tab of Site properties.
When a high-risk deployment is specified, a warning appears, as in Figure 14.11. Click OK to continue. To include collections exceeding the specified default size, remove the check box in front of Hide collections with a member count greater than site’s minimum size configuration, and you can also see collections containing more objects than specified as the default size. You see a warning that you have chosen to display additional collections that exceed the site’s default size for deployment verification. Available collections are still restricted by the site’s maximum size configuration. A final warning is displayed after the Deployment Settings page of the Deploy Software Wizard, where you must enable the check box I want to create this high risk deployment. (This will generate an audit status message.), shown in Figure 14.12.


FIGURE 14.12 Deployment verification warning.
When a deployment to a collection containing site systems is created and the setting to block deployments to collections containing site systems is enabled, you receive the error displayed in Figure 14.13.

FIGURE 14.13 High-risk deployment warning for a collection containing site system roles.
Simulating Deployments
ConfigMgr allows you to simulate an application deployment. This helps you determine the number of systems that will run each DT. In a simulated deployment, clients download and evaluate policy and return state messages.
To create a simulated deployment, right-click an application and select Simulate Deployment. Choose the target collection and the intended action (Install or Uninstall.) No schedule is required; clients download and evaluate policy on their next polling interval.
Understanding the End-User Experience
This section provides a brief overview of the end-user experience on Windows devices. ConfigMgr currently provides two types of end-user experiences:
![]() The first experience, introduced with ConfigMgr 2012, involves Software Center, which the authors will call old Software Center to distinguish it from the new Software Center and the Application Catalog.
The first experience, introduced with ConfigMgr 2012, involves Software Center, which the authors will call old Software Center to distinguish it from the new Software Center and the Application Catalog.
![]() The second experience involves the new Software Center, which combines functionality from the old Software Center and the Application Catalog. This section helps you determine the type of end-user experience to use and when to target devices or target users.
The second experience involves the new Software Center, which combines functionality from the old Software Center and the Application Catalog. This section helps you determine the type of end-user experience to use and when to target devices or target users.
There are two main views from the end-user perspective:
![]() Old Experience: Old Software Center is a client-based application that can be accessed from Start -> Programs -> Microsoft System Center -> Configuration Manager -> Software Center. This application, enabled by default, displays all device-targeted applications that meet the requirements for installation on the system.
Old Experience: Old Software Center is a client-based application that can be accessed from Start -> Programs -> Microsoft System Center -> Configuration Manager -> Software Center. This application, enabled by default, displays all device-targeted applications that meet the requirements for installation on the system.
The Application Catalog is a rich web-based portal that allows the user to request and install software and manage user–device affinity (if allowed by the administrator). It displays all user-targeted applications. The catalog can be accessed directly by the URL or by clicking Find additional applications from the Application Catalog in Software Center (see Figure 14.14).
![]() New Experience: To use the new Software Center, enable it using the Computer Agent device client setting. Chapter 9 includes information about client settings and how to enable and deploy them. The new Software Center is a client-based application that can be accessed from the same place as the old Software Center: Select Start -> Programs -> Microsoft System Center -> Configuration Manager -> Software Center. The application displays all device and user-targeted applications that meet requirements for installation on that system.
New Experience: To use the new Software Center, enable it using the Computer Agent device client setting. Chapter 9 includes information about client settings and how to enable and deploy them. The new Software Center is a client-based application that can be accessed from the same place as the old Software Center: Select Start -> Programs -> Microsoft System Center -> Configuration Manager -> Software Center. The application displays all device and user-targeted applications that meet requirements for installation on that system.
Using the Old Software Center
Figure 14.14 shows an example of software appearing in old Software Center. The Available Software tab shows all available software targeted to the device.

FIGURE 14.14 Showing available software in the Software Center.
This view also shows packages, applications, software updates, and OSD task sequences. You can search, hide optional software, and use the Show dropdown to filter to show only OSD, applications (including packages), or software updates. The user selects the desired application and clicks Install to start installation. The Status column shows the status, such as downloading, installing, installed, and so on. Virtually all information on this page is searchable, and if a help document exists for an application, you can link to it directly from here.
The user can also view the Installed Software tab to review installed applications. The Options tab, shown in Figure 14.15, lets the user specify when to install software. The user can specify work hours in the Work information section and enable the check box Automatically install or uninstall required software and restart the computer outside of the specified business hours. If this option is enabled, required software with a deadline in the future automatically installs at the next available user-defined window instead of waiting for the deadline, which could cause the installation to occur at a time that is not so convenient for the user. If the user configured a local business hours installation window for 10:00 PM tonight, and the deadline is 5:00 PM today, the software runs at the deadline instead of waiting for the window.

FIGURE 14.15 Options tab in the old Software Center.
TIP: OLD SOFTWARE CENTER IS FOR DEVICE-TARGETED DEPLOYMENTS
All deployments targeted to a device appear in the old Software Center unless configured to not to appear in Software Center in the User Experience tab of the Deploy Software Wizard.
The deployments shown in Software Center have been evaluated based on supported platform rules (for package/program and task sequences) and requirement rules (for ConfigMgr applications.) Consequently, the Software Center view shows only software that has met the requirements for installation on the current system.
Using the Application Catalog
Figure 14.16 shows an example of software appearing in the Application Catalog. You can search, view additional details, and filter by category.
This figure shows that the 7-Zip installation requires approval. If you select the 7-Zip application, the Install button in the bottom frame changes to Request. Clicking Request changes the view to allow the user to enter a reason for requesting the software, as shown in Figure 14.17.

FIGURE 14.16 The Application Catalog.

FIGURE 14.17 Request approval in the Application Catalog.
After submitting the request, the user can select the My Application Requests tab to view its status. When a request is submitted, the ConfigMgr administrator (or a delegated authority) can navigate to the Software Library -> Overview -> Application Management -> Approval Requests node in the ConfigMgr console and approve the request. If it is approved, the user can install the software on any device, based on the application’s requirements.
NOTE: APPLICATION CATALOG IS FOR USER-TARGETED DEPLOYMENTS
All deployments targeted to a user appear in the Application Catalog. Since these deployments target users, no evaluations run in advance to verify that the installation is supported on the current device.
Following is a brief walkthrough of the user experience when installing software from the Application Catalog:
1. The user selects the software and clicks Install.
2. The user receives a dialog asking to confirm software installation (see Figure 14.18) and clicks Yes to continue.

FIGURE 14.18 Application Installation confirmation dialog in the Application Catalog.
3. Two additional dialogs appear; these are informational only:
![]() The first queries the local computer for information.
The first queries the local computer for information.
![]() The second appears while evaluating software installation requirements.
The second appears while evaluating software installation requirements.
For a package/program, a requirement is as simple as whether the program can run on the current platform (perhaps the program is marked to only run on Windows 10, but the user attempts to install on Windows Server 2016). Alternatively, it can be a complex application requirement rule, such as verifying a specific organizational unit (OU) or requiring a specific amount of memory or disk space.
4. Once the evaluation completes, a dialog notifies that the installation has started. Depending on how notifications are configured, the user may see a system tray notification for installation progress. When the installation completes, a success dialog appears. The Software Center can also be launched to monitor installation status.
5. If a failure occurs during the requirements evaluation step, the end user receives an error dialog, as displayed in Figure 14.19.

FIGURE 14.19 Application Installation failure dialog in the Application Catalog.
As an application can have a large set of complex requirement rules, it can be difficult to inform the user specifically which rule (or rules) failed, so a dialog similar to Figure 14.19 would appear with examples of why the application installation did not start. Note that these are examples and not specific to requirement rules written for the application.
Using the New Software Center
With ConfigMgr Current Branch version 1511, Microsoft introduced a new Software Center, which has a new, modern look and contains applications that previously were visible only in the Application Catalog. A Silverlight-enabled browser is no longer needed to view the new Software Center. Note that both the Application Catalog website point and Application Catalog web service point still must be configured, since the new Software Center uses them to display information in the application.
After enabling the new Software Center, users can start it from the Start menu. The new Software Center has a different layout than the old Software Center, as shown in Figure 14.20.

The new Software Center contains several pages:
![]() Applications: This page shows all ConfigMgr applications and packages available to the computer and the currently logged-in user. Clicking Required makes only required applications available for filtering. Use the filter selections to filter applications based on the User Categories value specified in the Application Catalog tab of the ConfigMgr application properties. Applications can be sorted using the Sort by dropdown box; available options are Application name: A to Z, Application name: Z to A, Oldest, Most recent, Publisher name: A to Z, Publisher name: Z to A, and Status.
Applications: This page shows all ConfigMgr applications and packages available to the computer and the currently logged-in user. Clicking Required makes only required applications available for filtering. Use the filter selections to filter applications based on the User Categories value specified in the Application Catalog tab of the ConfigMgr application properties. Applications can be sorted using the Sort by dropdown box; available options are Application name: A to Z, Application name: Z to A, Oldest, Most recent, Publisher name: A to Z, Publisher name: Z to A, and Status.
![]() Updates: This page shows all available and to-be-installed updates; these also can be sorted using the Sort by dropdown box, with the same options available on the Applications page.
Updates: This page shows all available and to-be-installed updates; these also can be sorted using the Sort by dropdown box, with the same options available on the Applications page.
![]() Operating Systems: This page shows all available and to-be-installed operating systems, which can be sorted using the Sort by dropdown box, with the same options available on the Applications page.
Operating Systems: This page shows all available and to-be-installed operating systems, which can be sorted using the Sort by dropdown box, with the same options available on the Applications page.
![]() Installation Status: This page shows the status of ConfigMgr application installation, including the status of the installation (Installed or Failed). Status can be sorted with the Filter By dropdown box and the Sort By dropdown boxes, using the options specified for the Applications page.
Installation Status: This page shows the status of ConfigMgr application installation, including the status of the installation (Installed or Failed). Status can be sorted with the Filter By dropdown box and the Sort By dropdown boxes, using the options specified for the Applications page.
![]() Device Compliance: This page shows the status of conditional access compliance, either compliant or non-compliant. Conditional access is described in Chapter 18, “Conditional Access in Configuration Manager.” Users can check compliance by clicking Check Compliance.
Device Compliance: This page shows the status of conditional access compliance, either compliant or non-compliant. Conditional access is described in Chapter 18, “Conditional Access in Configuration Manager.” Users can check compliance by clicking Check Compliance.
![]() Options: This page provides options for Work Information, Power Management, Computer Maintenance, and Remote Control. These options are the same as specified in the old Software Center with one exception: Users can request policy by selecting Sync Policy under Computer maintenance options.
Options: This page provides options for Work Information, Power Management, Computer Maintenance, and Remote Control. These options are the same as specified in the old Software Center with one exception: Users can request policy by selecting Sync Policy under Computer maintenance options.
Notifications and Options for Required Deployments
The end user must initiate software installation if using the old Software Center for device-targeted optional deployments. The Application Catalog should be used for user-targeted optional deployments. You can also use the new Software Center for both device and user-targeted optional deployments. If required software is sent to the device or user, the behavior differs depending on settings specified in the deployment.
If a computer receives a policy with a required application that has a scheduled installation deadline and user notification is enabled, the end user receives a notification, as shown in Figure 14.21, that displays the following text: Software Changes are required. Your IT department requires changes to the software on your computer. Click here for options.

FIGURE 14.21 Required software notification.
If the user ignores the notification, it reappears, depending on the specified and active Computer Agent client settings specific to that workstation. An icon also stays active in the system tray. If the user clicks the notification or the View Required Software message from the system tray icon, a Software Center window opens, as shown in Figure 14.22. The user can click the View details hyperlink to open the Software Center for more detail regarding the application or package to be installed. The user can also initiate the installation from Software Center. In addition to viewing details, the user can use the following options to control installation behavior:
![]() Right Now (Recommended): This is the default option; it initiates installation after the user clicks OK.
Right Now (Recommended): This is the default option; it initiates installation after the user clicks OK.
![]() Outside My Business Hours: This option causes the software to be installed outside user-specified business hours. The Configure my business hours hyperlink takes the user to the Options tab in the Software Center, where business hours can be specified in the Work information section, shown in Figure 14.23. Business hours by default are 05:00 AM to 10:00 PM, Monday to Friday.
Outside My Business Hours: This option causes the software to be installed outside user-specified business hours. The Configure my business hours hyperlink takes the user to the Options tab in the Software Center, where business hours can be specified in the Work information section, shown in Figure 14.23. Business hours by default are 05:00 AM to 10:00 PM, Monday to Friday.
![]() Snooze and Remind Me: Reminds the user at a later time, where later depends on the specified Computer Agent client settings. The user also can specify to be reminded in 15 minutes, 30 minutes, 1 hour, 4 hours, 12 hours, or 1 day.
Snooze and Remind Me: Reminds the user at a later time, where later depends on the specified Computer Agent client settings. The user also can specify to be reminded in 15 minutes, 30 minutes, 1 hour, 4 hours, 12 hours, or 1 day.
The last option the user can specify is whether the software installation is allowed to restart the computer automatically, if needed.

FIGURE 14.22 Software Center installation options.

FIGURE 14.23 Configuring business hours from the Software Center.
Once software installation is initiated, the DT or program is executed on the workstation. If the outcome is successful, the user is notified that the software was successfully installed. If installation fails, the user is also notified. The notification allows the user to view details, opening the Software Center as shown in Figure 14.24, where the user can see when the installation will be retried. The user also can click Additional information to open the window shown in Figure 14.25. While for an end user the message displayed may be very cryptic, the ConfigMgr administrator can determine the cause of the failed installation by looking up the error code using the Error Lookup feature from the Configuration Manager Trace Log Tool (CMtrace.exe). In the example shown in Figure 14.25, the error 0x87D00607 translates to “Content not found”.

FIGURE 14.24 Application Details in the Software Center.

FIGURE 14.25 More information details in the Software Center.
Depending on the error level returned by the installation, the computer may need to be restarted or the user may have to log off to complete installation. In this case, the computer is either rebooted directly (if the option to reboot the computer automatically is selected) or rebooted depending on the specified Device Client Settings for Computer Restart active on the workstation. The user is also notified with a dialog box to reboot the computer to complete installation.
Monitoring and Troubleshooting
Most monitoring and troubleshooting for deployments occurs in the ConfigMgr console. Navigate to Monitoring -> Deployments to view all deployments. Right-click the header row and choose Group By -> Feature Type to organize this view by feature. Figure 14.26 shows an example of the Summary page for an application deployment.
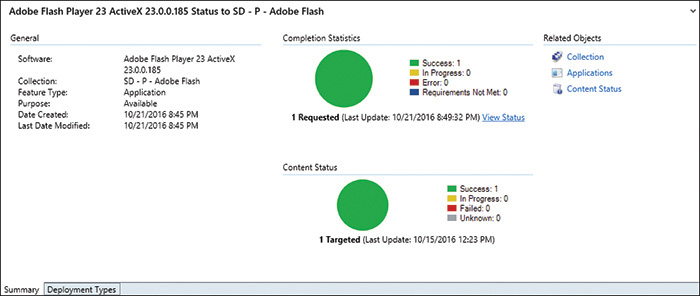
FIGURE 14.26 Summary page for application deployment monitoring.
The information in Figure 14.26 summarizes the deployment status. In one view, you can see the content status (to confirm that content is on the DPs), deployment status, and created and modified dates for the software. The links under Related Objects take you quickly to other areas of the console that you may need for troubleshooting.
Click the Deployment Types tab at the bottom to see the status of each DT if the deployment is for an application. Back on the Summary page, click View Status in the Completion Statistics section. A Deployment Status page appears, as shown in Figure 14.27. This page provides a considerable amount of detail. The top-right corner shows the summarization time. If the view is open a long time, click Refresh to see if an update summarization occurred. If not, click Run Summarization to trigger summarization for this deployment across your hierarchy.
You also see tabs for the following categories:
![]() Success: The installation returned a success exit code; for applications, the deployment state is reevaluated on an interval (by default seven days), so you may see many
Success: The installation returned a success exit code; for applications, the deployment state is reevaluated on an interval (by default seven days), so you may see many Already Compliant messages under Success.
![]() In Progress: The installation is currently in progress: downloading, waiting for a maintenance window, or installing.
In Progress: The installation is currently in progress: downloading, waiting for a maintenance window, or installing.
![]() Error: An error occurred during the installation, which could be a failure exit code or a fatal error from the installer.
Error: An error occurred during the installation, which could be a failure exit code or a fatal error from the installer.
![]() Requirements Not Met: The installation was evaluated against the system and determined that the target system does not meet the platform requirement or the DT requirements.
Requirements Not Met: The installation was evaluated against the system and determined that the target system does not meet the platform requirement or the DT requirements.

FIGURE 14.27 Deployment Status details page of application deployment monitoring.
Status information is grouped by category; if there are 500 errors, ConfigMgr groups like errors together to be managed in one view.
The Software Distribution - Package and Program Deployment and Software Distribution - Application Monitoring reports provide additional information.
Summary
This chapter focused on collections, content, deployment, and deployment monitoring. While the previous three chapters discussed ConfigMgr applications and packages, this chapter discussed creating a collection, distributing content, and deploying software. It also described the end-user experience, with both the old and new Software Center applications. The chapter discussed monitoring deployment status, and simulating application deployment.
Another important concept in this chapter is the Application Catalog and Software Center. It is important to know where your deployment will appear and how to configure notifications to work for your environment.
Chapter 15, “Managing Software Updates,” discusses distributing software updates to clients using the software update management capabilities of ConfigMgr.