
CHAPTER 6
Installing and Updating System Center Configuration Manager
IN THIS CHAPTER
![]() Performing Preinstallation Tasks
Performing Preinstallation Tasks
![]() Performing Site Installation Tasks
Performing Site Installation Tasks
As indicated in Chapter 4, “Architecture Design Planning,” and Chapter 5, “Network Design,” installing Configuration Manager (ConfigMgr) properly is much more than mounting the .iso on a server and running a setup program. ConfigMgr is a wide and deep product, meaning it has many in-depth capabilities that you must properly plan for as well as properly implement. Should you fail in these activities, you will run into immediate issues, and your expectations of ConfigMgr may truly fall short.
The Configuration Manager installation experience has been vastly improved and simplified from previous versions of the product. The authors strongly recommend reviewing Chapters 4 and 5 as a prerequisite to reading this chapter. Chapter 4 provides in-depth information and guidance on planning activities and decisions that will influence the choices you make during the installation steps this chapter discusses. Chapter 5 thoroughly covers the network requirements of ConfigMgr, discussing items such as firewalls, ports, client communications, and more. This chapter takes you through the foundational steps of installing a site hierarchy, primary standalone sites, site servers, and required components and performing the initial site configuration.
NOTE: CONFIGMGR CURRENT BRANCH BASELINE BUILD
Microsoft plans to release a “baseline build” of ConfigMgr Current Branch every year. A baseline build is required for initial installation. At the time this book was published, build (version) 1702 was the latest baseline build. Identify the latest baseline build and support life cycle at https://docs.microsoft.com/sccm/core/servers/manage/updates#a-namebkmkbaselinesa-baseline-and-update-versions.
Performing Preinstallation Tasks
Successfully installing Configuration Manager sites depends on the correct installation and configuration of all required external components.
The preceding chapters of this book provide extensive information on the dependencies and requirements you need to consider prior to performing the installation. The authors recommend creating a checklist of requirements based on the information in those chapters.
TIP: CHECKING DEPENDENCIES FOR INSTALLATION
Chapter 2, “Configuration Manager Overview,” outlines the dependencies required for each role in Configuration Manager.
The following sections provide a summary of the requirements specific to the installation tasks for ConfigMgr sites and the roles that can be installed during setup. The Management Point (MP) and Distribution Point (DP) roles are the only supported roles available for selection during installation of a primary site.
Required Windows and Hardware Components
Before you start the System Center Configuration Manager setup wizard, consider the following prerequisites:
![]() Minimum hardware requirements: Minimum hardware requirements, which in addition to the supported hardware requirements of the operating system, are specified at https://docs.microsoft.com/sccm/core/plan-design/configs/recommended-hardware.
Minimum hardware requirements: Minimum hardware requirements, which in addition to the supported hardware requirements of the operating system, are specified at https://docs.microsoft.com/sccm/core/plan-design/configs/recommended-hardware.
![]() Operating systems: All site roles support the following Windows operating systems (both Standard and Datacenter editions):
Operating systems: All site roles support the following Windows operating systems (both Standard and Datacenter editions):
![]() Windows Server 2012
Windows Server 2012
![]() Windows Server 2012 R2
Windows Server 2012 R2
![]() Windows Server 2016
Windows Server 2016
![]() Operating system roles and features: Table 6.1 lists roles and features that may be required, depending on the ConfigMgr site system being used. Be sure to review the latest information at https://docs.microsoft.com/sccm/core/plan-design/network/prepare-windows-servers.
Operating system roles and features: Table 6.1 lists roles and features that may be required, depending on the ConfigMgr site system being used. Be sure to review the latest information at https://docs.microsoft.com/sccm/core/plan-design/network/prepare-windows-servers.
TABLE 6.1 Operating System Roles and Features
Feature/Role |
Component |
Features |
.NET Framework:
Background Intelligent Transfer Services (BITS) BranchCache Data Deduplication Remote Differential Compression |
Roles |
Network Device Enrollment Service Web server (IIS):
|
To prepare your Windows servers to support ConfigMgr, review the latest information at https://docs.microsoft.com/sccm/core/plan-design/network/prepare-windows-servers. A frequent setup mistake is neglecting to configure IIS request filtering on DPs. By default, IIS filters specific filenames and extensions from download, which makes a lot of sense for websites. However, for a DP, you may need to download a folder named bin or a file with a .PCK extension—which requires configuring IIS filters. Also be sure to run the Prerequisite Checker (as discussed in the “Using the Prerequisite Checker” section, later in this chapter) on each server that will install a site role to ensure that all required components are installed.
TIP: CONFIGMGR PREREQUISITES
As ConfigMgr is an ever-changing product, so are the prerequisites. The prerequisites listed in this book were accurate at the time this book was published, but you should be sure to review the latest prerequisite information at https://docs.microsoft.com/sccm/core/plan-design/configs/supported-operating-systems-for-site-system-servers.
During planning, consider creating a matrix of your site systems by role and plan to configure the prerequisites by role type. Also, realize that Microsoft’s hardware requirements are for a minimum installation; plan to add additional resources based on the production demands of your ConfigMgr site(s).
The authors recommend that you plan to baseline a proof of concept (POC) site and scale it based on scenario testing in a controlled environment.
SQL Server Requirements
Every ConfigMgr site has a database engine requirement. Following are supported database requirements for the server assigned the site database role (review the latest information at https://docs.microsoft.com/sccm/core/plan-design/configs/support-for-sql-server-versions):
![]() SQL Server version: The following versions and editions are required and supported:
SQL Server version: The following versions and editions are required and supported:
![]() SQL Server 2016 Standard and Enterprise
SQL Server 2016 Standard and Enterprise
![]() SQL Server 2014 Standard and Enterprise
SQL Server 2014 Standard and Enterprise
![]() SQL Server 2012 Standard and Enterprise
SQL Server 2012 Standard and Enterprise
NOTE: MANAGING MORE THAN 50,000 CLIENTS
To be supported by Microsoft when you need to manage more than 50,000 clients, use SQL Server Enterprise edition. If SQL Server Standard edition is installed for the central administration site (CAS), the hierarchy is limited to managing a maximum of 50,000 clients. Upgrading the database server to Enterprise edition after site installation does not change this limit. Plan to install the Enterprise edition of SQL Server if your hierarchy needs to support more than 50,000 clients.
Microsoft also recommends using at least four TempDB data files, which should be of equal size.
![]() SQL Server requirements: Following is the required configuration for the supported editions and versions of SQL Server (for additional information, see Chapter 4):
SQL Server requirements: Following is the required configuration for the supported editions and versions of SQL Server (for additional information, see Chapter 4):
![]() Database collation: SQL_Latin1_General_CP1_CI_AS. Each site must use the same collation.
Database collation: SQL_Latin1_General_CP1_CI_AS. Each site must use the same collation.
![]() SQL Server features: Database Engine Services is the only required feature for each database site server.
SQL Server features: Database Engine Services is the only required feature for each database site server.
![]() Authentication method: Windows authentication is required.
Authentication method: Windows authentication is required.
![]() SQL Server instance: Install a dedicated instance of SQL Server for each site.
SQL Server instance: Install a dedicated instance of SQL Server for each site.
![]() SQL Server memory: In implementation scenarios with the site server role and the database role colocated, dedicate at least 50% of the memory to SQL Server.
SQL Server memory: In implementation scenarios with the site server role and the database role colocated, dedicate at least 50% of the memory to SQL Server.
![]() SQL Server Reporting Service (SSRS): SSRS is optional but must be installed for the Reporting Services point role.
SQL Server Reporting Service (SSRS): SSRS is optional but must be installed for the Reporting Services point role.
![]() SQL Server Ports: Configuration Manager supports only static ports (default or custom). In the case of SQL Server named instances, which use dynamic ports by default, you must manually configure a static port. Information on static ports for a named instance is available at https://docs.microsoft.com/sql/database-engine/configure-windows/configure-a-server-to-listen-on-a-specific-tcp-port.
SQL Server Ports: Configuration Manager supports only static ports (default or custom). In the case of SQL Server named instances, which use dynamic ports by default, you must manually configure a static port. Information on static ports for a named instance is available at https://docs.microsoft.com/sql/database-engine/configure-windows/configure-a-server-to-listen-on-a-specific-tcp-port.
![]() SQL Server Memory: You must set a memory limit for the SQL Server instance; a warning is displayed during the prerequisite check if the default configuration is unlimited. This setting is very important, and failing to configure it normally leaves SQL Server consuming nearly all the available memory by default. The authors recommend setting this limit to a value that leaves the operating system and other applications co-hosted on the server with enough memory to function at their recommended levels.
SQL Server Memory: You must set a memory limit for the SQL Server instance; a warning is displayed during the prerequisite check if the default configuration is unlimited. This setting is very important, and failing to configure it normally leaves SQL Server consuming nearly all the available memory by default. The authors recommend setting this limit to a value that leaves the operating system and other applications co-hosted on the server with enough memory to function at their recommended levels.
![]() SQL TempDB: The out-of-the-box configuration will lead to fragmentation issues as TempDB grows, so you must configure SQL TempDB. For information on best practice, see Steve Thompson’s excellent post on configuring TempDB size for ConfigMgr at https://stevethompsonmvp.wordpress.com/2016/02/05/proper-tempdb-creation-for-configuration-manager/.
SQL TempDB: The out-of-the-box configuration will lead to fragmentation issues as TempDB grows, so you must configure SQL TempDB. For information on best practice, see Steve Thompson’s excellent post on configuring TempDB size for ConfigMgr at https://stevethompsonmvp.wordpress.com/2016/02/05/proper-tempdb-creation-for-configuration-manager/.
TIP: ACCOUNT TYPE FOR SQL SERVICE
You can configure the SQL Server service to use an Active Directory (AD) domain account or the local system account. Microsoft’s SQL product team recommends using a domain account as a security best practice. Using a domain account requires you to register the service principal name (SPN) manually for the account. Information on SPN registration is available at https://docs.microsoft.com/sccm/core/servers/manage/modify-your-infrastructure#bkmk_SPN. Using the local system account option registers the SPN automatically. If the SPN is not configured properly for the AD account assigned as the SQL service account, Configuration Manager may not function correctly. The authors recommend ensuring that the SPN registration is configured properly before proceeding with your ConfigMgr installation.
Active Directory Requirements
A Configuration Manager installation has mandatory and optional Active Directory requirements, documented at https://docs.microsoft.com/sccm/core/plan-design/configs/support-for-active-directory-domains:
![]() Mandatory: All site systems must be members of an AD domain. You must use a domain user account that is a local administrator on the site server for the installation.
Mandatory: All site systems must be members of an AD domain. You must use a domain user account that is a local administrator on the site server for the installation.
![]() Optional: You can extend the AD forest schema to support publishing ConfigMgr data. Though the schema extension is optional, there are many benefits, as discussed in Chapter 2, which covers the schema extension steps in detail. (There are no changes in the schema if you previously extended it for ConfigMgr 2007 and newer versions.) A recommended best practice is to use an AD security group for the delegation required after extending the schema.
Optional: You can extend the AD forest schema to support publishing ConfigMgr data. Though the schema extension is optional, there are many benefits, as discussed in Chapter 2, which covers the schema extension steps in detail. (There are no changes in the schema if you previously extended it for ConfigMgr 2007 and newer versions.) A recommended best practice is to use an AD security group for the delegation required after extending the schema.
Windows Server Update Services
You must install the Windows Server Update Services (WSUS) role on each server that will be a software update point (SUP). You must also install the WSUS administration console on the ConfigMgr site server when the SUP will be installed on a remote site system. Simply install the WSUS role; there is no need to configure it, as ConfigMgr configures WSUS when you install the SUP. Review the latest prerequisites for the SUP at https://docs.microsoft.com/sccm/sum/plan-design/prerequisites-for-software-updates.
TIP: KEEP WSUS VERSIONS CONSISTENT
The WSUS version on the site server must be the same as the WSUS version on the SUP for the site server.
Install the WSUS role on each server that will be a SUP. You must also install the WSUS administration console on the ConfigMgr primary site server when the SUP is on a different server from the primary site.
Using the Prerequisite Checker
The Prerequisite Checker is crucial to ensuring a safe and smooth installation of ConfigMgr. Selecting Assess Server Readiness on the ConfigMgr Installation splash screen, displayed in Figure 6.1, redirects you to the latest prerequisite information at https://docs.microsoft.com/sccm/core/servers/deploy/install/prerequisite-checker.
NOTE: ADDITIONAL OPTIONS ON THE INITIAL SPLASH SCREEN
The splash screen contains additional options that allow you to do the following:
![]() Install the admin console
Install the admin console
![]() Download System Center Updates Publisher (SCUP), which is used for detection/deployment of third party patches
Download System Center Updates Publisher (SCUP), which is used for detection/deployment of third party patches
![]() Download clients for additional operating systems such as Linux and Mac OS X
Download clients for additional operating systems such as Linux and Mac OS X
Configuration Manager has two options for running a prerequisite check:
![]() Invoke the Prerequisite Checker as part of the setup routine
Invoke the Prerequisite Checker as part of the setup routine
![]() Use the standalone Prerequisite Checker
Use the standalone Prerequisite Checker

ConfigMgr uses the same executable to perform the prerequisite checks. The tool generates three log files in the root of the system drive. The primary log file with the full check details is ConfigMgrPrereq.log.
The following sections discuss the differences in these two approaches.
Invoking the Prerequisite Checker as Part of the Setup Routine
The Prerequisite Checker runs by default for any new installation. While it is important for this check to run during installation, many ConfigMgr administrators prefer to run it separately first to avoid any surprises or excess work while attempting installation.
Using the Standalone Prerequisite Checker
The other option available with the Prerequisite Checker is to run it from a command prompt. This option provides the most flexibility and additionally allows you to target a remote computer. The Prerequisite Checker verifies the minimum requirement of each site type listed in the relevant installation. Following are the checks you can either run on the local machine or use on a remote machine:
![]() Configuration Manager console
Configuration Manager console
![]() SQL and SQL Express
SQL and SQL Express
![]() SMS provider
SMS provider
![]() CAS
CAS
![]() Secondary site
Secondary site
![]() Upgrade to secondary site
Upgrade to secondary site
![]() Management point
Management point
![]() Distribution point
Distribution point
The tool requires you to use the fully qualified domain name (FQDN) of the targeted machine. Run the tool at the command prompt with a /? switch to invoke the help menu and view correct syntax, illustrated in Figure 6.2. Table 6.2 lists all the command-line options.

FIGURE 6.2 ConfigMgr Prerequisite Checker command-line options.
TABLE 6.2 Prerequisite Checker Command-Line Options and Usage
Usage Switch |
Description |
|
Runs the Prerequisite Checker without displaying the user interface. Specify this option before any other options. |
|
Verifies that the local computer meets the requirements for the primary site or CAS. You can specify only one option; it cannot be combined with the /SEC option. |
|
Verifies that the specified computer meets the requirements for the secondary site. This option cannot be combined with the /PRI or /CAS option. |
|
Verifies whether SQL Express can be installed on the specified computer. This option can be used only after the /SEC option. |
|
Verifies that the specified computer meets the requirements for SQL Server to host the ConfigMgr site database. This option is required when using the /PRI or /CAS option. |
|
Verifies that the specified computer meets the requirements for the SMS provider. This option is required when you use the /PRI or /CAS option. |
Verifies that the local computer meets the requirements for connecting to the central administration site. This option is valid only when you use the /PRI option. |
|
|
Verifies that the specified computer meets the requirements for the MP site system role. |
|
Verifies that the specified computer meets the requirements for the DP site system role. |
|
Verifies that the local computer meets the prerequisites for the ConfigMgr console. This option cannot be combined with any other option. |
TIP: PREREQUISITE CHECKER STANDALONE
In the unlikely event that you cannot run the Prerequisite Checker remotely, copy the Prerequisite Checker files to the remote computer. Review the directions at https://docs.microsoft.com/sccm/core/servers/deploy/install/prerequisite-checker#copy-prerequisite-checker-files-to-another-computer.
Using the Prerequisite Files Downloader Tool
A mandatory part of ConfigMgr installation via the setup wizard is checking for updated prerequisite components. The updated prerequisite components check requires an Internet connection to download files required by the setup routine. An option exists to download the prerequisite components from a local drive and specify the location of the files without an Internet connection requirement during the installation.
Perform the following steps to download the files to a local folder:
1. Create a folder on a local drive.
2. Open the command prompt as administrator.
3. Navigate to the SMSSETUPBinX64 folder and run setupdl.exe.
4. Follow the wizard to download the files to the desired folder. (Review c:ConfigMgrSetup.log for download progress and troubleshooting.)
5. Browse to the folder you created for the prerequisite files and start the download.
Performing Site Installation Tasks
The “Performing Preinstallation Tasks” section, earlier in this chapter, discusses prerequisites and dependencies you must consider and perform before invoking the System Center Configuration Manager Setup Wizard. The remainder of this chapter discusses installing ConfigMgr sites and initial postinstallation configurations.
You can install and implement ConfigMgr two different ways:
![]() By creating a hierarchy
By creating a hierarchy
![]() By creating a standalone site
By creating a standalone site
These two methods require you to install specific Configuration Manager site types and with a specific installation order.
A hierarchy supports the CAS, child primary, and secondary site types. In a hierarchy, a primary site must always join an existing CAS. Note that in a design where you have one primary site, you can add a CAS in the future as needed. (See the note “Do You need a Central Administration Site?” for more information.) This is discussed further in Chapter 4. Following is the order in which you must install a hierarchy:
1. Install a CAS by following the steps discussed in the next section, “Installing a Central Administration Site.”
2. Install one or more child primary sites by following the steps in the “Installing a Primary Site” section, later in this chapter.
3. Based on your design and needs, optionally install secondary sites under the child primary sites, as described in the “Installing a Secondary Site” section, later in this chapter.
A standalone site supports one primary site and one or more secondary sites under the primary site. Following is the order in which you must handle a standalone site implementation:
1. Install a primary site by following the steps discussed in the “Installing a Primary Site” section, later in this chapter.
2. Based on your design and needs, optionally install secondary sites under the primary site by following the steps in the “Installing a Secondary Site” section, later in this chapter.
NOTE: DO YOU NEED A CENTRAL ADMINISTRATION SITE?
In most cases, a CAS is not necessary. ConfigMgr has very granular role-based administration and very high scale numbers to support a single primary site. (Review the latest scale numbers at https://docs.microsoft.com/sccm/core/plan-design/configs/size-and-scale-numbers.) At the time this book was published, a single primary site could support 150,000 total clients. If you have more than 150,000 clients, or have other reasons you think you need a CAS, the authors recommend engaging a consultant to confirm hierarchy design. Chapter 4 discusses site planning in more detail.
TIP: USING THE CMTRACE LOG FILE READER FOR CONFIGMGR
The ConfigMgr installation includes an updated standalone log file reader, CMTrace.exe, which is located in SMSSETUPTOOLS. CMTrace.exe is great for reading the log files generated by the installation and configuration process. CMTrace is also installed to the TOOLS folder during installation, and it occasionally receives updates with ConfigMgr updates.
If you copy CMTrace to alternate locations (as is commonly done), be sure to look for newer versions of CMTrace after upgrading any primary site.
Installing a Central Administration Site
If you plan to build a hierarchy with more than one primary site, you must install a central administration site first. Following is a list of activities you must perform before starting the installation:
1. Install a supported operating system.
2. Install and configure the prerequisites for the CAS.
3. Optionally extend the AD schema and configure the delegation required.
4. Document the site code and site name for the CAS.
5. Optionally run the standalone Prerequisite Checker.
The authors recommend installing the prerequisites relevant to the CAS on the server or servers allocated to the CAS site installation. The supported roles on a CAS are listed in Chapter 4.
NOTE: ABOUT PREREQUISITES
The database server and SSRS requirements apply only if the CAS server is hosting the SQL Server components. Also, the minimum WSUS installation required on a CAS is the WSUS console. If you perform a full installation of WSUS, remember to cancel the Windows Server Update Services Configuration Wizard, as running it is not required.
With the prerequisites successfully installed, it is time to install the CAS. Perform the following steps:
1. Log on to the server (Armada in this example) using a domain user account with local administration privileges.
2. Start the installation from the System Center Configuration Manager splash screen. Double-click splash.hta and click Install.
3. Work through the following significant wizard pages:
![]() Before You Begin: This page lists the items you must check before you begin the installation. Click Next.
Before You Begin: This page lists the items you must check before you begin the installation. Click Next.
![]() Getting Started: Select Install a Configuration Manager Central Administration Site, shown in Figure 6.3, and then click Next.
Getting Started: Select Install a Configuration Manager Central Administration Site, shown in Figure 6.3, and then click Next.

![]() Product Key and Select for Current Branch (CB) or Long Term Servicing Branch (LTSB): Enter your product code and select Current Branch, and then click Next.
Product Key and Select for Current Branch (CB) or Long Term Servicing Branch (LTSB): Enter your product code and select Current Branch, and then click Next.
![]() Prerequisite Licenses: Accept the terms to continue with the installation, and then click Next.
Prerequisite Licenses: Accept the terms to continue with the installation, and then click Next.
![]() Prerequisite Downloads: You have two options: Download Required Files or Use Previously Downloaded Files. Specify either a UNC file path or a local file path to an existing folder. With the second option, you can use setupdl.exe in advance to download the prerequisite files to a local folder. This option is useful in situations where there is no Internet access during the installation process. Click Next.
Prerequisite Downloads: You have two options: Download Required Files or Use Previously Downloaded Files. Specify either a UNC file path or a local file path to an existing folder. With the second option, you can use setupdl.exe in advance to download the prerequisite files to a local folder. This option is useful in situations where there is no Internet access during the installation process. Click Next.
![]() Server Language Selection: Select the supported languages that are appropriate for your environment. (You can change this setting after installation by rerunning setup and selecting the Site Maintenance option.) Click Next.
Server Language Selection: Select the supported languages that are appropriate for your environment. (You can change this setting after installation by rerunning setup and selecting the Site Maintenance option.) Click Next.
![]() Site and Installation Settings: Type a unique three-character site code, provide a site name, and specify the installation folder. You cannot change these settings without reinstallation. Review Chapter 4 for information. Figure 6.4 shows the Site and Installation Settings page. Click Next.
Site and Installation Settings: Type a unique three-character site code, provide a site name, and specify the installation folder. You cannot change these settings without reinstallation. Review Chapter 4 for information. Figure 6.4 shows the Site and Installation Settings page. Click Next.

![]() Central Administration Site Installation: Choose the first option when installing a new hierarchy; choose the second option when adding a CAS to a standalone primary site, and then click Next.
Central Administration Site Installation: Choose the first option when installing a new hierarchy; choose the second option when adding a CAS to a standalone primary site, and then click Next.
![]() Database Information: Type the server name, instance name, and database name for the site server hosting the CAS database role. Figure 6.5 shows the default selection when the database server is colocated on the site server. It also shows the SQL Server service broker port (which is the service used for replication in the hierarchy). Click Next.
Database Information: Type the server name, instance name, and database name for the site server hosting the CAS database role. Figure 6.5 shows the default selection when the database server is colocated on the site server. It also shows the SQL Server service broker port (which is the service used for replication in the hierarchy). Click Next.
![]() Database File Information: Enter the paths to the locations of the SQL Server data file and transaction log. The default locations are entered by default. Click Next.
Database File Information: Enter the paths to the locations of the SQL Server data file and transaction log. The default locations are entered by default. Click Next.
![]() SMS Provider Settings: Accept or specify the SMS provider settings, and then click Next.
SMS Provider Settings: Accept or specify the SMS provider settings, and then click Next.
![]() Usage Data: This page provides basic information about usage data collected by Microsoft. After installation, you can change the level of data collected through the ConfigMgr console. Click Next.
Usage Data: This page provides basic information about usage data collected by Microsoft. After installation, you can change the level of data collected through the ConfigMgr console. Click Next.
![]() Service Connection Point Setup: This is your connection to the cloud and performs many functions in your hierarchy. Read full details about the service connection point at https://docs.microsoft.com/sccm/core/servers/deploy/configure/about-the-service-connection-point. Click Next.
Service Connection Point Setup: This is your connection to the cloud and performs many functions in your hierarchy. Read full details about the service connection point at https://docs.microsoft.com/sccm/core/servers/deploy/configure/about-the-service-connection-point. Click Next.

![]() Settings Summary: Review the summary of settings selected and then click Next to begin the built-in prerequisite check.
Settings Summary: Review the summary of settings selected and then click Next to begin the built-in prerequisite check.
![]() Prerequisite Check: During installation, the prerequisite check automatically runs. There should be no surprises at this point if you ran the Prerequisite Checker separately. Click Next.
Prerequisite Check: During installation, the prerequisite check automatically runs. There should be no surprises at this point if you ran the Prerequisite Checker separately. Click Next.
![]() Installation Progress: During installation you get the View Log option, which conveniently uses CMTrace.
Installation Progress: During installation you get the View Log option, which conveniently uses CMTrace.
![]() Complete Installation: The final wizard page includes a link to the installation log files. Click Finish.
Complete Installation: The final wizard page includes a link to the installation log files. Click Finish.
For more information, review the documentation for using the setup wizard at https://docs.microsoft.com/sccm/core/servers/deploy/install/use-the-setup-wizard-to-install-sites.
Installing a Primary Site
There are two modes of installation for a primary site:
![]() Create a standalone primary site: This is used for a single primary site installation.
Create a standalone primary site: This is used for a single primary site installation.
![]() Join the primary site to an existing hierarchy: You can install this primary site type only if you previously installed a CAS as part of a hierarchy deployment.
Join the primary site to an existing hierarchy: You can install this primary site type only if you previously installed a CAS as part of a hierarchy deployment.
The two modes of primary sites differ in the type of roles you can enable. The supported roles on a primary site are listed in Chapter 4.
Following is a list of steps you must perform before starting the installation of either type of primary site:
1. Install a supported operating system.
2. Install and configure the minimum prerequisites for a primary site.
3. Optionally extend the AD schema and configure the delegation required.
4. Document the site code and site name for the primary site.
5. Optionally run the standalone Prerequisite Checker.
6. Document the CAS site code and FQDN of the CAS site provider.
7. Verify that the SQL collation on the child primary assigned database server is the same as the CAS database.
8. Ensure that the user account running the installation has the following rights:
![]() Local administrator rights on the CAS site server
Local administrator rights on the CAS site server
![]() Local administrator rights on the CAS database server
Local administrator rights on the CAS database server
![]() Local administrator rights on the primary site server
Local administrator rights on the primary site server
![]() Local administrator rights on the primary site database server
Local administrator rights on the primary site database server
![]() User-assigned rights with the Infrastructure Administrator or Full Administrator role on the CAS
User-assigned rights with the Infrastructure Administrator or Full Administrator role on the CAS
TIP: ABOUT PREREQUISITES
The authors recommend installing all the prerequisites for the primary role based on the design of the environment. In scenarios where all roles are hosted on a single server, installing the prerequisites in advance reduces errors during additional site role installation. Review the complete list of prerequisites at https://docs.microsoft.com/sccm/core/plan-design/configs/site-and-site-system-prerequisites.
With the prerequisites successfully installed, you can install a primary site that will join to the existing CAS. (The standalone primary site installation uses a very similar process, so this chapter shows the more complex scenario of connecting to an existing CAS in detail.) Perform the following steps:
1. Log on to the server (Athena in this example) with a domain user account with local administration privileges.
2. Start the installation from the System Center Configuration Manager splash screen. Double-click splash.hta and click Install.
3. Work through the following significant wizard pages to install a standalone primary site:
![]() Getting Started: Select Install a Configuration Manager Primary Site, and then click Next.
Getting Started: Select Install a Configuration Manager Primary Site, and then click Next.
![]() Prerequisite Downloads: You have two options: Download Required Files or Use Previously Downloaded Files. Specify either a UNC file path or local file path to an existing folder, and then click Next.
Prerequisite Downloads: You have two options: Download Required Files or Use Previously Downloaded Files. Specify either a UNC file path or local file path to an existing folder, and then click Next.
![]() Server Language Selection: Select the supported languages that are appropriate for your environment. This setting can be changed postinstallation, by rerunning setup and selecting the Site Maintenance option. Click Next.
Server Language Selection: Select the supported languages that are appropriate for your environment. This setting can be changed postinstallation, by rerunning setup and selecting the Site Maintenance option. Click Next.
![]() Client Language Selection: Select the Configuration Manager client-supported languages appropriate for your environment, and then click Next. You can change this setting after installation by rerunning setup and selecting the Site Maintenance option.
Client Language Selection: Select the Configuration Manager client-supported languages appropriate for your environment, and then click Next. You can change this setting after installation by rerunning setup and selecting the Site Maintenance option.
![]() Site and Installation Settings: Type a unique three-character site code, provide a site name, and specify the installation folder. You cannot change these settings without a reinstallation. Figure 6.6 shows the Site and Installation Settings page. Click Next.
Site and Installation Settings: Type a unique three-character site code, provide a site name, and specify the installation folder. You cannot change these settings without a reinstallation. Figure 6.6 shows the Site and Installation Settings page. Click Next.

FIGURE 6.6 Selecting the site code and site name.
![]() Primary Site Installation: Select Join the Primary Site to an Existing Hierarchy and specify the FQDN of the CAS. Click Next.
Primary Site Installation: Select Join the Primary Site to an Existing Hierarchy and specify the FQDN of the CAS. Click Next.
![]() Database Information: Type the server name, instance name, and database name for the site server hosting the primary site database role. Figure 6.6 shows the default selection when the database server is colocated on the site server. It also shows the SQL Server service broker port (which is the service used for replication in the hierarchy). Click Next.
Database Information: Type the server name, instance name, and database name for the site server hosting the primary site database role. Figure 6.6 shows the default selection when the database server is colocated on the site server. It also shows the SQL Server service broker port (which is the service used for replication in the hierarchy). Click Next.
![]() Database File Information: Enter the path to the location for the SQL Server data file and transaction log. The default locations are entered by default. Click Next.
Database File Information: Enter the path to the location for the SQL Server data file and transaction log. The default locations are entered by default. Click Next.
![]() SMS Provider Settings: Accept or specify the SMS provider settings and click Next. Chapters 4 and 5 discuss aspects of the SMS provider.
SMS Provider Settings: Accept or specify the SMS provider settings and click Next. Chapters 4 and 5 discuss aspects of the SMS provider.
![]() Client Computer Communication Settings: Select whether clients communicate over HTTPS only (which requires PKI certificate authentication to be configured) or whether to use a particular communication protocol on each site system. Click Next.
Client Computer Communication Settings: Select whether clients communicate over HTTPS only (which requires PKI certificate authentication to be configured) or whether to use a particular communication protocol on each site system. Click Next.
![]() Site System Roles: You can install the MP and DP roles. Select the required roles and click Next. Figure 6.7 shows both optional roles selected.
Site System Roles: You can install the MP and DP roles. Select the required roles and click Next. Figure 6.7 shows both optional roles selected.
![]() Settings Summary: Review the summary of settings selected and click Next to begin the built-in prerequisite check.
Settings Summary: Review the summary of settings selected and click Next to begin the built-in prerequisite check.

FIGURE 6.7 Configuring the MP and DP site system roles.
![]() Prerequisite Check: Review and resolve any blocking issues and click Begin Install.
Prerequisite Check: Review and resolve any blocking issues and click Begin Install.
![]() Complete Installation: The final wizard page is the completion page. There is a link to the installation log files on this page.
Complete Installation: The final wizard page is the completion page. There is a link to the installation log files on this page.
![]() Review Logs: When the installation dialog shows that the process is complete, the fun is just beginning. Review C:ConfigMgrSetup.log for additional information. Click Finish.
Review Logs: When the installation dialog shows that the process is complete, the fun is just beginning. Review C:ConfigMgrSetup.log for additional information. Click Finish.
Installing a Secondary Site
The final site type you can install is a secondary site. You must connect to a primary site or a CAS to initiate the installation from the administration console. A DP and an MP are automatically enabled as part of installing a secondary site.
Following is the list of additional prerequisite activities you must perform before starting the Create Secondary Site Wizard:
![]() Document the secondary site code and site name.
Document the secondary site code and site name.
![]() Add the primary site provider server computer account to the local administrators group on the secondary site server.
Add the primary site provider server computer account to the local administrators group on the secondary site server.
![]() Optionally assign the secondary site provider server computer account security rights to publish to the system management folder in the case where the Active Directory schema has been extended.
Optionally assign the secondary site provider server computer account security rights to publish to the system management folder in the case where the Active Directory schema has been extended.
![]() Ensure that the user account running the installation has the following rights:
Ensure that the user account running the installation has the following rights:
![]() Local administrator rights on the secondary site server
Local administrator rights on the secondary site server
![]() Local administrator rights on the primary site server
Local administrator rights on the primary site server
![]() Local administrator rights on the primary site database server
Local administrator rights on the primary site database server
![]() User-assigned rights with the Infrastructure Administrator or Full Administrator role on the CAS or secondary site parent primary site
User-assigned rights with the Infrastructure Administrator or Full Administrator role on the CAS or secondary site parent primary site
![]() Install and configure the required prerequisites, as documented at https://docs.microsoft.com/sccm/core/plan-design/configs/site-and-site-system-prerequisites.
Install and configure the required prerequisites, as documented at https://docs.microsoft.com/sccm/core/plan-design/configs/site-and-site-system-prerequisites.
![]() Optionally run the standalone Prerequisite Checker with the SEC option.
Optionally run the standalone Prerequisite Checker with the SEC option.
With the prerequisites successfully installed, it is time to install the secondary site. Perform the following steps:
1. Launch the Configuration Manager console and connect to the secondary site’s parent primary site (for a standalone primary) or the CAS.
2. Connect to the ConfigMgr console and navigate to Administration -> Site Configuration -> Sites. Select the parent primary site in the middle pane and then click Create Secondary Site on the ribbon bar.
3. Configure the following significant wizard pages to create a secondary site:
![]() General: Type a unique three-character site code, the fully qualified domain name, and a site name and specify the installation folder for the secondary site. You cannot change these settings without a reinstallation. Figure 6.8 shows the general page with configuration details for the secondary site SS1 in the Odyssey lab. Click Next.
General: Type a unique three-character site code, the fully qualified domain name, and a site name and specify the installation folder for the secondary site. You cannot change these settings without a reinstallation. Figure 6.8 shows the general page with configuration details for the secondary site SS1 in the Odyssey lab. Click Next.

FIGURE 6.8 The General tab of the Create Secondary Site Wizard.
![]() Installation Source Files: You have three options:
Installation Source Files: You have three options:
![]()
![]() Copy installation files over the network from the parent site server
Copy installation files over the network from the parent site server
![]()
![]() Use the source files at the following location
Use the source files at the following location
![]()
![]() Use the source files at the following location on the secondary site server (most secure)
Use the source files at the following location on the secondary site server (most secure)
The default option is to copy the source files from the parent site. Accept the default or provide details for the alternative choice, and then click Next.
![]() SQL Server Settings: Accept the default option to install SQL Server Express using the default ports or provide the details for a full supported SQL Server instance for the secondary site. Click Next.
SQL Server Settings: Accept the default option to install SQL Server Express using the default ports or provide the details for a full supported SQL Server instance for the secondary site. Click Next.
![]() Distribution Point: Review the distribution point options on this page. The authors recommend selecting the option to install IIS if required, as shown in Figure 6.9. Note that you can have IIS and BranchCache installed on the new server by enabling the check boxes. Click Next.
Distribution Point: Review the distribution point options on this page. The authors recommend selecting the option to install IIS if required, as shown in Figure 6.9. Note that you can have IIS and BranchCache installed on the new server by enabling the check boxes. Click Next.
![]() Drive Settings: You have two configurable options: Drive Space Reserve and Content Placement Options. Specify the minimum space to reserve on the distribution point drive(s). You can also select the logical drives to use and a secondary location. The default is to allow automatic configuration where the drive with the most free space is selected. Click Next.
Drive Settings: You have two configurable options: Drive Space Reserve and Content Placement Options. Specify the minimum space to reserve on the distribution point drive(s). You can also select the logical drives to use and a secondary location. The default is to allow automatic configuration where the drive with the most free space is selected. Click Next.
![]() Content Validation: Specify content validation configuration by enabling the check box Validate Content on a Schedule and selecting the desired schedule time. Click Next.
Content Validation: Specify content validation configuration by enabling the check box Validate Content on a Schedule and selecting the desired schedule time. Click Next.

FIGURE 6.9 Installing a distribution point in the Create Secondary Site Wizard.
![]() Boundary Group: Select or create boundary groups you want to assign to the distribution point of the secondary site and whether clients outside the assigned boundary groups can use the DP as a fallback. Click Next.
Boundary Group: Select or create boundary groups you want to assign to the distribution point of the secondary site and whether clients outside the assigned boundary groups can use the DP as a fallback. Click Next.
![]() Summary: Review the Summary page to verify the configuration and then click Next to begin the installation.
Summary: Review the Summary page to verify the configuration and then click Next to begin the installation.
![]() Complete Installation: The final wizard page completes the wizard and shows success if all you have completed all mandatory sections. The installation process is not complete, however; when you click Finish, the wizard gathers your secondary site installation properties and initiates the installation process. Monitor the state and status of the installation by selecting the secondary site in the console and selecting Show Install Status. Use the status window to track the installation of the secondary site. Click Finish.
Complete Installation: The final wizard page completes the wizard and shows success if all you have completed all mandatory sections. The installation process is not complete, however; when you click Finish, the wizard gathers your secondary site installation properties and initiates the installation process. Monitor the state and status of the installation by selecting the secondary site in the console and selecting Show Install Status. Use the status window to track the installation of the secondary site. Click Finish.
Installation Validation
The installation wizard eventually reports either success or failure. Investigate failures by using the log files listed in Appendix A, “Configuration Manager Log Files.” You must also validate reported success status, as discussed in the next sections.
Validation Using the Console
You can validate the successful installation of a ConfigMgr site by using the ConfigMgr console. Two nodes can be used to validate the status of the site and components selected during the installation of the site:
![]() Site Status
Site Status
![]() Component Status
Component Status
These status nodes are located under Monitoring -> System Status -> Site Status and Monitoring -> System Status -> Component Status. These two status nodes are illustrated in Figure 6.10.

FIGURE 6.10 Viewing site status.
A healthy functioning site shows a status of OK for all configured and active components for the site. Review warnings and errors in the status nodes and resolve them before making the site available for use.
Validation with Log Files
ConfigMgr provides extensive logging of processes and installation. For a list of Configuration Manager log files, see Appendix A.
The installation log files also provide a detailed look at the installation steps performed by the installation process.
Configuring Site Properties
The “Performing Preinstallation Tasks” and “Performing Site Installation Tasks” sections of this chapter discussed preparing and installing the supported site types in Configuration Manager. The remainder of this chapter discusses basic configurations you must perform before managing clients.
Initial ConfigMgr Configurations
After successfully installing your Configuration Manager site, the authors recommend that you perform some initial configurations. The customizations discussed in the following sections focus on ensuring that you can provide the following basic functionality:
![]() Establishing reporting functionality
Establishing reporting functionality
![]() Preparing ConfigMgr for client management
Preparing ConfigMgr for client management
Establishing Reporting Functionality
ConfigMgr addresses the saying “You can’t manage what you don’t measure.” ConfigMgr reporting capabilities provide the means to see and measure the various features and functionality of the product. The Reporting Point (RP) role is an optional installation and highly recommended. The RP is typically installed and enabled on a CAS for the hierarchy implementation and on the primary site for a standalone implementation. For a detailed discussion on the reporting functionality, see Chapter 21, “Configuration Manager Reporting.”
Preparing Configuration Manager for Client Management
The basic client management functionality of a Configuration Manager implementation requires you to configure and enable core infrastructure settings after installation.
ConfigMgr has simplified the creation of boundaries and separated the two functions associated with them. Separation of boundaries is implemented by using boundary groups. Boundary groups, discussed later in this chapter, in the “Configuring Boundary Groups” section, have a dependency on creating standard boundaries. Boundaries can be created manually as well as through Active Directory Forest Discovery.
Configuring Active Directory Forest Discovery
Active Directory Forest Discovery is a newer discovery method for Configuration Manager. Chapter 9, “Client Management,” discusses discovery methods in depth. This section discusses the use of AD Forest Discovery in relation to site boundary creation. Figure 6.11 shows the properties of the Active Directory Forest Discovery for the hierarchy. (This discovery method is configurable at all primary sites, as well as the CAS.) You must enable this discovery method and select one or both automatic boundary creation methods if you want AD sites and subnets in your environment created as site boundaries in ConfigMgr.

FIGURE 6.11 Active Directory Forest Discovery Properties.
Configuring Boundary Groups
In Configuration Manager, boundaries—whether manually created or automatically created by Active Directory Forest Discovery—are not in use until you create a boundary group. ConfigMgr Current Branch version 1610 reinvigorated boundary groups to support boundary group relationships, which control fallback and time intervals to fallback. For more information, see https://docs.microsoft.com/sccm/core/servers/deploy/configure/boundary-groups. Also, clients can now use boundary groups for SUP and MP selection.
The authors recommend that you create a boundary group for site assignments before deploying ConfigMgr agents. You can optionally create a boundary group for content required by clients.
Follow these steps to create a boundary group for site assignment:
1. In the console, navigate to Administration -> Hierarchy Configuration -> Boundary Groups and click Create Boundary Group on the ribbon bar.
2. In the General section, type a name and a description for the boundary group. Click Add in the Boundaries section and select the relevant boundary/boundaries. Figure 6.12 shows an example.

FIGURE 6.12 The General tab of the Create Boundary Group dialog.
3. To configure the boundary group type and association with a site, configure the properties on the References tab:
![]() Site Assignment: Select Use this boundary group for site assignment and select the site associated with the boundary group, as illustrated in Figure 6.13.
Site Assignment: Select Use this boundary group for site assignment and select the site associated with the boundary group, as illustrated in Figure 6.13.
![]() Content: In the case of a content-only boundary group configuration, make sure Use this boundary group for site assignment is not selected. Under the content location section, click Add and select a content role site system(s). Figure 6.14 illustrates a boundary group configured for content only.
Content: In the case of a content-only boundary group configuration, make sure Use this boundary group for site assignment is not selected. Under the content location section, click Add and select a content role site system(s). Figure 6.14 illustrates a boundary group configured for content only.
NOTE: SITE ASSIGNMENT BOUNDARY GROUPS
You must configure a site assignment boundary group for a primary site before you install a ConfigMgr client in the scenario where only one primary site is installed in the hierarchy or in a standalone primary site implementation. Client deployment will not complete if the site you try to assign the client to does not have a site assignment boundary group configured or a fallback site configured for hierarchy implementations with more than one primary site.


FIGURE 6.14 Creating a boundary group for content.
TIP: SEPARATE BOUNDARY GROUPS
You can combine site assignment and content location into a single boundary group; however, when you do, you lose flexibility and better separation. In addition, site assignment boundary groups cannot have overlapping boundaries, whereas content boundary groups support overlapping boundaries. The authors recommend planning for and implementing boundary groups for site assignment and having separate boundary groups for content location only.
Connecting ConfigMgr to Cloud Services
ConfigMgr now has the capability to connect to various Microsoft cloud services. Each cloud service provides different capabilities, and each can be configured independently, except for the cloud management gateway (CMG) that is optimally used with Azure AD authentication. Once you establish connectivity to a given cloud service, you can use that service for one or more ConfigMgr features.
Authenticating to Azure Active Directory
By connecting to Azure AD, you enable ConfigMgr to authenticate to various cloud services and also delegate ConfigMgr permissions to access those services. This is done by using two different Azure AD app types:
![]() A web app is basically an identity (a client ID) along with a credential (a secret key) that allows an application to authenticate to Azure AD by relying on a user account that maps to the OAuth standard’s definition of a private or confidential client.
A web app is basically an identity (a client ID) along with a credential (a secret key) that allows an application to authenticate to Azure AD by relying on a user account that maps to the OAuth standard’s definition of a private or confidential client.
![]() A native app is basically an identity without credentials that is used with user or device authentication to access resources; this maps to the OAuth standard’s definition of a public client.
A native app is basically an identity without credentials that is used with user or device authentication to access resources; this maps to the OAuth standard’s definition of a public client.
ConfigMgr uses one or both types of apps to access Microsoft cloud services, depending on the requirements of the cloud service to which you are establishing connectivity.
You must have an Azure AD tenant to connect to Azure AD. This is included automatically with a subscription to Office 365 or Microsoft Intune. A Microsoft Enterprise Mobility + Security (EMS) subscription also includes Azure Active Directory Premium.
If you have global admin rights to your tenant, you can use ConfigMgr to create the necessary web app and/or native app directly from the ConfigMgr console. However, if another team owns global admin rights in your organization, you can request that they create a web app and/or native app for you and send you that information, which you can then import into the ConfigMgr wizard. The following information must be collected from that team:
![]() Web app:
Web app:
![]() Friendly name of the app
Friendly name of the app
![]() Friendly name of the tenant
Friendly name of the tenant
![]() Tenant ID (a GUID)
Tenant ID (a GUID)
![]() Client ID (a GUID)
Client ID (a GUID)
![]() Secret key (a random string value)
Secret key (a random string value)
![]() Native app:
Native app:
![]() Friendly name of the app
Friendly name of the app
![]() Client ID (a GUID)
Client ID (a GUID)
For more information on how to create a web app in the Azure AD portal, see the Azure AD documentation at https://docs.microsoft.com/azure/active-directory/develop/active-directory-integrating-applications. The ConfigMgr apps do not require an actual sign-on URL (for web apps) or redirect URI (for native apps). Any value may be supplied.
The following sections explain how to use the Azure services wizard to establish connectivity between ConfigMgr and each respective cloud service. To launch the Azure services wizard, follow these steps:
1. In the ConfigMgr console, navigate to Administration -> Cloud Services -> Azure Services.
2. Expand the Azure Services group in the Home tab on the ribbon bar and click Configure Azure Services.
3. When the Azure services wizard launches, select the Azure service to which you want to connect.
Connecting to Cloud Management
Connecting ConfigMgr to the CMG enables you to configure Azure AD user discovery and authentication. Azure AD user discovery can be used to target software to users with Azure AD Join (AADJ) Windows 10 devices. You can also allow the CMG to authenticate Azure AD Join Windows 10 clients. This removes a common hurdle to Internet-based client management (IBCM), which required client certificates to authenticate to Internet-facing MPs. Instead, the CMG leverages Azure AD and the Azure AD device identity on an Azure AD Join Windows 10 device to authenticate clients on the Internet.
Follow these steps to connect to cloud management:
1. In the ConfigMgr console, launch the Azure service wizard, as discussed in the “Authenticating to Azure Active Directory” section, earlier in this chapter.
2. On the Azure Services page, select Cloud Management Gateway.
3. On the General page, provide a name and a description.
4. On the App page, create a web app or a native app by clicking Browse.
For a web app, either import the information from your Azure AD team (see the “Authenticating to Azure Active Directory” section) or click Create and follow the rest of the steps in the Server App window:
![]() Supply a friendly name for the app, a home page URL, an app ID URI, and the secret key validity period (which is like a password expiration date for a service account).
Supply a friendly name for the app, a home page URL, an app ID URI, and the secret key validity period (which is like a password expiration date for a service account).
![]() Sign in with an account that has permissions to create web apps in Azure AD.
Sign in with an account that has permissions to create web apps in Azure AD.
For a native app, either import the information from your Azure AD team (see the “Authenticating to Azure Active Directory” section) or click Create and follow the remainder of the steps in the Client App window:
![]() Supply a friendly name for the app and a redirect URI.
Supply a friendly name for the app and a redirect URI.
![]() Sign in using an account that has permission to create native apps in Azure AD.
Sign in using an account that has permission to create native apps in Azure AD.
5. In the Discovery page of the wizard, click Enable Azure Active Directory User Discovery and optionally configure the discovery schedule by clicking Settings.
Refer to Chapter 9 for additional information on Azure AD User Discovery.
Connecting to OMS Connector
Connecting to the Microsoft Operations Management Suite (OMS) cloud service allows you to sync your ConfigMgr collections to the OMS portal, enabling you to use collections as OMS computer groups. You can then use those computer groups to scope/filter your OMS Log Analytics searches. For information on how to import ConfigMgr information to OMS, see the OMS documentation at https://docs.microsoft.com/azure/log-analytics/log-analytics-sccm.
To configure the OMS connection, ensure that the following prerequisites are met:
![]() The OMS connector does not support creating web apps via the Azure services wizard; instead, you must pre-create the web app by following the steps in the “Authenticating to Azure Active Directory” section, earlier in this chapter. Once those steps are complete, grant the web app contributor rights in the Azure resource group that contains the OMS Log Analytics workspace. For details on how to delegate permissions, see the OMS documentation at https://docs.microsoft.com/azure/log-analytics/log-analytics-sccm#provide-configuration-manager-with-permissions-to-oms.
The OMS connector does not support creating web apps via the Azure services wizard; instead, you must pre-create the web app by following the steps in the “Authenticating to Azure Active Directory” section, earlier in this chapter. Once those steps are complete, grant the web app contributor rights in the Azure resource group that contains the OMS Log Analytics workspace. For details on how to delegate permissions, see the OMS documentation at https://docs.microsoft.com/azure/log-analytics/log-analytics-sccm#provide-configuration-manager-with-permissions-to-oms.
![]() The OMS connector must be installed on the computer hosting the service connection point (SCP), and the SCP must be in online mode.
The OMS connector must be installed on the computer hosting the service connection point (SCP), and the SCP must be in online mode.
![]() You must also install the Microsoft Monitoring Agent (MMA) for OMS on the SCP, as the MMA and the OMS connector must use the same OMS workspace. To install the agent, see the OMS documentation at https://docs.microsoft.com/azure/log-analytics/log-analytics-sccm#download-and-install-the-agent.
You must also install the Microsoft Monitoring Agent (MMA) for OMS on the SCP, as the MMA and the OMS connector must use the same OMS workspace. To install the agent, see the OMS documentation at https://docs.microsoft.com/azure/log-analytics/log-analytics-sccm#download-and-install-the-agent.
When you have met all the prerequisites for connecting the OMS connector, use the procedure documented at https://docs.microsoft.com/sccm/core/clients/manage/sync-data-microsoft-operations-management-suite to establish a connection to OMS.
Connecting to Upgrade Readiness
The procedure at https://docs.microsoft.com/sccm/core/clients/manage/upgrade/upgrade-analytics discusses how to connect to Upgrade Readiness (formerly known as Upgrade Analytics).
Deploying a CMG in Microsoft Azure
To set up a CMG for ConfigMgr, follow the documentation at https://docs.microsoft.com/sccm/core/clients/manage/setup-cloud-management-gateway. The CMG is hosted in Azure App Services (Azure’s Platform as a Service offering). This means that the virtual machines hosted in Azure are designed to be headless and managed by Azure itself, similar to a cloud DP.
The CMG also requires that you select an Azure cloud service domain name (<name>.cloudapp.net). This name can be any format or even random text, but it must be globally unique. The FQDN of the CMG is then associated with a CNAME DNS record (for example, myCMG.contoso.com). The FQDN of the CNAME DNS record is then used to point your clients to the CMG and to require an SSL server certificate. Having the CNAME associated with your registered domain name allows you to obtain a certificate from a public certificate authority such as DigiCert. You can use the <name>.cloudapp.net format directly, but because Microsoft owns the cloudapp.net domain, you must use a private/internal certificate authority.
The CMG requires an on premise HTTPS MP to allow secure communication. Clients on your network automatically obtain a primary site’s CMG’s name for use when they are on the Internet. You can either leverage client authentication certificates (like IBCM) or, if using Windows 10 devices in ConfigMgr Current Branch version 1710, you can have those clients leverage Azure AD authentication to the CMG to further simplify deployment. Appendix B, “Co-Managing Microsoft Intune and ConfigMgr,” provides additional information.
Installing Optional Site Systems
This portion of the chapter discusses site system installation and uses the fallback status point (FSP) as an example of site roles you can install for your Configuration Manager primary site or hierarchy.
Installing the Fallback Status Point
The FSP is the ConfigMgr clients’ emergency system. The FSP is typically used during client installation and during postinstallation when clients cannot communicate with their management points. You must assign an FSP to a client during the client installation; so plan to install an FSP role before deploying clients. To install and enable an FSP for a ConfigMgr site, follow these steps:
1. In the console, navigate to Administration -> Site Configuration -> Sites. In the middle pane, select the desired site on which to enable the FSP and click Add Site System Roles on the ribbon bar.
2. Configure the following options on the General page:
![]() Name: This option is preselected. (You must specify a fully qualified domain name if you initiate the role creation by selecting the Add Site system option.)
Name: This option is preselected. (You must specify a fully qualified domain name if you initiate the role creation by selecting the Add Site system option.)
![]() Site Code: This is the site on which you will be enabling the role.
Site Code: This is the site on which you will be enabling the role.
![]() Specify an FQDN for This Site System for Use on the Internet: The FQDN is used in the case where a supported site system role will be accessed from the Internet.
Specify an FQDN for This Site System for Use on the Internet: The FQDN is used in the case where a supported site system role will be accessed from the Internet.
![]() Require the Site Server to Initiate Connections to This Site System: With this security option, communication is controlled and initiated by the site provider.
Require the Site Server to Initiate Connections to This Site System: With this security option, communication is controlled and initiated by the site provider.
![]() Site System Installation Account: Use the site system computer account to install the role or specify a domain user account.
Site System Installation Account: Use the site system computer account to install the role or specify a domain user account.
Click Next to proceed to the role selection page.
3. On the Proxy page of the wizard, enter any proxy information that is required for your site server to connect to Microsoft.
4. Select Fallback status point on the System Role Selection page, as shown in Figure 6.15.

FIGURE 6.15 Selecting the Fallback Status Point role in the Add Site System Roles Wizard.
5. On the next page, set the FSP-specific settings by either accepting the default configuration or modifying the number of state messages and throttle interval, in seconds, from their defaults (which are 10000 and 3600, respectively).
6. On the summary page, review the settings and click Next to proceed with role installation.
7. Review the FSPMSI.log file for the installation status.
TIP: FSP LOCATION AND CLIENT INSTALLATION
The FSP is the site role clients send messages to if communication to their assigned management point fails. Plan to install the FSP role on a different site server from the MP. In addition, specify the FSP property in the client installation options of the site. If an FSP is installed, the client push installation method automatically assigns an FSP to a client during installation. Other installation methods require you to specify the FSP property, although this is not required if it is already specified in the client installation properties and the AD schema is extended.
Configuring Hierarchy Settings
Hierarchy settings are sitewide settings that are managed from the top site (the CAS if you have a CAS; otherwise, your single primary site). The following sections look at some of the most popular settings.
Fallback Site
Clients that do not fall within a site assignment boundary group are assigned to the fallback site if one is configured for the hierarchy. This option is specific to hierarchies only. Perform the following steps to enable a primary site in a hierarchy as a fallback site:
1. In the console, navigate to Administration -> Site Configuration -> Sites. Click the Sites node and then click Hierarchy Settings on the ribbon bar.
2. Check the option Use a fallback site (see Figure 6.16), select a primary site from the hierarchy, and click OK to complete the configuration.

FIGURE 6.16 Enabling the fallback site.
Diagnostics and Usage Data
Choose the level of diagnostics data wisely; don’t simply choose Basic. You can help the ConfigMgr product team’s cause by encouraging your attorneys and security/privacy consultants to submit the right level of diagnostics data for your company. The more you give, the more you help the product team build the right features, identify and fix the most popular bugs, and give you a better product. Review the diagnostics data at https://docs.microsoft.com/sccm/core/plan-design/diagnostics/how-diagnostics-and-usage-data-is-used and the diagnostics data FAQ at https://docs.microsoft.com/sccm/core/understand/frequently-asked-questions-about-diagnostics-and-usage-data.
To view and modify diagnostics and usage data, return to Hierarchy Settings (as described in the previous section) and select the Diagnostics and Usage Data tab. Review the options.
Troubleshooting Site Installation
Generally, installations complete flawlessly, although you may occasionally have the need to troubleshoot. Table 6.3 provides information on troubleshooting resources, known issues, and resolutions.
TABLE 6.3 Troubleshooting Resources and Known Issues
Resource/Issue |
Notes |
Log file |
Configuration Manager provides detailed logging of the installation process. The logs specific to installation are listed in Appendix A. |
Incorrect or missing dependency component configuration |
Most of the common troubleshooting issues are associated with missing or incorrectly configured dependencies. You must ensure that you have installed and configured the required prerequisites. Run the Prerequisite Checker and plan to resolve issues identified before proceeding with the installation. Review the latest supported configuration information at https://docs.microsoft.com/sccm/core/plan-design/configs/supported-configurations. |
Firewalls |
You must ensure that the required ports used by Configuration Manager during and after the installation process are configured properly on firewalls (operating system or external appliances). |
User and computer account rights |
You must ensure that the required rights have been assigned to users or computer accounts used in the installation and configuration processes. |
SQL non-default instances |
Ensure that you configure static ports for SQL Server instances. The default instance is configured with a static port (the default is 1433). All other instances are configured by default with a dynamic port. |
Publishing in Active Directory |
You must delegate the required security rights to the System Management container. The installation process for hierarchies uses published data in this folder for the initial replication configuration. |
Replication issues during hierarchy primary and secondary site installation. |
A primary site installation when joined to a hierarchy must perform an initial replication with the CAS. This replication process is also required for a secondary site. If this initial replication process is unsuccessful, the site indicates a pending state, and the console shows a read-only status. You must ensure that all site provider servers have the right to publish to the System Management container using the computer account and are also in the local administrators group of both child and parent sites before starting the installation. Sites in a read-only or pending state may require a full reinstallation. |
TIP: USER FORUMS AND BLOGS
Troubleshooting information on Configuration Manager is available on Internet user forums. Use the ConfigMgr Current Branch Forum at https://social.technet.microsoft.com/Forums/en-US/home?category=ConfigMgrCB as well as search engines such as Bing and Google to aid in your troubleshooting, as the product has many community leaders discussing the most up-to-date issues and how they have been resolved.
Updating Configuration Manager
After you have deployed ConfigMgr Current Branch, prepare to update! Updates are normally released three times per year. Even if you install ConfigMgr with the latest baseline version, odds are you will have an update already available, or one will become available soon after you complete the installation.
NOTE: KNOW THE DIFFERENCE BETWEEN INSTALL, UPGRADE, AND UPDATE
Note the difference between install, upgrade, and update. Initially, you either install ConfigMgr Current Branch or upgrade (also called in-place upgrade) from ConfigMgr 2012 to ConfigMgr Current Branch. Once you have ConfigMgr Current Branch up and running, you then update ConfigMgr, usually by triggering in-console updates, but sometimes out-of-band updates may also need to be installed. Read more at https://docs.microsoft.com/sccm/core/understand/upgrade-update-install.
Most updates arrive and are initiated in the console. Following are the significant wizard pages you must configure to perform an in-console update. (The images here show an update of build 1706 with a hotfix. The process is the same for a new version of Current Branch.) Navigate to Administration Updates and Servicing and follow these steps:
1. From the Updates and Servicing node, select the desired update and click Install Update Pack.
2. On the General page, review the information about what is included in the update and choose whether to ignore prerequisite checks. As always, a best practice is to perform the prerequisite check separately, prior to running an update.
3. On the Features page, review and choose the desired features. Note that you can later enable these features from the Updates and Servicing node.
4. On the Client Update Settings tab, choose whether to validate in a pre-production collection or upgrade the client without validating, as shown in Figure 6.17. (For more information on updating clients, see Chapter 9.)
5. Review and accept the license terms.
6. Confirm the settings on the Summary tab.
7. Review the progress and completion message to verify that the wizard completes successfully.

FIGURE 6.17 Configuring client update settings.
Congratulations! You have successfully started the update process. A common misconception is that the update is complete at this point, but it is really just getting started. Depending on the type of update, the process could take from one to multiple hours, so be patient and let the process continue.
8. Review the status of the update from the Updates and Servicing node. In the Details pane, click Show Status to monitor the process in more detail. The wizard takes you to Monitoring -> Overview -> Updates and Servicing status and filters the view to show the details of the update you are currently installing (see Figure 6.18).
9. Click Show Status to launch the detailed installation status dialog shown in Figure 6.19. Then click on the various statuses in the upper pane to see the details in the lower pane. Click Refresh to receive updated information in the dialog. Click the View Post-Setup Configuration Tasks link to go to a web page with generic post-setup tasks that you may need to perform, depending on your environment.
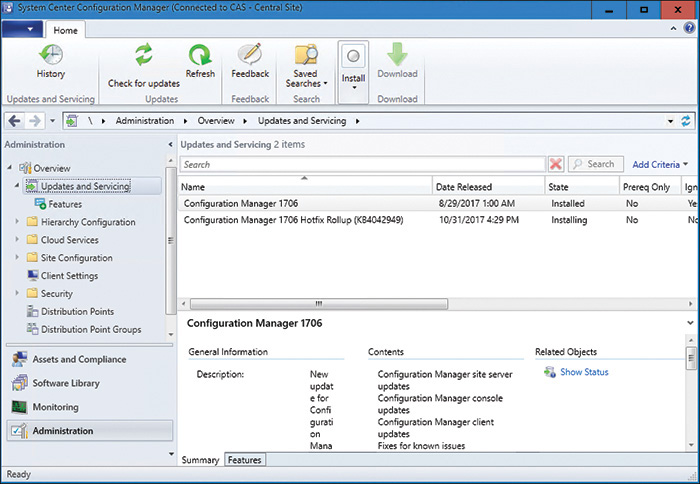
FIGURE 6.18 Viewing update status from the Updates and Servicing node.

As these figures show, the update process is fairly painless. So update well and update often. If you encounter issues, review CMUpdate.log in the site server log file folder. Review Appendix A for additional log file information.
Scheduling Updates
By default, the entire hierarchy is automatically updated immediately (in proper order) after success of the top-level site (either a CAS or a single primary site). For many environments, this process is acceptable. You may have a requirement from your customers or users for different downtime windows, based on location or other operational needs. You can configure service windows that are specific to the update process; when you do this, standard ConfigMgr service windows do not impact the site update process. You can configure service windows for each site by using the following process:
1. Navigate to Administration -> Overview -> Sites, select the desired site, and click Properties on the ribbon bar.
2. In the properties dialog, chose the Service Windows tab, as shown in Figure 6.20, and click the starburst icon to create a new service window.

Using CD.Latest
When you install an update, your base installation changes, and it should be considered unique to your environment. A folder on your site server named CD.Latest is basically a source installation folder with up-to-date files (based on the last update installed to your environment). The following are supported scenarios for using the CD.Latest installation files:
![]() Site Recovery: When you need to reinstall the site, you must use CD.Latest, which contains the binaries that match the ConfigMgr database. If you do not have CD.Latest, you cannot recover the site.
Site Recovery: When you need to reinstall the site, you must use CD.Latest, which contains the binaries that match the ConfigMgr database. If you do not have CD.Latest, you cannot recover the site.
![]() Installing a Child Primary Site: Use the CD.Latest files from the CAS as source files for installing each child primary site.
Installing a Child Primary Site: Use the CD.Latest files from the CAS as source files for installing each child primary site.
![]() Expanding a Standalone Primary Site: You currently have a standalone primary site, so you must use the source files from the CD.Latest folder on your primary site.
Expanding a Standalone Primary Site: You currently have a standalone primary site, so you must use the source files from the CD.Latest folder on your primary site.
Never use CD.Latest for a fresh standalone installation. Always use the latest ConfigMgr baseline build and update using the process described in the “Updating Configuration Manager” section of this chapter. Read more about CD.Latest at https://docs.microsoft.com/sccm/core/servers/manage/the-cd.latest-folder.
Summary
This chapter discussed and provided guidance on preparing for System Center Configuration Manager Current Branch installation, installation of supported sites, postinstallation configuration, upgrading, and troubleshooting of installation issues.
Chapter 7, “Upgrading and Migrating to ConfigMgr Current Branch,” provides a detailed discussion of how to migrate from previous versions of the product to ConfigMgr Current Branch.