2. Basic Outlook Operations
In This Chapter
• Learn how to work with the ribbon
• Accessing the Quick Access toolbar
• Using shortcuts with context menus
• Learn how to use the Navigation bar
• Find out how to control panes
Before you jump in and start whipping up emails and appointments willynilly, it’s a good idea to take some time and familiarize yourself with the basic methods Outlook offers to access tools, commands, and features. Learning how to find your way to the commonly used commands and features now can help you speed up your work later. Microsoft Outlook presents commands, settings, and options through dialog boxes, context menus, toolbars, and the ribbon. In many cases, you can access the same tools and features through several different avenues.
It’s also a good idea to figure out how the Folder pane, Information Viewer, and Navigation bars work so you can easily maneuver around the various modules and their associated tasks. In this chapter, I’ll show you how Outlook presents commands and tools for you to use, and how to control the Navigation bar and the way panes work.
Working with the Ribbon
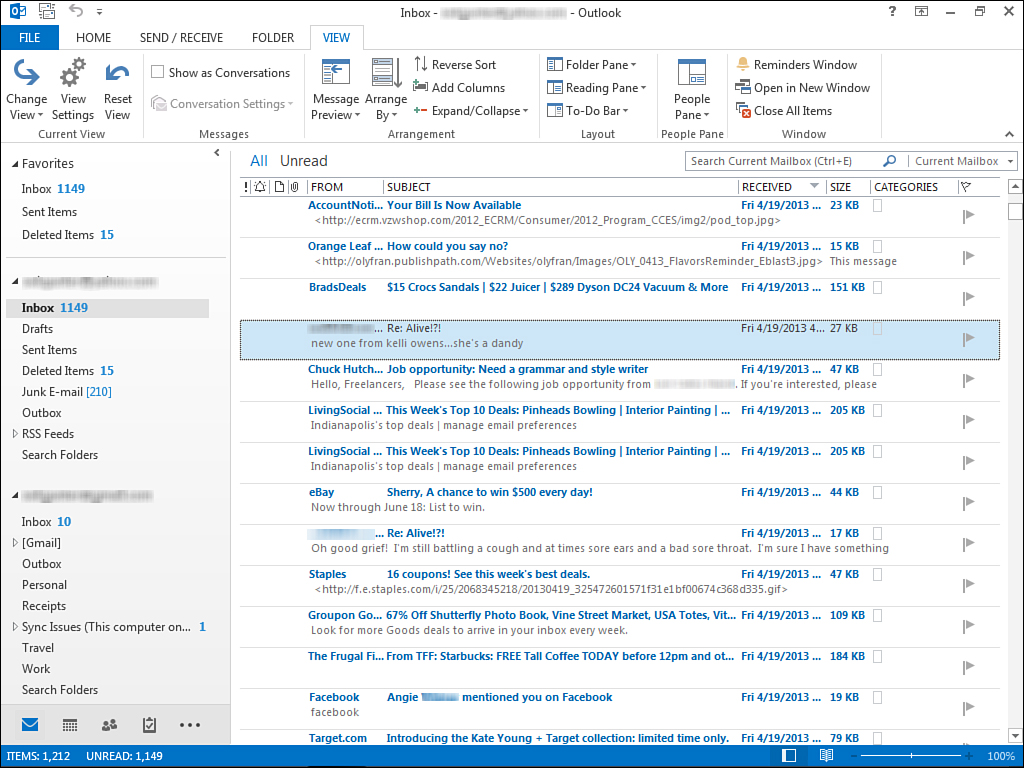
The ribbon organizes commands and features into tabs listed across the top of the program window. If you haven’t worked with the latest versions of Microsoft Office in the past few years, you may be interested to know that the ribbon replaces the menus and toolbars of old. With the ribbon format, related command buttons and features are organized into groups found within each tab. For example, if you display the Home tab, shown in Figure 2.1, you can find most of Outlook’s module-specific commands, such as creating new items. If you display the Folder tab, it offers tools for working with folders. The various buttons, drop-down menus, and galleries found on the ribbon tabs are grouped under labeled headings, such as Actions or Tags, along the ribbon’s expanse.

Now here’s something rather interesting—the commands found on the various tabs change based on what module you’re using. If you’re working with the Mail module, for example, the Home tab shows tools related to emailing, but if you’re working with Calendar, the Home tab shows commands for changing Calendar’s display. Pretty nifty, eh? Just keep this in mind when you’re looking for a command in a certain spot, but it’s not there—you probably need to switch modules to find it again.
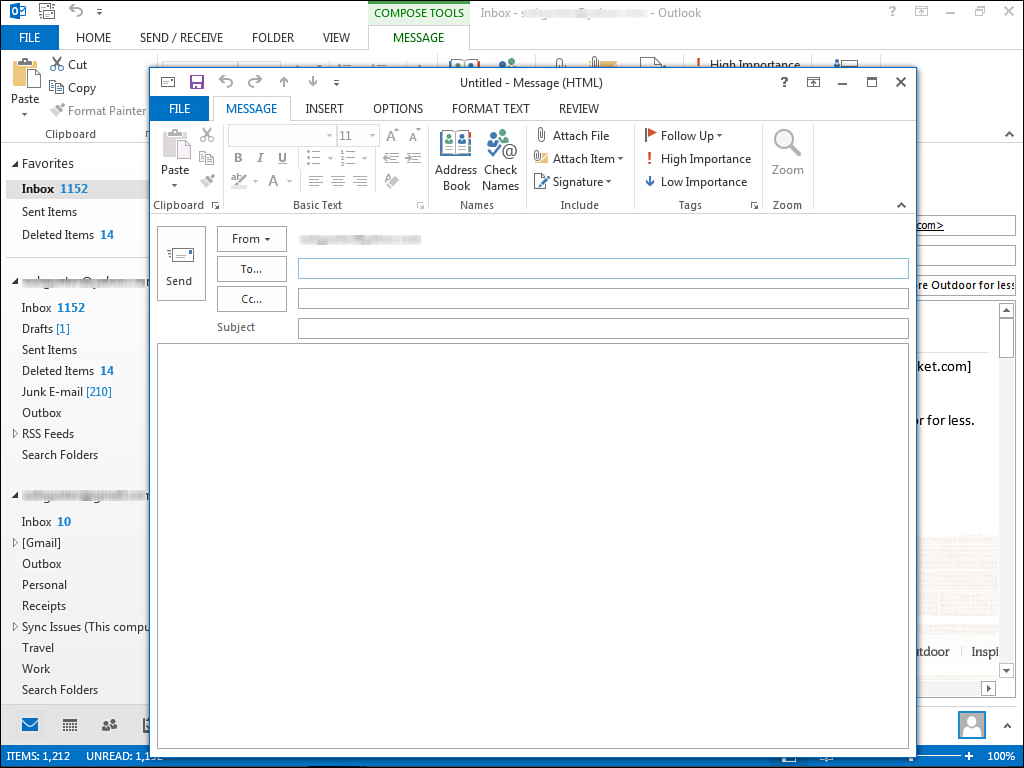
When you open a specific item in Outlook, such as a message window or an appointment window, the individual window has its own ribbon of tabs pertaining to the item. These tabs of commands are unique to the task at hand. If you’re writing an email message, for example, the message window displays tools for formatting the message text or inserting pictures, shapes, and so on, as shown in Figure 2.2.
 Note
Note
When it comes to software lingo, lots of terms are interchangeable. For example, commands, features, settings, and options are all basically the same thing—selections you make in the program to perform a computer task or define something. Sometimes this involves clicking or tapping a command button, such as OK or Cancel; other times this involves choosing from a variety of options to apply, such as clicking check boxes or option buttons (the tiny circles with bullets) to turn items on or off. At the very heart of it, all software programs are about taking your input, whether it’s clicking/tapping buttons or typing in text, and turning it into something, such as an email message.
How to Use Ribbon Elements
Using the ribbon is a fairly straightforward procedure. All you have to do is click a tab name to view its contents—or if you have a touchscreen computer or tablet, tap the tab name. To activate a command or feature, click it or tap it. Suppose you want to flag a task you create in the Tasks module. You can select the task from your list, click the Home tab (if it’s not already displayed), click a follow-up flag to assign (or tap). Bada-boom, bada-bing, the flag is immediately added.
Note
The ribbon appears throughout the Microsoft Office suite of programs, such as Excel and PowerPoint, and it also appears in other programs. After you learn your way around the ribbon in Outlook, you’ll easily traverse the ribbon format in other programs with ease.
If you see a drop-down arrow—which is simply a downward pointing arrow icon—next to any ribbon feature, you can click it or tap it to display a menu of additional choices or options. Figure 2.3 shows an example of a drop-down menu. After the menu drops, you can click (or tap if you have a touchscreen) a selection from the menu to apply it to your document.

The ribbon also features list boxes, called galleries, as shown in Figure 2.4. You can scroll through the gallery to view selections and click or tap the one you want to apply.
You can also expand the gallery to view all the settings at one time, as shown in Figure 2.5.
Note
The ribbon got its name from its earliest conception idea of combining commands onto an area of the screen resembling a paper scroll-like strip. Although the ribbon doesn’t really work quite like a paper scroll, it still offers easy, intuitive access to commands and features.
You may notice some groups of commands on a tab have a tiny icon in the bottom-right corner of the group. When clicked, this icon opens a dialog box where you can find additional and advanced commands. For example, if you click the Arrange group’s icon found on the Calendar module’s Home tab, the Outlook Options dialog box opens with more settings. You learn more about dialog boxes later in this chapter.
As for the tabs found on the ribbon, here’s a rundown of the main tabs:
• File—This tab opens a special screen called Backstage view, with various file-related commands, such as Open & Export, Info, and Print.
• Home—This tab organizes all the basic commands for working with module items.
• Send/Receive—This tab lists commands for sending and receiving messages for your email account folders.
• Folder—Use the commands on this tab to control how you work with folders in Outlook, including moving items between folders or sorting folders.
• View—You can find all the various ways to change your view of a module’s contents on this tab, including controlling panes.
In addition to these, remember that task-specific tabs may appear when you are working on a specific type of Outlook item, such as a message window or task window.
 Tip
Tip
If you’re using a touchscreen device, such as a tablet, you can use all the common touch gestures to interact with onscreen elements, such as flicking to scroll or tapping to select. Just assume anytime I instruct you to select or click something, you can use the tap gesture to accomplish the same thing with your touchscreen.
Tip
Outlook’s ScreenTips can help you quickly identify commands and what to do with them. Hover your mouse pointer over a command or tool to reveal a pop-up ScreenTip. Move the pointer away and the ScreenTip disappears. To turn ScreenTips off, click the File tab, click Options, and click the General category. Click the ScreenTip style drop-down menu and choose Don’t Show ScreenTips.
Hiding and Displaying the Ribbon
There are a lot of commands available in Outlook, and placing them on various tabs on the ribbon helps keep them organized. However, it also makes the ribbon appear a bit intrusive at times because it holds so many things. You can easily hide the ribbon and get it out of the way when you’re working. You can summon it back again with a click.
To hide the ribbon, double-click any tab name on the ribbon. Outlook immediately hides the entire thing except for the tab names, shown in Figure 2.6. To display the ribbon again, double-click a tab name.

If you want the ribbon to always appear locked in place, click the Pushpin icon located at the far right end. Click the same area to unlock the ribbon again.
Tip
Want to customize the ribbon? You can add and subtract commands to suit the way you work. To find customizing options, right-click an empty area of the ribbon and click Customize the Ribbon. This opens the Outlook Options dialog box to the Customize Ribbon tab, where you can add and subtract commands, create new tabs, rename tabs, or reset to the default settings.
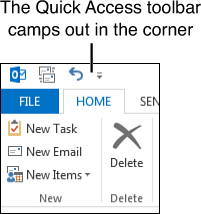
Working with the Quick Access Toolbar
In the top-left corner of the Outlook program window, you’ll find a small grouping of icon buttons called the Quick Access toolbar. This toolbar gives you quick access to common actions. By default, the Quick Access toolbar displays the Send/Receive All Folders and Undo buttons, as shown in Figure 2.7. For example, you can use the Undo shortcut icon to quickly undo an action.
You can also choose to display more or fewer shortcuts on the toolbar. Click the arrow icon at the end of the bar to display a drop-down menu (see Figure 2.8). Check marks next to the command names indicate the icons that appear on the toolbar. To add an icon, click the command name. To remove an icon, click it to uncheck it and delete it from the toolbar.

As you can imagine, placing shortcuts up at the top of your program window can be a time saver if you find yourself performing the same tasks over and over, such as printing an email message, and you tire of looking through the ribbon or other dialog boxes to find a command.
Tip
Want to customize the Quick Access toolbar? You can add an icon for a command you use the most or rearrange the order of buttons. Click the arrow icon at the end of the Quick Access toolbar and choose More Commands. This opens the Outlook Options dialog box to the Quick Access Toolbar tab where you can add and subtract commands.
Using Context Menus and Toolbars
Microsoft Outlook offers several ways to apply commands related to the task at hand. Called context menus and toolbars, these features pop up and display shortcut commands pertaining to the item you are working with in a document.
For example, when you select text in an email window, a mini toolbar appears near the cursor. You can use this toolbar, shown in Figure 2.9, to quickly apply basic formatting commands to the message text. If you ignore the mini toolbar and keep working, it eventually disappears. To activate a command from the toolbar, click the button.

Tip
You can turn off the automatic mini toolbar display if you do not find it helpful. To do so, click the File tab on the ribbon, and then click Options. The Outlook Options dialog box opens. Click the General category, then deselect the Show Mini Toolbar on Selection check box and click OK. This turns the feature off. To turn it on again, revisit this dialog box and check the box again.
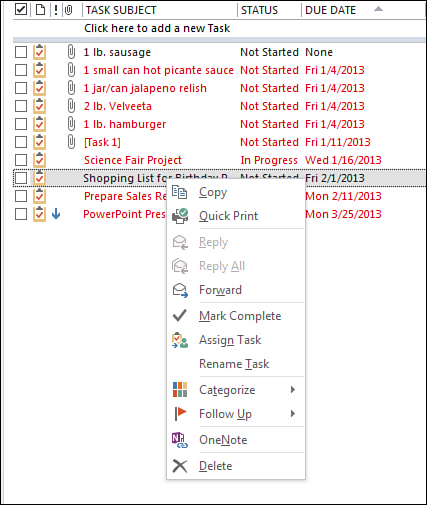
If you right-click while performing a task, such as reading email, a context menu pops up listing commands related to what you’re doing. For example, if you right-click a task (see Figure 2.10), the context menu includes commands for marking the task, categorizing it, sending it to OneNote, and more. To make a selection from the context menu, click the command.
Dealing with Dialog Boxes
Dialog boxes are a basic part of just about every software program. Dialog boxes allow users to specify more input. Many of Outlook’s dialog boxes offer more options for you to choose from before applying a feature, or present a variety of related settings all in one convenient spot. Figure 2.11 shows a typical dialog box. As you can see, it looks a lot like a form you might fill out.

FIGURE 2.11 Dialog boxes require additional input from a user before implementing a feature or action.
Dialog boxes display many of the same tools found in the ribbon, including buttons, list boxes, drop-down menus, spinner arrows, check boxes, and text boxes or fields in which you enter data. You can also find slider controls, tabs, and option buttons among the many dialog boxes in Outlook.
The bottom of a dialog box typically has command buttons to execute the changes or to exit the box without changing anything. Click OK to execute the settings you specified, or click Cancel to forgo the changes.
Some dialog boxes may include buttons that open additional dialog boxes. Tools and settings you find on Outlook’s ribbon may open dialog boxes as well. You are sure to encounter lots of dialog boxes as you work, but once you know what to expect from them and how to enter your input, you can handle them with ease.
Tip
You can move a dialog box around onscreen by clicking and dragging its title bar.
Note
From time to time, Outlook presents another type of box to you, called a prompt box. It looks like a dialog box in appearance, but generally it cautions you about a task or program need and offers some command buttons to choose from—just make the appropriate selection to move on.
Working with the Navigation Bar
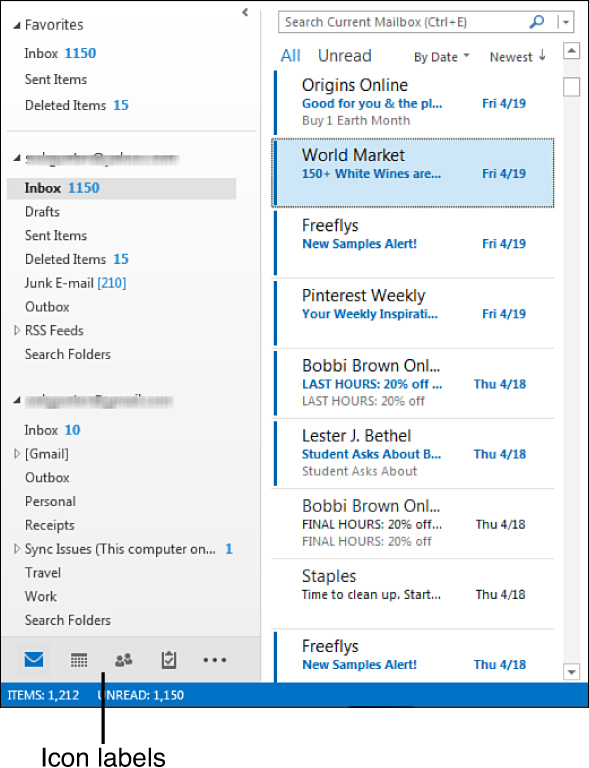
As you learned back in Chapter 1, “Introduction to Outlook,” you can use Outlook’s Navigation bar to switch between modules—the different parts of Outlook. By default, the bar is set to display in compact mode, as shown in Figure 2.12, which shows only icons representing each module. You can also display the bar in full mode, which shows the text-based names of the components across the bottom of the program window (just above the status bar). Figure 2.13 shows the bar with the text names displayed.

Depending on your screen display, not all icons may appear listed on the bar. You can click the bar’s ellipsis to view additional icons, as shown in Figure 2.14. If you happen to collapse the Folder pane, which you learn how to do in the next section, the Navigation bar appears listed vertically (see Figure 2.14), but only if the bar displays icons instead of text labels.
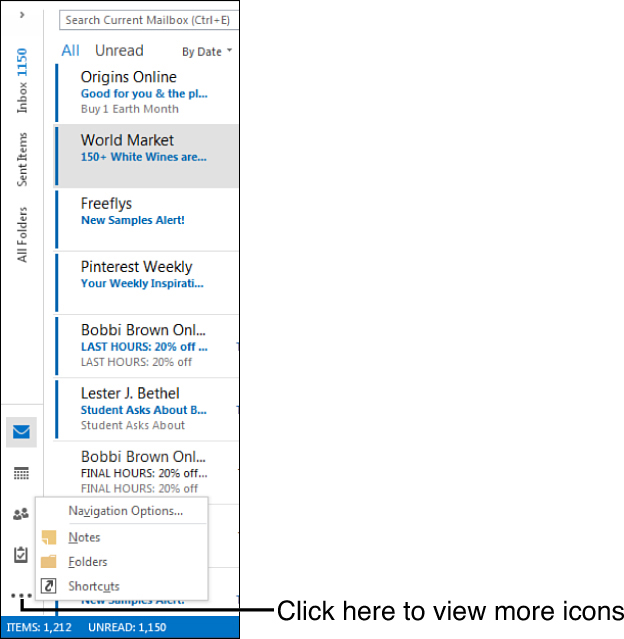
FIGURE 2.14 If the Folder pane is collapsed, you can still view the Navigation bar, either vertically or horizontally.
You can control the display of the Navigation bar using the Navigation Options dialog box, shown in Figure 2.15. To find your way to this dialog box, use one of these methods:
• Click the ellipsis on the Navigation bar and choose Navigation Options from the pop-up menu.
• Click the View tab, click Folder pane, and then click Options.

When you’ve got the dialog box open, you can do the following:
• To turn text labels on, deselect the Compact Navigation check box.
• To change how many module icons appear listed in the bar, set another number of visible items in the Maximum Number of Visible Items box.
• To change the order of module icons in the bar, adjust the display by moving module names up or down in the list.
When you finish making your changes, click OK to apply them.
Working with Panes
A common way to divide a program window into workable areas is to use panes. Most users are familiar with panes from Web browsing. Typically, a navigational pane appears on the left or top side of a web page with links that, when clicked, display another page somewhere off to the right or below. Outlook uses panes to divvy up areas of the window. Let’s go over the various ways you can work with these panes.
Working with the Folder Pane
The far left side of the program window features the Folder pane. This pane displays different aspects of your Outlook folder structure depending on which module you’re viewing. For example, when viewing the Mail module, shown in Figure 2.16, the pane displays all your email account inboxes and their subfolders.

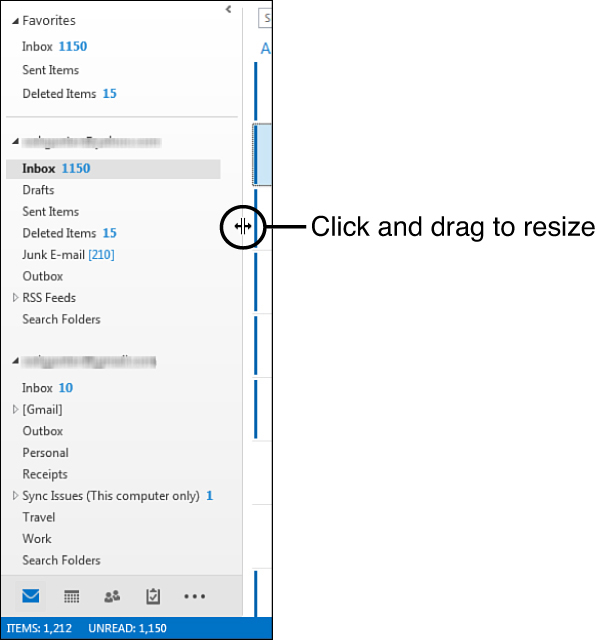
You can expand and collapse the pane to free up onscreen workspace. Click or tap the Minimize button located in the upper-right corner of the pane, pointed out in Figure 2.16. When collapsed, the pane folds to a skinny columnar display along the left side of the program window, like the example in Figure 2.17. To expand it again, click the Expand button.

Note
Notice when the Folder pane is collapsed, the Navigation bar runs vertically instead of horizontally—but only if the bar is displayed in Compact Navigation mode (icons instead of text labels).
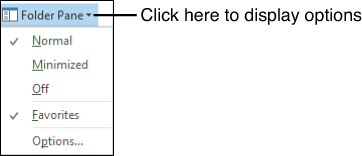
You can also control the Folder pane using the Folder pane drop-down menu on the View tab, as shown in Figure 2.18. For example, you can turn the pane off entirely by selecting the Off option. To turn it back on again, revisit the drop-down menu and choose Normal.
You can also resize the Folder pane. Just move your mouse pointer over the pane’s right border and drag it to a new size, wider or thinner. You can do the same thing with any pane in Outlook; drag the pane’s border to resize the pane, whether it’s the Reading pane, the message list, or the To-Do bar. Figure 2.19 shows what the Folder pane looks like when it’s being resized.
Working with the Reading Pane
Out in the main area of the Outlook window, called the Information Viewer by Microsoft programmers, you can also control the view of the Reading pane. The Reading pane, which displays the contents of a selected message from the list, is an optional item. You can turn it on or off, or resize it. You can choose to display it to the right of the message list, at the bottom of the main area, or turn it off entirely. Figure 2.20 shows the Reading pane displayed at the bottom of the viewing area, and Figure 2.21 shows the pane turned off. The pane can be displayed in any module, but it appears by default when using Mail and Tasks.

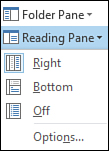
To control the Reading pane, click the View tab and click the Reading pane drop-down arrow, as shown in Figure 2.22. Next, select a setting you want to apply. Outlook immediately changes the window to reflect your selection.
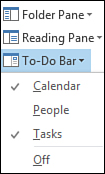
Working with the To-Do Bar and Peeks
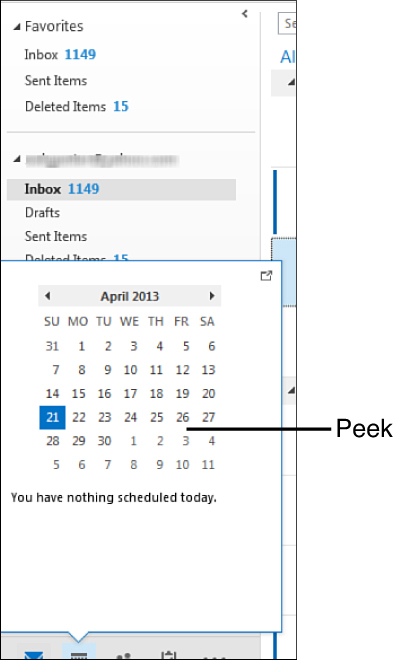
You can use the To-Do bar to view sneak peeks of your calendar, people info, or tasks, or all three at the same time. A peek is a quick glance at current content, such as your calendar. Suppose you’re busy typing up a reply to an email and need to check your calendar to suggest a date. Rather than having to open the full Calendar module, you can use the peek feature to check the current month. For quick peeks, just hover the mouse pointer over the module item on the Navigation bar, as shown in Figure 2.23.
The To-Do bar opens a full-on pane for peeks, as shown in Figure 2.24. The To-Do bar is not turned on by default, but you can summon it anytime you want it. Click the ribbon’s View tab, click the To-Do bar drop-down arrow, and click which part you want to view, as shown in Figure 2.25. You can turn on just one peek or all three. A check mark next to the item’s name indicates it’s displayed; no check mark means the item is turned off. To turn them all off, click the Off command. To turn off individual peeks in the bar itself, you can click the peek’s Close button.