6. Advanced Email Features
In This Chapter
• Formatting your messages to make the text look nice
• Assigning priority levels to messages
• Learning how to use Quick Parts to speed up text entry
• Adding your own custom signatures
• Requesting read receipts
• Subscribing to RSS feeds
By now, you’re probably starting to notice the plethora of tiny tool buttons hanging out in the Message form window, and perhaps you’re already clicking them to see what happens. Or maybe you’re wondering about that strange toolbar that pops up when you select text in a message. Outlook has many extra features you can use to spruce up your email messages, automate replies, and take your emailing tasks to the next level. For example, did you know you can automatically insert a digital signature at the bottom of all your emails that includes contact info or a company name and number? Or did you know you can embed pictures to enhance your messages? I’m going to show you some exciting tools you can use to expand your Outlook email knowledge beyond the basics.
Formatting Your Messages
If you’re interested in making your message text look a little more polished or downright eye-popping, you can tap into Outlook’s formatting tools. Formatting, also referred to as attributes, includes commands you can utilize to change the appearance of your text and its layout in the message body. You might be familiar with formatting tools in other programs, such as Microsoft Word or PowerPoint; the same tools are available in Outlook. For example, you can bold text to add emphasis, change the font and size, and control the alignment of text across the message page.
You can find basic formatting controls ready at the click on the Message tab in any Message form window, as shown in Figure 6.1. You can also gain quick access to basic formatting commands using the pop-up toolbar, called the mini toolbar. It appears when you select text in the message and hover near the top of the selection area, as shown in Figure 6.2. Ignore the toolbar and keep working if you don’t want to activate any tools, and the toolbar fades away.


For an even greater selection of formatting tools, click the Format Text tab, shown in Figure 6.3. This tab includes styles (preset formatting you can apply), indentation controls, and more. Formatting tools are arranged logically into groups on the tab; the Font group displays font-related commands, and the Paragraph group displays paragraph-related tabs, for example.

To apply formatting to message text, start by selecting the text. Selecting text in Outlook works the same way as selecting text in other programs. Drag across the selection, or double-click and triple-click to select words and sentences, respectively. To apply a formatting command, click the tool. For example, to make text bold, on the Message or Format Text tab, click the Bold button, or on the mini toolbar, click the Bold button. Outlook immediately bolds the selected text.
You can also right-click and choose Font or Paragraph to open dialog boxes of commands for formatting text and paragraphs.
Formatting is a personal preference. You decide how fanciful your messages need to look. Just keep in mind that too much formatting can distract from your message and make it difficult to read. The best approach is to use formatting wisely, just as you would in a document you create in Microsoft Word. Whether you use a little formatting, a lot, or none at all, at least you know that the formatting tools are there if you need them.
Recall from Chapter 4, “Basic Email Tasks,” that Outlook offers three email formats you can apply to your messages:
• HTML—A web page format supported by most email readers. It allows text and paragraph formatting (such as bold, italic, text alignment, fonts and sizes, background colors, and so on).
• Rich Text—A step beyond HTML, this Outlook/Exchange Server email format supports more attributes than HTML, such as borders and shading.
• Plain Text—Supported by all email readers, this format is simple, basic plain text.
To change the email format for a message, click the Format Text tab and choose an option from the Format Group of tools. To change the default format for all your messages, open the Outlook Options dialog box (click the File tab and click Options). Under the Compose message group of options, click the Compose Messages in This Format drop-down arrow and choose a format.
You can apply Office themes and color schemes to your messages using the tools found on the Options tab in the Message form window. You can even set a background color for the message page.
 Tip
Tip
For quick formatting while you type, try a keyboard shortcut for any of the big three basics: bold, italic, or underline. Press Ctrl+B for bold, Ctrl+I for italic, or Ctrl+U for underline.
Don’t overlook Outlook’s reviewing tools. You can use them to check a message for spelling errors before sending it out into cyberspace. Check out the Review tab in the Message form window for tools such as language and translation, research, grammar, and a thesaurus.
Setting Priority and Sensitivity Options
One way to add urgency or attention to an email you send is to assign a priority level. Priority levels come in three settings: High, Normal, and Low. Normal is the default setting, so you don’t have to specify it when creating a regular old message. When you assign High status, for example, the recipient can immediately determine how important the message is and the urgency of a timely response. With High priority, Outlook adds a red exclamation point to the message that’s visible in the recipient’s email Inbox.
To assign a priority level to your message, click the Message tab and choose a priority level in the Tags group of tools, as shown in Figure 6.4. Click the High Importance button to assign High priority level, or click Low Importance to mark the message as low-level priority. You might set low priority in your office environment to help your coworkers or boss recognize the message as lower in the chain of importance.

In the lower corner of the Tags group, if you click the Message Options button, you can open the Properties dialog box shown in Figure 6.5. From here, you can click the Importance drop-down arrow and choose a priority level.

FIGURE 6.5 The Properties dialog box offers all three priority levels in a drop-down list of options.
While you’re looking at the Properties box, you can also use the controls found within to set a sensitivity level for a message. Click the Sensitivity drop-down arrow (see Figure 6.5) and choose a setting. Like the priority level setting, Normal is the default sensitivity setting. You can also set Personal, Private, or Confidential. Be warned, however, that these settings don’t necessarily protect your email message from prying eyes; rather, they just alert the recipient regarding the nature of the message. If you use Outlook in an office or corporate setting, check with your administrator concerning any policies for confidential emails.
Using Quick Parts
To help you build better, faster emails, you can save text you type in repeatedly with your messages into reusable blocks, called Quick Parts. Microsoft’s Quick Parts feature is available throughout the Office suite and is used to insert all kinds of elements, such as headers and footers, salutations for letters, page numbers, and so on. In fact, you can turn any piece of text you use over and over into a building block and keep it in your Outlook Quick Part library, ready to use at a moment’s notice.
To turn text into a building block, follow these steps:
1. Select the message text you want to turn into a Quick Part.
2. Click the Insert tab.
3. Click the Quick Parts drop-down arrow.
4. Click Save Select to Quick Part Gallery. This opens the Create New Building Block dialog box, as shown in Figure 6.6.

5. Type a name for your building block.
6. Optionally, fill out any additional details you want to save along with the text element.
7. Click OK to save the building block.
Anytime you want to add your building block to a message, click the Quick Parts drop-down menu on the Insert tab and choose your item from the gallery, as shown in Figure 6.7.

To remove a Quick Part you no longer need, display the Quick Parts drop-down menu, right-click the Quick Part, and choose Organize and Delete. This opens the Building Blocks Organizer, as shown in Figure 6.8. Select your Quick Part and click the Delete button to remove it. You can also use this dialog box to view a list of all your Quick Parts and manage them.

Adding Signatures
A digital signature is a portion of text you add to the end of every email message, a salutation of sorts that uniquely identifies you as the sender. Some people use signatures to include company information, such as the name and web address, whereas others use signatures to include contact information, such as addresses and phone numbers. It’s not uncommon to see signatures with famous quotes, logos and graphics, and sales information. You can instruct Outlook to add a default signature to every new message you create, or you can choose to add one manually when you need it.
To create a signature, follow these steps:
1. On the ribbon, click the File tab.
2. Click Options to open the Outlook Options dialog box (see Figure 6.9).

3. Under the Compose messages group, click the Signatures button to open the Signatures and Stationary dialog box shown in Figure 6.10.

4. Click New to open the New Signature dialog box (see Figure 6.11).
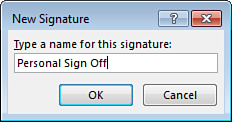
5. Type in a name for the new signature.
6. Click OK.
7. Type in your signature text and format it any way you want using the formatting tools (see Figure 6.12). You can change text color, make text bold or italic, or set a different font or size.

8. Click OK.
9. Click OK again to close the Outlook Options dialog box.
The next time you compose a new email message for that particular account, Outlook automatically inserts the signature into the email’s message body as shown in Figure 6.13.

To edit signatures or assign new ones to your accounts, reopen the Signatures and Stationary dialog box and make your changes. You can delete signatures, edit existing signatures, or change which accounts they’re associated with.
Controlling Replies, Forwarding, and Receipts
You can control how Outlook handles replies and forwarding with the options found in the Outlook Options dialog box. By default, Outlook is set up to include the original message text in any replies. You can change this. For example, you may prefer to send the original text as an attachment instead.
To open the Outlook Options dialog box, click the File tab and click Options. Next, click the Mail category and scroll down to the Replies and Forwards group of tools, as shown in Figure 6.14. Click the When Replying to a Message drop-down list and make your selection. You can make similar changes to how the message text is handled when forwarded. Click OK to exit the dialog box and apply the changes.

You can also request delivery receipts or read receipts with your messages. When you activate these features, the recipient’s email server generates a response when the person receives or views the email message. This can help you keep track of whether someone has read your message. You can also assign a delivery reply to another email address, or a day or time for delivery, or even a delivery expiration. It’s starting to sound like Outlook turns you into a delivery control hub. These particular tracking controls appear in the Properties dialog box for the Message form window. Check out Figure 6.15 to view them.

Tip
To view additional tracking options, open the Outlook Options dialog box; click File, Options. Click the Mail category and scroll down to the Tracking group of tools to view additional settings for receipts.
Outlook also offers several tools for sending automatic replies and forwarding emails if you’re using Microsoft Exchange Server. For example, if you’re getting ready to go on vacation, you can set up Outlook to send automatic replies to incoming messages to let people know you’re out of the office. If you don’t use an Exchange account, you can use Outlook’s rules to set up out-of-office replies. To learn more about creating rules, see Chapter 5.
Inserting Other Items into Messages
You can insert pictures into your messages, essentially embedding them. This process is a bit different from attaching a picture file to the message. With an embedded picture, it appears in the message body. Picture options are offered on the Message form window’s Insert tab, shown in Figure 4.16. Outlook lets you embed several types of pictures:
• Pictures from File—Use this option to insert pictures stored on your computer.
• Online Pictures—Activate this option to insert clip art pictures, pictures you search for using Bing Search, or pictures from your SkyDrive (cloud) account.
• Draw a Shape—Draw your own original shapes using the drawing tools.

Inserting a Picture
To insert a picture from your computer, follow these steps:
1. Click the Insert tab.
2. Click the Pictures button.
3. The Insert Pictures dialog box opens (see Figure 6.17). Navigate to the folder or drive containing the file you want to insert.

4. Click the picture filename.
5. Click Insert.
Outlook inserts the picture in the message body (see Figure 6.18) and displays the Format tab. You can resize the picture and adjust its formatting. The Picture Tool’s Format tab offers lots of tools you can use to work with pictures, including cropping, controlling text wrap around the picture, and artistic effects you can apply.

Tip
You can also double-click the filename in the Insert Pictures dialog box to insert a picture.
To resize a picture, click and drag a corner handle on the picture.
Inserting Online Pictures
If you click the Online Pictures button on the Insert tab, you can choose from three online sources for pictures. You can search for a clip art picture from the Microsoft Office website, look for an online picture using the Bing search engine, or grab a picture you’re storing on your SkyDrive account. You can do all three from the Insert Pictures box (see Figure 6.19)

To search for a clip art picture from the Microsoft Office website, click the Office.com Clip Art search box and type in a keyword or words for the type of picture you’re looking for, then click Search or press Enter. The dialog box displays a list of matches, similar to Figure 6.20. If you find one you like, click it and click Insert.

Outlook places the picture in your message, and like a picture you insert from your computer, the Picture Tools Format tab appears with tools for editing the picture.
To locate a picture online, click in the Bing search box and type a keyword for the type of picture you want to find; press Enter. A list of possible matches appears, and you can choose one to add.
To insert a picture from your SkyDrive account, click the Browse button and navigate to the folder containing the picture you want to download. Select it and click Insert.
After you’ve inserted a picture, you can edit it or format it as you like.
Inserting Shapes
You can also draw your own artwork in the form of shapes using the Microsoft AutoShapes collection. On the Insert tab, click the Shapes button (see Figure 6.21) and choose a shape to draw from the gallery. After you select one, click and drag the shape to the size you want in the message area, similar to Figure 6.22.


Outlook places the picture in your message, and like a picture you insert from your computer, the Drawing Tools Format tab appears with tools for editing the shape, including adding a fill color, changing the shape outline, or adding text to create a logo or graphic.
Tip
You can also insert a screenshot of your own computer into your messages. For example, you might take a snapshot of a gaming screen to share with a friend. Make sure the window you want to capture is not minimized, then activate the Screenshot button on the Message form window’s Insert tab and click the screenshot you want to use.
The Wonderful World of RSS Feeds
RSS feeds (Really Simple Syndication) is a technology that allows web content to be converted into a feed that is viewed as message posts. You can receive RSS feeds for blogs, podcasts, news, and so on. You can use Outlook to check the latest updates of your favorite RSS feeds. Feeds you subscribe to appear in the RSS Feeds folder in the Mail component.
You can conduct a web search to find popular RSS feeds to try if you don’t already have a few favorites. Many of your favorite sites may already offer them. You need the RSS feed location, or URL, to connect to the feed.
To subscribe, use these steps:
1. Click File.
2. From the Info tab, click the Account Settings drop-down arrow.
3. Click Account Settings.
4. The Account Settings dialog box opens; click the RSS Feeds tab (see Figure 6.23).

5. Click New.
6. Type in the RSS Feed address (see Figure 6.24).

7. Click Add.
8. The RSS Feed Options dialog box appears with a general name for the feed already assigned (see Figure 6.25). Click OK to continue.

9. The RSS Feed is added to the list box; click Close.
10. Click the Send/Receive tab.
11. Click Send/Receive All Folders to update the latest posts.
12. Click the RSS Feeds folder in the Folder pane to view the RSS feed subfolders to which you are subscribed (see Figure 6.26).

13. Click the folder you want to open.
14. Click the message you want to view.
15. The Preview pane displays the message.
There are oodles of RSS feeds you can subscribe to, including YouTube channels and social media sites.
 Note
Note
If you no longer want to subscribe to an RSS Feed, reopen the Account Settings dialog box to the RSS Feeds tab, select the Feed Name, and then click the Remove button.