
IN THIS CHAPTER
Digital audio fundamentals
Music files overview
MP3 mini-primer
Linking and embedding sound
Streaming audio
Incorporating podcasts
Web sites tend to be divided into two categories: those totally without sound, and those that use a lot of it—there's not much middle ground. Many music and entertainment sites rely heavily on both streaming audio and downloadable audio files, such as MP3.
In this chapter, you learn how to use audio in the Web pages you design with Dreamweaver. You look at traditional digital audio formats such as AIFF and WAV, and how you can turn these into files suitable for publishing on the Web, in formats such as MP3 and RealAudio. You also examine music formats, such as standard MIDI files and QuickTime Music. Finally, you'll learn how to link to an individual podcast as well as a podcast feed.
Lest you forget that you're dreamweaving here, you also look at some Dreamweaver extensions you can use to get audio-enabled sites up and running in no time. But before you leap into those deep waters, it's a good idea to get an overview of digital audio and its place on the Web.
Note
Because the primary technologies for distributing streaming audio are also the primary technologies for streaming video, you may find it helpful to familiarize yourself with the Big Three streaming media technologies—RealMedia, QuickTime, and Windows Media—introduced in Chapter 26.
Digital audio files are digitized representations of sound waves. Although not as heavy as digital video, digital audio files—even those that have been compressed—are still a strain for today's Web. As usual, you can provide a better experience for users of your Web site if you minimize file sizes wherever possible.
Many different formats for digital audio files are in use today across the various computer platforms. The most common formats are described in Table 27-1 and can be identified by their unique filename extensions and/or by their icons on Macintosh systems.
Table 27-1. Web Digital Audio File Formats
Audio Format | Typical Filename Extension | Description |
|---|---|---|
AU |
| Very common on the early Unix-dominated Web. Uncompressed and no longer suitable for Web use. |
AIFF |
| The Audio Interchange File Format was developed by Apple. Uncompressed versions can be played in most browsers, but avoid using AIFF on the Web if possible because of its large file sizes. |
Flash |
| Not just an animation format, Flash streams PCM- or MP3-compressed audio at various bit rates. |
MP3 |
| The MPEG Audio Layer 3 format features high-quality digital audio files with excellent compression. MP3 has become the standard for downloadable music. It plays in QuickTime Player 4+, RealPlayer 6+, Windows Media Player 5.2+, and a whole range of standalone players that work as browser helper applications. |
QuickTime |
| A QuickTime movie with a soundtrack only. |
RealAudio |
| The audio component of RealNetworks' RealMedia. Lots of players. Good quality at low bit rates, but not as good as MP3. |
Rich Music Format |
| Beatnik's hybrid audio/music format. Samples are either PCM or MP3 compressed. |
Shockwave Audio |
| The audio component of Shockwave, they're low-bit-rate MP3 files with a different file header. They stream over HTTP, and any MP3 player can play them locally. |
WAV |
| Co-developed by Microsoft and IBM, this is the default audio format for Windows. Uncompressed versions play in browsers, but avoid using WAV files on the Web whenever possible because of their large file sizes. |
Windows Media |
| Microsoft's streaming media solution. |
Which audio format should you choose? That depends on a combination of factors, including your target audience, available bandwidth, and the purpose of the audio content.
Although most browsers can play standard digital audio files, such as AIFF and WAV, the sheer uncompressed bulk of these files renders them unsuitable for the Internet, especially now that so many highly compressed formats exist. In the early days of the Web, with slower computers and less advanced compression technologies, these uncompressed audio files were the only game in town. But today, fast computers are capable of easily decoding MP3 and RealAudio, and free players for those formats are common.
A live Internet broadcast dictates a streaming solution such as RealAudio, QuickTime, or Windows Media. If you're offering complete songs or podcasts for download, you may not have to look any further than MP3. It's not uncommon to offer a sound file in multiple formats. Although many users have more than one player, offering your audio in a few formats gives you a better chance of reaching everybody.
Converting one audio file format to another typically involves opening the source file in an audio editor that can read that format and exporting it in another format. If you lack a professional audio editor such as Adobe Audition, a simple alternative is to use QuickTime Pro; it reads and writes a lot of formats. You can also easily cut and paste sections of files—to remove or add a few seconds of silence, for example.
In addition to categorizing audio by file format, you can also think of audio on the Web as being in one of two categories: uncompressed or compressed. AIFF and WAV audio files come in compressed and uncompressed formats, but only the uncompressed versions play in Web browsers. If you can't compress an audio file in some way, the only way to reduce its file size is to reduce its quality in one of three ways:
Convert a stereo file into a mono file: A stereo file has two audio channels, whereas a mono file has only one. Converting a stereo file to mono halves its file size.
Lower the bit depth: From 16-bit to 8-bit, for example. A lower bit depth reduces the accuracy and cleanness of the stored audio waveforms.
Lower the sample rate: From 44 kHz to 22 kHz, for example. This lowers the range of audio frequencies in the recording, chopping off the "high end" or treble frequencies.
You can make the preceding conversions by opening the audio file in an application such as Audacity, a free, cross-platform audio program available at http://audacity.sourceforge.net, and changing the parameters, as shown in Figure 27-1.

Figure 27-1. Changing a WAV file's settings can produce a much smaller file without significantly degraded sound quality.
Network-ready audio file types that are specifically created for the Internet, such as MP3 and RealAudio, are compressed through encoding. Rather than arbitrarily lowering the quality of the file to make it lighter, you pick a target bit rate, as shown in Figure 27-2, and the encoding software produces the best quality file it can at that bit rate. If you've ever exported a JPEG graphic from an image editor and specified a target file size, the principle is the same.

Figure 27-2. Choosing a 22-kilobits-per-second (32 Kbps) rate when converting a WAV file to an MP3 file in Audacity.
When working with a compressed audio format, you ideally start with the best master copy that you have in an uncompressed format, such as AIFF or WAV, and then encode that audio file as MP3 or RealAudio. If you want your audio to move quickly, even over dial-up connections, choose a low bit rate such as 24 Kbps, but be aware that the sound quality will be less than ideal.
Note
Always keep a master copy of your audio file when you're encoding. Encoding a file is often a lossy compression; in other words, information/quality is lost to create smaller files. Although you can convert an MP3 back to an AIFF, it will not be the same quality as the original AIFF from which the MP3 was made. The process is similar to converting a TIFF to a JPEG; if you try to convert back to the TIFF, the quality of the image is reduced.
In the 19th Century, before the technology to electronically record audio existed, a musical performance could be "recorded" by making a series of stipples on a cylinder. The performance could then be played "live" for the listener through a music box. Later, player pianos used rolls of paper with appropriate holes punched in them to cause the piano keys to mimic the performances of far away or long-dead musicians. In the early 1980s, electronic musical instrument manufacturers created the Musical Instrument Digital Interface (MIDI) to enable the keys of one electronic keyboard to trigger the sounds in another. It wasn't long before somebody realized that the MIDI information being output by all electronic keyboards could be recorded, thus turning any electronic instrument into a modern-day music box or player piano.
The key to using MIDI files on the Web is their very small file size. A MIDI file is the ultimate in compressed sound: The musical instruments aren't even included! For example, a 3-minute, full-fidelity, 128-bps stereo MP3 file weighs in at just under 3MB. A QuickTime movie that contains only a music track can give you 10 minutes of music for 60K with similar fidelity, although you're limited to the sounds contained in the QuickTime synthesizer.
Today, MIDI files appear on the Web in one of three ways:
QuickTime Music: MIDI information is stored as a music track within a QuickTime movie, and it is played back through the QuickTime software synthesizer (or through a hardware synthesizer such as a sound card if the user has configured QuickTime to use one). The QuickTime synthesizer sounds have often been criticized for being a little bland. Music tracks can coexist with all other kinds of QuickTime media in one movie, so they make excellent soundtracks for digital video tracks. QuickTime movies have a filename extension of
.mov.Rich Music Format: Beatnik's hybrid audio/music format. MIDI information is played through the Beatnik player's software synthesizer, which contains generally excellent and often original sounds. Moreover, additional instrument sounds can be included in an RMF by adding digital audio samples with the Beatnik Editor. RMF files are unique among music file formats in that users cannot get the raw MIDI data out of them. Some content authors see this is as an advantage. RMF files have an
.rmffilename extension.Standard MIDI files: This is the raw data of MIDI music files. Their biggest drawback is that the Web author cannot know what kind of synthesizer the user will employ to play back a MIDI file. If he is using older Windows machines, this synthesizer may not even include actual instrument sounds, but instead use FM synthesis to come up with very poor approximations. Standard MIDI files have a filename extension of
.mid, .midi, or.smf.
Occasionally, you may want to render a MIDI file as a digital audio file to play it in a situation where a synthesizer is unavailable. Doing this the hard way involves playing the file through a synthesizer and recording the output to a digital audio file. You have an easier way, however, if you have QuickTime Player Pro. Open your QuickTime Music or import your Standard MIDI file into QuickTime Player Pro and then choose File
Warning
RMF files are designed to disallow this conversion. Always keep the original Standard MIDI file when you create an RMF.
The MP3 audio format has quite simply taken the Web—and the world—by storm. Whereas other downloadable music formats come with caveats such as ownership by one company or built-in limitations on how users can use the files they purchase, MP3 just did the work and got the job done. MP3 software players are common. A number of manufacturers offer MP3 hardware for a variety of uses, including home, car, and personal stereos.
Generally, the MP3 "scene" shows interest in new and/or unusual artists, offers a selection of dynamic, full-featured players (see Figure 27-3), and maintains an attitude of music appreciation. Conversely, non-MP3 downloadable music has generally featured bland players, corporate music, proprietary technologies, and an unhealthy fascination with watermarking and controlling content. It's not hard to see why the market chose MP3.

Figure 27-3. Many standalone MP3 players, such as Winamp and Audion, feature sexy looks that can be changed by applying new skins.
Table 27-2 lists common MP3 player software—including old friends such as RealPlayer that now handle MP3—and the URLs where they can be found. Many of these applications offer to set themselves up as browser-helper applications. You might feature some of these links at the bottom of pages with MP3 content, so users who are new to MP3 can get a leg up.
Table 27-2. Common MP3 Players
Player Software | URL |
|---|---|
Audion (Mac only) |
|
iTunes |
|
QuickTime Player |
|
Real Player |
|
Winamp (Windows only) |
|
Windows Media Player |
|
The most common MP3 files are downloadable music files. These files aim for CD quality and so are recorded with a bit rate of 128 Kbps. This works out to a little less than 1MB per minute for a stereo, 44.1 kHz file, which is too heavy to move quickly on today's Web. You can encode an MP3 using a variety of bit rates, however. Lower bit rates mean lower quality, but even at 16 Kbps, speech sounds pretty good, and the 60K per minute bulk of a mono file will be music to your ears.
Warning
Beware of MP3 encoders that sacrifice quality for speed. Many encoders simply eliminate the upper audio frequency range so that they can encode the rest in record time. Although this might be fine if you're encoding your CD collection into a massive jukebox on your computer, it is less than ideal for content creators who want the best-quality encoded files.
The simplest way to add sound to a Web page is to create a link to an audio file by specifying the file path in the Link text box of the Text or Image Property inspector. When the user clicks that link, the sound file downloads, and whatever program has been designated to handle that type of file opens in a separate window. An exception to this is the QuickTime Plugin. Instead of opening linked audio files in the QuickTime Player, it opens them within the browser window as if they were a new Web page. To get back to your Web page, the user clicks the browser's Back button.
To create a link to an audio file in Dreamweaver, follow these steps:
Select the text or image that you want to serve as the link to the audio file.
In the Property inspector, enter the name of the audio file in the Link text box, or click the Folder icon to browse for the file. To link to a dynamic source, choose Select File Name from Data Sources and select an appropriate field from the available recordset(s).
Because audio files can be large, it's good practice to note the file size next to the link name, as shown in Figure 27-4, or to enter it in the Alt text box for your image.
When you use the link technique for incorporating sound, you have no control over the position or appearance of the player. However, you can control these factors and more by embedding your audio.

Embedding a sound file truly integrates the audio into your Web page. Embedding the sound file also gives you a much greater degree of control over the presentation of the audio player itself, including the following:
The clip's play volume
Which part, if any, of the player's controls is visible
The starting and ending points of the music clip
As with any other embedded object, you can present the visual display inline with other text elements—aligned to the top, middle, or bottom of the text, or blocked left or right to enable text to flow around it. Dreamweaver controls all these parameters through two different objects: the Plugin object and the ActiveX object. Each type of object calls a specific type of player. Calling the Windows Media Player as an ActiveX object explicitly enables you to modify a great number of parameters for Internet Explorer—which are completely ignored by Navigator. You learn about all your embedding options, including techniques for cross-browser audio, in the next few sections.
Note
The Assets panel does not include a Sound or Audio button. To insert audio elements, you must use the Plugin button in the Media group in the Common category of the Insert bar.
As with video, Dreamweaver uses the generic Plugin object to embed audio in your Web page. The object requires only three parameters: the source of the audio file and the width and height of the object. To embed an audio file in your Web page, follow these steps in Dreamweaver:
Position the cursor where you want the control panel for the audio file to appear.
Insert the Plugin object by choosing Insert

In the Select File dialog box that appears, choose your audio file.
Use either of these two techniques to size the Plugin placeholder:
Click the resizing handles on the Plugin placeholder and drag it out to a new size.
Enter the desired values in the W (Width) and the H (Height) text boxes of the Property inspector.
For a default audio plugin, start with a width of 144 pixels and a height of 60 pixels. These dimensions are slightly larger than necessary for Internet Explorer's audio controls, but they fit Navigator's controls perfectly, as shown in Figure 27-5, and the control panel does not appear to be clipped when viewed through any browser. You may need to adjust the width and/or height after further testing.
When the Plugin object is inserted, Dreamweaver displays the generic Plugin placeholder.
Background music, played while the user is viewing online material, is one of the Web's hidden treasures. When used tastefully, background music can enhance the overall impact of the page. Conversely, when abused, it can drive users away in droves.
Making a regular embedded sound into a background sound is as simple as adding a few parameters to the <embed> tag: hidden tells the browser not to display any controls, autostart tells it to start playback automatically, and loop tells it to play the audio continuously. Although you can add these attributes to the <embed> tag manually in the HTML Code window, it's easier to add them using the Property inspector. Follow these steps to embed background music in a Web page:
Position the cursor near the top of your Web page. Choose Insert
Choose your audio file in the Select File dialog box.
Dreamweaver inserts a 32 × 32 pixel placeholder to indicate where the Plugin code is located. You can resize the placeholder so your layout won't be affected.
In the Property inspector, enter 2 in both the H (Height) and W (Width) text boxes.
Note
Entering a width and height attribute is necessary for compatibility with older browsers.
If your Property inspector is not already expanded, expand it now (by clicking the arrow icon in the lower-right corner of the inspector). Click the Parameters button to open the Parameters dialog box.
In the Parameters dialog box, click the Add (+) button and enter hidden in the Parameter column. Click in the Parameter column, and type in the first parameter. Use Tab to move to the Value column and enter true, as shown in Figure 27-6. Use Tab again to move to the next parameter. The following list can help you navigate and use this dialog box:
Use Shift+Tab if you need to move backward through the list.
To delete a parameter/value pair, highlight it and click the Delete (–) button at the top of the Parameters column.
To add a new parameter, click the Add (+) button to move to the first blank line, and use Tab to move to the next parameter.
To move a parameter from one position in the list to another, highlight it and click the up or down arrow buttons at the top of the Parameters column.
Enter autostart as the next parameter, and give it the value true.
To make the audio clip repeat, enter loop as the next parameter; and in the Value column, enter the number of times you want the sound to repeat. To make the audio repeat indefinitely, enter true as the value.
Click OK to finish.

You can exercise a much finer degree of control over the audio in your pages by calling specific plugins. The trade-off, unfortunately, is that by designating a plugin, you reduce the size of your potential audience. Some plugins are specific to a browser or browser version. Moreover, plugins that aren't distributed with the major browsers face an uphill battle in terms of market penetration. If you use a plugin, you can always expect some users to be resistant to downloading the necessary software. Before you incorporate any plugin, you must weigh these issues against your overall design plan.
The Windows Media Player is Internet Explorer's default multimedia player. You can use it to play the standard audio formats, including MP3, WAV, AIFF, AU, and MIDI files. Calling Windows Media Player directly as an ActiveX control, however, gives you far more flexibility over the player's appearance and functionality: its width, height, control panel display, loudness, number of loops, and so on.
To incorporate the Windows Media Player ActiveX control, follow these steps:
Position the cursor where you would like the Windows Media Player control panel to appear. Choose Insert
In the ClassID text box, enter the ID for the Windows Media Player control: CLSID:22d6f312-b0f6-11d0-94ab-0080c74c7e95.
Tip
If you've entered this long Windows Media Player class ID previously, you can click the arrow button and choose the ID from the drop-down list.
Change the width and height values in the W and H text boxes to match the desired control display. The Windows Media Player display resizes to match your dimensions as closely as possible.
Click the Parameters button.
Click the Add (+) button and enter the first parameter: FileName. Use Tab to move to the Value column.
Enter the path and filename for your audio file. Unfortunately, there is no Browse button in the Parameters dialog box, so you must enter the pathname by hand. If the audio file resides in your site, be sure to specify a relative URL rather than an absolute one.
Continue entering the desired parameters and values for your audio file, as shown in Figure 27-7.
Click OK when you're finished.

The Windows Media Player ActiveX control has many parameters to choose from—34, to be exact. Explaining all these parameters is beyond the scope of this book, but Table 27-3 describes the key parameters.
Note
As with plugins, all the parameters and/or values of an ActiveX control may be linked to a dynamic source. From the Parameters dialog box, click the lightning-bolt icon in either the Parameter or Value column to expose the available recordset fields.
Table 27-3. Windows Media Player Parameters
Possible Values | Description | |
|---|---|---|
| true (default) or false | Determines if the sound begins playing when the download is complete. |
| Any valid sound-file URL | Specifies the sound file to be played. |
| Any integer | Sets the number of times the file should repeat. If the value is 0, the sound loops continuously. The default is 1. |
| Number of seconds | Determines the beginning point for the audio clip, relative to the start of the file. |
| Number of seconds | Determines the ending point for the audio clip, relative to the start of the file. |
| true (default) or false | Shows the control panel if set to true. |
| true or false (default) | Shows the display panel if set to true. |
| Any integer, from 0 (loudest, default) to 10,000 (softest) | Sets the loudness of the audio. |
Warning
Windows Media Player's default volume setting is 0, but this is the highest setting, not the lowest setting. Specifying a higher number for the volume parameter lowers the volume of the sound.
All ActiveX controls are included in HTML's <object>...</object> tag pair. Dreamweaver codes this for you when you insert any ActiveX control. Netscape doesn't recognize the <object> tag, and Internet Explorer doesn't recognize the <embed> tag when it's within an <object> tag, so it's possible to target both browsers with one <object> and <embed> pair.
After you've entered the FileName parameter and value for the Windows Media Player ActiveX control, select the Embed checkbox in the Property inspector. The same name that you specified as the FileName now appears in the Embed text box. Dreamweaver takes advantage of the fact that Netscape doesn't recognize the <object> tag by inserting the <embed> tag inside the <object>...</object> tag pair. The resulting HTML looks like the following:
<object classid="clsid:22d6f312-b0f6-11d0-94ab-0080c74c7e95"
 width="193" height="270">
  <param name="FileName" value="sounds/Fantasy.mid">
  <param name="PlayCount" value="0">
  <param name="ShowDisplay" value="true">
  <embed src="sounds/Fantasy.mid" width="193" height="270"
   filename="sounds/Fantasy.mid" playcount="0" showdisplay="true">
  </embed>
</object>
Note that Dreamweaver picks up the attributes and parameters from the ActiveX control to use in the <embed> tag. You often have to adjust these, especially the width and height values, which differ markedly for Internet Explorer and Netscape audio player displays.
Although audio files are not nearly as large as video files, downloading them can take a long time. Audio-on-demand—or streaming audio—is an alternative to such lengthy downloads.
For streaming audio, you have the same Big Three choices as you do for streaming video—RealMedia, QuickTime, and Windows Media—plus Shockwave streaming audio and Flash movies.
Note
Streaming audio files have a lot in common with streaming video files. Streaming video is discussed in Chapter 26. Shockwave and Flash are covered in Chapter 25.
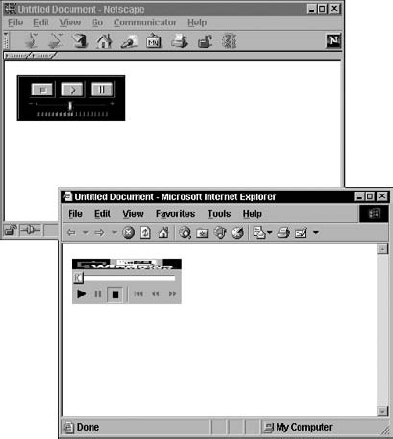
Before including a link to a RealAudio file, you first must make a basic choice: Is the player free-floating or is it embedded in the page? It's purely a design decision, but the coding necessary for each option is completely different. To insert a RealAudio streaming audio file with a free-floating player, shown in Figure 27-8, follow these steps:
Select the link or image that you want to use to begin the RealAudio file.
In the Property inspector, enter the path to the RealAudio metafile in the Link text box or use the Browse For File button to locate the file. Make sure that the metafile has a
.ramor.rpmextension.

Figure 27-8. This is a free-floating RealPlayer player, opened by clicking the streaming tutorial link.
An embedded player is best inserted using Dreamweaver's ActiveX object—the embedded player consists of two ActiveX objects, one for the player control (or controls) and one for the audio file itself. The separation of content and player makes it easy to link the content to a data source while maintaining the same control panel.
Note
ActiveX objects can only be displayed/played in Internet Explorer on Windows; Netscape does not support ActiveX, and it is not supported on the Macintosh.
If desired, your design may include a single control panel or a series of controls—play, stop, fast-forward, rewind, and so on—all affecting your audio. The two key RealAudio parameters are controls and console. The controls parameter sets the type of control being inserted; the console parameter indicates which embedded audio file is being played.
To embed a RealAudio file with separate controls, you must follow a two-phase procedure. First, embed the actual audio file or, if the source is dynamic, a link to a data source. Follow these steps:
Choose Insert
From the ActiveX Property inspector, set the ClassID to RealPlayer.
Change the Width and Height values in the W and H text boxes to 0 for audio-only playback.
If you know the
codebaseURL, enter it in the Base text box. Thecodebaseproperty is an Internet location from which the ActiveX control can be automatically downloaded and installed if the browser does not find the control on the user's system. The codebase values are provided by the ActiveX control creator.Click the Parameters button to display the Parameters dialog box.
Click the Add (+) button and enter the first parameter: src. Use Tab to move to the Value column and enter the path and filename for your file. To serve different audio files from a data source, click the lightning-bolt icon in the Value column. In the Dynamic Data dialog box, select an appropriate field containing URLs of RealMedia files.
Enter the next parameter, console, in the left column.
In the Value column, enter a unique name for the sound file. This unique console name is used to link the controls to the audio file.
Click OK when you're finished.
In the Property inspector, select the Embed option to make the audio cross-browser compatible.
Now you're ready to add the controls that enable user interactivity. Follow these steps:
Again, choose Insert
From the ActiveX Property inspector, set the ClassID to RealPlayer.
Change the Width and Height values to the size desired for the type of controls selected. Here are some common dimensions:
All: Width: 375, Height: 100
ControlPanel: Width: 350, Height: 36
PlayButton: Width: 44, Height: 26
PlayOnlyButton: Width: 26, Height: 26 (These dimensions apply to all individual controls, such as PauseButton and FFCtrl.)
Select Parameters in the Property inspector.
In the Parameters dialog box, enter controls in the first column, and enter the name of the control (that is,
all, controlpanel, playbutton, pausebutton, and so on) in the second.Add a second parameter, console. The value of console should be the same as that entered for the audio file in step 8 of the previous series of steps.
Click OK to close the Parameters dialog box.
Select Embed on the Property inspector to ensure cross-browser compatibility (see Figure 27-9).

Repeat these steps to add additional individual controls. When you're done, test your Web page by previewing it in a browser.
For a streaming audio file, only the source file and the dimensions are really required, but it probably comes as no surprise to you that a great number of attributes are available. You can add any of the attributes found in Table 27-4 through the Parameters button of the selected RealAudio file's Property inspector.
Table 27-4. RealAudio Parameters
RealPlayer Attribute | Possible Values | Description |
|---|---|---|
| true (default) or false | Enables the RealAudio clip to start playing as soon as content is available |
| _master or _unique | Determines the console name for each control in a Web page that uses multiple controls. To force controls on a page to refer to the same file, use the same |
| all, controlpanel, infovolumepanel, infopanel, statuspanel, statusbar, playbutton, playonlybutton, pausebutton, ffctrl, rwctrl, stopbutton, mutectrl, mutevolumectrl, volumeslider, positionslider, positionfield or statusfield | Enables the placement of individual control panel elements in the Web page. You can use multiple controls in one attribute, or multiple |
| true or false (default) | Suppresses the Title, Author, and Copyright labels in the Status panel. If you set |
A podcast is, in essence, a digital multimedia file, suitable for playback on computers or portable media devices, such as the Apple iPod. Although there are an increasing number of video podcasts, audio podcasts make up the great majority of available content. A podcast is, like many other audio files, often stored in an MP3 format. What makes a podcast different is that the content is typically syndicated via XML files called feeds. The syndication makes it possible for someone to subscribe to a particular podcast feed and automatically receive the latest audio program.
One reason podcasts are popular is because they are easy to create. Anyone with a relatively recent computer, a microphone (even built into a laptop), and audio recording software can create one. Once the audio recording has been saved as an MP3 file, it's a good idea to add identifying tags called ID3 tags. ID3 tags are like <meta> tags and typically contain details about the podcast, such as the title, the name of the creator, and, where pertinent, keywords that describe the content. When the file is played, the MP3 player extracts the ID3 tags and displays the info.
Tip
One popular program for adding ID3 tags to an MP3 file is Apple's iTunes, available for free on both Macintosh and Windows platforms. To assign ID3 tags, select a file imported in the iTunes Library. Choose File
Most syndicated podcasts rely on a special form of an XML file format known as RSS. There's a bit of dispute over what RSS actually stands for—Really Simple Syndication, Rich Site Summary, or RDF Site Summary are among the contenders—but, bottom line, they all mean the same thing: a consistent format for publishing content.
Note
If you're completely new to XML and want to know more, check out Chapter 32, " Integrating with XML and XSLT," before continuing.
The key containing elements of an RSS feed are the opening XML indicator, an <rss> tag, and a <channel> tag, like this:
<?xml version="1.0" encoding="iso-8859-1"?>
  <rss version="2.0">
    <channel>
    </channel>
  </rss>
Within the <channel> tag, you'll find a series of meta-like tags including the title, description, language, and copyright details as well as a link to the HTML page that hosts the main content.
<channel>
  <title>My Podcasts</title>
  <link>http://www.idest.com/</link>
  <description>The lastest Dreamweaver news</description>
  <language>en-us</language>
  <copyright>Copyright 2006 idest</copyright>
</channel>
Following these tags, but still within the <channel> tags are the individual <item> tags that describe and provide links to each podcast. A typical <item> might look like this:
<item>
  <title>New York, New York</title>
  <link>http://www.idest.com/pod/091507.htm</link>
<description>
    How to add podcasts to your Web pages.
  </description>
  <enclosure url="http://www.idest.com/media/pd01.mp3" length="640561"
type="audio/mpeg"/>
</item>
Within each <item> tag, the <enclosure> tag links to the actual MP3 podcast file. You'll note that the <enclosure> tag is what is referred to as an empty tag because it, like <img>, does not have both opening and ending tags pairs—it's just a single tag. You can have as many <item> tags, each representing a single podcast, in your channel as you'd like.
A completed RSS feed XML file might look like this:
<?xml version="1.0" encoding="iso-8859-1"?>
  <rss version="2.0">
    <channel>
      <title>My Podcasts</title>
      <link>http://www.idest.com/</link>
      <description>The latest Dreamweaver news</description>
      <language>en-us</language>
      <copyright>Copyright 2007 idest</copyright>
      <item>
        <title>New York, New York</title>
        <link>http://www.idest.com/pod/091507.htm</link>
        <description>How to add podcasts to your Web @@ta
pages.</description>
        <enclosure url="http://www.idest.com/media/pd01.mp3" @@ta
length="640561" type="audio/mpeg"/>
      </item>
    </channel>
</rss>It's up to the Web designer whether a separate link to an individual podcast is provided along with the link to the podcast RSS feed. As noted earlier, linking to an MP3 file is just like linking to any other file: Simply select the text or graphic and, in the Property inspector, enter the path to the MP3 file.
RSS feeds are linked in a similar manner, but the link goes to an XML file rather than an MP3 file. To help identify RSS feeds, a common symbol has been widely adopted. The orange-and-white feed icon (see Figure 27-10) has been approved for use by both the Mozilla and Microsoft browser teams and can be found at http://feedicons.com in a variety of formats.

Adding sound to a Web page brings it into the realm of multimedia. Dreamweaver gives you numerous methods to handle the various audio formats, both static and streaming. When you use custom Dreamweaver objects and actions, enhancing your Web site with audio is a snap. When adding audio to your Web pages, keep these points in mind:
The common downloadable audio file formats are MP3, AIFF, WAV, AU, and RMF.
The common downloadable music file formats are MIDI, QuickTime Music, and RMF.
You can either link to a sound or embed it in your Web page. With standard audio, the linking technique calls an independent, free-floating player; the embedding technique incorporates the player into the design of the page. Hiding the player creates background music or sound.
Third-party plugins offer far greater control over the appearance and functionality of the sound than relying on a browser's default plugin; to use a third-party plugin, however, your user must download it.
Streaming audio provides almost instant access to large audio files, and RealAudio is one of the leaders in player deployment.
Designers can link to individual podcasts, which are typically in MP3 format, as well as a podcast feed, which is stored as an XML file.
In the next chapter, you learn how to use Dreamweaver templates to enhance your Web page creation skills.