
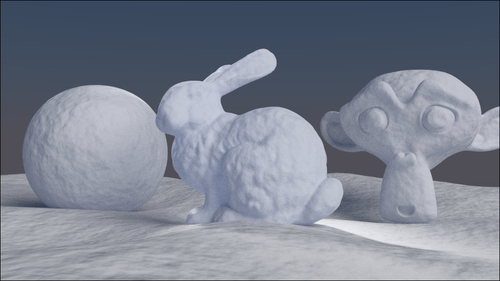
In this recipe, we will create a snow material and also fake a slight Sub Surface Scattering effect.
Now we are going to create the material:
- Select the cube and click on New in the Material window, under the Properties panel, or in the Node Editor window's header. Rename the material to Snow.
- Set the Camera view to Rendered.
- In the Material window on the right, under Surface, switch the Diffuse shader with a Mix Shader node. In the first Shader slot, select a Diffuse BSDF shader and in the second slot a Glossy BSDF shader.
- Set the Roughness value of the Glossy shader to
0.300. - Add a Fresnel node (press Shift + A and go to Input | Fresnel) and a Math node (press Shift + A and go to Convertor | Math). Set the IOR value of the Fresnel node to
1.300, and then connect the Fac output to the first Value socket of the Math node. Set the second Value to10.000, the operation mode to Divide, and finally connect its Value output to the Fac input socket of the Mix Shader node. - Add a Translucent BSDF node (press Shift + A and go to Shader | Translucent) and set its color to R 0.598, G 0.721, B 1.000.
- Select the Mix Shader node and press Shift + D to duplicate it. Set the Fac value of this duplicate to
0.300and then connect the first Mix Shader node output to its first input socket, and set the Translucent output to the second input socket. Connect the output of the second Mix Shader node to the Surface input of the Material Output node. - Add a Noise Texture node (press Shift + A and go to Texture | Noise Texture) and press Shift + D to duplicate it.
- Add a Texture Coordinate node (press Shift + A and go to Input | Texture Coordinate) and a Mapping node (press Shift + A and go to Vector | Mapping). Connect the Object output of the Texture Coordinate node to the Vector input of the Mapping node, then its Vector output to both the Vector input sockets of the Noise Texture nodes.
- Add a Math node (press Shift + A and go to Convertor | Math). Press Shift + D to duplicate it thrice (so, now you have obtained a total of four Math nodes). Connect the first Noise Texture node's Fac output (the gray one) to the first Value input of the first Math node and set the second Value to
2.000. Also, set the operator to Multiply. - Connect the second Noise Texture node's Fac output to the first Value input of the second Math node and let its second Value be set to the default of
0.500. Again set the operator to Multiply. - Now connect the outputs of the two Math nodes to the input Value sockets of the third Math node. Let the operator be set to Add.
- Connect the output of the third Math node to the first Value input of the fourth Math node, set its operator to Multiply, and let the second Value to the default value of
0.500. - Connect the fourth Math node output to the Displacement input socket of the Material Output node.
- Now go to the second Noise Texture node and change the Scale value to
15.000. Let the other values, also for the first texture node, unchanged (that is, set Scale to5.000, Detail to2.000, and Distortion to0.000). - Optionally, in the Mapping node set the Scale value to
0.500for all the three axes, as shown here: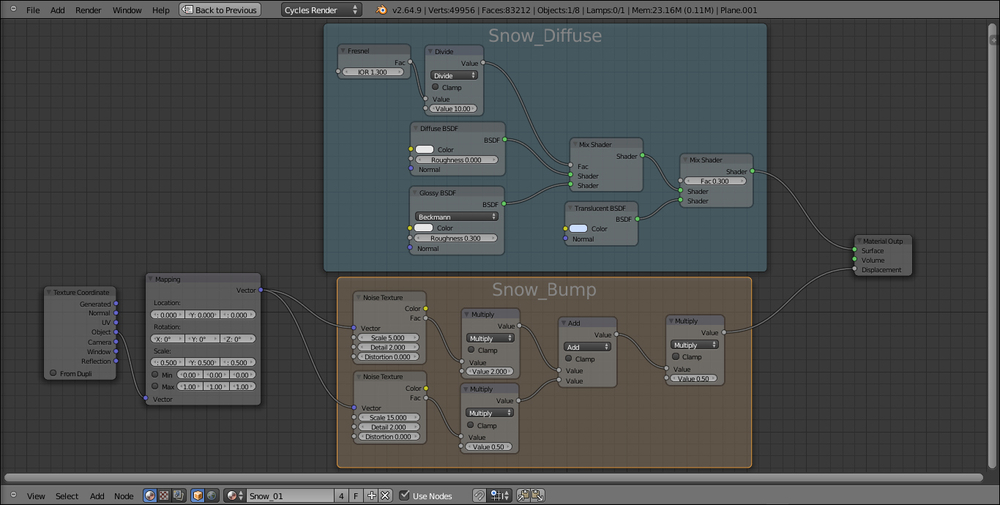
As usual, to better understand this recipe, we can divide this material creation in two stages: the first one for the general color and consistency of the snow and the second one to add bumpiness to the surface.
- First stage: We just made a basic shader by mixing Diffuse and Glossy shaders by the Index Of Refraction of the Fresnel node. This Fresnel value is divided by the Math node to obtain a softer transition (try changing this value from
10.000to1.000to see a totally different effect). We then also mixed in a bluish Translucent shader, but giving predominance to the basic shader by setting the factor value in the second Mix Shader node to0.300. The Translucent shader gives the appearance of the light seeping through the snow and showing in the shadowed areas of the object. - Second stage: Here, we added two Noise Texture nodes with different scale values to simulate the soft snow bumpiness. The first two Multiply math nodes separately set the influence of each noise. These values get merged by the Add node and finally piped in one more Math node, which is set to Multiply as well, to establish the overall weight of the bump effect that, being directly connected to the Displacement input in the Material Output node, affects together all the shaders in the network.
..................Content has been hidden....................
You can't read the all page of ebook, please click here login for view all page.