
In this recipe, we will create a basic raw ground material.
The first step is to start Blender and switch to Cycles. Delete the default cube and add a plane. In edit mode, scale it nine times bigger (18 units per side) and then follow these steps:
- Go in the Object Modifiers window and assign a Subdivision Surface modifier to the plane. Switch from Catmull-Clark to Simple and set the levels of Subdivisions for both View and Render to
2. - Assign a second Subdivision Surface modifier. Again, switch to Simple and set the levels of Subdivisions for both View and Render to
4. - Assign two Displace modifiers. In the first one, assign a Voronoi texture, increase the Size value to
1.80, and set the displacement strength to0.400. In the second one, assign the default Clouds texture, increase the Size value to0.75and the Depth value to5, set the displacement strength to0.400as well. - In the Object Tool panel, under Shading, set the plane smooth.
- Go to the World window and click on Use Nodes, then click on the little square with a dot to the right-hand side of the color slot. From the menu, select Sky Texture. Set the Strength value to
0.250. - Select the lamp, go to the lamp's Object Data window and click on Use Nodes. Then, change the Lamp type to Sun, set the Size value to
0.100, and the Strength value to1.400. Change the light color to R 1.000, G 0.935, B 0.810. In orthogonal top view, rotate the Sun lamp to a degree of90°. - Place the camera to have a nice angle on the plane and switch the 3D view to a Camera view (press 0 from numpad).
- Split the 3D window to two horizontal rows and change the upper one to a Node Editor window.
- Set the Camera view mode to Rendered.
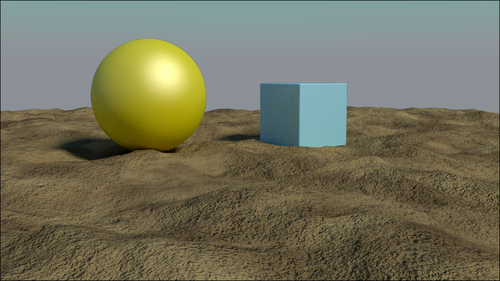
We are now ready to create this:
- Select the plane and click on New in the Material window under the Properties panel, or in the Node Editor window's header.
- In the Node Editor window, add a Texture Coordinate node (press Shift + A and go to Input | Texture Coordinate), a Mapping node (press Shift + A and go to Vector | Mapping), and a Musgrave Texture node (press Shift + A and go to Texture | Musgrave Texture).
- Connect the Object output of the Texture Coordinate node to the Vector input of the Mapping node and the Vector output of the latter to the Vector input of the Musgrave Texture node.
- Connect the Color output of the Musgrave Texture node to the Color input of the Diffuse shader. Set the Scale value of the Musgrave Texture node to
0.500. - Add a Wave Texture node (press Shift + A and go to Texture | Wave Texture) and a Mix node (press Shift + A and go to Color | Mix). Connect the Wave color output to the Color2 input of the Mix node, and then connect the Color output of the Musgrave node to the Color1 input.
- Connect the Mix node output to the Color input of the Diffuse shader. Set the Mix node's Blend Type to Subtract. Connect the Mapping output to the Wave texture's Vector input.
- Set the Wave node's Scale value to
0.200, Distortion to20.000, Detail to16.000, and Detail Scale to5.000. - Add a ColorRamp node (press Shift + A and go to Convertor | ColorRamp) and drag it to the link connecting the Wave node to the Mix node to paste it in between. Change the interpolation mode to B-Spline and move the black marker nearly one-fourth of the slider length to the right.
- Add two Noise texture nodes (press Shift + A and go to Texture | Noise Texture and then press Shift + D) and connect them to the Mapping node. Select the Subtract node and press Shift + D to duplicate it twice. Change their blend types to Multiply and connect the Color output of the Subtract node to the Color1 input of the first Multiply node, and also connect the Color output of the first Noise texture to the Color2 input.
- Then, connect the Color output of the first Multiply node to the Color1 input of the second Multiply node and the Color output of the second Noise texture to the Color2 input.
- Connect the second Multiply output to the color input of the Diffuse shader. Set the first Noise texture's Scale value to
10.000, Detail to5.000, and Distortion to0.300. For the second Noise texture, set Scale to35.000, Detail to5.000, and Distortion to1.000. - Add a Bright/Contrast node (press Shift + A and go to Color | Bright/Contrast), drag it to be pasted between the Subtract node and the first Multiply node. Set the contrast to
-0.800. - Press Shift + D to duplicate the Bright/Contrast node and drag it to be pasted between the first Noise texture and the first Multiply node. Also, set the contrast to
-0.400. - Press Shift + D to duplicate the Bright/Contrast node again and drag it to be pasted between the second Noise texture and the second Multiply node. Also, set the contrast to
-0.500. - Add a Bump node (press Shift + A and go to Vector | Bump) and paste it between the second Multiply node and the Diffuse shader. Switch the input connection from Strength to Height and the Normal output from the Color input of the Diffuse to the Normal input, as shown in the following screenshot:

- Add a Mix Shader node (press Shift + A and go to Shader | Mix Shader) and a second Diffuse BSDF shader (press Shift + A and go to Shader | Diffuse BSDF). Paste the Mix Shader node between the first Diffuse shader and the Material Output node and connect the second Diffuse shader to the second Shader input socket.
- Connect the Bump output to the second Diffuse shader's Normal input. Set the Bump strength to
1.000. - Change the first Diffuse shader's color to R 0.593, G 0.479, B 0.242. Change the second Diffuse shader's color to R 0.106, G 0.067, B 0.053 and the set Roughness value to
1.000. - Add one more Noise texture node (press Shift + A and go to Texture | Noise Texture) and a new ColorRamp node (press Shift + A and go to Convertor | ColorRamp). Connect the Mapping node output to the Noise vector input and the texture Color output to the Fac input of the ColorRamp node. Then, connect the ColorRamp node's Color output to the Fac input socket of the Mix Shader node.
- Set the Noise node's Scale value to
1.000and the Detail value to5.000. Switch the ColorRamp node's interpolation to B-Spline and move the black marker one-third to the right, the white marker one-third to the left, and click on the Add button to add a new marker. Set its color to black and move it very close to the first black marker, as shown in the following screenshot:
The way this material works is very similar to the sand material:
..................Content has been hidden....................
You can't read the all page of ebook, please click here login for view all page.