
25
Tips and Tricks in Azure
There is always more than only one way to do a particular thing. This statement is especially true in the Azure ecosystem, where we are given multiple tools and shortcuts when provisioning resources, configuring services, and developing applications. This chapter will show you how to enhance productivity even more and shorten the time needed to deliver a working solution. The following topics will be covered in this chapter:
- Using the Azure CLI
- Using Cloud Shell
- Automating infrastructure deployments with ARM templates and Azure Bicep
- Using VS Code for a better developer experience
- Using Continuous Deployment for automated deployments to Azure
Technical requirements
To perform the exercises in this chapter, you will need the following:
- An Azure subscription
- The Azure CLI: https://docs.microsoft.com/en-us/cli/azure/install-azure-cli
- VS Code: https://code.visualstudio.com/download
Using the Azure CLI
When interacting with Azure resources, you have multiple paths to take to choose from.
- Using the Azure portal
- Leveraging the REST API of Azure Resource Manager
- Using the REST APIs of deployed resources
- Installing the Azure PowerShell module
- Implementing an Infrastructure-as-Code approach
- Installing the Azure CLI
In this chapter, we will focus on understanding the Azure CLI as our main tool for daily tasks as it’s detached from the standard Microsoft technology stack and can be easily understood by people using the command-line interface on a daily basis.
Note
While most tasks can be done with both Azure PowerShell and the Azure CLI, there are some minor differences (for example, some SQL database operations can be done only by using Azure PowerShell). Using Azure PowerShell requires at least basic knowledge of PowerShell, thus we’re not going to cover it in this book.
The Azure CLI is installed by a simple installer and consists of tens of different modules, each responsible for handling a single Azure resource. To confirm you have the Azure CLI installed, run the following command in your favorite terminal:
az
This should return a list of modules available for use:

Figure 25.1 – Welcome screen of the Azure CLI
The Azure CLI can be run on any machine, which allows for executing programs written in Python. If you have difficulties running it directly from an installer, you can use Docker for that:
docker run -it mcr.microsoft.com/azure-cli
This will start a Docker container, from which you can sign in to Azure and start managing resources. Signing into your account in the Azure CLI is very simple – just use the following command:
az login
This should open your browser (or a new tab) and ask you to select an account you would like to use for signing in:

Figure 25.2 – Picking an account when signing in with the Azure CLI
As you can see, even if you have multiple accounts, you can easily switch between them when logging in.
Note
Picking an account is a default screen when your browser has Azure credentials already cached. If it is your first login (or you are using incognito mode), you will be asked for your username before entering a password.
There is one thing we need to mention – there are two different contexts in which you may work in the Azure CLI:
- Account
- Subscription
To switch account, you always need to use az login – this is the only way to change the credentials used by the Azure CLI to communicate with Azure. Once signed in, the Azure CLI will display a list of active subscriptions you have access to:

Figure 25.3 – List of active subscriptions after successful login
Depending on the account selected, you may have access to different subscriptions. Therefore, it’s important to remember which account was used to log in to the Azure CLI in order to manage the correct piece of infrastructure.
Note
When using the Azure CLI, you’re performing all the operations as you. That means that all activity logs will have your username linked to an operation and the whole RBAC access will be scoped to your individual account. Avoid using your personal account with things such as CI/CD setups so you can save yourself from potential security breaches and your account being used to abuse your infrastructure.
Remember that you can use az login to sign in as a service principal or managed identity. To do that, use the following commands:
az login --service-principal -u <name> -p <secret> --tenant <tenant-name>
az login --identity # For system-assigned identity
az login --identity -u <identity-name> # For user-assigned identity
There is also a small trick that can save you a lot of time – if you have a resource (such as a virtual machine, web app, function app, or Kubernetes) that has managed identity enabled and assigned to it, you can leverage az login with the –identity switch without providing any kind of additional credentials. This is because the Azure CLI can interact with managed identity infrastructure and obtain a token on its own.
The last thing I would like to mention is the ability to query the result. You probably noticed that, in some chapters, we were already using Azure CLI commands to perform some operations or get results. Some of those actions generated quite a huge JSON output, which was difficult to read. That is where output formatting and querying come into play. Let us use the following command and result:
az network vnet list -g <your-resource-group-name>
It will return a result like mine:
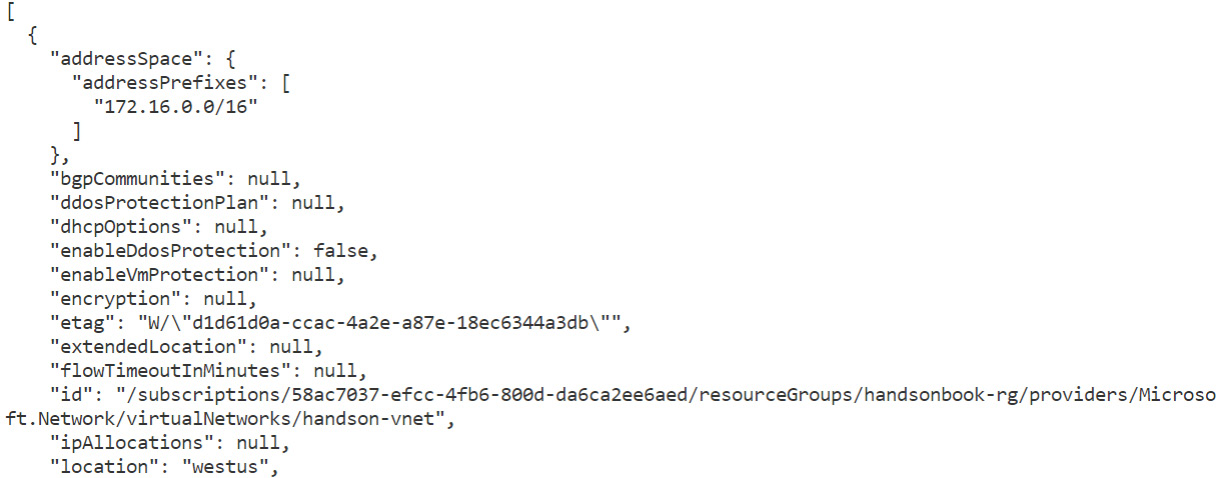
Figure 25.4 – Listing available VNets with the Azure CLI
The output is useful for further processing – it is nowhere near being easy to read to the human eye. Let us tweak it a little bit:
az network vnet list -g <your-resource-group-name> -o table
The result will be much nicer:

Figure 25.5 – Listing available VNets as a table
You can experiment with other output formats (such as tsv, yaml, and so on) to see which seems the best for you. To extract exact information, we can use the –query parameter:
az network vnet list -g <your-resource-group> -o table --query “[].addressSpace.addressPrefixes”
This will return all address prefixes of all virtual networks inside a selected resource group:

Figure 25.6 – Extracting a field from a result
The syntax is called JMESPath – you can find more information about it in the Further reading section. Let us now check the available capabilities of Cloud Shell in Azure.
Using Cloud Shell
Sometimes your computer may not allow for installing multiple developer tools that are useful when interacting with Azure. If that is the case, you can always use an inbuilt tool called Cloud Shell, which gives you an interesting alternative to installing all the software on your machine.
When you sign in to the Azure portal, you can see a small terminal icon in the top-right corner:

Figure 25.7 – Accessing Cloud Shell in the Azure portal
When you click on it, it will display an additional window, where you can start entering various commands:

Figure 25.8 – Cloud Shell window
For now, Cloud Shell offers you a rich environment including tools such as the following:
- The Azure CLI
- Terraform
- Docker
- Git
- Runtimes for .NET, Java, Python, and so on
It also contains a simple text editor, which can be useful when creating files or modifying existing ones:

Figure 25.9 – Accessing the text editor
Of course, there are some limitations to what Cloud Shell can do and how it works:
- By default, Cloud Shell uses your account credentials to operate. You can change that with the az login command.
- Only a subset of the functionalities of Docker is available as Cloud Shell does not operate in a full environment. While you cannot run containers, you can still build, push, and pull them.
- Cloud Shell persists files on an attached file share, meaning files and data can be lost once the underlying storage account is deleted.
The benefits of running Cloud Shell over your local environment include keeping your machine clean and having integrated development environments with Azure and the most recent versions of the whole toolset. You can easily run it as your secondary environment, especially for simpler tasks.
With some basics for CLI tools, let us now check how infrastructure deployments can be automated with tools such as ARM templates and Azure Bicep.
Automating infrastructure deployments with ARM templates and Azure Bicep
When deploying infrastructure to Azure, you can use either a manual or automated approach. A manual approach would include using the Azure portal or the Azure CLI / Azure PowerShell. An automated approach would leverage either CI/CD pipelines calling various commands from CLI tools or using Infrastructure-as-Code. Infrastructure-as-Code is a generic approach that assumes that your infrastructure is scripted using one of the available languages or tools. Those scripts can then be used by you or your automation infrastructure to deploy infrastructure using a desired state approach.
Azure already has two native tools that can be used to leverage Infrastructure-as-Code:
- ARM templates
- Azure Bicep
A word from the reviewer
Bicep is a tool that generates an ARM template under the hood and has been written to make managing ARM templates a lot easier. By installing the Bicep CLI, you can then run the following to convert an existing ARM template into a Bicep file:
bicep decompile myarmtemplate.json
And you can run the following to build an ARM template from a Bicep file (which is handy if you have an existing repo of ARM templates and haven’t moved to Bicep yet):
bicep build mybycepfile.bicep
The other win for Bicep is the code completion, schema validation, and schema version validation that it gives, although there can still be some minor differences in supported resource API versions.
While the names are quite different, these are almost the same tools. The only difference is in the way you write and prepare your scripts. Look at the following examples:
param storageLocation string
param storageName string
resource storage ‘Microsoft.Storage/storageAccounts@2019-06-01’ = {
  name: storageName
  location: storageLocation
  sku: {
    name: ‘Standard_LRS’
  }
  kind: ‘StorageV2’
  properties: {}
}
What you can see there is a simple script deploying a storage account using Azure Bicep. For comparison, here is the same script but prepared with an ARM template:
{
    “$schema”: “https://schema.management.azure.com/schemas/2019-04-01/deploymentTemplate.json#”,
    “contentVersion”: “1.0.0.0”,
    “parameters”: {
        “sa_name”: {
            “defaultValue”: “handsonsa”,
            “type”: “String”
        }
    },
    “variables”: {},
    “resources”: [
        {
            “type”: “Microsoft.Storage/storageAccounts”,
            “apiVersion”: “2021-09-01”,
            “name”: “[parameters(‘sa_name’)]”,
            “location”: “westeurope”,
            “sku”: {
                “name”: “Standard_LRS”,
                “tier”: “Standard”
            },
            “kind”: “StorageV2”,
            “properties”: { }
        }
    ]
}
As you can see, those two tools use completely different language to reflect the shape of the infrastructure. Under the hood, both ARM templates and Azure Bicep use the same mechanism – Azure Resource Manager APIs. When starting to develop scripts with those tools, I strongly recommend using Azure Bicep as its goal is to replace ARM templates at some point in the future.
Note
ARM templates and Azure Bicep are native Azure tools, meaning they guarantee support for all existing resources, very often before they reach the General Availability stage. Third-party tools such as Terraform work differently and, most of the time, are behind the main development stream.
There are some huge advantages of using an Infrastructure-as-Code approach over traditional deployment methods:
- Your code is scripted as text files, meaning it can be reviewed before introducing any changes.
- You can easily incorporate it into your CI/CD pipelines.
- You can quickly deploy your infrastructure to another region or just create a replica, changing only a subset of parameters.
- The process is repeatable, meaning you are guaranteed to achieve the same result with each run.
Both ARM templates and Azure Bicep are deployed using an Azure CLI command:
az deployment group create
az deployment sub create
az deployment mg create
az deployment tenant create
In most cases, you will be using the az deployment group subgroup to get your resources deployed. The reason for that is quite simple – most deployments happen at the resource group level. The rest of the subgroups (sub/mg/tenant) deploy the template using subscriptions/management group/tenant scopes, which are higher in the hierarchy than resource groups.
Tip
You can use higher scopes to deploy your whole infrastructure using a single script. For example, by using management group or tenant scopes, you could deploy your subscription, resource groups, and resources inside them. Such an operation is impossible when deploying a template on a resource group level.
Let us now see how continuous deployment can be designed so you can deploy your applications and your infrastructure as a single unit of work.
Using continuous deployment for automated deployments to Azure
There are two parts to the common CI / CD process:
- Continuous Integration, which is responsible for building your application and integrating it with all the dependencies it uses
- Continuous Deployment, responsible for delivering artifacts created in the previous step
While Continuous Integration is part of a process designed to build your application, Continuous Deployment is a much more generic approach. In general, Azure does not assume anything regarding the technology you use. This means that all the toolsets, parameters, and steps needed are almost the same for all programming languages and runtimes.
Note
Here, we are assuming that all platforms that can be deployed to Azure follow the same patterns and require a similar number of steps to configure an infrastructure correctly so they can run smoothly. This is true for most cases, but still, we need to be prepared for some level of customization.
When working with cloud resources and planning for any kind of delivery of software and infrastructure as a single package, we need to take into consideration the following factors:
- If the whole process is supposed to be automated, we need to make sure that both code and infrastructure can be built and deployed as a unit without manual steps.
- We need to ensure that a proper level of access is assigned to principals running our pipelines – things such as RBAC assignment, access policies, and locks should also be part of the pipeline.
- We need to decide how deployments are validated. Even if infrastructure and software were deployed correctly, we need to make sure they work without issues.
When implementing Continuous Deployment for Azure, tools such as the Azure CLI or Azure PowerShell are especially helpful as they can be easily incorporated into working pipelines without installing an additional toolset.
Let us consider best practices for deploying applications to Azure:
- Use tools such as Azure Bicep, ARM templates, Terraform, or others to script your infrastructure and deploy it before deploying your application.
- Leverage native Azure tools for deploying web apps (avoid using FTP directly).
- Use Azure Key Vault for storing secrets for your apps.
- Use managed identities wherever possible to allow setting access via RBAC.
- Make sure the principal used for deployment is correctly configured and used instead of individual access credentials.
- Introduce E2E tests that validate application deployment after deployment.
Implementing all those elements will improve the way your application and infrastructure deployment work, but it also requires quite a lot of work to connect all the dots. However, this also guarantees the best results as most of the work will be automated with a proper level of access.
Summary
With this short chapter, we have completed the book. By covering topics such as the Azure CLI, ARM templates, and Azure Bicep, you should now have enough knowledge to explore Azure even more on your own. Congratulations, you can consider yourself familiar with the fundamentals of the cloud platform Microsoft provides.
Remember that the best way to learn about Azure resources is to follow documentation and practice various scenarios. Cloud resources are dynamic objects that happen to change quite frequently. To keep the same pace, find some channels where all the news is published – it could be Twitter, LinkedIn, or Microsoft mailing lists. This should help you keep up with all the interesting new capabilities and prepare yourself for possible changes.
Questions
Here are some questions to test your knowledge of the important topics covered in this chapter:
- What are the different login options for the Azure CLI?
- Are Azure PowerShell and the Azure CLI the same from a capabilities point of view?
- Are ARM templates and Azure Bicep compatible under the hood?
- Is Infrastructure-as-Code part of the Continuous Deployment pattern?
Further reading
For more information, refer to the following sources:
- JMESPath: https://jmespath.org