iPad Considerations
You’re almost at the end of this book; congratulations for making it this far! While the book is described as being for iPhone and iPad development, you’ve mostly focused on iPhone thus far. The good news is that this is because the skills for an iPhone developer are almost 100% the same as those for an iPad developer. There are a few minor differences that you need to take into account when dealing with the iPad, and they revolve around the different screen size, also known as the form factor.
In this chapter you’ll take a look at a typical iPad application, and you’ll explore the differences for some common scenarios by building them yourself.
App Navigation on the iPad
In Chapter 9, you looked at the “Table View” control and saw how it is used for in-app navigation to content. Perhaps the biggest difference between building for the iPad and building for the iPhone lies in how you do this. To see an example, consider the email app that ships with your iOS device. Figure 12-1 shows how this looks on an iPhone.
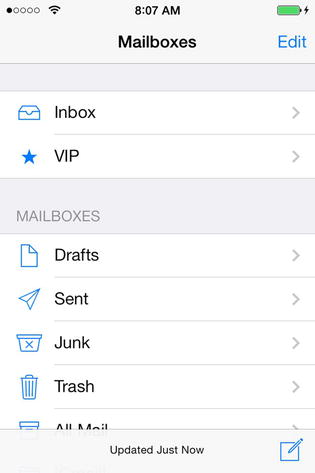
Figure 12-1. The email app on an iPhone
As you can see, it’s basically a table view with a number of sections. When you select a section—for example, “Inbox”—the same table-based navigation as you saw in Chapter 9 occurs—the table slides away revealing the next set of content. So, for example, if we choose the inbox, we’ll see something like Figure 12-2, which is also a table view!
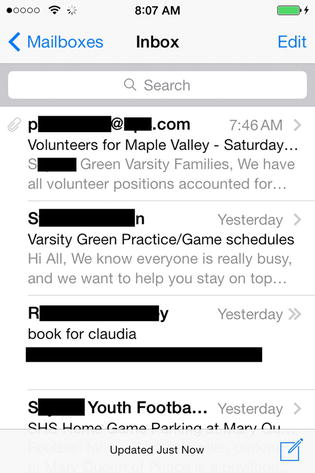
Figure 12-2. The email inbox is a table view
And, as you can see, each mail item is a cell in the table view. Selecting it navigates to the email item, as shown in Figure 12-3.

Figure 12-3. An email item on the iPhone
Consider how different things are on the iPad with the same application. Figure 12-4 shows the email application on the iPad. Notice that because the list of mailboxes doesn’t need to take up the entire screen, a preview of a mail item can be shown on the right-hand side. On the iPad, the last email item that you read is shown on the screen.
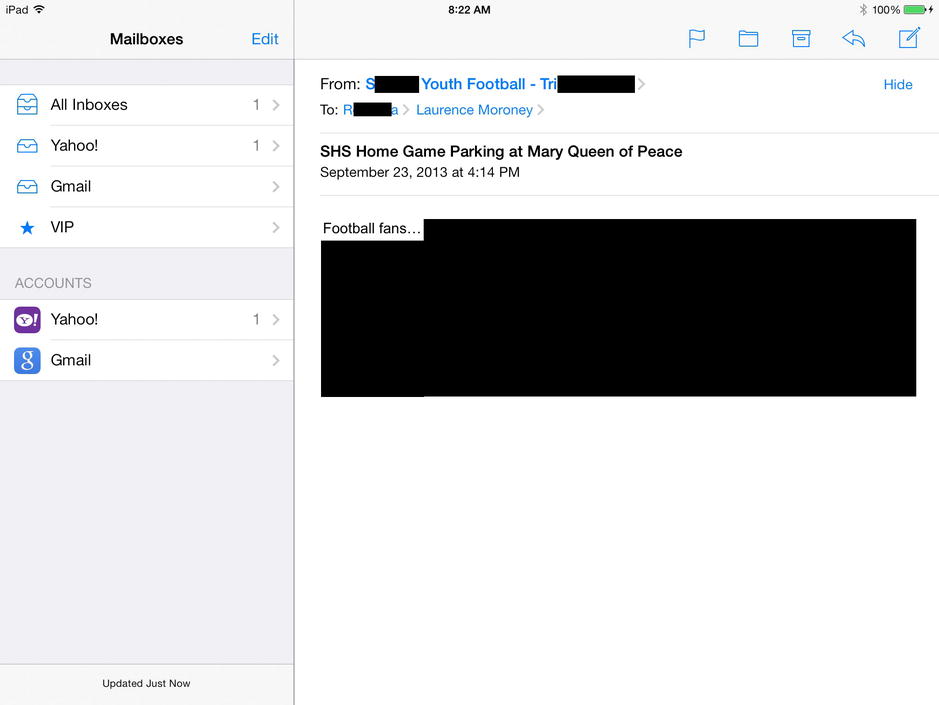
Figure 12-4. The email App on the iPad
The list of mailboxes is still a table view, so you can navigate within it. Selecting a mailbox yields the view in Figure 12-5.

Figure 12-5. Inbox view
The table view on the left navigates to the view of your inbox, just as it did on the iPhone version of the app. The right-hand side is used to view the email, so you don’t need an additional click to move “in” to the mail and back “out” to the inbox like you do with the iPhone.
The iPad version also needs to consider portrait orientation, where you hold the iPad so that the horizontal axis is shorter than the vertical one. You can see this in Figure 12-6.
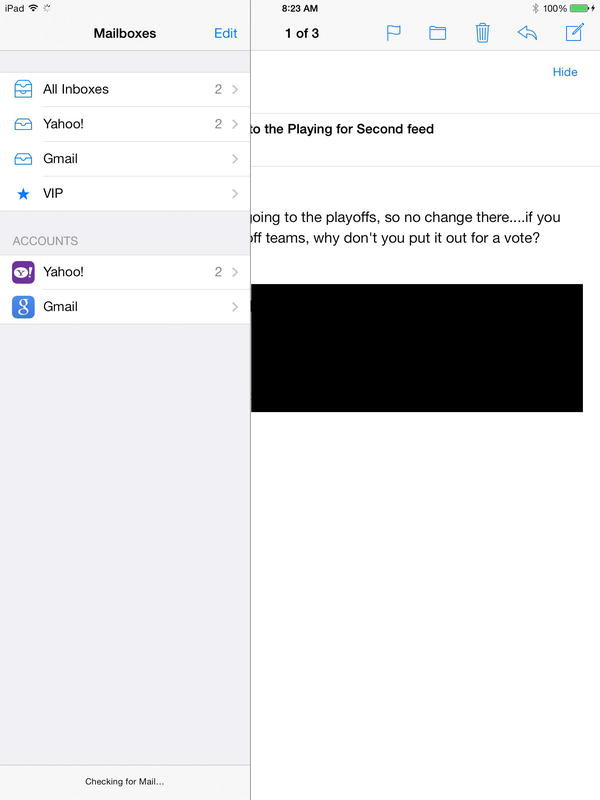
Figure 12-6. iPad in portrait mode
In this case, the menu to the left, while still a table view, becomes a pop over: it lies on top of the underlying content, instead of being to the left of it. This is more apparent when you navigate to a mail item. You can see this in Figure 12-7.
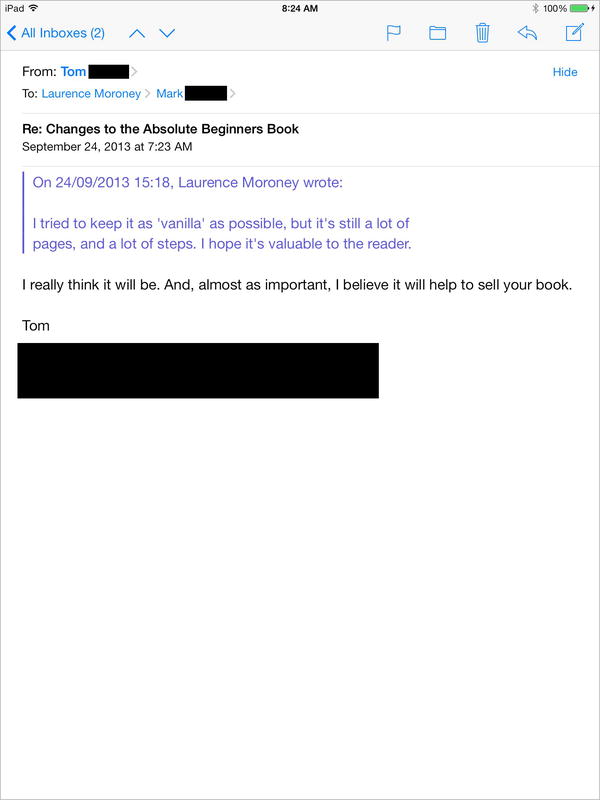
Figure 12-7. Looking at a mail item in portrait mode
On the top right-hand side of the screen, you can see a link “back” to all inboxes. On an iPhone, this would move you away from the mail message to show the inbox or list of inboxes, as that is all the screen real estate allows. On the iPad, the list will pop over the mail item as you saw back in Figure 12-6.
To be able to build for the iPad, you’ll need to understand how to do this common scenario for yourself, so in the next section you’ll do exactly that.
Building an iPad App
Start up Xcode and create a new project. Instead of the Single View Application you’ve been building throughout this book, let’s go a little deeper. While any of the templates can be used on an iPad, we’ll use one that is very similar to the email app that you’ve been looking at. Select the Master-Detail Application type, as shown in Figure 12-8.

Figure 12-8. Building a new app
When asked to choose options for your new project, use the Product Name “characters” as shown in Figure 12-9. Ensure that the Devices selection is set to “iPad.” The “Universal” setting creates an app that builds for both iPad and iPhone, with different storyboards for each. For the sake of simplicity, we’re just doing iPad here. If “Use Core Data” is selected, uncheck the box.

Figure 12-9. Options for your new project
Finish the steps and Xcode will create the app for you. Run it on the iPad simulator, where you should see something like Figure 12-10.

Figure 12-10. Running the master-detail app
As you can see, it is running in portrait mode, which the simulator defaults to. The detail view is analogous to the email message within the mail app, and the master content is analogous to your inbox. You can see “Master” in the top left-hand side of the screen, and, if you click on it, the master list will pop up. See Figure 12-11.

Figure 12-11. Viewing the master list
Clicking on the “+” will add new details to the master list, with the current time stamp. Select any of these, and the detail view will show that content.
To see the iPad in landscape mode, you can select “Rotate Left” under the hardware menu. In this orientation, the master list is “docked” to the left of the screen, and selecting any item will show its content in the detail area. See Figure 12-12.

Figure 12-12. Viewing the master-detail app in landscape mode
Now that we see how the master-detail sample app works, let’s edit it to create a simple app of our own.
Open Main.storyboard, and you’ll see something like Figure 12-13. The storyboard in this app is very complex, but don’t worry, you’ll get the hang of it by working through apps like this one.
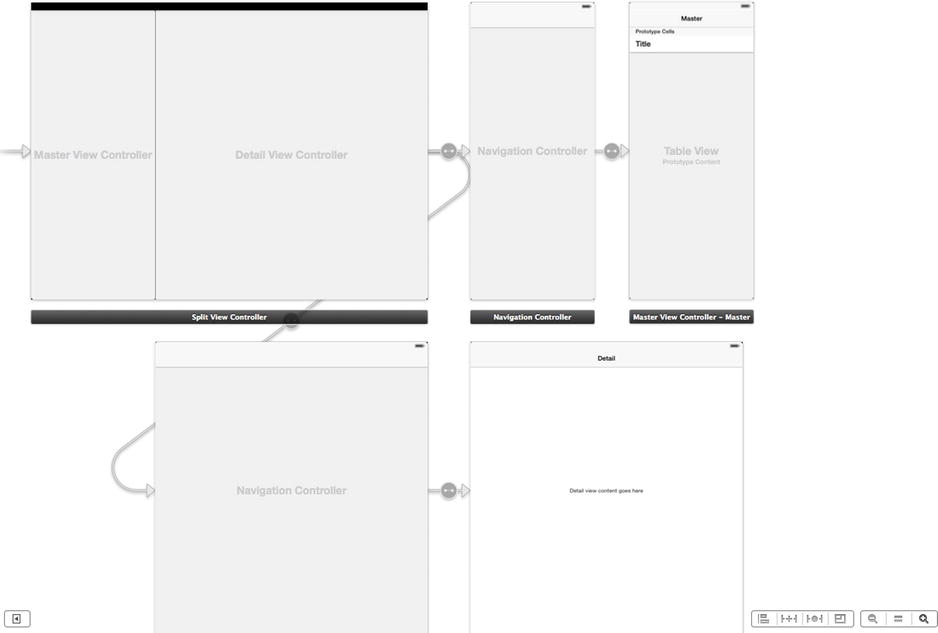
Figure 12-13. The master-detail storyboard
The box on the top left might look familiar—it’s the overall app, with the master view controller docked to the left of the detail view controller. Navigation in the app is controlled through a table view, as shown on the top left, and the navigation controller regulates the contents of the detail view, as shown at the bottom.
The detail view has a label that says “Detail View Content Goes Here.” Before going further and editing the storyboard, consider how that gets updated.
Take a look at DetailViewController.h, and you’ll see this code:
#import <UIKit/UIKit.h>

@interface DetailViewController : UIViewController<UISplitViewControllerDelegate>

@property (strong, nonatomic) id detailItem;

@property (weak, nonatomic) IBOutletUILabel *detailDescriptionLabel;
@end
Note that even though there is only one control on the view, the label, there are actually two properties. One is the outlet for the label (called “detailDescriptionLabel”), and the other is something called “detailItem.” The latter of these is used to help the navigation controller communicate with the view and pass along the content that it wants the view to see.
The user picks the item from the master list, so let’s look at the “MasterViewController.m” file, where the code resides. Selecting an item on a table view fires the didSelectRowAtIndexPath code, so take a look at that. It should look like this:
- (void)tableView:(UITableView *)tableView didSelectRowAtIndexPath:(NSIndexPath *)indexPath
{
NSDate *object = _objects[indexPath.row];
self.detailViewController.detailItem = object;
}
As you can see, when the user selects an item, the current item on the table view is selected and is set to the detailItem of the detailViewController. This is how the content is passed to the view. When you look at the “detailViewController.m” file, you can see how the detail view controller handles it.
Take a look at its viewDidLoad method. This is called whenever the view is loaded.
- (void)viewDidLoad
{
    [superviewDidLoad];
        // Do any additional setup after loading the view, typically from a nib.
    [selfconfigureView];
}
Every time you’ve seen that function so far in this book, you’ve probably seen the [super viewDidLoad] call, but the [self configureView] is new. So let’s take a look at it:
- (void)configureView
{
// Update the user interface for the detail item.

if (self.detailItem) {
self.detailDescriptionLabel.text = [self.detailItemdescription];
    }
}
As you can see, this function checks to see if something has been passed into it, and if something has been, the function sets the text of the label to the description of the item that was passed in.
Let’s now change the app so that instead of allowing the user to add random times and dates to the master list, you’ll add a static list of people that are characters from a book.
Tip If you haven’t already looked at Chapter 9, it’s a good idea to do so before continuing. Many of the concepts of building table view content that you’ll use in this section are already covered there.
There are a few changes you’ll need to make to MasterViewController.m. First, go to the viewDidLoad method. It should look like this:
- (void)viewDidLoad
{
    [superviewDidLoad];
        // Do any additional setup after loading the view, typically from a nib.
self.navigationItem.leftBarButtonItem = self.editButtonItem;

UIBarButtonItem *addButton = [[UIBarButtonItemalloc] initWithBarButtonSystemItem:UIBarButtonSystemItemAddtarget:selfaction:@selector(insertNewObject:)];
self.navigationItem.rightBarButtonItem = addButton;
self.detailViewController = (DetailViewController *)[[self.splitViewController.viewControllerslastObject] topViewController];
}
Delete all but the first and last lines. The code you are removing provides the user with the ability to add or remove content from the master list. You’re going to provide a static list of names instead. You can initialize that static list in viewDidLoad. When you’re done, your code should look like this:
- (void)viewDidLoad
{
    [superviewDidLoad];
_objects = [[NSMutableArrayalloc] initWithObjects:
@"Fintan",
@"Zack",
@"Ayako",
@"Nizhoni",
@"Sinclair",
@"Iara",
nil];

        self.detailViewController = (DetailViewController *)[[self.splitViewController.viewControllerslastObject] topViewController];
}
If you run your app on the iPad simulator, you’ll see something like Figure 12-14.
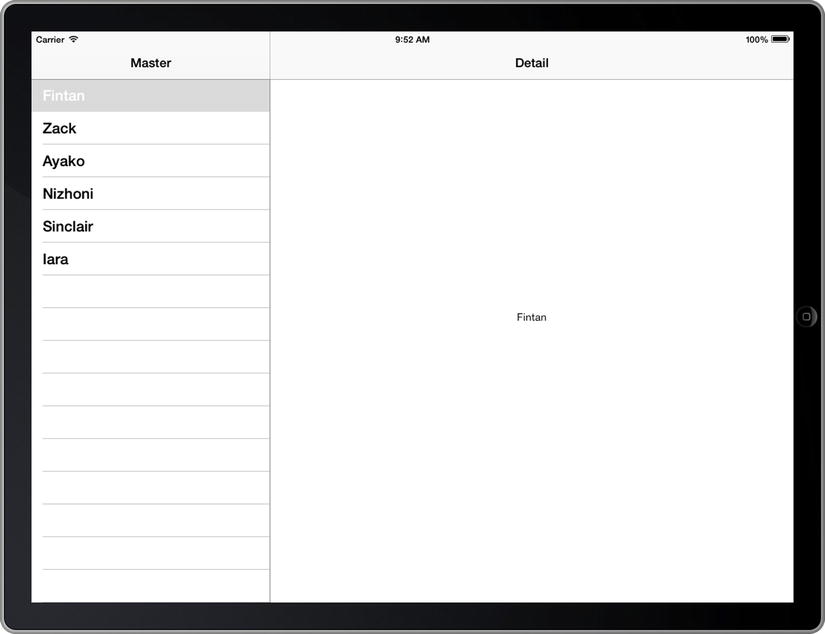
Figure 12-14. The characters app with a static master list
You’ll notice that when you select a character name, the name appears in the detail view. But let’s make that a little more interesting and have it render a picture of that character instead.
As you might recall from earlier in this section, the configureView method in DetailViewController.m executes when someone makes a selection from the list. Select DetailViewController.m from the project navigator and take a look. It sets the text of detailDescriptionLabel based on the description of the navigation item. That’s why it now renders the name of the character instead of the time and date as it did earlier. As a recap, here’s the code:
- (void)configureView
{
// Update the user interface for the detail item.

if (self.detailItem) {
self.detailDescriptionLabel.text = [self.detailItemdescription];
    }
}
Let’s update it so that it renders the address of an image instead. The address of the image will be http://ios7developer.com/book/<character name>.jpg, so the code to do that is here:
- (void)configureView
{
if (self.detailItem) {
NSString *imageAddress = [NSStringstringWithFormat:@"http://ios7developer.com/book/%@.jpg", [self.detailItemdescription]];
        imageAddress = [imageAddress lowercaseString];
self.detailDescriptionLabel.text = imageAddress;
    }
}
This builds an NSString called “imageAddress” with the preceding format and then converts it to lower case.
Tip The stringWithFormat message on NSString is used to construct strings. Locations in this string with the characters %@ will be replaced by strings, so in this case you can see that the filename %@.jpg will become <character name>.jpg
The code then renders the address into the detailDescriptionLabel. See Figure 12-15 for how that will appear at run time.
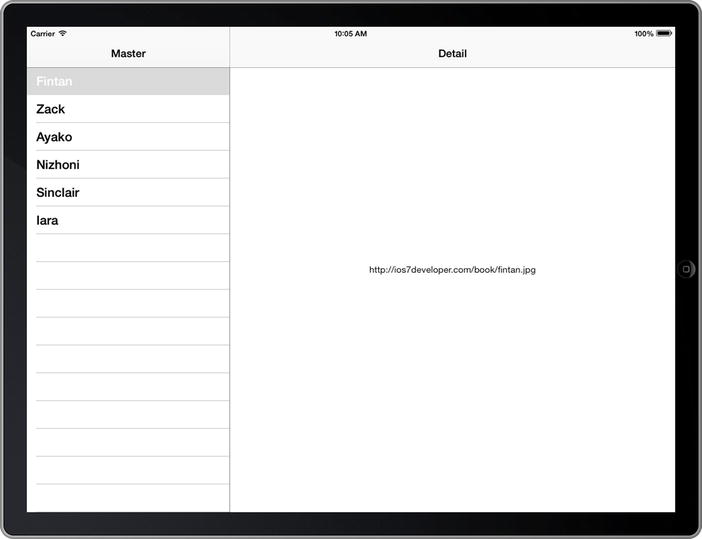
Figure 12-15. Rendering the address of the image
Of course, it would be much better if the code rendered the image instead of the address, so you’ll do that next.
Tip Many web servers are case sensitive for paths, so the file http://ios7developer.com/book/Fintan.jpg might be different from http://ios7developer.com/fintan.jpg. As such, it’s somewhat of a standard that you use all lowercase in defining URLs in order to keep things simple. The master list capitalized the names, as it should, so we convert that to lowercase in order to create the URL.
Go back to your Main.storyboard file and zoom in on the detail view design. See Figure 12-16.
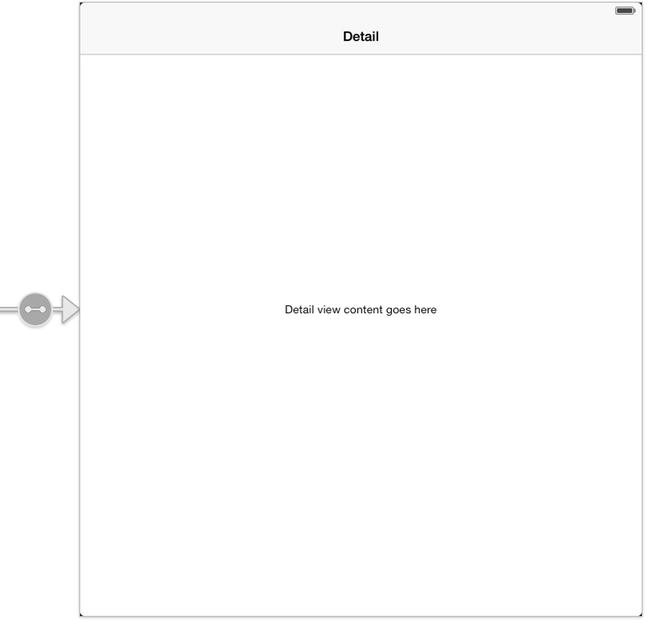
Figure 12-16. The detail view controller design
Drag the label toward the bottom of the view and make the font larger. Also add a UIImageView and change the title to read “Picture.” See Figure 12-17.
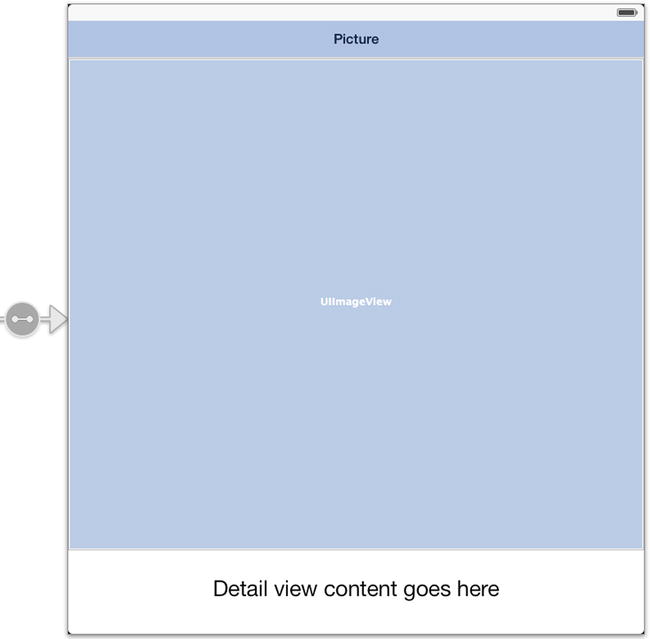
Figure 12-17. Designing the detail view
Using the assistant, CTRL-drag the UIImageView to DetailViewController.h and create an outlet called “imgCharacterPicture.”

Figure 12-18. Creating the outlet for the image
Now that you have an outlet for the image, you can use this to load an image from a URL. This was covered in Chapter 11, so review that chapter if you need more detail.
To load the image, go back to the configureView function and add code to have it load the image into imgCharacterPicture, like this:
- (void)configureView
{
// Update the user interface for the detail item.

if (self.detailItem) {
NSString *imageAddress = [NSStringstringWithFormat:@"http://ios7developer.com/book/%@.jpg", [self.detailItemdescription]];
        imageAddress = [imageAddress lowercaseString];
NSURL *url = [NSURLURLWithString:imageAddress];
NSData * imageData = [[NSDataalloc] initWithContentsOfURL: url];
_imgCharacterPicture.image = [UIImageimageWithData: imageData];
self.detailDescriptionLabel.text = imageAddress;
    }
}
Now when you run your app, you can browse images of characters. See Figure 12-19.
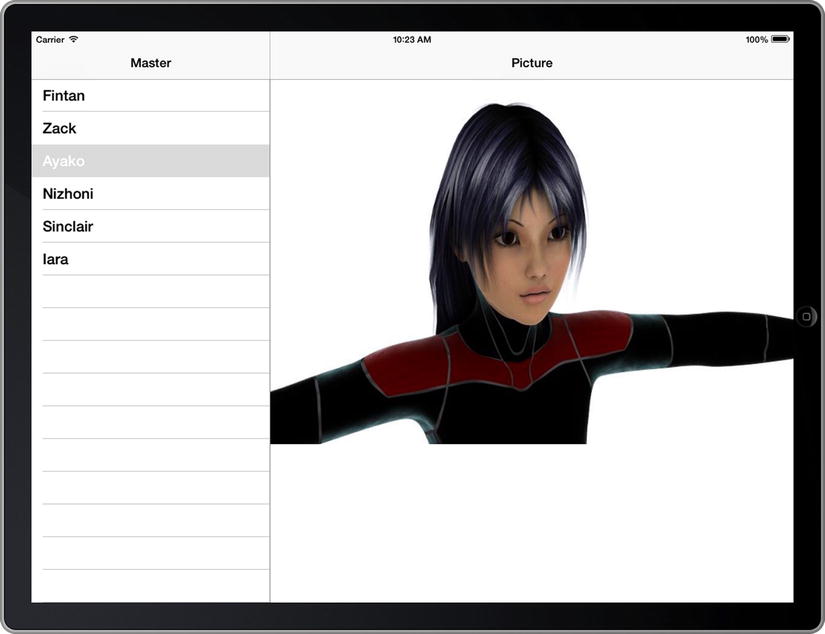
Figure 12-19. Running the “Character Browser” app on an iPad
The app works naturally in portrait mode too, as you can see in Figure 12-20.
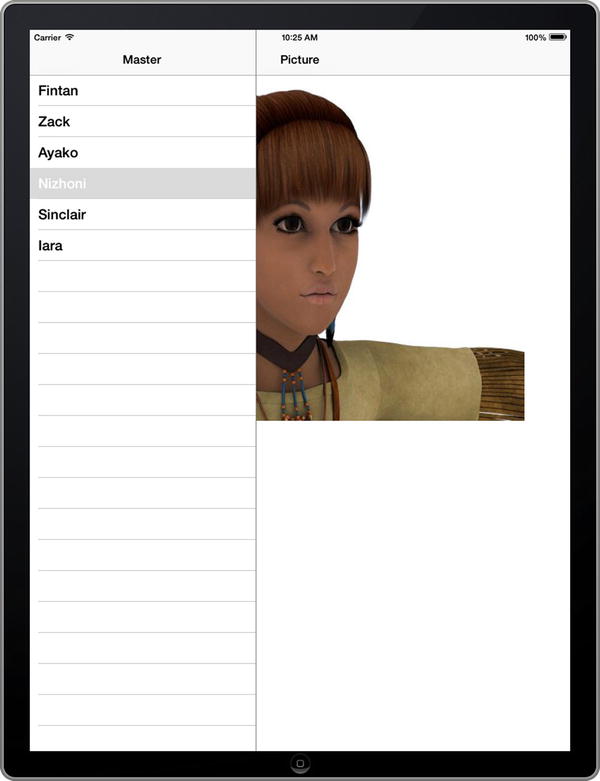
Figure 12-20. Running the app in portrait mode
And that’s it! You’ve just built your first iPad app, which has some of the same basic functionality as the email app that comes with iOS. Congratulations on taking this step in your journey.
Note These characters are from the novels The Fourth World, The Million-Year Journey, and The Legend of the Locust, of which I’m the author. They are renders that were done to support a potential animated movie. –Laurence Moroney
Summary
In this chapter you took a look at some of the differences in building iPad applications, a skill set that is an enhancement to the iPhone development skill sets that you’ve been working on throughout this book. You saw how to build a master-detail application that works in landscape and portrait modes and that uses the common design pattern of an iPad navigation app. In the next chapter, you’ll wrap up your beginner’s learning by stepping through the process of app store deployment.