Web Views and Connections
It’s hard to find an app that doesn’t rely on networking in some way. It might need to get updated data, connect with online leaderboards, or just receive a news feed of some sort. In Chapter 10 you used online data within the Map View, and you’ll build on that experience in this chapter. You’ll enlist a “Web View” control to provide embedded browsing functionality and learn to use the underlying networking APIs to build an app that pulls data off the Internet.
As its name suggests, the “Web View” control is used to provide a view of web content. It’s basically the Safari browser from your iOS device, but without all the functionality for controlling it, such as back buttons, bookmark management, and so on. You can use this control to get a view of HTML data embedded in your app. This is useful when that’s the type of data that you want to render, because managing HTML for yourself within your app, including layout, styling, JavaScript, and all of the other bits and pieces that go into a web page, is a very complex task.
You can see where the “Web View” control is in Safari in Figure 11-1.

Figure 11-1. The “Web View” control in Safari
The rest of the browser app is typically called the “chrome,” and it includes the address bar, buttons, other screens such as bookmark management, and more. Incidentally, this is what inspired the name for Google’s browser, as its aim was to reduce the amount of chrome that was visible on the screen, for a clean, elegant look. In the next section you’ll take a look at how to build a very basic browser—one with a lot less chrome than the Safari one, using the “Web View” control.
Build a Web View App
This chapter will gloss over many of the basic concepts of building an app, such as what is in the project and where. We’ll mostly be asking you to create outlets and actions without showing you how. If you’re not familiar with any of the concepts, go back, and at least read Chapter 2 and Chapter 4, where you’ll see how to create applications and how to use the storyboard editor to add controls to your view controller, as well as how to wire them up with outlets and actions.
Designing the App
To begin, create a single view application and call it “webViewDemo.” When you’re done, open its “Main.storyboard” file.
On the controls list at the bottom right of the screen, scroll until you see the “Web View” control. It should look like Figure 11-2.
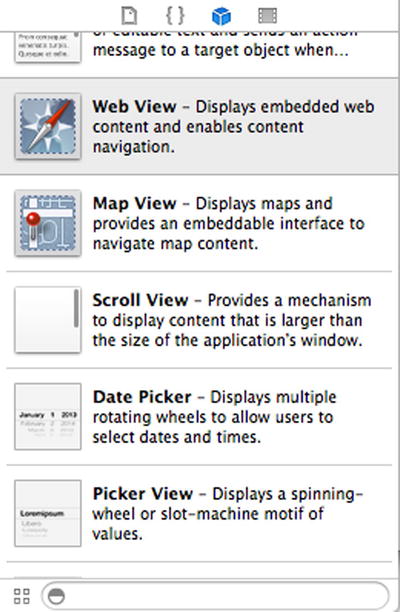
Figure 11-2. Finding the web view
Drag and drop the “Web View” control onto your view on the storyboard. It will automatically size itself to take up the full size of the window. You do not want to do this, and the simple trick to avoid it is to drop it somewhere other than directly on the window. See Figure 11-3, where I’ve dropped it off to the side a little.
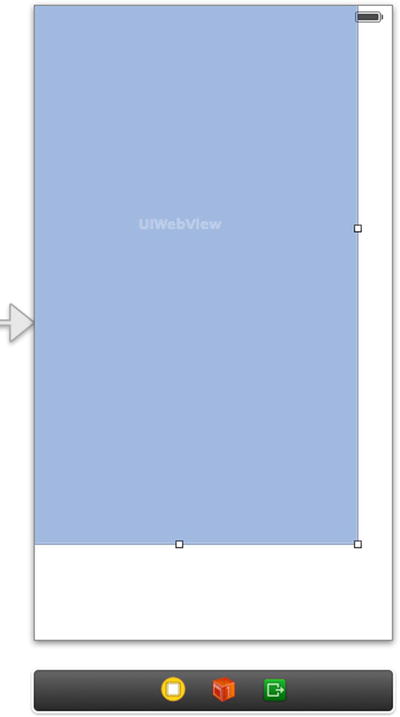
Figure 11-3. Dropping the web view to the side
Once you do this, you get sizing handles that you can use to size and place the web view where you want it. Put it where it fills the bottom of the view, leaving a small space at the top, as shown in Figure 11-4.
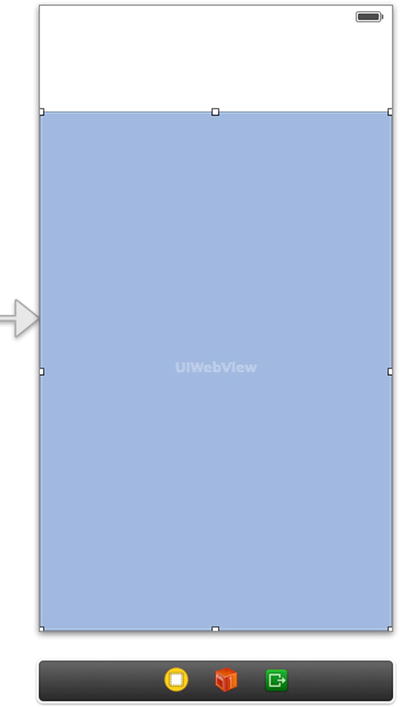
Figure 11-4. Placing the web view for our app
Now that you’ve placed it, add a text field and a button at the top of the view and change the button’s title to “Go.”
When you’re done, the designer should look something like Figure 11-5.
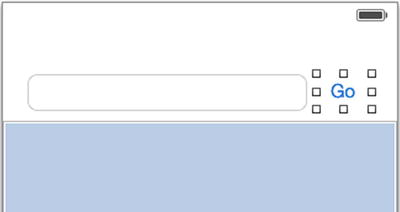
Figure 11-5. Adding the text field and the button
Outlets, Actions, and Delegate Declarations
Now you need to set up some outlets and actions. All of this should be done with the assistant using CTRL-dragging of the relevant controls and dropping them onto ViewController.h.
For the web view, create an outlet called “webView.”
For the text field, create an outlet called “txtAddress” and create an action for the “Editing did End” event that you call “AddressChanged.”
For the button, create an action called “GoPressed” that works for the “Touch Up Inside” event.
Finally, while you’re editing ViewController.h, add a <UITextFieldDelegate> delegate to the interface. When you’re done, your complete ViewController.h should look like this:
#import <UIKit/UIKit.h>

@interface ViewController : UIViewController<UITextFieldDelegate>
@property (strong, nonatomic) IBOutlet UITextField *txtAddress;
@property (strong, nonatomic) IBOutlet UIWebView *webView;
- (IBAction)AddressChanged:(id)sender;
- (IBAction)GoPressed:(id)sender;

@end
Note If you’re not familiar with some of the text field constructs, such as using the delegate, the delegate methods, or the concept of first responder, check back in Chapter 5, where we go through it in more detail.
Now it’s time to edit the “ViewController.m” file
Editing the Code
In this section you’re going to edit the code in ViewController.m. You’ll set up the delegate functionality and handle UITextField events. You’ll also write a custom method that will be shared between multiple actions.
Managing the UITextFieldDelegate
First off, because you set it up to be a UITextFieldDelegate, you should do a little setup and housecleaning.
Within your viewDidLoad method , as you called the textfield txtAddress, set the delegate for txtAddress to be self.
- (void)viewDidLoad
{
    [super viewDidLoad];
        // Do any additional setup after loading the view, typically from a nib.
    _txtAddress.delegate = self;
}
In order for the “Return” key to work on the keyboard, you also need to create a textFieldShouldReturn method. As this class is a UITextFieldDelegate, there’s a specific syntax that you need to call. Go to the bottom of the file, just above @end, and start typing the letters –te; a hint window will pop up. See Figure 11-6.

Figure 11-6. Adding the textFieldShouldReturn method
Choose the textFieldShouldReturn method from the list and press “Enter” to insert the declaration.
Within this code you should read the address of the textField. Then use this to generate a call to the Internet for that address and load the results into the web view. However, because you will also be doing the same thing in the “Go” button, you’re not going to write all that code in the textFieldShouldReturn method. Instead, in a few moments you’ll write a method called “CallWeb” and use that to manage the web view. Within textFieldShouldReturn, you’ll just call this method.
Enter this code:
-(BOOL)textFieldShouldReturn:(UITextField *)textField
{
    NSString *addr = _txtAddress.text;
    [_txtAddress resignFirstResponder];
    [self CallWeb:addr];

    return true;
}
Let’s look at this line by line:
NSString *addr = _txtAddress.text;
This will simply take the text that the user entered and use the NSString variable addr to reference it.
[_txtAddress resignFirstResponder];
You learned about first responders in Chapter 5. This line simply resigns first responder status from _txtAddress, having the effect of dismissing the keyboard.
[self CallWeb:addr];
This will give you an error at the moment because you haven’t written the CallWeb method yet. Don’t worry about that for now; just make sure you enter the code as shown. This will call the CallWeb method and pass it the address that was typed in.
return true;
The method has finished executing, so just return true to let the operating system know you’re done, and everything is fine!
Creating the Custom CallWeb Method
The custom text field method that you just wrote calls a method named CallWeb, which hasn’t been created yet. It used the syntax [self CallWeb:addr], which gives a hint as to where and how you should write the code for this method.
First, as it is in “self,” it should be written in ViewController.m. Second, as you pass addr to it, which is an NSString*, you should create it to be able to accept an NSString* .
Here’s what that should look like:
-(void)CallWeb:(NSString *)addr
{
}
When using the web view control, you can tell it to go to a page using an NSURLRequest object. This object can be initialized using an NSURL object, which contains the URL of the resource that you want to load.
Tip If you’re not familiar with the term “URL,” it means Uniform Resource Locator, and it’s a way of defining addresses on the Internet. URLs are commonly confused with addresses, and they’re not exactly the same. When using a URL, the protocol used to determine the content also needs to be specified. Typically when thinking of web sites, where the protocol is http://, we refer to URL and address interchangeably, but this not exactly correct. Http stands for Hypertext Transfer Protocol, and, along with its secure cousin https://, where the “s” stands for Secure, it is the standard method for browsing pages on the Internet.
So, for example, the web site ios7developer.com has ios7developer.com as its address, but http://ios7developer.com or http://www.ios7developer.com as its URL.
Consider the case of an FTP site—for the preceding site, the address of the ftp site is still ios7developer.com, but the URL is ftp://ios7developer.com.
So, our addr variable has the address of the site, but we need to turn this into a URL by using an NSURL object before we can create a web request using an NSURLRequest object.
In Objective-C we can do that like this:
NSURL *url = [NSURL URLWithString:addr];
NSURLRequest *theRequest = [NSURLRequest requestWithURL:url];
The first line simply creates an NSURL object called url and initializes it using the string addr. Similarly, the second line uses an NSURL object to generate a request.
Now, to use this request so as to have the web view load the page, we simply use the loadRequest message on the web view, like this:
[_webView loadRequest:theRequest];
This would work very well, but it requires the user to type the http:// before every address, because if you remember the preceding example, a name like ios7developer.com is an address, and not a URL, and if you ask the web view to load ios7developer.com it’ll get confused and do nothing.
So let’s do a little coding and take a look at the address that comes in. If it has the text “http://” in it, we’ll use it. If not, we’ll add “http://” to the front of it.
Here’s the code:
NSString *urlString;
addr = [addr lowercaseString];
if([addr rangeOfString:@"http://"].location == NSNotFound)
{
    urlString = @"http://";
    urlString = [urlString stringByAppendingString:addr];
}
else
{
    urlString = addr;
}
NSURL *url = [NSURL URLWithString:urlString];
First, we create a new NSString called urlString and leave it uninitialized and empty. Then we convert the address that was passed to the method (addr) to lower case. This makes it easier to compare, and because typical URLs are not case sensitive, we can do this.
Then, using the rangeOfString message on addr, we can determine if the text “http://” is present. If it isn’t, the result of its location will be NSNotFound. In that case, urlString will be set to the text “http://,” and then addr will be appended to that. If it is present, then urlString will just be set to whatever was in addr.
Then we go ahead and create the NSURL as before.
Here’s the complete method:
-(void)CallWeb:(NSString *)addr
{
    NSString *urlString;
    addr = [addr lowercaseString];
    if([addr rangeOfString:@"http://"].location == NSNotFound)
    {
        urlString = @"http://";
        urlString = [urlString stringByAppendingString:addr];
    }
    else
    {
        urlString = addr;
    }
    NSURL *url = [NSURL URLWithString:urlString];
    NSURLRequest *theRequest = [NSURLRequest requestWithURL:url];
    [_webView loadRequest:theRequest];
}
You’re almost done. Before running the app, you’ll just need to add code to the actions you already created.
Earlier, you created action methods called GoPressed for when the user pressed the Go button and AddressChanged for whenever the contents of the text field changed. In this case, if the user changes the contents of the text field and then taps elsewhere on the screen, the event will fire.
For both of these methods you do pretty much what you did in textFieldShouldReturn—get the address, resign the first responder, and call the CallWeb method.
Here’s the code:
- (IBAction)AddressChanged:(id)sender {
    NSString *addr = _txtAddress.text;
    [_txtAddress resignFirstResponder];
    [self CallWeb:addr];

}

- (IBAction)GoPressed:(id)sender {
    NSString *addr = _txtAddress.text;
    [_txtAddress resignFirstResponder];
    [self CallWeb:addr];
}
And that’s everything you need. Run the app and give it a try.
Note You have the same lines of code in AddressChanged, GoPressed, and textFieldShouldReturn. This is violating a general principle called DRY (don’t repeat yourself). As an exercise, how would you avoid this? Hint: Some of this code could be added to CallWeb. We’ll give you the answer in the next section.
Running the App
Now if you run the app you just created, you’ll see that you have a basic web browser of your own! Try it by typing an address and then either pressing the “Return” key on the keyboard or clicking the “Go” button. See Figure 11-7 to see it in action!

Figure 11-7. Using your embedded browser
This isn’t just a dumb rendering of HTML—it’s a fully functional browser. For example, in Figure 11-7, we visited Amazon.com and searched for a book using Amazon’s search engine. The results are shown in the mobile browser view.
Note Yes, that’s a real book, and it’s one of my novels, so I guess this is a shameless self-plug. Sorry about that. ![]() Laurence Moroney
Laurence Moroney
For your convenience, here’s the full code, with changes made to prevent DRY.
#import "ViewController.h"

@interface ViewController ()

@end

@implementation ViewController

- (void)viewDidLoad
{
    [super viewDidLoad];
        // Do any additional setup after loading the view, typically from a nib.
    _txtAddress.delegate = self;
}

- (void)didReceiveMemoryWarning
{
    [super didReceiveMemoryWarning];
    // Dispose of any resources that can be recreated.
}

- (IBAction)AddressChanged:(id)sender {
    [self CallWeb];
}

- (IBAction)GoPressed:(id)sender {
    [self CallWeb];
}

-(BOOL)textFieldShouldReturn:(UITextField *)textField
{
    [self CallWeb];
    return true;
}

-(void)CallWeb
{
    NSString *addr = _txtAddress.text;
    [_txtAddress resignFirstResponder];
    NSString *urlString;
    addr = [addr lowercaseString];
    if([addr rangeOfString:@"http://"].location == NSNotFound)
    {
        urlString = @"http://";
        urlString = [urlString stringByAppendingString:addr];
    }
    else
    {
        urlString = addr;
    }
    NSURL *url = [NSURL URLWithString:urlString];
    NSURLRequest *theRequest = [NSURLRequest requestWithURL:url];
    [_webView loadRequest:theRequest];
}
@end
Creating an Internet-Connected App
In the previous section, you saw how to create an app that used a web view to connect to the Internet and render the contents of a web site. But how about if you don’t want your app to show a web page, and instead want it to render data that it gets off the web? In this section, you’ll learn how to do that by building an app that serves random inspirational quotes from Martin Luther King, Jr., sourced off the web.
You can see the quotes by visiting http://ios7developer.com/book/quotes.php or http://mlk-quotes.appspot.com/quotes .

To create an app that consumes this service and gives you a random Martin Luther King, Jr. quote, create a new single view application. Open its “Main.storyboard” file and add a label and a button.
Make the label large enough to fill the top half of the screen and add the button beneath it. Change the title for the button to “Get Quotes.” Your screen should look like Figure 11-9.

Figure 11-9. Adding the label and the button
With the label selected, open the attributes inspector and change the number of lines to 0 (it was 1 when you placed the label), and then set the “Line Breaks” setting to “Word Wrap.” See Figure 11-10. Setting the number of lines to 0 like this makes the label size itself dynamically to fit your text.

Figure 11-10. Setting the label attributes
Next, create an outlet for the label and call it “lblQuote.”
Create an action for the button and call it “btnGetQuote.”
When you’re done, your ViewController.h should look like this:
#import <UIKit/UIKit.h>

@interface ViewController : UIViewController
@property (strong, nonatomic) IBOutlet UILabel *lblQuote;
- (IBAction)btnGetQuote:(id)sender;

@end
Once you’ve finished editing that, it’s time to edit your “ViewController.m” file to implement the code that will execute when the user clicks the button.
You’ll be using the stringWithContentsOfURL message on the NSString object to get the data. This requires you to have an NSError object, which will catch any communications errors, so declare that first. All this code will be in the btnQuote method .
NSError *error=nil;
Next, you’ll create an NSURL object and initialize it with the string containing the address of the service.
NSURL *theURL = [NSURL URLWithString:@
        "http://mlk-quotes.appspot.com/quotes"];
Once you have the NSURL , you can use it to populate a string. You’ll have to specify an encoding and the place to put any errors. Encoding is how text is represented on your computer and how it is transmitted across the Internet. The most common format for straight, English text is called ASCII (American Standard Code for Information Interchange), which is represented by the NSASCIIStringEncoding constant.
Here’s the code:
NSString *theQuote = [NSString stringWithContentsOfURL:theURL encoding:NSASCIIStringEncoding error:&error];
If you have a connection to the Internet, and if the service is running correctly, you’ll get a string returned to theQuote—otherwise the string will be empty.
You can check this by inserting if(theQuote), which will return true if there’s something in the string and false otherwise. If there’s something in the string, you can load it into the label. If there isn’t, you can load the details of the error into the string.
Here’s the code:
if(theQuote)
{
    _lblQuote.text = theQuote;

}
else
{
    _lblQuote.text = [NSString stringWithFormat:@"Error, can't get quote. Details:%@",error];
}
Here’s the full btnGetQuote function:
- (IBAction)btnGetQuote:(id)sender {
    NSError *error=nil;
    NSURL *theURL = [NSURL URLWithString:@"http://mlk-quotes.appspot.com/quotes"];
    NSString *theQuote = [NSString stringWithContentsOfURL:theURL encoding:NSASCIIStringEncoding error:&error];
    if(theQuote)
    {
        _lblQuote.text = theQuote;

    }
    else
    {
        _lblQuote.text = [NSString stringWithFormat:@"Error, can't get quote. Details:%@",error];
    }
}
Now if you run the app and click the “Get Quotes” button, you’ll see a random, inspirational quote. See Figure 11-11.
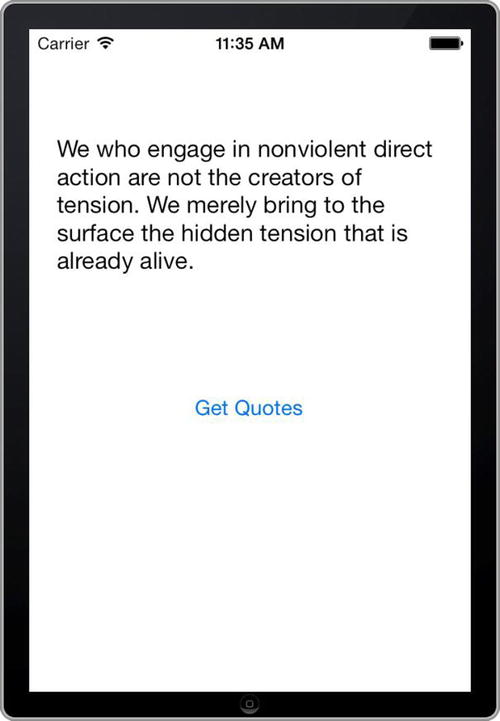
Figure 11-11. The Internet-connected quote app
This service has 33 quotes and serves one at random each time it’s called. See which one is your favorite!
I personally like “The time is always right to do what is right.” See if you can get the app to render it!
String data is relatively trivial, so let’s look at one more example—one in which you download an image from the web and render it in your app.
Download an Image from the Web
In this section you’ll create an app that’s similar to the one from the previous section, in which you press a button to download content from the web. In this case, the content will be a bit more sophisticated than a string—you’ll download an image.
Create a new single view application and call it “downloadImageTest .” Open Main.storyboard and add an “image view” control and a button to it.
Make the image view about 2/3 of the height of the screen. Center the button and give it the title “Get Image.” See Figure 11-12.

Figure 11-12. Laying out the image view app
Create an outlet for the image view and call it “imgPic.”
Create an action for the button and call it “btnGetImage.”
When you’re done, your ViewController.h should look like this:
#import <UIKit/UIKit.h>

@interface ViewController : UIViewController
@property (strong, nonatomic) IBOutlet UIImageView *imgPic;
- (IBAction)btnGetImage:(id)sender;

@end
Now it’s time to edit your ViewController.m to implement the code for btnGetImage.
First, create an NSString to hold the address of the image:
NSString *urlString = @"http://mlk-quotes.appspot.com/mlk.jpg";
This string can be used to create an NSURL object, as follows:
NSURL *url = [NSURL URLWithString:urlString];
Data can be downloaded into an NSData object, and this, similar to the string earlier, can be initialized using a URL. So, to load the binary data that represents the picture, you can create an NSData object like this:
NSData * imageData = [[NSData alloc] initWithContentsOfURL: url];
At this point, it’s not a picture—it’s just the data representing the picture. To turn the NSData object into a picture, you can use it to create a UIImage object. This object can be assigned to the image property of the image view in order to render the image.
Here’s the code:
_imgPic.image = [UIImage imageWithData: imageData];
At this point the image view has the image and will draw it.
Here’s the entire code for btnGetImage :
- (IBAction)btnGetImage:(id)sender {
    NSString *urlString = @"http://mlk-quotes.appspot.com/mlk.jpg";
    NSURL *url = [NSURL URLWithString:urlString];
    NSData * imageData = [[NSData alloc] initWithContentsOfURL: url];
    _imgPic.image = [UIImage imageWithData: imageData];

}
Now if you run the app and click the button, you’ll see the image get downloaded and rendered into the image view.
See Figure 11-13.
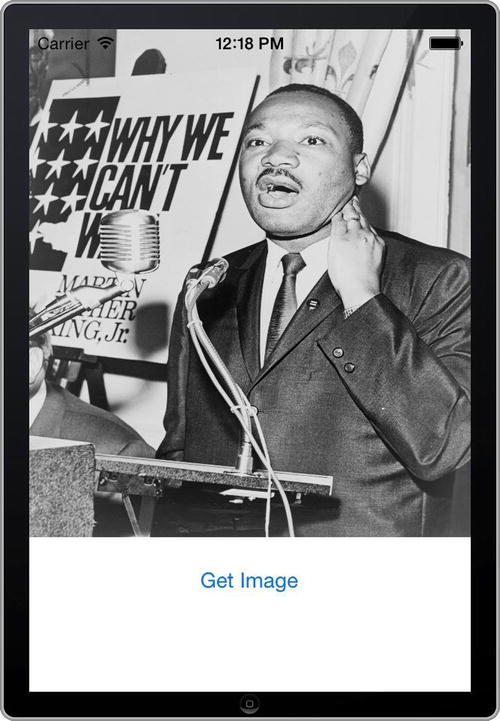
Figure 11-13. The image download app in action
Hopefully this has whetted your appetite for the types of apps you can build with Internet connectivity!
Summary
In this chapter you learned about connecting your app to the web. You saw how to use the “Web View” control to create a simple web browser app, which allowed you to render web sites. You then went under the hood to learn how to write code that downloaded data from the web, first by calling a cloud service that gave you a random inspirational quote, and then by downloading a web image and rendering it in your app. While these scenarios are relatively simple, they give you the building blocks for typical web applications. Hopefully these examples have been as inspirational as the quotes from the cloud service!