A very common scenario for application developers in iOS is to add mapping to an application. Apple launched a new mapping service in 2012, and there’s a really useful toolkit that’s available to integrate this into your apps. In this chapter you’ll learn how to use the mapping control, as well as the MapKit libraries, to build a simple mapping app that shows you the basics of how it works!
Creating a Mapping App with the Map View
Let’s roll our sleeves up and get started with creating a new app that uses mapping. If you aren’t familiar with creating new apps, it’s a good idea to go back to Chapter 2 and Chapter 4 for a quick getting-started guide.
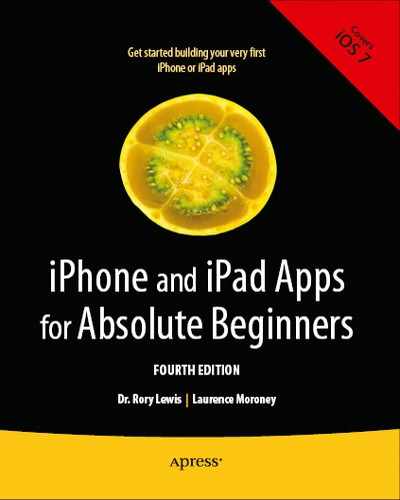
Create a new single view app and call it “mapControlDemo .” When this is done, open the “Main.storyboard” file and find the “Map View” control. You can see this in Figure 10-1.
Figure 10-1. The “Map View” control
Drag and drop the “Map View” control, and it will snap to fill the full screen area. If you try to run the app at this point it will fail because you haven’t included the necessary libraries for the MapKit. This is a common scenario in iOS development, and while this is the first time you’ve hit something like this, it won’t be the last!
It’s easy to do though, so let’s take a look at how you add new libraries to your app.
First, in the project navigator, make sure that you’ve selected just the project file and none of the source files. It will be the entry at the top with the blue Xcode icon. See Figure 10-2.
Figure 10-2. Selecting the project file
Once you’ve done this, you’ll see the project settings in the center of your Xcode window. It should look something like Figure 10-3.

Figure 10-3. Xcode project editor settings
Across the top of the screen you’ll see a number of tabs. Select the one called “General.” You’ll see a section called “Linked Frameworks and Libraries,” which you should open. You’ll see that CoreGraphics, UIKit, and Foundation are the specified linked libraries. See Figure 10-4.
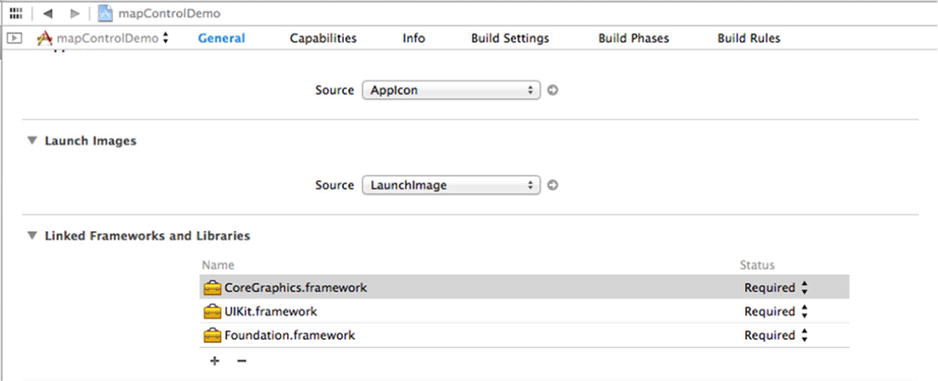
Figure 10-4. Linking with libraries
Click the “+” button at the bottom of the list, and you’ll be presented with a list of frameworks and libraries that you can add. See Figure 10-5.

Figure 10-5. Choosing your framework
Pick the MapKit framework as shown in Figure 10-5 and click “Add.” Now you can launch your app, and it should run happily.
Tip You can search for frameworks instead of scrolling through the entire list. Simply type into the search box, and Xcode will filter the list based on your criteria.
The app will fill your screen, including the area behind the clock and battery meter at the top. See Figure 10-6.

Figure 10-6. Running your app
You can now pan around the app and simulate multi-touch to zoom in and out of the app by holding the “Option” key on your keyboard as you drag.
In the previous section you saw how to add a “Map View” control to your app. It filled the screen and allowed you to explore it, but other than that there was no interactivity. In this section you’ll amend the app so that whenever the user moves the map, it will report back on the location of the center of the map in latitude and longitude.
If the app is running, stop it and go back to your Main.storyboard file. Resize the “MKMapView” control so that it fills the top half of the screen. Sometimes it’s a little tricky to do this, so we find the best thing to do is drag the control off the view, resize it using a corner, and then drag it back on and resize further.
You can see it filling the top half of the View in Figure 10-7.
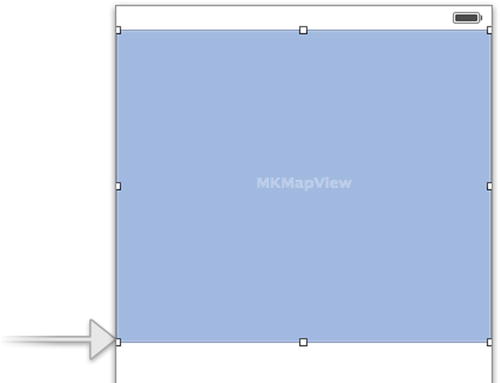
Figure 10-7. Resizing the MKMapView
Add two labels below this, and make sure that they fill the width of the screen. When you’re done, CTRL-drag them to ViewController.h in the assistant window to create two outlets called “lblLatitude” and “lblLongitude ,” respectively.
Also, create an outlet for the MKMapView and call it “myMap.”
Mapping works using delegates, so you need to tell your view controller that you’ll be using them. This is done in the “ViewController.h” file. First, you need to import the header files for the MapKit at the top of the file:
#import <MapKit/MapKit.h>
Then you’ll need to implement the interface to have your view controller be an MKMapViewDelegate. Here’s the code:
@interface ViewController : UIViewController<MKMapViewDelegate>
Here’s the complete code for your ViewController.h file:
#import <UIKit/UIKit.h>
#import <MapKit/MapKit.h>
@interface ViewController : UIViewController<MKMapViewDelegate>
@property (strong, nonatomic) IBOutlet UILabel *lblLatitude;
@property (strong, nonatomic) IBOutlet UILabel *lblLongitude;
@property (strong, nonatomic) IBOutlet MKMapView *myMap;

@end
Now, go to the “ViewController.m” file and make the edits. Start with your viewDidLoad function, where you’ll inform iOS that this view controller is the delegate for your map control, which you called myMap. Here’s the code:
- (void)viewDidLoad
{
    [super viewDidLoad];
        // Do any additional setup after loading the view, typically from a nib.
    _myMap.delegate = self;
}
The control supports lots of different methods, and the one you’re going to use in this example is the regionDidChangeAnimated function . This function will get called whenever the user changes the location of the map by panning or zooming. Start typing –(void)m, and you’ll see a hint pop up with a list of all the functions that are available, because you’ve set this view up as an MKMapViewDelegate . See Figure 10-8.

Figure 10-8. Choosing the mapping function
Select the regionDidChangeAnimated function and create braces for the function. Your code should look like this:
-(void)mapView:(MKMapView *)mapView regionDidChangeAnimated:(BOOL)animated
{

}
The map control has a property called region, which has a property called center, which defines the coordinates of the center of the map. This includes a latitude and a longitude value for the center of the map. Each is a floating point number, and you can get the string for the latitude like this:
NSString *lat = [[NSString alloc]
    initWithFormat:@"%f",_myMap.region.center.latitude];
Similarly, the longitude can be loaded into a string like this:
NSString *longt = [[NSString alloc]
    initWithFormat:@"%f",_myMap.region.center.longitude];
These can be assigned to the labels via their outlets. Here’s the complete function:
-(void)mapView:(MKMapView *)mapView regionDidChangeAnimated:(BOOL)animated
{
    NSString *lat = [[NSString alloc] initWithFormat:@"%f",_myMap.region.center.latitude];
    _lblLatitude.text = lat;

    NSString *longt = [[NSString alloc] initWithFormat:@"%f",_myMap.region.center.longitude];
    _lblLongitude.text = longt;

}
Now if you run your app and move the map around, you’ll see the longitude and latitude of the current map center. See Figure 10-9.
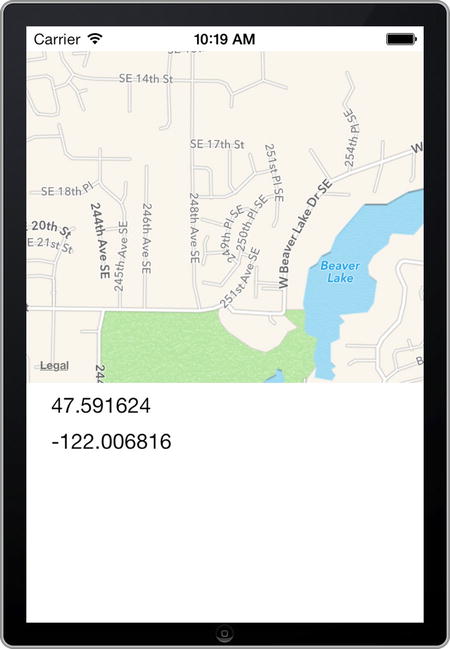
Figure 10-9. Viewing the latitude and longitude of the center of the map
As you zoom and pan around the map, you’ll see the labels update with the current center coordinates. In Figure 10-9, you can see where we’ve set the map location to be a neighborhood on the east side of Seattle.
Another common scenario for mapping applications is adding pins to a map to denote a particular area. This can be done using annotations. In this section, you’ll see how to update the simple app to allow you to drop pins on the center of the map.
Before starting, you’ll need to create a custom class that represents your pin. Right click on the mapControlTest folder in project navigator, and select “New File.” See Figure 10-10.

Figure 10-10. Adding a new file to a project
You’ll see a dialog that asks you to choose a template for your new file. Pick “Objective-C Class” and click “Next.”
The next dialog asks you to name the class and specify its subclass. Give it the name “myPin” and set the subclass field to “NSObject.” Click “Finish” and then click “Create.” The class will be added to your project.
This class will be a map annotation, which needs to implement the MKAnnotation interface. To do this, open your “myPin.h” file and add an import to the MapKit headers.
#import <MapKit/MapKit.h>
Next you have to specify that your class implements the MKAnnotation interface. Here’s the code, with the changes in bold:
@interface myPin : NSObject<MKAnnotation>
Finally, your annotation class should implement properties that an annotation needs, with—at the very minimum—a coordinate, which is a CLLocationCoordinate2D type, and a title, which is an NSString type. You must use these names, or the interface won’t work. The concept of interfaces in object-oriented programming means that if you build an object that implements an interface, its data classes should be the same as those in the class it is using. As such, you must use these names.
Here’s the complete myPin.h code:
#import <Foundation/Foundation.h>
#import <MapKit/MapKit.h>

@interface myPin : NSObject<MKAnnotation>
{
    CLLocationCoordinate2D coordinate;
    NSString *title;
}

@property (nonatomic,copy) NSString *title;
@property (nonatomic, assign) CLLocationCoordinate2D coordinate;

@end
Now your class’s implementation file “myPin.m” has a very simple implementation—you just need to synthesize the properties that you created on myPin.h.
Here’s the full code for myPin.m:
#import "myPin.h"

@implementation myPin
@synthesize coordinate,title;


@end
Now let’s edit the user interface to add a button. Open Main.storyboard, drag a “Button” control to the view, and edit its title to read “Drop Pin.” See Figure 10-11.

Figure 10-11. Adding a button to the app
Using the assistant, create an action by CTRL-dragging the button to ViewController.h. Give it the name “dropPin,” and make sure the “Event” field reads “Touch Up Inside.” Click “Connect” to create the function. See Figure 10-12.
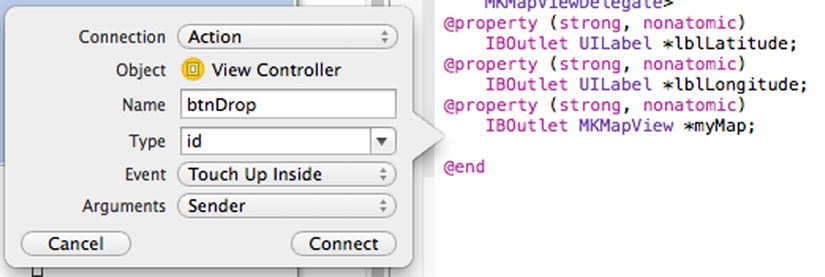
Figure 10-12. Creating the button action
In your ViewController.m, you’ll see a btnDrop function is created for you. It looks like this:
- (IBAction)dropPin:(id)sender {
}
Before you can code this function, which will use a myPin object, you have to tell ViewController.m about myPin by importing its header.
At the top of the ViewController.m, add this code:
#import "myPin.h"
Now, within this method, you can create an instance of myPin and set its coordinate value from the map center, like this:
CLLocationCoordinate2D center = _myMap.region.center;
myPin *thePin = [[myPin alloc] init];
thePin.coordinate = center;
You can then assign a title to it, like this:
thePin.title = @"Map Center";
Then add it to the map, like this:
[_myMap addAnnotation:thePin];
For your convenience, here’s the entire ViewController.m code:
#import "ViewController.h"
#import "myPin.h"
@interface ViewController ()

@end

@implementation ViewController

- (void)viewDidLoad
{
    [super viewDidLoad];
        // Do any additional setup after loading the view, typically from a nib.
    _myMap.delegate = self;
}

- (void)didReceiveMemoryWarning
{
    [super didReceiveMemoryWarning];
    // Dispose of any resources that can be recreated.
}

-(void)mapView:(MKMapView *)mapView regionDidChangeAnimated:(BOOL)animated
{
    NSString *lat = [[NSString alloc] initWithFormat:@"%f",_myMap.region.center.latitude];
    _lblLatitude.text = lat;

    NSString *longt = [[NSString alloc] initWithFormat:@"%f",_myMap.region.center.longitude];
    _lblLongitude.text = longt;

}

- (IBAction)dropPin:(id)sender {
    CLLocationCoordinate2D center = _myMap.region.center;
    myPin *thePin = [[myPin alloc] init];
    thePin.coordinate = center;
    thePin.title = @"Map Center";


    [_myMap addAnnotation:thePin];
}
@end
Run the app, and when you press the button, a pin will be dropped in the center of the map. You can also touch the pin to see the string. As you pan the map around and drop new pins, the old ones will stay in their previous locations. See Figure 10-13.

Figure 10-13. Using pins on a map
Now that you’ve seen how to add annotations, let’s next look at changing the map type between a standard map and satellite imagery.
In order to change the map mode, you use the mapType property of the map view, which takes the values MKMapTypeStandard, MKMapTypeSatellite, or MKMapTypeHybrid, which correspond to a standard map, a satellite view, and a mixed map with both styles, respectively.
If the app is presently running, stop it and open Main.storyboard.
In Chapter 7 you learned about the “segmented” control, which allows you to have multiple commands across a horizontal space. On Main.storyboard, drop a segmented control onto the design surface of your view controller. Using the attributes inspector add a new segment by setting the ”segments” value to 3. Give the segments the names “Map,” “Satellite,” and “Hybrid,” respectively.
See Figure 10-14.
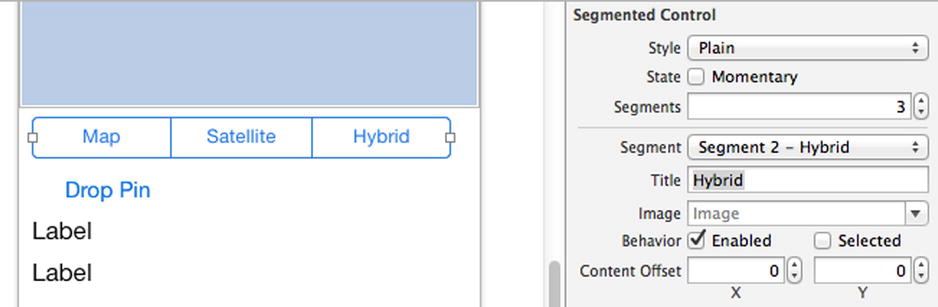
Figure 10-14. Adding a segmented control
Create an outlet for the segmented control, called “styleChosen,” and create an action for it called “btnChoose.”
Now, in your ViewController.m, you’ll have a function called btnChoose that looks like this:
-(IBAction)btnChoose:(id)sender {
}
As you created an outlet called “styleChosen ” for the segmented button, you can find out which segment was touched by the user with its selectedSegmentIndex property. The following code will change the mapType based on what the user touched.
- (IBAction)btnChoose:(id)sender {
    switch(_styleChosen.selectedSegmentIndex)
    {
        case 0:
            _myMap.mapType = MKMapTypeStandard;
            break;
        case 1:
            _myMap.mapType = MKMapTypeSatellite;
            break;
        case 2:
            _myMap.mapType = MKMapTypeHybrid;
    }
}
You can now run the app and change the map type using the segmented control.
Figure 10-15 shows the app with the map in satellite mode.

Figure 10-15. Map in satellite mode
Selecting the hybrid mode will give you satellite imagery overlaid with titles such as street names, park names, and metadata like one-way streets. See Figure 10-16.
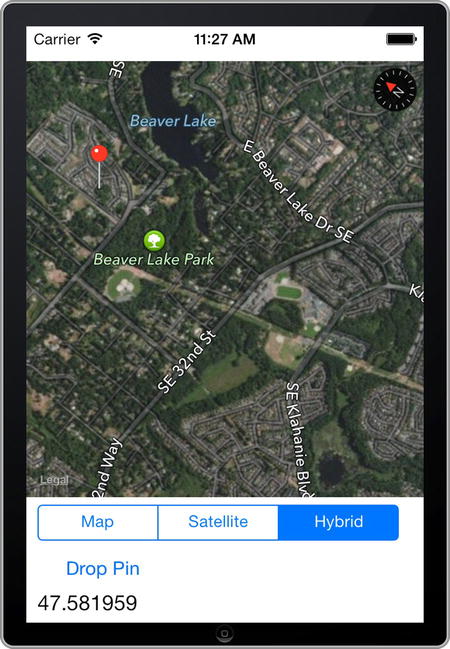
Figure 10-16. Seeing the map in hybrid mode
Hopefully these were good examples that will teach you the basics of mapping. There is a lot more great information about how to use MapKit on Apple’s developer site at: http://developer.apple.com/library/ios/#documentation/MapKit/Reference/MapKit_Framework_Reference/_index.html.
Summary
In this chapter, you were introduced to mapping in iOS. You saw how to use the “Map View” control and the Map Kit libraries to add a map to your application and to query that map for its location. You also saw how to add annotation pins to the map, as well as how to change the map mode to different styles, such as a basic map, a satellite image, or a hybrid of the two. Mapping is an integral part of many iOS applications, and this was an introduction on how to use it!