Your First iOS Apps
The first app you’ll build is a basic “Hello, World” app where, despite the simplicity of the app, you’ll implement some of the functionality that is found in more advanced applications, including taking user input and having your code update the user interface as a result. By the time you finish this chapter, you’ll know how to run the app in the following three ways:
- iPhone app on iPhone simulator: This shows you how to run an iPhone app in the iPhone aspect ratio on an iPhone-sized emulator.
- iPhone app on iPad simulator: iPhone applications can be run on iPads too, with a special “2x” mode that enlarges the user interface to make it fit the screen. You’ll see how to test your iPhone app with the iPad simulator to see how it would look in this scenario.
- iPad app on iPad simulator: Applications can also be written specifically for the iPad, taking advantage of the larger screen resolutions. You’ll see how to do that too!
Note Supplementing this book are a number of screencasts of the examples in this book. If you prefer video instead of step-by-step reading, we hope they’ll be a great resource for you. You can access these, as well as blogs and help forums around the book, by visiting ios7developer.com.
Creating Your First iPhone App
In this first example, you’re going to create an app that gives you a button and a label. When you tap the button, text will appear on the label that says “Hello World!” This is a very simple app, but you’re going to spend quite a bit of time, and quite a few pages, on it. That is because an app like this, despite its simplicity, implements many of the concepts found in larger, more sophisticated apps, making it a really useful learning tool.
Use Xcode to create your app. Launch Xcode, and the “Welcome to Xcode” screen will appear. See Figure 2-1.
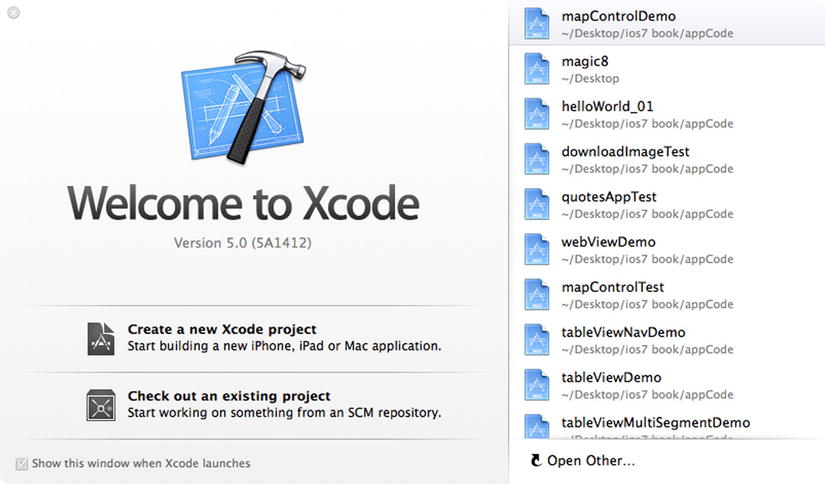
Figure 2-1. The “Welcome to Xcode” screen
Click the “Create a new Xcode project” option, and you’ll see a list of templates for your new application.
Your first application will use the “Single View Application” template. Select it as shown in Figure 2-2, and click “Next.”
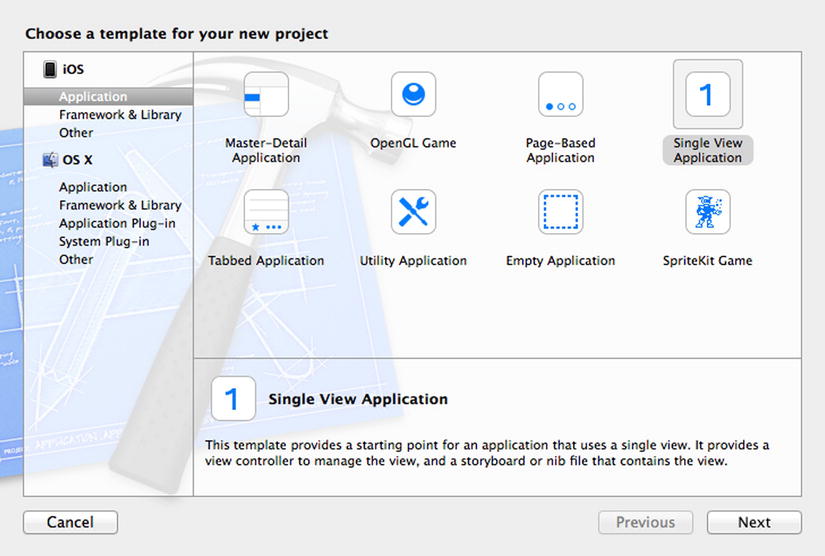
Figure 2-2. Selecting your application template
When you click “Next,” you’ll see a new dialog that requests the options for your new project.
These settings are shown in Figure 2-3, and the recommended settings are:
- Product Name: This is the name of your app. For now use “helloWorld_01.”
- Organization Name: This is the name of your organization, or yourself if you are an individual developer.
- Company Identifier: This is the identifier for your company. It is written in reverse-domain-name format. So, for example, if your company is ios7developer.com, you would use “com.ios7developer” here. The reason for this is that once you deploy your app to the app store, you could have different apps with the same name, written by different people. Our “Hello, World” will be com.ios7developer.helloWorld_01, whereas yours will be different.
- Class Prefix: This is used to organize your classes into namespaces, which defaults to matching your company identifier. For the sake of simplicity, erase the class prefix. It will make your initial code easier to read.
- Devices: You’ll see the drop-down list giving you the options “iPad”, “iPhone,” and “Universal.” This defaults to “iPhone,” so keep it that way. A “Universal” selection is one that runs on both iPhone and iPad.

Figure 2-3. Setting the options for your new project
Click “Next,” and you’ll get a dialog that asks you where you want to create your code. It will likely default to your desktop. If not, use the drop-down list at the top of the screen to specify your desktop and click “Create.” You can see this in Figure 2-4.

Figure 2-4. Choosing your source location
Note that you should keep the “Source Control” checkbox at the bottom unchecked. If you were to check this box, you would be enabling Source Code control through git. This allows you to work with other developers in such a way that you can check changes in and out, avoiding multiple people touching code at the same time. It’s beyond the scope of this book, but if you’re interested in learning more about git, the ‘Pro Git’ book by Scott Chacon is available for free here: http://git-scm.com/book.
Once you click “Create,” Xcode will create a folder on your desktop containing all the source code and metadata that your application needs. Xcode will also launch the workbench that you’ll use for editing your user interface and code. You’ll see that in the next section. Congratulations—you’ve created your first iPhone app project!
Xcode and Your Project Files
In the previous section you created your first app, called helloWorld_01, and saved it on the desktop. Xcode then launched, showing your application.
Figure 2-5 shows what the top-left-hand side of Xcode will look like. If you don’t see the code files listed, make sure the folder icon in the toolbar is selected, as shown in Figure 2-5.

Figure 2-5. Exploring your Xcode project
There are lots of files shown here, and you’ll learn what each does as you work along through this book. You can see that there are two pairs of files (AppDelegate and ViewController), each with a “.h” and a “.m” file. These are called classes, and they have the code for your application in Objective-C. AppDelegate has the code for the shell of your application, and ViewController has the code for the default view of your application. Think about a single-view application as a shell containing a view. The shell handles all the application-level stuff, such as launching, shutting down, and so forth, and each “screen” in your app has a view. The code for this view is called a “controller.” As this app only has one screen, it has one controller piece of code, and that’s the ViewController.h and ViewController.m files. These terms come from a common pattern used in software development called “Model-View-Controller,” or just MVC. Under this pattern, applications can be built by creating a Model of your data, a View that the user has on your data, and a Controller that manages the interaction between the two.
The “Supporting Files” folder contains other files that your app will need, including the “.plist” file that contains metadata about your application and the main.m file that is the starting point of your application as it runs.
Your user interface is the Main.storyboard file. You’ll edit that in the next section.
Don’t worry if some of this seems overwhelming right now—there are a lot of concepts to take in, and you’ll go through them step by step. Before you know it, it will become second nature!
Using Interface Builder to Create Your “Hello, World” App
Using Xcode, select Main.storyboard, and the storyboard editor will open. On the left-hand side of the screen, you’ll see a menu drop down that reads “View Controller Scene.”
Drop this down to view all the options underneath it and select the “View Controller” entry, as shown in Figure 2-6.
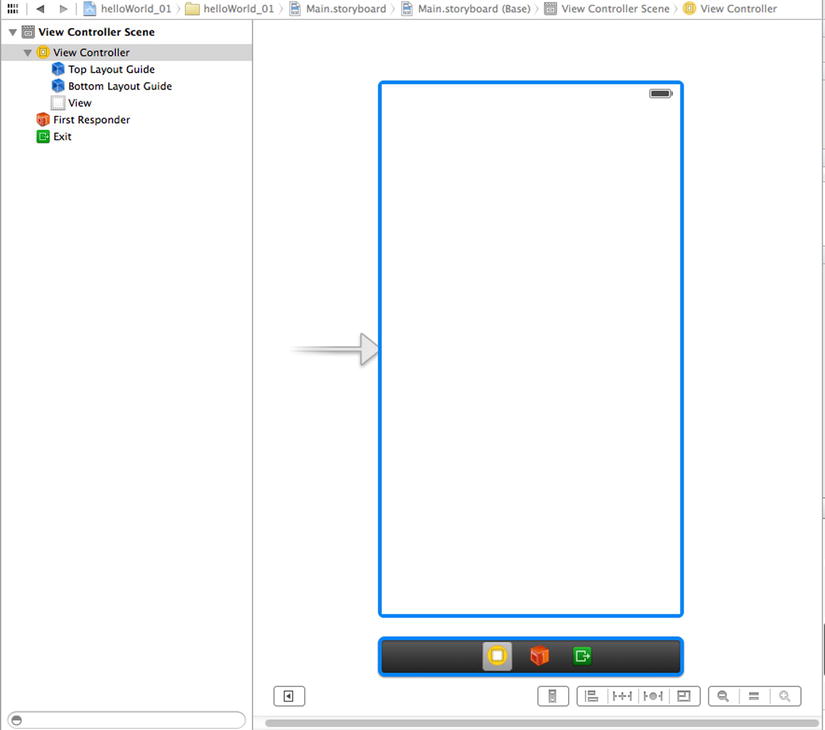
Figure 2-6. Exploring the scene in interface builder
To the right of this, you should see the utility area, where all the settings for your user interface are kept. If you don’t see it, make sure that you click the “View Utility Area” button on the very top-right-hand side. It looks like a square with a shaded area to the right.
You can see the utility area in Figure 2-7.

Figure 2-7. The utility area
Across the top of the utility area, you’ll see six buttons. These are shown in Figure 2-8.
![]()
Figure 2-8. Utility area buttons
From left to right, these buttons are:
- File Inspector: Used to set the details including the name, document, language, and localization for the interface
- Quick Help Inspector: Gives context-sensitive help on the currently selected object
- Identity Inspector: Provides details on the class underlying the view
- Attributes Inspector: Displays metadata about the currently selected view, such as background color
- Size Inspector: Shows definitions about how controls should stretch to fit the view
- Connections Inspector: Shows definitions about how the view connects to code
Again, don’t worry if you don’t understand most of this yet. As you work through this book you’ll be using each of these tabs, so it’s good to take a quick tour to get a feel for what the controls do.
The important setting that we want you to see here is that which connects the interface that you are designing to the underlying code that you’ll write. With “View Controller” selected (see Figure 2-6), make sure the “Custom Class” button is clicked, and you’ll see that this user interface will map to a specific class—in this case ViewController. That class is implemented using the ViewController.m and ViewController.h files.
At the bottom of the utility area, no matter which button is selected, you’ll see a list of controls. Scroll this list until you see the “Label” control, as shown in Figure 2-9.
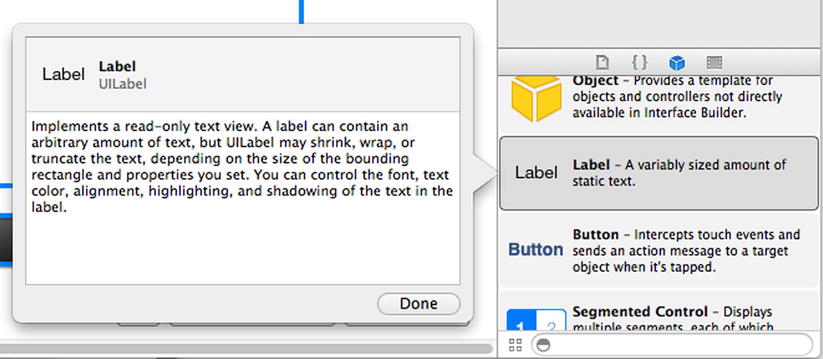
Figure 2-9. Selecting the “Label” control
Using your mouse, drag the “Label” control onto the view. As you move it around, you should see blue dotted guide lines that will help you place it. Vertical ones show you the horizontal center of the view and vice versa. Others show you borders around the edge of the screen that you might want to avoid. You can drop the label wherever you like on the view. When you’re done, it will look something like Figure 2-10.
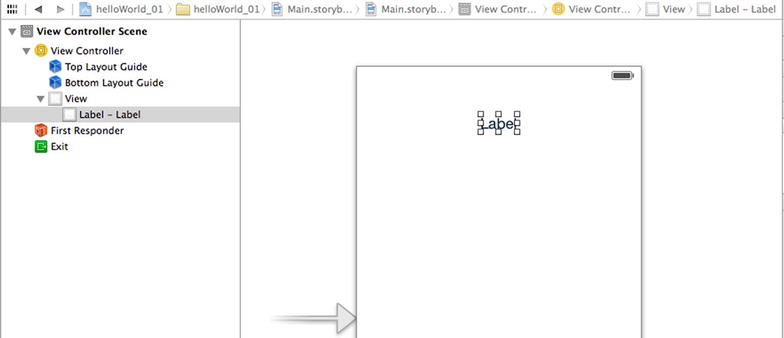
Figure 2-10. Placing your label on the view
You should then drag the little white dots around the label to resize it. Xcode will crop any text that goes into a label to the size of the label by default, so your “Hello, World!” text will look something like “He . . .” unless you make the label larger.
Experiment until you get the width that you like; you’ll notice that the word “Label” appears on the left of the screen. To re-center it, don’t move the label—find the “Alignment” setting in the attributes inspector and set it to “Center.”
Go back to the controls list and scroll until you see the “Button” control. Select it and drag and drop it onto the view, just like you did with the label. When you’re done, your view should look something like Figure 2-11.

Figure 2-11. Placing the “Button” control on the view
With the button selected (it will be highlighted on the list on the left and will have dots around it on the designer to the right), select the “Attributes Inspector” button. You’ll see the “Title” property that says “Button.” You can use this to change the title to “Press Me!” See Figure 2-12. (Alternatively, you could double click on the button in the designer and just type the new caption.)
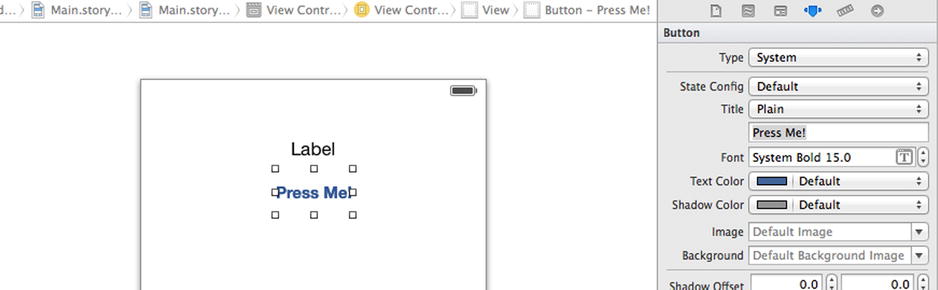
Figure 2-12. Updating the button title
You’ve now finished with the designer, so save your work before you go to the next step. You can do this by pressing ⌘s or selecting “Save” on the “File” menu.
At the top of the screen, where you opened the utility area, you should now close it and then open the “Assistant” editor. (This is the second icon from the left looking like a tuxedo.) See Figure 2-13.

Figure 2-13. Opening the assistant
Note that when an icon is selected it’s shaded in light blue. So, in Figure 2-13 you can see that the utility area at the right has been closed, and that the assistant has been opened.
You should see that a code window will open beside the designer.
Note If the code in the assistant window on the right is for ViewController.m, as shown in Figure 2-14, you’ll need to make some changes. This is actually the wrong file, but it is often the default file that you get. If this happens, find where it says Automatic > ViewController.m at the top of the assistant window. You can see it in Figure 2-15. Once you’ve done this, click on ViewController.m, and a drop-down menu will appear that you can use to pick ViewController.h.
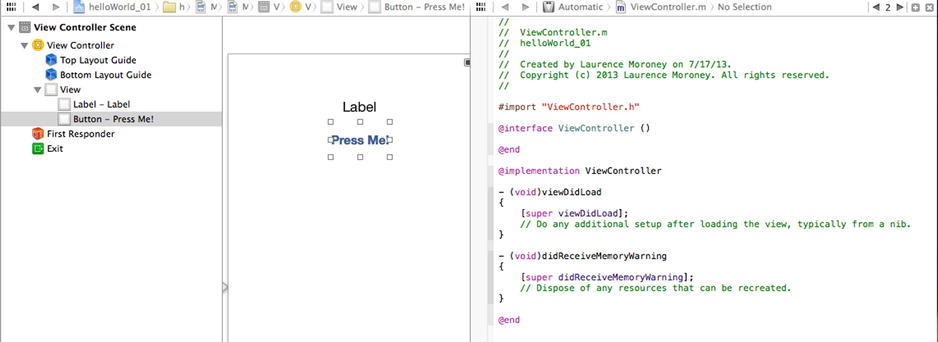
Figure 2-14. Using the assistant window

Figure 2-15. Assistant with ViewController.h selected
As mentioned earlier, classes are defined using two files. The .h (or header) file contains all the information about the class, including the names of the functions and variables used within it. The .m (or implementation) file contains all the logic. To map the controls to functions in the class, you’ll need to edit the .h file, so it should be the one selected in the assistant view before you go any further.
When the user presses the button, you want something to happen. You’ll write the code for this; Objective-C and iOS call this an Action. So, to create an action that happens in response to the user pressing your button, you should hold the CONTROL key and drag the button onto the code window, just below the word @interface. This creates what is called a connection .
You’ll see a little helper window pop up. It will look like Figure 2-16.
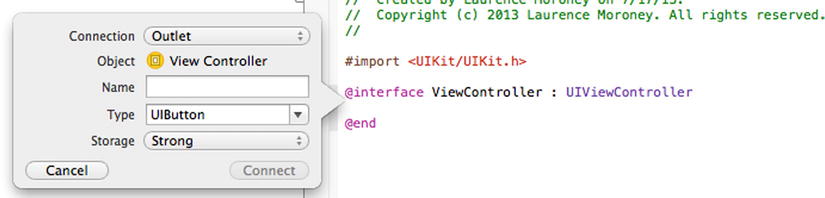
Figure 2-16. Connection helper window
The default type of connection is called an Outlet . You’ll see what that is for a little later in this chapter. What you want to create right now is an action, so change the “Connection” setting to this. You’ll see that the settings change. See Figure 2-17 for how they will look now.
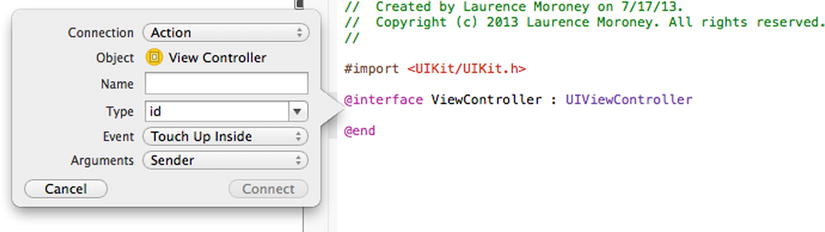
Figure 2-17. Connection helper window for actions
The important parts you want to set up here are the “Name” and “Event” types.
The Name setting is the name of the function that will run when the action happens. Type “btnPressed” into the Name field.
The Event setting is the type of interaction from the user that will trigger this action. Every control has a different set of events that it supports. For a button, “Touch Up Inside” is the default event. It fires, as the name suggests, when the user releases their touch inside the button.
Enter these values (“btnPressed” for Name and “Touch Up Inside” for Event), and click the “Connect” button. You’ll see that the code in the assistant window has changed. See Figure 2-18. (If you inspect the .m file, you’ll see that code has been added there too. You’ll be editing that code in the next section.)

Figure 2-18. Your newly amended code
When you want to change something on the user interface from within your code, you have to tell iOS how they are connected, and this is where an outlet is used. An outlet is effectively the name of your control as visible to your code. So, in order to change the label’s content when the user presses the button, you need to create an outlet to the label.
So, as you did with the button, select the label and then, while holding the CONTROL key, drag it over to the code window and drop it just below the btnPressed line.
The connection helper window will appear, and you will see that you’ll need to specify a name for your outlet. Type “MyLabel” into the Name field. See Figure 2-19.
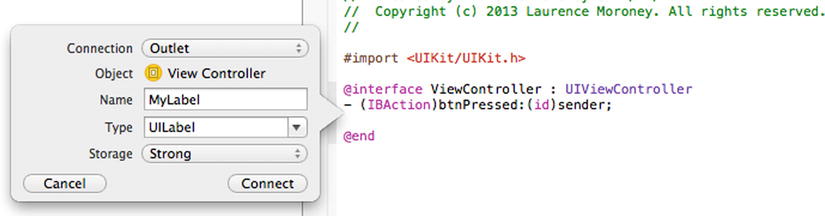
Figure 2-19. Helper window for configuring the outlet
Click the “Connect” button and you’ll see that some more code has been generated for you in the header file. See Figure 2-20.

Figure 2-20. Updated code in the header file
You’ve now completed the user interface for your application, and you’ve defined the action and outlet that it uses.
Writing the Code for Your Application
Before continuing, it’s a good idea to review the differences between a .h and a .m file. The .h file is a header file, and in a header file you tell the computer what types of commands you’ll execute and what types of data you will use in the implementation file. The .m file is the implementation file in which you program those commands and use that data.
In the previous section, you created the user interface for the application, and you set up the action method that will be called when the button is pressed, as well as the outlet value to allow the label to be changed. When you did this, Xcode generated code for you in the .h and .m files. The .h (where “h” stands for header) file contains the declarations of the data and methods that your program will use. The .m file (where “m” stands for messages, a concept used early on in Objective-C, but which has been greatly expanded on since) is the implementation of your code, where you write your methods. So, for example, when you created the action for handling the button being touched, you’ll see that Xcode placed the declaration of the method into the ViewController.h file and an empty method handler in the ViewController.m file.
In the project navigator, select ViewController.m to view the implementation code. You’ll notice that there is now an empty function called btnPressed waiting for you to add code to it. See Figure 2-21.
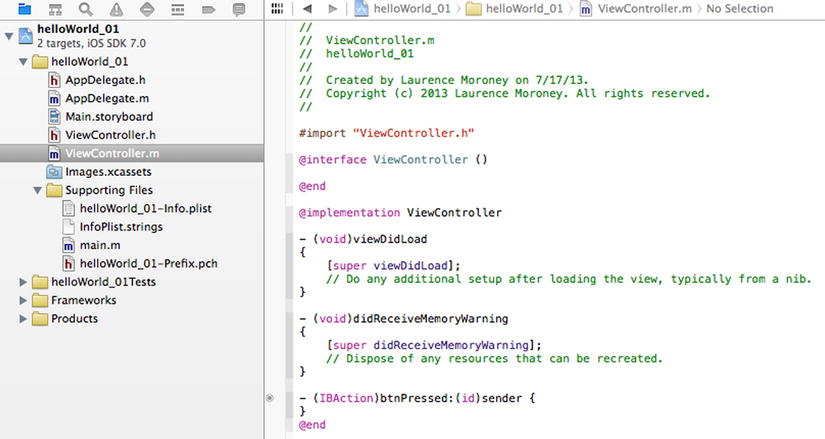
Figure 2-21. Editing the “View Controller” implementation code
Now, we said that we want the application to change the text in the label to “Hello, World!” when the user presses the button. We’ve already identified that pressing the button is the action, and this causes the btnPressed function to be called. We’ve also seen that an outlet is necessary for us to manipulate the UI from within our code, and we created an outlet to the label called MyLabel. To address the outlet called MyLabel, in code we prefix that with an underscore, so we use _MyLabel.
So, within the btnPressed function , you should enter this code:
_MyLabel.text = @"Hello, World!";
The entire function should look like this:
- (IBAction)btnPressed:(id)sender {
    _MyLabel.text = @"Hello, World!";
}
And that’s it! You’ve just written all the code needed for your ”Hello, World!” app. In the next section you’ll see how to run and test it using the iPhone and iPad emulators.
Testing the App on the iPhone Emulator
At the top of the Xcode editor, you’ll see a toolbar that allows you to pick your run target and to start your application on it. It looks like Figure 2-22.

Figure 2-22. Running your application
Clicking the device type—where it says “iPhone Retina (3.5 inch)”—will give you a list of available devices that you can test on. Clicking the “Run” button on the left will compile your code and launch the emulator, if it compiles successfully.
If you’ve developed in Xcode for iOS before, you might think that the iPad emulator has launched, because it’s so large, but don’t worry—it’s still the iPhone emulator. It’s just that in order to fit all the pixels from the retina display onto your screen, you need a much larger surface area. See Figure 2-23.

Figure 2-23. Using the iOS7 iPhone emulator
If you need more space on your screen, with the emulator selected, you can select “Scale” from the “Window” menu and reduce the size to 75% or 50%.
Click the “Press Me!” button, and you’ll see that the label changes to “Hello, World!” as expected. See Figure 2-24.
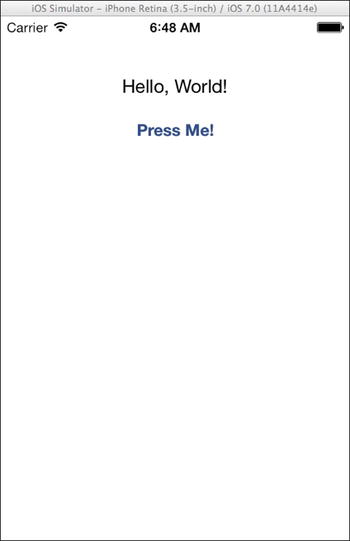
Figure 2-24. The result of clicking the button to get “Hello, World!”
This is running using the iPhone simulator. Let’s now look at running it on the iPad simulator.
Simply drop down the list at the top of your Xcode window and select “iPad Retina.” Your screen should look like Figure 2-25.

Figure 2-25. Configuring Xcode to use the iPad simulator
When you click “Run”, your app will launch as an iPhone app within the iPad. Remember back at the beginning of the chapter, you specified it was an iPhone app? iPad launches iPhone apps in a small, iPhone-sized rectangle in the center of the screen, and the emulator does the same. See Figure 2-26.

Figure 2-26. Running in the iPad simulator
If you want to run full screen, the iPad allows you to do so by pressing the “2x” button. You can see it at the top-right-hand side of the emulator.
Your app isn’t written with the iPad screen in mind, so this just “zooms” into your app. See Figure 2-27.

Figure 2-27. Zooming into your app on the iPad
And that’s it! It’s been quite a few pages to build a simple app, but it’s a great start to using the tools that are available to you in building iOS apps. But you’re not quite done yet. In the next section you’ll see how you can build an iPad app with the same functionality. You’ll go through it a lot quicker, as you’ve already covered most of the concepts.
Using Xcode, from the “File” menu, select “New,” and then select “Project.” You’ll see the “Choose a Template” dialog (refer back to Figure 2-2 for details), and, on this, select “Single View Application” and press “Next.”
You’ll see the “Project Options” dialog. Fill it out as you did earlier, but this time you’ll select “iPad” as the device, and of course you’ll use a different project name, in this case “helloWorld_02.” See Figure 2-28.
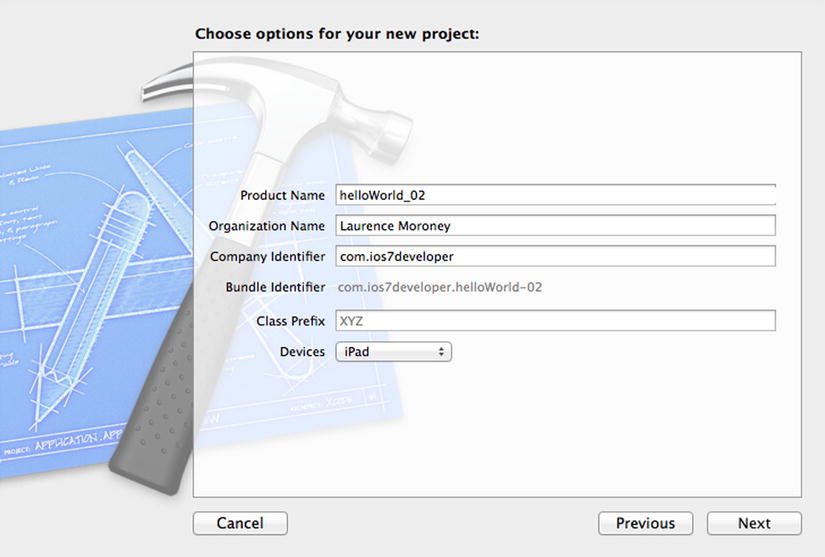
Figure 2-28. Creating your iPad project
Click “Next” when you’re done, and on the next screen click “Create.”
You’re now back in Xcode and ready to edit the code to make an iPad application.
Repeat everything you did earlier in this chapter for the iPhone application. The chief difference, of course, is that the view is much bigger when working with the iPad. Drop a label and a button on the view and edit their properties as before. Use the assistant to create an outlet for the label (called MyLabel) and an action for the button (called btnAction), just like you did with the iPhone app.
When you’re done, open the ViewController.m file, and edit the btnPressed code as before to this:

You can now run your app, and you’ll see it launches as a full-screen iPad application. See Figure 2-29.
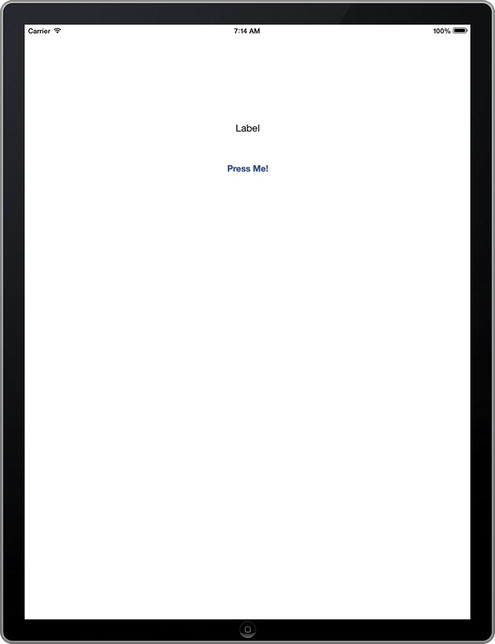
Figure 2-29. Running your iPad app
Summary
If you’ve never coded for iOS before, and this is your first venture into this exciting and valuable skillset, we hope you enjoyed it! While the app you built didn’t really do a whole lot from a user perspective, you covered many of the basics that a more sophisticated app does. In creating this “Hello, World” app, you’ve touched on the following:
- Project structure
- iOS storyboards
- Managing user input via actions
- Managing programmatic user interface output using outlets
- Used headers and classes
- Worked with a view
- Automatically generated stubs and prototypes
- Written your first lines of Objective-C code
- Ran an iPhone application on the iPhone simulator
- Ran an iPhone application on the iPad simulator
- Ran an iPad application on the iPad simulator
Note If you have no idea what stubs, prototypes, or any of these concepts mean right now, don’t worry—you will! You did this when you dragged the controls onto the assistant in order to add the declarations of the outlet and action to the .h file and the empty function to the .m file.
That’s a lot of ground to have covered, and a great start on getting into more sophisticated development. Congratulations, and see you in Chapter 3!