
You may remember building a diorama project from a shoebox for school as a child. We're going to make one today, using Unity. Let's assemble our first scene, which is composed of simple geometric objects. Along the way, we'll talk about using Unity, world scale, and rendering. We'll also explore various sources for 3D content, where you can find them, and how to use them in your Unity VR scenes. In this chapter, we will get you started in creating VR projects with Unity and work through some core concepts, including the following:
- Installing Unity
- Getting started with Unity
- Creating a simple diorama
- Using prefabs
- Creating and importing content
Technical requirements
To implement the projects and exercises in this chapter, you will need the following:
- A PC or Mac with Unity 2019.4 LTS or later, the XR Plugin for your device, and the XR Interaction Toolkit installed
You can access or clone the GitHub repository for this book (https://github.com/PacktPublishing/Unity-2020-Virtual-Reality-Projects-3rd-Edition-) to optionally use the assets and completed projects for this chapter as follows:
- The asset files for you to use in this chapter are located in UVRP3Files/Chapter-02-Files.zip.
- All completed projects in this book are in a single Unity project atUVRP3Projects.
- The completed assets and scenes for this chapter are in the UVRP3Projects/Assets/_UVRP3Assets/Chapter02/folder.
Installing Unity
To get started, you first need to install Unity on your development machine. All the projects in this book will be built using the Unity 3D game engine. Unity is a powerful, cross-platform 3D development environment with a user-friendly editor.
If you don't have Unity installed on your computer yet, we'll do that now! The full-featured Personal Edition is free and runs on both Windows and Mac (for details, see https://store.unity.com/#plans-individual). This book is written with Unity 2019.4 LTS and Unity 2020.x in mind.
Development system requirements
There are a few prerequisites that we need before we get started. You should have a Mac or Windows PC to develop on with enough resources to install and run Unity (a Linux version of Unity is also in the works). Details of the current system requirements for Unity can be found on its website (https://unity3d.com/unity/system-requirements), including the supported operating system versions, the graphics card, or built-in GPU, sufficient disk space, and necessary RAM.
For VR development, we recommend that you have a physical device that you are targeting for the build applications, compatible with the Software Development Kit (SDK) that you are using with Unity. That may be an Android mobile VR, such as Oculus Quest, or a Windows-based HMD, such as Oculus Rift, HTC Vive, Windows IMR (from Acer, HP, and so on), or the other VR device supported by Unity.
Installing Unity Hub
Unity Hub is a convenient desktop application for managing all your Unity projects and installed versions, and is a portal to Unity's own plethora of learning content. It is not uncommon to create a project using one version of Unity, and then at a later date start another project with a newer version of Unity. I recommend using Unity Hub for managing your Unity installs and projects (https://docs.unity3d.com/Manual/GettingStartedUnityHub.html).
For existing projects, hold back on updating Unity to a newer version until you've scheduled time to address possible compatibility issues that might be introduced with the upgrade. This is especially recommended with projects that are nearing release. Unity Hub is a convenient tool for managing your Unity projects and associated installed versions.
If you don't have Unity Hub installed on your development machine, do it now by going through the following steps:
- Browse to the Unity Store Unity Personal download page at https://store.unity.com/download.
- Download and install Unity Hub.
- Sign in to your Unity account or Create one if you do not have an account.
Now we can install Unity itself.
Installing the Unity Editor
The next step is installing the Unity Editor itself, and at the same time, the modules that are needed for you to build your target platforms. To install Unity, go through the following steps:
- Within Unity Hub, choose Installs in the left-hand menu tabs.
- Select the ADD button to open the Add Unity Version dialog box, and choose the current version of Unity, 2019 or later.
- Select Next to select the optional modules that you also want to install.
- If you're targeting Android devices, check the Android Build Support module, as well as the corresponding tools (you may need to unfold the list with the arrow icon), as shown in the following screenshot.
- Then select NEXT.
- If prompted, accept any additional license terms and the download will begin:

Now we're ready to create our first project.
Creating a new Unity project
Let's create a new Unity project named VR_is_Awesome, or whatever you'd like:
- In Unity Hub, choose Projects in the left-hand menu tabs.
- Select the NEW button (in the top-right) to start a new project (note that the NEW button includes a dropdown list for selecting an installed Unity version other than your default).
- In the Create New Project dialog box, you will be prompted to choose a Template. For the projects in this book, we will use the Universal Render Pipeline. Select Universal Render Pipeline.
- Enter a project name, such as VR_is_awesome. You can also select its location in your filesystem.
- Select CREATE to create a new empty project and open the Unity Editor on your desktop.
A Create New Project dialog box is shown in the following screenshot:

Unity Hub gives you the option to choose a template when creating a new Unity project. The projects in this book will use the Universal Render Pipeline (formerly called the Lightweight Render Pipeline). If you are aiming for high-end graphics quality, you may decide to use the High-Definition Render Pipeline (HDRP) in your own projects instead.
Installing additional packages and assets
Once you create and open a specific Unity project, there may be more packages and assets that you want or need to install. Unity provides several avenues for extending its features, platform support, editor tools, and runtime assets:
- Package Manager: Use the Unity Package Manager (in Unity's top menu., go to Window | Package Manager) to view which packages are available for installation or are already installed in your Project (https://docs.unity3d.com/Manual/upm-ui.html).
- Import Unity Package: You can import asset package files (filename extension .unitypackage) from the menu Assets | Import Package—for example, packages can be exported from another project and shared via Assets | Export Package.
- Import Asset: You can import individual assets that are created with another app or downloaded from the web with Assets | Import New Asset, or simply drag and drop a file into the Project window in Unity.
We'll use all of these mechanisms at one time or another later in this chapter and throughout this book.
The Unity Asset Store, available through your web browser, is home to a growing library of free and commercial assets created both by Unity Technologies and members of the community. Learn more at https://unity3d.com/quick-guide-to-unity-asset-store. Assets you may have purchased (or got for free) on the store can be installed using the Open In Unity button on the web page, and also as a package listed in the Package Manager.
With a new project, it's always a good idea to open thePackage Managerand review what's already installed in your project, so let's do that now:
- Select Window | Package Manager.
- By default, the filter is set to In Project.
- You may notice that from time to time, newer updates to your packages will become available. With appropriate caution, you should update. Especially with point releases, these updates should only be bug fixes rather than potentially breaking features.
- To add a package, you need to find uninstalled packages. Change the filter dropdown to All Packages to see all packages, including those not yet installed in your project.
The following image shows a Package Manager window where several packages have updates available:

Now that you have Unity installed on your development machine, let's explore how to use the Unity Editor.
Getting started with Unity
For you beginners out there, we're going to take this chapter nice and slow, with more hand-holding than you'll get later in this book. Even if you already know Unity and have developed your own games, it may be worthwhile to revisit the fundamental concepts, since the rules are sometimes different when designing for virtual reality.
Exploring the Unity Editor
The Unity Editor consists of multiple nonoverlapping windows, or panels, that may be subdivided into panes. The following is a screenshot of a project with the default window layout, annotated to identify some of the panels: (1) Hierarchy, (2) Scene, (3) Inspector, and (4) Project:

A Unity project consists of one or more scenes, containing a hierarchy of game objects. In the preceding screenshot, I have just created a new default empty scene (File | New Scene) and added a 3D cube (GameObject | 3D Object | Cube). The Hierarchywindow (1) shows the contents of the current scene in a hierarchical tree view. The current scene in the screenshot contains a Main Camera and a Directional Light, and we've added a Cube. As we'll see, objects can be nested with children objects to form nested parent–child object structures.
The Scene window (2) is a graphic rendering of this scene, where you can visually compose the 3D space of the current scene, including the placement of objects. There are interactive gizmos in this window for manipulating objects’ positions, rotations, and scales.
In the preceding screenshot, there are additional windows of interest, although we can only see their tabs. Behind theScenewindow (2) is a Game view, which displays what the in-game camera sees. When you pressPlay(the play triangle in the top-center toolbar), the running app is played in the Game view window.
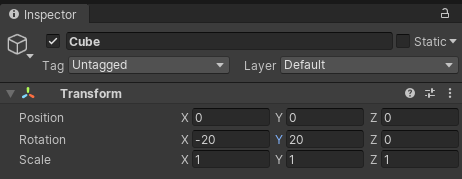
Presently in this scene, the Cube is selected, permitting its properties to be examined in the Inspector window (3). Game objects can be given Components (such as Transform, MeshRenderer, and Box Collider, shown in the preceding screenshot) that define the behavior of the object. And each component has specific properties that can be edited in the Inspector. For example, our Cube is positioned at the origin (0, 0, 0) and rotated along the XYZ axes by (-20, 20, 0) degrees. These Transform properties are shown in the following screenshot:
TheProjectwindow (4) shows the asset files on your hard drive, in the project'sAssets/folder, which can be used in any of the project scenes. These include various reusable graphics, audio, scripts, and so on that, you've imported into the project, as well as those you'll create along the way.
Behind theProjectwindow (4) is aConsolewindow, which shows messages from Unity, including warnings and errors from code scripts. TheConsolewindow is very important during development, so you should try to arrange it so that it is always visible during development.
Note that each window (and each component in the Inspector window) has a three-dot-icon context menu with additional item-specific options—for example, in the Inspector's context menu you can choose between Normal and Debug views. In the Transform component's context menu, you can Reset the transform values, and in the Console window's context menu, you can access detailed player and editor log files, as shown in the following screenshot:

At the top is the main menu bar (on a Mac, this will be at the top of your screen, not at the top of the Unity window), and a toolbar area with various controls that we'll use later on, including the Play (triangle icon) button that starts Play mode.
In the main menu, the Assets menu lets you create, import, and manage assets in your ProjectAssets ( the same as the +create button atop the Project window). The GameObject menu lets you add new objects to the current scene (like the + create button atop the Hierarchy window). The Component menu lets you add component behaviors to the currently selected object (the same as the Add Component button in the Inspector window). From the menu bar's Window menu, you can open additional windows as needed. Go ahead—click and explore these now.
The editor's user interface is configurable—each window can be rearranged, resized, and tabbed by grabbing one of the panel tabs and dragging it or even completely undocking it from the editor itself. On the upper right-hand side is a Layout selector that lets you either choose between various default layouts or save your own preferences.
Like most professional design and development applications, the Unity editor has a lot to it. The key to not getting overwhelmed is to focus on justthe functions you are using at the moment and basically ignore the rest until you need them. That is how I'll present Unity throughout this book. Let's start by creating and reviewing a new, empty scene.
Understanding the default new scene
Start a new scene in Unity as follows:
- Using the main menu at the top of the editor, select File.
- Then, from the menu, select New Scene.
A default empty Unity scene consists of a Main Camera object and a single Directional Light object. These are listed in the Hierarchy window and depicted in the Scene window. The Scene window also shows a perspective of an infinite reference ground plane grid, like a piece of graph paper with nothing on it. The grid spans across the x (red) and z (blue) axes. The y axis (green) is the vertical axis.
The Inspector window shows the details of the currently selected item. Select the Directional Light with your mouse, either from the Hierarchy list or within the scene itself, and look at the Inspector window for each of the properties and components associated with the object, including its transform. An object's transform specifies its position, rotation, and scale in the 3D world space. For example, a Position of (0, 3, 0) is three units above (in the Y direction) the center of the ground plane (X = 0, Z = 0). A Rotation of (50, 330, 0) means that it's rotated 50 degrees around the x-axis and 330 degrees around the y-axis (the same as -30, since 360 is a full circle). As you'll see, you can change an object's Transform values numerically here or directly with the mouse in the Scene window.
Similarly, if you click on the Main Camera, it may be located at the (0, 1, -10) position with no rotation—that is, pointed straight ahead, towards the positive Z direction. If the Game window is visible, you'll see the camera view rendered there.
Unity provides a rich set of scene-editing tools, including built-in grid and snapping features, which we'll look at next.
Using grid and snap
Unity provides a grid system to visualize and snap. You have control over the grid displayed in the Scene view. It is for editing only, and so is not part of the Game view. It's accessed using the Grid Visibility button at the top of the Scene view. You can control which plane to grid (X, Y, or Z) and the opacity of the grid lines, as shown in the following screenshot:

The three-dot-icon menu opens the Grid and Snap settings window to show more controls:

You can see the default Grid and Snap settings in the preceding screenshot. The visual grid size is set to 1 unit (normally meters). When snap is enabled, moving an object will snap to 0.25 units on any axis, rotations will be snapped to 15 degrees, and scaling will be snapped in increments of 1.
To enable snapping, toggle theGrid Snappingbutton (the icon with a grid and magnet) so that it's enabled. Note that you'll also need to haveGlobal handlesenabled (the Global icon to the left of the Grid Snapping one), as shown in the following screenshot:

As you grow more familiar with Unity, you'll continue to configure and refine its settings to your liking.
A couple more options
Next, we'll add a couple of settings that I like for any new project. Consider these tips and suggestions. Among the settings I like for any new project are the following two:
- Personalized windows layout
- Play mode editor color
Personally, I prefer my editor layout to have the scene Hierarchy window adjacent to the Inspector window, and I like the Console window to be visible all the time. In the layout shown in the following screenshot, for example, there's a column on the left with the Scene, Game, and Console windows (top to bottom). The center column contains the Hierarchy and Project windows. On the right is the Inspector, with tabs for Lighting, Project Settings, and other less frequently used windows:

You can save the layout configuration using the Layout dropdown menu in the upper-right of the editor, as shown in the following screenshot. With this, you can readily switch between layouts:

In Unity, when you press Play and the scene is running, it's convenient to have visual feedback to show that you are in Play Mode. This is important because the changes you make to a GameObject in the Inspector are not preserved after you exit Play mode, so it's good to be reminded of the mode. Although the triangular Play button is highlighted, I like to use a more prominent reminder by changing the background color. You can set the editor play mode color as follows:
- Open the Preferences window (Edit | Preferences...).
- Select the Colors tab on the left.
- Modify the Playmode tint color—for example, I like a reddish tint, which is listed as #EAC4B2, as shown in the following screenshot:

Now that you have Unity installed and have walked through an introduction on how to use it to create and edit 3D scenes, let's build a simple diorama scene.
Creating a simple diorama
We will add a few objects to the scene, including a unit cube, a flat plane, a red ball, and a photographic backdrop. Here is a photograph of a physical mock-up of the diorama we will build in VR:

To begin, let's create a new scene and name it Diorama:
- If you haven't already, start a new scene in your opened project by selecting File | New Scene.
- Then select File | Save As....
- Open the Assets/Scenes/ folder.
- Set the file name to Diorama.
- Press Save.
Ok, now we'll add stuff.
Adding a cube and a plane
Let's add the first object to the scene, a unit-sized cube:
- Within theHierarchywindow,click on the+ (create) menu in the upper-left corner.
- Click on 3D Object | Cube. The same selection can also be found in the main menu bar's GameObject menu.
A default cube will be added to the scene, centered on the ground plane at the (0, 0, 0) position, with no rotation and a scale of 1, as you can see in the Inspector window. The Transform component should have Position (0, 0, 0), Rotation (0, 0, 0), and Scale (1, 1, 1). These are the reset settings. If for some reason your cube has other Transform values, set them in the Inspector panel, or go through the following steps:
- Click the three-dot menu icon in the upper right-hand side of the Inspector window's Transform component.
- Select Reset to reset the Transform values.
This cube has the dimensions of one unit on each side. As we'll see later, one unit in Unity corresponds to one meter in world coordinates. Its local center is the center of the cube.
Now, let's add a ground plane object to the scene:
- In the Hierarchy window, click on the + (create) menu in the upper-left (or main GameObject menu).
- Select 3D Object | Plane.
- If necessary, reset its Transform values.
- A default plane is added to the scene, centered on the ground plane at Position(0, 0, 0). Rename it as GroundPlanein the name field at the top of its Inspector.
Note that at a scale of (1, 1, 1), Unity's plane object actually measures 10 by 10 units in X and Z. In other words, the size of GroundPlane is 10 by 10 units and its transform's Scale is 1.
The cube is centered at Position (0, 0, 0), just like the ground plane; however, maybe it doesn't look like it to you. The Scene window may show a Perspective projection that renders 3D scenes onto your 2D computer monitor. The Perspective distortion makes the cube not seem centered on the ground plane, but it is. Count the grid lines on either side of the cube. As you'll see, when it is viewed in VR and you're actually standing in the scene, it won't look distorted at all. This is shown in the following screenshot (the default colors may look different on your screen than in this image; we'll adjust that soon):

The Cube is submerged in the GroundPlane because its local origin is at its geometric center—it measures 1 by 1 by 1 and its middle point is (0.5, 0.5, 0.5). This might sound obvious, but it is possible for the origin of a model to not be its geometric center (such as one of its corners). The Transform component's position is the world space location of the object's local origin. Let's move the cube as follows:
- Move the Cube onto the surface of the GroundPlane—in the Inspector panel, set its Y position to 0.5: Position (0, 0.5, 0).
- Let's rotate the cube a bit around the y-axis. Enter 20 into its Y rotation: Rotation (0, 20, 0).
Note the direction in which it rotates—that's 20 degrees clockwise. Using your left hand, give a thumbs-up gesture. See the direction your fingers are pointing? Unity uses a left-handed coordinate system. (There is no standard for the coordinate system handedness; some software uses left-handedness, others use right-handedness).
In the previous screen capture, our GroundPlane is white. Yours probably still has the default gray color. Let's fix that by creating a new Material for the plane, as follows:
- In the Project window, open the Materials folder. (If there isn't one, select Create | Folder, and name it Materials).
- With the Materials folder selected, click on + | Material (or right-click in the Project folder) to create a new material and name it White Material.
- In the Inspector window, click the white rectangle to the right of Base Map, which opens the Color window. Select white (hexadecimal #FFFFFF).
- Drag the White Material from the Project window onto the Ground Plane in the Scene window.
- Also, for this demonstration, let's Auto Generate the environment lighting by selecting Window | Rendering | Lighting (orLighting Settings in Unity 2019). Ensure that the Scene tab is selected at the top of the window and check the Auto Generate checkbox at the bottom of the window (the Lighting settings window is discussed in more detail in later chapters).
Before we go much further, let's save our work by clicking File | Save and continue building our scene.
Adding a red ball
Next, let's add a sphere to the scene:
- From the main menu, select GameObject | 3D Object | Sphere.
- If necessary, select Reset from the Inspector panel's Transform component as we did earlier (using its three-dot-menu or by right-clicking).
Like the Cube, the Sphere has a radius of 1.0, with its origin at the center. It's hard to see the Sphere as it is embedded in the Cube. We need to move the Sphere position.
This time, let's use the Scene window's Gizmos tool to move the object. In the Scene view, you can select graphical controls, or Gizmos, to manipulate the object's transforms, as shown in the following illustration from the Unity documentation (http://docs.unity3d.com/Manual/PositioningGameObjects.html):

In the Scene window, with the Sphere selected, make sure that the Move tool is active (the second icon in the top-left icon toolbar) and use the arrows of the x-, y-, and z-axes to position it. I left mine at Position (3, 0.75, -1.75).
Let's make this Sphere into a red ball, with a new Material:
- In the Project window, with the Materials/ folder selected, Click Create | Material and name it Red Material.
- In the Inspector window, click the white rectangle to the right of Base Map, which opens the Color window. Choose a nice juicy red.
- Drag the Red Material from the Project window onto the Sphere (note that you can drag it onto the Sphere in the Scene window, in the Hierarchy, or, provided the Sphere is currently selected, directly onto its Inspector window).
The Sphere should now look red. Save your scene.
One more thing. The view in the Scene window is never necessarily aligned with the camera that renders the scene in the Game window. It's easy to align the two:
- In the Hierarchy, select the Main Camera.
- From the main menu, click GameObject | Align View to Selected (don't click Align With View, as this would change the Main Camera rather than the Scene view camera; if you make that mistake, press Ctrl + Z to undo, or click Edit | Undo).
Here's what my scene looks like now:

Let's look at other ways of changing the scene view next.
Changing the scene view
You can change the scene view any time in a number of ways, and this varies depending on whether you have a mouse with three-buttons, two-buttons, or a Mac mouse with only one button. Read up on it in the Unity Manual (which can be found at https://docs.unity3d.com/Manual/SceneViewNavigation.html) to find out what works for you.
In general, combinations of left and right mouse clicks with the Shift + Ctrl + Alt keys will let you perform the following actions:
- Drag the camera around.
- Orbit the camera around the current pivot point.
- Zoom in and out.
- Press Alt and right-click to swing the current eye orbit up, down, left, and right.
- When the hand tool is selected (in the upper-left icon bar), the right mouse button moves the eye.
In the upper-right-hand side of the Scene window, you have the Scene View Gizmo, which depicts the current scene view orientation, as shown in the following screenshot. It may indicate, for example, a Perspective view, with X extending back to the left and Z extending back to the right:

You can change the view to look directly along any of the three axes by clicking on the corresponding colored cone, as shown in the following screenshot. Clicking on the small cube in the center changes the Perspective (3D) view to the Orthographic (2D nondistorted) view:

Next, let's improve our diorama with some image textures.
Making a Crate Material
We've already used Materials to apply an albedo color to the simple geometry in the scene, including the white plane and the red sphere. But Materials can do more, much more. Materials define how a surface should be rendered, including the textures for the object's surface and how it reacts to lights. This information is used by the shader code associated with the Material.
A texture is an image file that gets "painted" onto the object's surface, not unlike wallpaper or package labeling. It is used for simulating details and making objects appear more realistic. Let's make our Cube look like a wooden crate. We've included a crate.jpg texture file with this book, or you can Google search wooden crate texture to find one on your own:
- In the Project window, created another Asset subfolder named Textures (by clicking on + | Folder).
- Drag the crate image file from your filesystem into the Unity project's Textures folder. Ours is named crate.jpg.
- In the Project window, in the Assets/Materials/ folder, create another material (right-click, then go to Create | Material) named Crate Material.
- In Inspector, select the little doughnut icon next to the Base Map to open a Select Texture dialog box, then choose the crate one (note that the search bar at the top of the dialog has the keyboard focus, so you can readily start typing the first few letters of the name to search).
- Select the texture with a double-click (or single-click, then close the box with the red X in the upper right).
- Set the Base Map to full color (white) by clicking its color chip and selecting white (#FFFFFF) so that the full fidelity of the texture pixels is not tinted.
- Now, drag the Crate Material from the Project window onto the Cube in the Scene (or in the Hierarchy list).
- Let's be more specific about our crate box. Rename it as Crate by selecting it in the Scene or Hierarchy and editing its name at the top of the Inspector.
- Save your work (File | Save).
The following screenshot shows the Crate Material in the Inspector, already applied to the cube. I've also opened the Base Map texture for preview by Ctrl-clicking the texture tile with the mouse:

Next, we'll add another texture to the scene, this time as a backdrop image.
Adding a photo
Let's add a photo of the big-screen backdrop of our diorama. We've included with this book a photo I took at the Grand Canyon, but you can use one of your own (the idea is to use a vista image with no nearby objects in the foreground). The steps are similar to the ones we used for the crate:
- Drag the photo image from your filesystem into the Unity project's Textures/ folder. Ours is named GrandCanyon.jpg.
- Create a quadrilateral (a simple four-sided square) 3D primitive object by navigating to GameObject | 3D Object | Quadand naming it Photo.
- In Inspector, reset its transform if necessary (Transform | 3-dot-icon | Reset).
- Scale it to the size of the GroundPlane. Set its transform Scale to (10, 10, 10) (you may recall that the planes in Unity are 10 by 10 units, whereas other primitives, such as Cube and Sphere, are 1-unit sized).
- Move it to the edge of the GroundPlane at a Position value of Z =5, and above, at Position value of Y =5.
- In the Project window, in theMaterials/folder, create another material (right-click and go to Create | Material) namedGrandCanyon Material.
- Drag the GrandCanyon Material from the Project window onto the Photo quad in the Scene (or in the Hierarchy list).
- In the Inspector, select the little doughnut icon next to the Base Map to open a Select Texture dialog box, then double-click to choose the GrandCanyon one.
- Set the Base Map to full color (white) by clicking its color chip and selecting white (#FFFFFF).
In my scene, the image looks a little squished compared to the original. My original photo is 2576 x 1932 pixels or a 0.75 aspect ratio. But our quad is square. Let's fix that up:
- Select the Photo quad in the scene.
- Set its transform Scale Y to 7.5.
- Set its transform Position Y to 3.75 (this is its new center offset, 7.5 / 2; in fact, you can type 7.5/2 into the Y value slot and Unity will evaluate the calculation).
Why 3.75? The height started at 10, so we scaled it to 7.5. The scaling of objects is relative to their origin. So now, half of the height is 3.75. We want to position the center of the backdrop 3.5 unit above the ground plane.
We have the size and position set up, but the photo looks washed out. That's because the ambient lighting in the scene is affecting it. You might want to keep it that way, especially as you build more sophisticated lighting models and materials in your scenes. But for now, we'll disallow lighting effects on the photo using the Unlit shader. With Photo selected, change it to Unlit by going through the following steps:
- Select the Photo object.
- In Inspector, note that the photo's GrandCanyon Material component in the Inspector window has its default Shader set as Universal Render Pipeline/Lit.
- Change the Material's Shader to Universal Render Pipeline/Unlit using the dropdown selection list.
One more thing: let's adjust the GroundPlane color to better match the photo ground:
- Create a new material in the Materials folder and name it Ground Material.
- Drag it onto the GroundPlane object.
- Then, change itsBase Mapcolor. I suggest using the dropper (icon) to pick a sandy tone from the image in your photo plane.
Here's what mine looks like; yours should be similar:

There! That looks pretty good. Save your scene.
We have created a 3D diorama scene consisting of a few geometry primitives, including a Plane, Cube, Sphere, and Quad, and applied some simple Materials. Obviously, Unity is capable of using more complex and interesting graphics. Next, we'll look at using Unity prefabs for managing reusable GameObjects.
Using prefabs
Unity prefabs (short for prefabricated object) allow you to create, store, and modify GameObjects as reusable assets together with all its components, property values, and child GameObjects. Prefabs are easily created by dragging an object from the scene Hierarchy window into the Project window, or they may be imported as part of a Unity asset package. You can read more about prefabs in the Unity Manual at https://docs.unity3d.com/Manual/Prefabs.html.
Let's see how this works by creating a simple reusable model built from simple geometric elements.
Creating and instantiating a prefab
We're going to create a reusable character prefab named BobHead. First, let's build the little guy from a few primitive 3D objects, as follows:
- In the Hierarchy, create an empty GameObject named BobHead (by clicking on +| Create Empty; name it BobHead).
- Set its position to something like Position (3, 0.75, 1.25).
- Create a child Sphere for its head (right-click the BobHead and click 3D Object | Sphere). Name it Head.
- In the ProjectMaterials/ folder, create a new Material, named BobHead Material, and make it a dark blue (for example, #191963).
- Drag the BobHead Material onto the Head.
Now, add the eyes:
- Create a child white-colored eye (right-click the BobHead, then click 3D Object | Sphere) and name it Eye.
- Set its Transform Position (0.15, 0.2, -0.35) and Scale (0.15, 0.25, 0.25).
- Drag the White Material that we created earlier from the ProjectMaterials/ folder onto the Eye.
- Duplicate the eye (select the Eye and press Ctrl + D).
- Change its Transform Position X to -0.15.
The resulting model, including the scene Hierarchy, is shown in the following screenshot:

Now to create a prefab of the object. We'll save it in a project folder named Assets/Prefabs/ by going through the following steps:
- In the Project window, create a new folder named Prefabs (at the root Assets/, right-click, then click Create | Folder and name it Prefabs).
- In the Hierarchy window, click and drag the BobHead GameObject into the Project window's Prefabs/ folder we just created.
Note that a few things have changed in the editor, as shown in the following screenshot:
- The ProjectAssets/Prefabs/ folder contains the BobHead.prefab file, with a preview image.
- Because the asset is presently selected, the Inspector shows its component values and a button to Open Prefab for editing. We'll get to that in a moment.
- The BobHead object name in the Hierarchy is now blue, indicating that it's now a prefab instance.
- There's also a > icon on the BobHead that you can click to edit the prefab asset (the same as the Open Prefab button).
The BobHead prefab is now available as a template for other BobHead GameObjects; you may want to add one or more to your scenes. All instances of the prefab will inherit the properties of the prefab. To add a new instance, just drag it from the Project window into the scene. Let's do that now:
- In the Project window, click the BobHead prefab and drag it into the scene (either the Scene view window or the Hierarchy).
- Once positioned as you like, drop it into the scene.
- Add a few more too.
The following screenshot shows the scene with multiple BobHead instances. In the Hierarchy, the BobHead objects are blue because they reference prefab assets:

You can now modify the instance as you like, such as adjusting its position and scale.
In summary, we have learned the following definitions:
- GameObject: Generally refers to game objects in the Scene and Hierarchy, containing a geometric mesh, material, and other components that define its behavior.
- Asset: Refers to files in the ProjectAssets/ folder that can be added to a scene, including prefab GameObjects, materials, audio clips, and more.
- Prefab asset: A GameObject saved as an asset.
- Prefab instance: A prefab that's been added to a scene is said to be instantiated.
Now that we have a prefab, let's see how to edit it.
Editing and overriding a prefab
Suppose that you now decide that the BobHead needs adjustment; perhaps you want to add a hat. You can modify the prefab and all of the instances will be updated. You could select the BobHead prefab in the ProjectPrefabs/ folder and select Open Prefab to edit it (or just double-click it). Right now, we'll edit it first in the scene Hierarchy, then apply the overrides:
- To add a hat, select one of the BobHead objects in the hierarchy, right-click,and select Create Empty, then rename it Hat.
- Set its Position to (0, 0.5, 0).
- Right-click the Hat and select 3D Object | Cylinderto add a cylinder as a child of Hat— name it HatTop.
- Set itsTransform Scale to (0.5, 0.1, 0.5).
- Drag the Red Material from the Project's Materials/ folder (created earlier in this chapter) onto the HatTop.
- Right-click the Hat again and select 3D Object | Cylinderto add a cylinder as a child—name it Brim.
- Set itsTransformScale to (0.75, 0.01, 0.75) and Position to (0, -0.075, 0).
- Drag the Red Material from the Project's Materials/ folder onto the Brim.
- Adjust the Hat transform to Rotation (0, -15, 25) and Position (-0.2, 0.5, 0).
That looks cool! Presently, only one of the BobHead instances has a hat. Suppose we want each of them to have one too. Select the BobHead object in Hierarchy; note the Overrides dropdown in the Inspector. Click it to show the modifications that you have made relative to the original prefab, as shown in the following screenshot: that'd be the Hat:

Do the following steps to actually apply the overrides:
- Click the Overrides in Inspector.
- Press Apply All.
Voila! Now all the BobHeads in the scene have been updated, as shown in the following screenshot:

Because prefabs may include child objects, it is possible for a child to be another prefab. That's perfectly fine. This is called a nested prefab, and will behave as you expect—for example, we could have made the Hat object its own separate prefab and then inserted it into the BobHead prefab. If you change the original child prefab, then that change will be reflected in the parent prefab.
In addition, modified instances of a prefab can be saved as a separate prefab variant. In that case, the new prefab still references the original prefab so that if the original prefab is changed and said properties have not been overridden by the variant, then the variant (and all its instances) will inherit those changes.
One more thing to point out. When you edit a prefab instance in Unity, you have the option to view it in the Scene window in the context of its position within the scene (Normal), to gray out the surrounding scene (Gray), or hide the context altogether (Hidden). The following image shows a BobHead being editing with a Gray context:

There you have it! Prefabs are a very powerful feature of Unity that we will use throughout this book. Next, we'll look at how to import content from outside of Unity.
Importing content
So far, we have shown you how to use Unity and be productive in creating a scene, but with pretty simple content. Normally, Unity is not a 3D-modeling or asset-creation tool. Rather (as the name Unity suggests), it's a unified platform for pulling together content from a variety of sources to assemble and program a game or experience involving animation, physics, rendering effects, and so on. If you are a 3D artist, then you may know how to create content in other programs, or you can find a plethora of models on the web.
Creating 3D content for VR
Unity offers some basic geometric shapes, but when it comes to more complex models, you'll need to go beyond Unity. The Unity Asset Store and many other sites have tons of amazing models. Where do they come from? Will you run into problems while importing them into Unity?
For example, Blender is a free and open source 3D animation suite (http://www.blender.org/) that you can use to make a model and then import it into Unity. Other popular software, for both hobbyists and professionals, includes ZBrush, 3DS Max, Maya, and Cinema4D. A detailed list of 3D modeling software can be found at https://en.wikipedia.org/wiki/List_of_3D_modeling_software.
Actually, there are content creation tools that run right inside the Unity editor. Polybrush and ProBuilder are two examples, bought by Unity Technologies in 2019 and provided free with Unity itself (we will be using both these packages in later chapters in this book). Many other in-editor tools can be found on the Unity Asset Store, for example, by searching modeling or painting tools (https://assetstore.unity.com/tools?category=tools%2Fmodeling%5Ctools%2Fpainting&orderBy=1).
In addition to traditional 3D-modeling software, there is a new generation of 3D design apps that let you directly create inside VR. Let's be honest: it's pretty awkward trying to use an inherently 2D desktop screen with a 2D mouse to form, sculpt, and manipulate 3D models. If only it could be more like real-life pottery, sculpture, and construction. Well, why not just do it directly in VR? Some of the growing number of VR 3D content creation tools include the following:
- Google Tiltbrush (https://www.tiltbrush.com/): 3D painting and sculpture; import directly into Unity with Unity SDK (https://github.com/googlevr/tilt-brush-toolkit).
- Google Blocks (https://arvr.google.com/blocks/): 3D modeling and painting.
- Tiltbrush and Blocks models can also be uploaded to Google Poly (https://poly.google.com/) and imported into Unity with the Poly Toolkit on the Asset Store (https://assetstore.unity.com/packages/templates/systems/poly-toolkit-104464).
- Microsoft Marquette (https://www.maquette.ms/): Import with the Unity Addon (https://www.maquette.ms/unity-addon).
- Adobe Medium (originally by Oculus) (https://www.oculus.com/medium): Digital clay tool.
- Adobe Substance Painter (originally by Allegorithmic) (https://www.substance3d.com/products/substance-painter/): Design PBR (physically based rendering) textures and materials.
- Oculus Quill (https://www.oculus.com/experiences/rift/1118609381580656/): Illustration and animation tool.
- VR Gravity Sketch (https://www.gravitysketch.com/): Sculpting tool for 3D models.
- Unity Editor XR (https://github.com/Unity-Technologies/EditorXR): An experimental extension of the Unity editor that operates in VR, with 3D gizmos for scene editing and access to all the Unity windows, including Inspector and Project assets.
Let's see how to import assets from the store in the next section.
Importing from the Unity Asset Store
One terrific source is the Unity Asset Store (https://www.assetstore.unity3d.com/en/). Many asset packs are free, especially starter ones, with possible paid upgrades if you want more. These can be very useful, for instance, if you are looking for a few things to get your learning and experimental projects going.
As of Unity 2020.1, you are expected to browse and purchase assets from the Unity Asset Store website using your web browser. You can then find and import packages that you already own using the Package Manager (by going to Window | Package Manager). The Package Manager window with the My Assets filter selected is shown in the following screenshot:

Unfortunately (or fortunately), Unity keeps evolving, and some asset packages can get left behind. The Asset Store is filled with popular packages that were built for older versions of Unity and may have problems importing into the current version, possibly including the following:
- Unsupported shaders
- Obsolete C# script APIs
In this book, we created our Unity project using the Universal Render Pipeline, derived from the new Scriptable Render Pipeline (SRP) system that replaces the built-in render pipeline (https://docs.unity3d.com/Manual/ScriptableRenderPipeline.html). As we'll see, Unity provides tools to help upgrade materials for your Render Pipeline (RP). Sometimes that works, but sometimes it needs manual adjustment, as we'll show you next.
The Unity Scripting API (programmer interface) also evolves. When importing old scripts, Unity will try to automatically update them to work with the current version. Sometimes it cannot. Usually, if an API function has changed, Unity will give a warning that it is deprecated, and then eventually it will become unsupported after a number of Unity updates. You may find assets on the Asset Store that have not been updated and will throw errors when you try to import. Sometimes, this incompatibility makes the package unusable and obsolete. But sometimes a minor script edit can take care of the problem without having to chase down the developer and request a fix.
Let's run through a couple of these scenarios now, while at the same time learning more about Unity.
A skybox is a panoramic texture drawn behind all objects in the scene to represent the sky or another vista at a far distance. You can find many skyboxes to use in your projects; one of my favorites is the free Wispy Skybox from MUNDUS. Let's add it to our project now:
- In your browser, go to the Asset Store (https://assetstore.unity.com/) and search for Wispy Skybox, or go directly to https://assetstore.unity.com/packages/2d/textures-materials/sky/wispy-skybox-21737.
- Click Open in Unity.
- In Unity, the Import Unity Package dialog box will pop up, with all the contents selected. Click Download (if present), and then click Import.
- Check your console window for errors (by going to Window | General | Console). I see none, so that's good.
- Open the scene's Lighting window (by going to Window | Rendering | Lighting).
- Select the Environment tab at the top of thewindow.
- At the top is a slot for Skybox Material. Click the doughnut icon, which opens the Select Material dialog.
- Search using the string wispy.
- Select one of the skyboxes to use in the scene.
Voila! That's good.
Next, let's import a model with a relatively high-quality PBR material. For fun, let's add the FREE Snowman from Angry Mesh:
- In your browser, go to the Asset Store (https://assetstore.unity.com/) and search for free snowman, or go directly to https://assetstore.unity.com/packages/3d/props/free-snowman-105123.
- Click Open in Unity.
- In Unity, Import the package.
- In the Project window, go to the Assets/ANGRY MESH/Snowman/Prefabs/ folder.
- Drag the Snowman_01 prefab into the scene.
Oh no! It looks all magenta. That's Unity telling you that the object's materials are missing or not compatible with the current render pipeline:

To fix it, we'll try converting the imported materials to our RP:
- Select Edit | Render Pipeline | Universal Render Pipeline | Upgrade Project Materials to UniversalRP Materials, then click Proceed:

There we go. Now he looks happier:

If you were to open the Demo_Snowman demo scene that comes with the package, you will see three snowmen in a terrain of pink snow! The upgrade tool didn't work on the terrain. Let's see why:
- Save your current work by going to File | Save.
- Go to File | Open Scene and select the scene Assets/ANGRY MESH/Snowman/Scene/Demo_Snowman.
- Select the Terrain GameObject.
- In Inspector, click the gear icon to open its Terrain Settings (you may need to first click Active to enable this object if the gear icon is disabled). Note that its Material property is called Default-Terrain-Standard.
As we've seen, Unity has a number of built-in default materials—for example, when you create a new object, its default material is Lit with the URP/Lit shader, because that's compatible with our current render pipeline. The default material with the imported terrain is not compatible with our render pipeline. We can create new material instead by going through the following steps:
- In the Terrain's Inspector, next to the Material slot, click the Create... button.
- Name it Snow Terrain Material.
- Set its Shader to Lit (Universal Render Pipeline/Terrain/Lit).
There, that works! Although we're not using this terrain in our scene, it was worthwhile seeing how to drill down into the game object properties to fix the unsupported shader that it was using.
Next, let's look at some assets that we will definitely be using in the projects in this book.
Using Unity Legacy Standard Assets
Several of the chapters in this book use a variety of assets that Unity has provided as a Standard Assets package for a long time; however, while still useful and fun, the package as a whole has grown stale and unsupported. Since Unity 2018, it was removed from the standard Unity install and became available on the Asset Store instead. We're still going to use this package, but we'll need to make some adjustments for compatibility with Unity 2019.3 or later and the Universal RP.
You can import the entire package or a subset as described in the following steps:
- In your browser, go to the Asset Store (https://assetstore.unity.com/) and search for Unity Standard Assets, or go directly to https://assetstore.unity.com/packages/essentials/asset-packs/standard-assets-for-unity-2017-3-32351.
- ClickOpen in Unity, click Download, and then click Import.
- In Unity, theImport Unity Packagedialog box pops up, with all the contents selected.
- Uncheck the SampleScenes folder.
- Uncheck the Standard Assets/2D folder.
- Uncheck the Standard Assets/Cameras folder.
- Uncheck the Standard Assets/Characters/FirstPersonCharacter folder.
- Uncheck the Standard Assets/Characters/RollerBall folder.
- Uncheck theStandard Assets/Vehiclesfolder.
The import box with items that we don't need for this book is shown in the following image:

Import the assets, then correct any import errors as follows:
- ClickImport.
- Check your Console window for errors by going to Window | General | Console.
- There may be numerous import errors, but most of them will have been corrected by Unity. Click the Clear button (in the top-left of the Console window).
- The remaining errors need to be resolved manually. I see two script files with obsolete references. We could update the scripts rather easily, but since we will not need time at all, they can just be deleted.
- Clicking an error message will take you to the offending file in the Project window. Locate the file, right-click it, and select Delete. At the time of writing, the broken files will be as follows:
- AssetsStandard AssetsUtilityForcedReset.cs
- AssetsStandard AssetsUtilitySimpleActivatorMenu.cs
- The import can now continue. More errors may be found and fixed by Unity. Click Clear again.
That should complete the import. Next, let's attempt to convert materials to the current render pipeline:
- SelectEdit | Render Pipeline | Universal Render Pipeline | Upgrade Project Materials to UniversalRP Materials and then clickProceed.
You can browse the warning messages, but don't worry about them; we'll find incompatible materials soon enough.
One of the models that we plan to use soon is the Ethan humanoid model. Let's add him to the scene:
- In the Project window, drill down to the Assets/Standard Assets/Characters/ThirdPersonCharacter/Prefabs/ folder.
- Drag the ThirdPersonController into the Scene.
- You may want to turn him around so that he's facing the camera by going to Transform | Rotation | Y: 180.
Say hi to Ethan!

Ethan has a third-person control script that lets you control his animation with user input. We will work on VR input devices in later chapters, so for now, let's try it out with just the keyboard:
- Click on the Play icon at the top of the Unity window in the center to start your game.
- Use the W, A, S, and D keys to move him around. Run, Ethan! Run!
- Be careful not to let him fall over the edge of our playground, or he'll fall down forever.
- Click on the Play icon again to stop the game and return to edit mode.
Other than creating geometry inside Unity and getting asset packages from the Asset Store, content is otherwise imported from other graphics software.
Importing models in supported formats
Unity has built-in support for reading and importing models in a few generic file formats, including .fbx and .obj. Most 3D-modelling software can export these files. No extra software or licenses are required to use these files. In general, you should try to obtain 3D models in .fbx or .obj file format.
Unity also supports importing models in a number of proprietary formats, provided that you have the corresponding applications that edit these files on your development machine. These include Autodesk 3ds Max (.max) and Blender (.blend). This can be an advantage if you or your team is actively working on 3D models with one of these applications, and you have the software licenses to install it on your system (if needed). But you must have a copy of the application on your own system for Unity to know how to import the files. Not having to export files to .fbx, for example, before using them in Unity saves a step, especially if the models are still being developed and modified. Unity can import proprietary files from the following 3D-modelling software (from the Unity Manual, https://docs.unity3d.com/Manual/3D-formats.html):
- Autodesk® 3ds Max®
- Autodesk® Maya®
- Blender (a free and open source 3D application)
- Cinema4D
- Modo
- LightWave
- Cheetah3D
For models that have been imported in Unity, you can modify their Import Settings and reimport as needed. The following is a screenshot of the import settings for the snowman FBX file we used earlier—for example, you can change the Scale Factor and Units if the source file was built at a scale other than Unity's 1-unit equals 1-meter scale. There are settings to select what to import from the file's scene, the mesh, and geometry.
Depending on the capabilities of the model, the Rig, Animation, and Materials tabs provide additional import parameters. If you change settings, click Apply to reimport the object with the new settings:

When the source model has materials, you can instruct Unity to use those Materials automatically, or you have the option to extract the Materials into separate Unity Material files that can be modified and adjusted like any other Material in Unity.
While Unity provides a lot of import parameters, if you have access to the original modeling software, you can also gain control of the file that is using that software's export settings—for example, in Blender, its default coordinate system has the z-axis up, while Unity's is y. This can be compensated by rotating it once inside Unity, or you can adjust Blender's FBX export settings as shown in the following screenshot:

Next, we'll consider the workflows related to creating and importing 3D assets.
Round-trip geometry workflows
All this said, Unity is increasingly more capable of creating and modifying geometry within the Unity Editor itself—for example, the ProBuilder package that is integrated into Unity (which we'll use in Chapter 10, Exploring Interactive Spaces) is useful for white-boxing (prototyping) level designs and creating simple buildings with walls, passageways, and windows. There are many other third-party tools to be found on the Asset Store.
Unity is supporting advanced workflows with the FBX Exporter package, available in Package Manager, which provides round-trip workflows between Unity and other 3D software. With this package, GameObject hierarchies, animations, lights, and cameras can now be exported from Unity and shared with other applications.
The tool also allows you to preconfigure an integration with a specific 3D-modeling software. Presently, only Autodesk Maya and 3ds Max are supported, but more may be available by the time you read this. For details and instructions on using the FBX Exporter, see https://docs.unity3d.com/Manual/HOWTO-exportFBX.html. The package is presently still in preview, but is very promising.
As you can see, building a VR project requires you to not just understand how to use the many features of Unity itself, but how to import artwork and other assets from other sources into your project.
Summary
In this chapter, you built a simple diorama, became more acquainted with the Unity editor, and learned about importing content into your project. We started by installing Unity via Unity Hub, creating a new VR project with the Universal Render Pipeline, and installing additional packages using Package Manager.
Then you learned some basics of the Unity editor, such as how to navigate between its many windows and how to use the Scene editing gizmos, including grid and snap. We built a simple diorama scene with a ground plane, a crate (cube), a red ball, and a photo backdrop. You then created a BobHead prefab and learned about prefab editing, overrides, variants, and nesting, which we'll be seeing more of in upcoming chapters.
You also looked at the value of, and potential problems with, importing assets and Unity asset packages, including ones from the Asset Store. We learned about the issues with importing legacy assets that are not necessarily compatible with the version of Unity and render pipeline that you are using and how to fix it. Lastly, you learned how Unity is growing support for round-trip geometry workflows with the FBX Exporter package.
When developing for VR, you need to set up Unity for the specific platform and device that you plan to target, as well as the SDK external to Unity that is used to build the executable project. In the next chapter, we'll set up your development system and Unity settings to build and run the project to play on your VR headset.