Chapter 7. TEC components integration 235
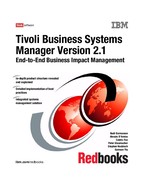
Looking at the properties display, you see both the event that caused the object’s
creation and the Red state, as shown in Figure 7-13.
Figure 7-13 Properties window
You can see in the top right-hand field that the Type is generictest 1.0.
When this condition no longer exists the IBM Tivoli Monitoring engine sends the
TMW_Clearing event to TEC, which sets the event to HARMLESS. This in turn is
forwarded to IBM Tivoli Business Systems Manager.
7.5 Defining a component from DM monitors
In this section, we show another simple component that is based on the Tivoli
Distributed Monitoring (DM) monitors; in this case, Tivoli Distributed Monitoring
Classic 3.7 in the Tivoli Management Framework environment.

236 Tivoli Business Systems Manager Version 2.1: End-to-End Business Impact Management
To implement the IBM Tivoli Business Systems Manager object that relates to a
Tivoli Distributed Monitoring profile, the following steps have to be executed:
1. Create a monitoring profile with a Classic DM monitor (SentryProfiles) using
any monitors that conform to the DM monitors. Define an action to send the
result to TEC for each level of monitoring that you want, with at least one for
the error condition and one for the resolution that will inform you that the
change of status occurred. For example, we send one for the CRITICAL
status and one for the HARMLESS status.
More information about this can be found in the Tivoli Distributed Monitoring
manual
Tivoli Distributed Monitoring Version 3.7 Users Guide
, GC31-8382.
2. Define the monitoring collection to IBM Tivoli Business Systems Manager. For
IBM Tivoli Business Systems Manager to recognize a forwarded DM event,
you must define its underlying data structure. The gemdmmap command
facilitates the association of a DM profile with an IBM Tivoli Business Systems
Manager object class. This command must be executed on the database
server machine. It also creates the software component if it has not been
created. Our command to create the DM profile association is
gemdmmap.sh -S ibmtiv5 -U sa -P XXXX -i -D ‘ClassicSentryProfile’ -m ‘DM’
-p ‘ClassicSentryProfile ‘ -v ‘1.0’
The command associates all events from a profile called ClassicSentryProfile
to a component in IBM Tivoli Business Systems Manager. After this command
completes the association appears as shown in Example 7-12.
Example 7-12 List of associated DM profiles
C:>gemdmmap -S ibmtiv5 -U sa -P XXXX -l
gemsp_list_DMtoCID:
DM profile name Manufacturer Product Version DM only
-------------------- ------------ -------------------- ------- -------
ClassicSentryProfile DM ClassicSentryProfile 1.0 yes
To activate the database changes, you must restart several affected IBM
Tivoli Business Systems Manager services:
– Agent Listener
– Propagation Agent dispatcher
– Console Server
3. Create and associate icons to the application. The image file can be a BMP
file or a JPG file. We use the gemimageimport command to associate an icon
with a software component. The syntax of the gemimageimport is:
gemimageimport.sh -p product -v version [-l | -s] -i image_filename

Chapter 7. TEC components integration 237
4. Create a standard TEC rule for event forwarding. This was done by running
the ihsttec.sh script as shown in 7.2.3, “Updating the TEC event classes and
rules” on page 217.
Now we are ready to examine the event flow from TEC to IBM Tivoli Business
Systems Manager.
Figure 7-14 Flow diagram
The flow of an 3.7 DM Classic event from the endpoint to IBM Tivoli Business
Systems Manager looks something like this:
Note: You must modify the rule for step 5 if the name of the profile is not the
one provided when the ihsttec.sh script is run. Open the ihstdmon.rls file and
change the sub source condition (in our case it is ClassicSentryProfile) to
another profile. Recompile and reload the rulebase if you do this.
238 Tivoli Business Systems Manager Version 2.1: End-to-End Business Impact Management
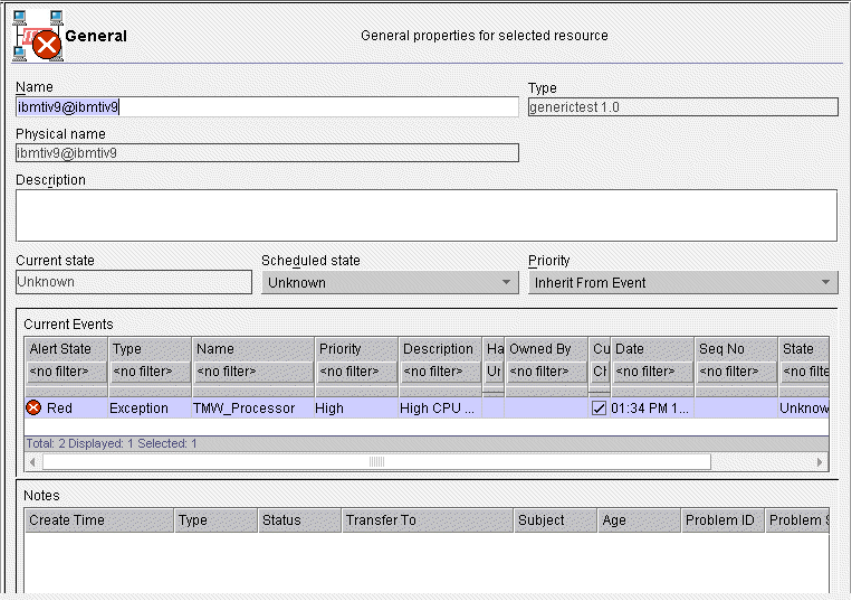
1. The monitor generates an alert because a threshold on the endpoint has
been breached. The monitor is enabled, so an alert will be sent to TEC.
A FATAL event is received from ibmtiv8, as shown in Figure 7-15. The icon
shaped like a curved arrow shows that something has been executed against
this event.
Figure 7-15 Event Viewer: Group All - All events
Chapter 7. TEC components integration 239
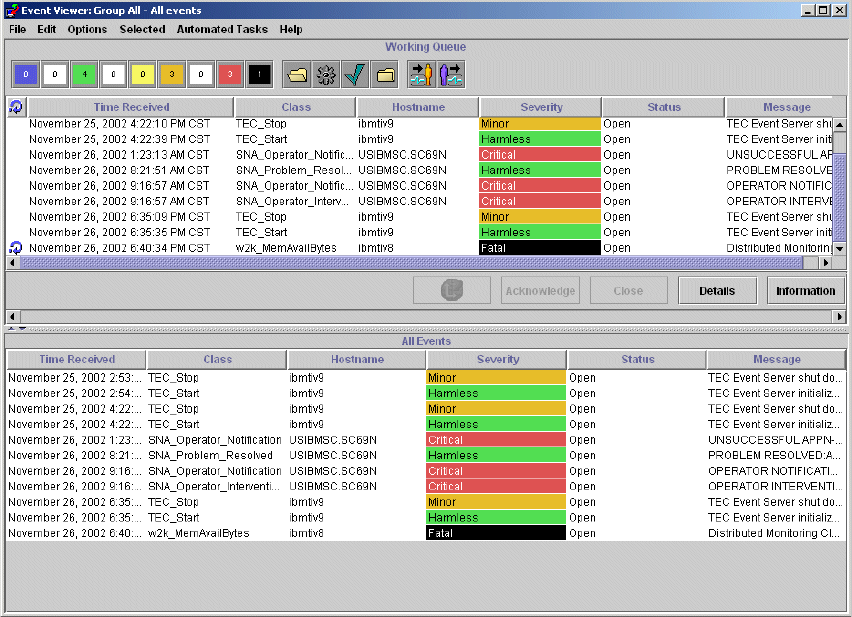
2. IBM Tivoli Business Systems Manager processes this event and writes any
updates to the objects’ changes to the IBM Tivoli Business Systems Manager
database.
An alert for this event is propagated up to show that there is a problem with
the ibmtiv8, as shown in Figure 7-16.
Figure 7-16 All Resources - Descendents window
If you take ownership of the event by right-clicking on ClassicSentryProfile
1.0:ibmtiv8 and selecting Take Ownership, the ibmtiv8 - Note Editor shown
in Figure 7-17 on page 240 opens.
..................Content has been hidden....................
You can't read the all page of ebook, please click here login for view all page.