Organize
You’ve got your favorite media in your iTunes library, but you’d like to organize it better. In this chapter, I’ll show you how to make playlists, the key to setting up your listening sessions. I’ll look at using tags to create playlists automatically with your favorite tunes. I also cover some special topics that will help you with tasks like finding your media files on your disk and managing a large iTunes library.
Organize Topics
Playlists
How Do I Make a Standard Playlist? | How Can I Share Playlists? | What Can I Do with a Playlist?
What Are Smart Playlists? | How Do I Create a Smart Playlist? | What Interesting Things Can I Do with Smart Playlists? | Do Smart Playlists Slow Down iTunes?
How Can I Organize My Playlists?
Special Questions
How Do I Delete Songs from My Library?
How Does iTunes Organize My Files?
Where Can I Put My Media If I Run Out of Room on My Computer?
How Do I Move an iTunes Library from a Windows PC to a Mac?
What’s the Best Way to Deal with My Huge Music Library?
Can I Have More than One iTunes Library on My Computer?
On Playlists
You can listen to your music by album, or by selecting song after song. You can play all the music by a specific artist, or you can shuffle your entire library. But iTunes reveals its biggest strength when you make playlists.
A playlist is a list of songs that you play together, one after the other, with a first song and a last song. Pretty basic; kind of like a CD.
But playlists are more than that. A playlist is a self-contained unit, one with a bunch of tracks you can always play in order or in Shuffle mode; a group of songs that you can listen to while dining or when chilling outside; or your favorite lively songs to listen to when you work out.
A playlist can be the equivalent of an album, a double-album set, a live concert, or an opera. It can be a compilation of favorite songs by different groups, or a selection of music for a special occasion. It can even contain all your songs, if you want. With smart playlists, you can create endless playlists that keep adding music as you listen. And a playlist can even include videos and podcasts.
Let’s distinguish between two types of playlists:
- Standard: Standard playlists are groups of songs (or other media) that you organize manually. The key word here is manually: as you’ll see ahead, smart playlists are automatically created from conditions you select, but standard playlists require that you choose every track they contain, and their play order. Standard playlists are also static; they don’t change as you play them, unless you intervene or play them in Shuffle mode.
- Smart: Smart playlists are dynamic. You choose conditions, and iTunes scans your library for files that match these conditions, based on the tags your files contain. (Hence the importance of tagging your media correctly.) In essence, the conditions in a smart playlist tell iTunes to search your library for items that match them.
How Do I Make a Standard Playlist?
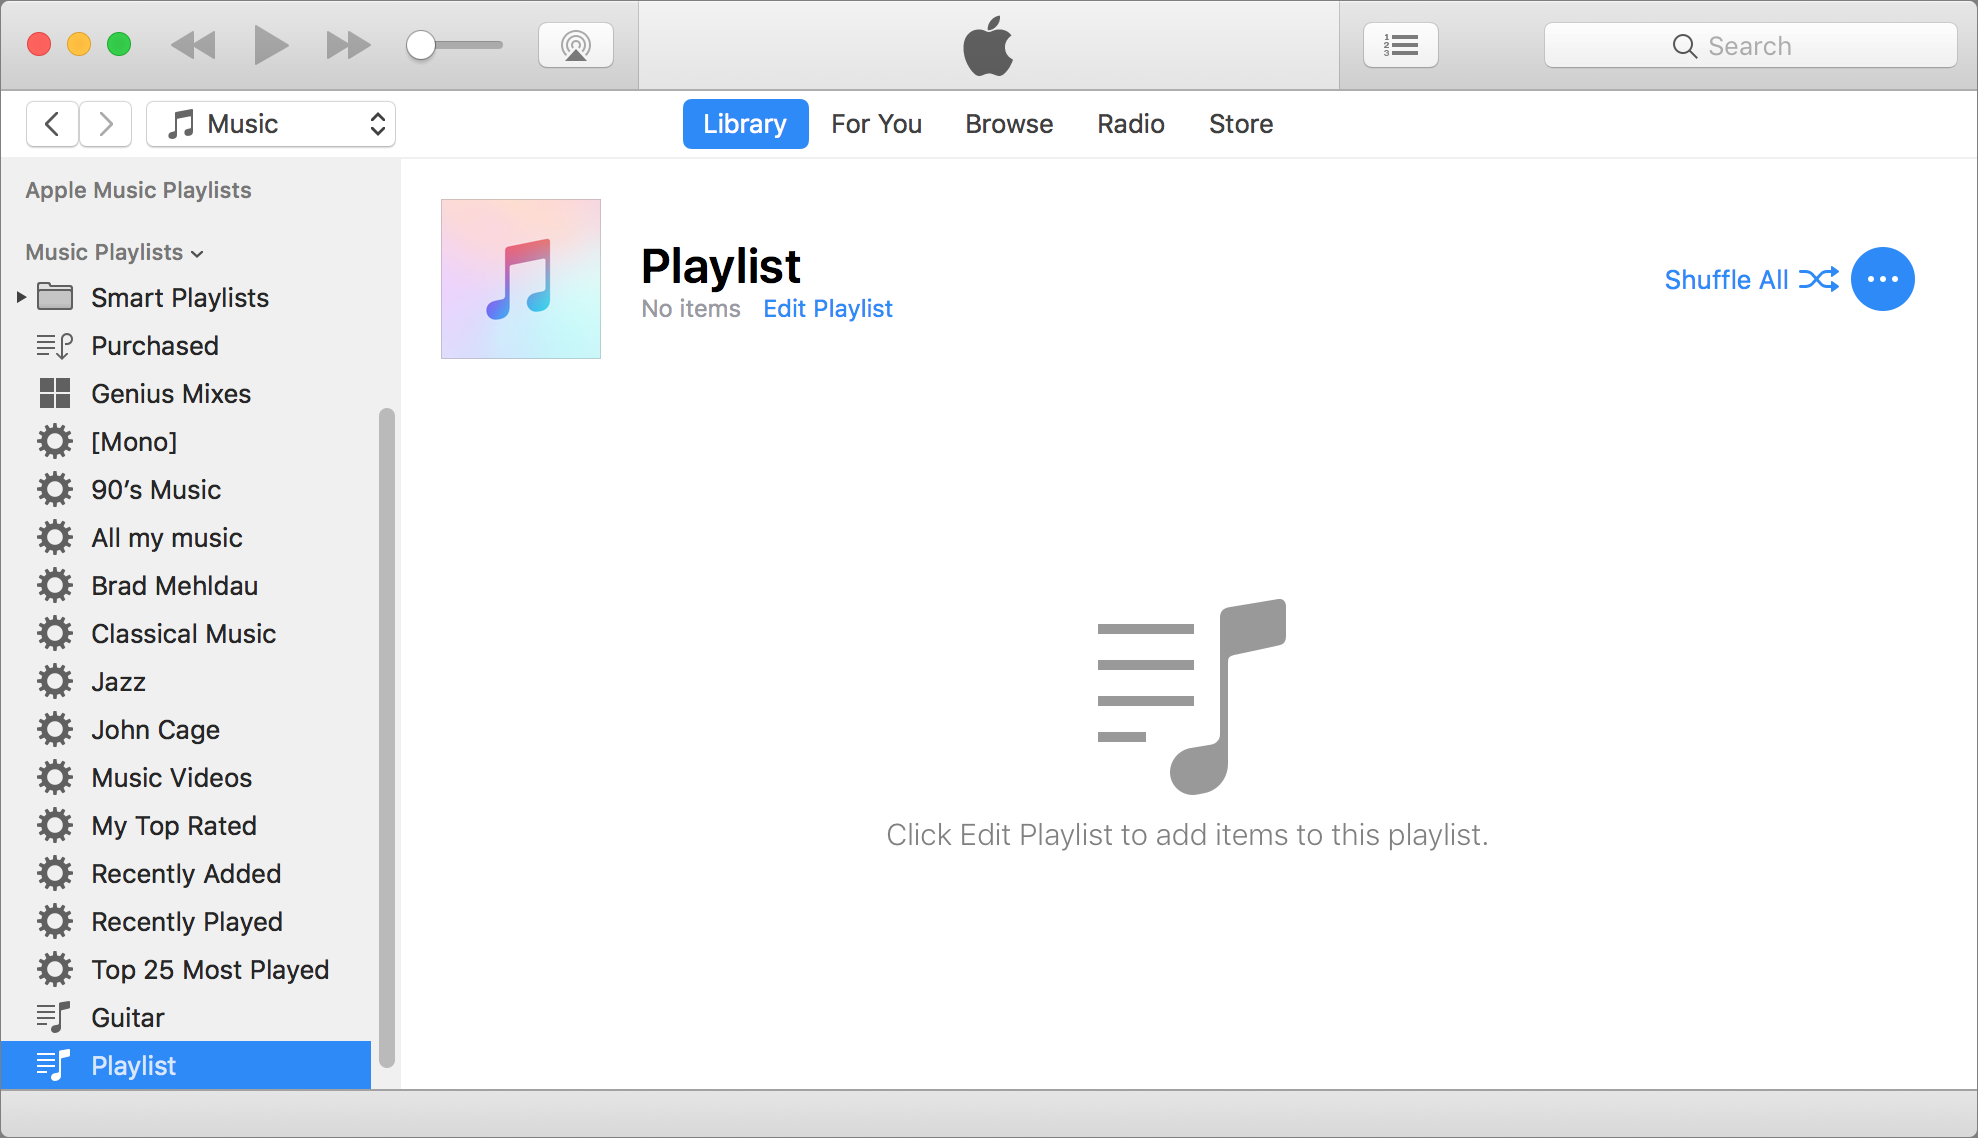
You create a standard playlist by choosing File > New > Playlist, or pressing Command-N. iTunes adds the playlist to the sidebar, and highlights its name. By default, iTunes names the new playlist Playlist (or, if that name exists, Playlist 2, and so on). Type a name for the playlist, and then press Return to save the name.
It is possible to create multiple playlists with the same name. Try to give your playlists unique names so you can tell them apart. To later change the name of a playlist, find it in the Playlists sidebar, click it, wait a moment, click it again, and type a new name.
Click the new playlist in the sidebar to work with it (Figure 74).
To add items to a playlist, you have two options. The first option has you looking at your iTunes library as you normally would. When you find an item that you want to add to your playlist, you drag it to the playlist entry in the sidebar. With this way of working, you can’t see what’s in your playlist while you add to it. With the second option, you can see both your library and the contents of your playlist at once.
Drag items to a playlist in the sidebar:
- Browse your library any way you wish: Albums view, Artists view, Songs view, etc. You can also use the Search field to find items. Drag the items you want to the sidebar and drop them on the new playlist: you can drag songs, albums, artists, or entire genres.
- When you’ve finished adding items to the playlist, click it in the sidebar and check that all the right tracks are added.
- Open the View Options window (Command-J) and choose a sort order, such as by Artist, Name, or Year. Or leave the sort order as Playlist Order to either listen in the order in which you’ve added items or to customize the order manually by dragging items up and down in the list.
- For more sorting options, choose Songs from the View As pop-up menu. The View Options window expands, and you see your playlist as a simple song list with several columns. You can sort your playlist by any of the visible columns (click a column header to sort), and add other columns by selecting their boxes in the View Options window. If you want to sort the tracks by the order in which you added them to the playlist, you must sort by the item number column; click the unlabeled area that contains a caret above the item numbers to do this.
Drag items to a playlist while viewing the playlist:
- Click “Edit Playlist” in the playlist’s header.
iTunes displays the contents of the playlist in a new Edit Playlists panel at the right of the window. At the same time, it shows a view of your music library between the sidebar and the Edit Playlist panel (Figure 75).

Figure 75: Here’s a new playlist I’ve started adding music to. Make your iTunes window as large as possible if you edit playlists in this way, at least on a computer with a small display. This image shows the iTunes window at its largest size on a 12-inch MacBook, and, as you can see, it’s quite cramped. - Browse your music library from the left-hand sidebar. You can browse by Albums, Artists, Songs, and so on.
- If you want to search for items, use the Search box at the top right of the window.
- Drag albums, artists, songs or entire genres to the Edit Playlist panel to add them to your playlist. You can choose a sort order from the header above the playlist; the default Manual Order is the order in which you drag items to the playlist, but you can change this to Name, Artist, Album, etc.
- If you wish, add a description for the playlist; type in the Add Description field. You may want to do this if you share playlists with your friends.
- When you’ve finished creating the playlist, click Done at the bottom of the Edit Playlist panel.
iTunes switches back to the view it was in before you clicked Edit Playlist. You see your playlist highlighted in the sidebar, with its contents to the right.
Now that you’ve made a playlist, you can edit it at any time. You can manually add or remove items, move them around, change the sort order, and so on.
To play your playlist, select it in the sidebar and click the Play ![]() button in the iTunes toolbar. If that doesn’t work, see How Do I Play a Playlist?.
button in the iTunes toolbar. If that doesn’t work, see How Do I Play a Playlist?.
How Can I Share Playlists?
If you’ve gone to a lot of trouble to create a playlist—standard or smart—with your favorite songs, and you want to share it with, say, your spouse, you can do this:
- Select the playlist in iTunes.
- Choose File > Library > Export Playlist, and save it in XML format.
- Have your spouse import that file into iTunes, by choosing File > Library > Import Playlist.
iTunes displays the playlist in the sidebar, and if your spouse already has all its songs, populates it with the songs.
If your spouse doesn’t have the songs, also do this, before importing the XML file:
- Create a new folder in your Finder (perhaps on the Desktop), and open the folder.
- Switch to iTunes, select all the tracks in the playlist, and drag them to the window for that folder. iTunes automatically copies song files when you drag their entries like this.
- Transfer that folder to your spouse’s computer, and add the folder to your spouse’s iTunes library by dragging it onto the iTunes window.
The songs are now available in the imported playlist.
What Can I Do with a Playlist?
When you have a playlist, you can, well, play it. You can use the Repeat or Shuffle controls to either play it over and over or to play the songs in a random order. You can also Burn the playlist to a CD. And you can Sync the playlist to your iOS device and listen to it there.
Here’s how I use my playlists:
- I put albums that I haven’t listened to in a while, but would like to listen to again in the near future, in a few “Rotation” playlists. After I’ve had my fill of an album, I delete it from the playlist.
- I keep a New Music playlist for new albums. As with my “Rotation” playlists, once I tire of listening to an album, I delete it from the playlist.
- I have playlists for particular artists or groups; for example, one with all my Bob Dylan albums, so I can sync these songs easily to my iPhone. Others contain sets of music, such as some Grateful Dead concerts from 1972; groups of classical works, such as Beethoven’s string quartets, or my favorite works by a specific composer; or box sets of different types of music.
- I keep a playlist for my favorite songs. I add to it regularly, and I sync it to all my iOS devices.
What Are Smart Playlists?
While you can make your own playlists by manually choosing which tracks they contain, and the order in which they play, smart playlists can make the process easier. They automatically choose songs, based on your desires. You may never want to use smart playlists, because you listen to your albums only in their original order; or you might want to use nothing but smart playlists, because music, like the universe, should obey other laws than linearity.
Smart playlists act like multi-criteria searches of your iTunes library, automatically adding items that match rules you choose. Apple includes a few smart playlists (Figure 77) by default so you can have an idea of what they can do.
The best way to understand smart playlists is to look at some simple ones to see how they work. To edit a smart playlist (or look at its rules), Control-click it in the sidebar and choose Edit Smart Playlist, or select it and press Command-I.
Let’s look at the Recently Played playlist (Figure 78).

This playlist can be summarized like this:
Match [all media] for [all] of the following rules
[Last Played] [in the last]
2
[weeks]
[Media Kind] [is not] [Podcast]
As you can see in the figure just above, this playlist looks for items that were played in the last 2 weeks. By default, this is “all media,” but you can constrain it by choosing a type of media from the first menu. The “Live updating” checkbox is selected, meaning the playlist updates as you listen to songs. As a result, whenever a song in your Music library is played (and, consequently, its Last Played date and time are updated), it is added to the playlist automatically.
With this playlist, you can quickly find the songs that you’ve listened to recently; here “recently” is set to 2 weeks, but you could choose 2 days, 2 months, or some other duration. (If you don’t select “Live updating,” you can play the songs in the playlist as is, but the playlist won’t change to reflect anything you’ve played since you created the playlist. To update it, edit the playlist and then click OK.)
There are other smart playlist options. You can select “Limit to” and limit the number of items the playlist contains, its total time, or the amount of data it contains. You can pick its contents by any of a dozen criteria. You can also match only checked items, meaning that unchecked items in your library won’t be added. (I talk about checking tracks in the sidebar The Importance of the Little Checkboxes, ahead.)
The playlist shown above, like many of the other default smart playlists (My Top Rated and Top 25 Most Played) is simple; it uses only two rules. But what if you want more complex criteria? Read on.
How Do I Create a Smart Playlist?
To make a smart playlist, choose File > New > Smart Playlist (Option-Command-N). By default, the first condition is set up so that the rules below match the media kind you are viewing when you create the smart playlist, and the first rule is set to [Artist] [contains], with a blank field following.
To begin setting up your playlist, you can:
- Choose a different type of media (or all media) from the Match pop-up menu at the top of the dialog.
- Use the first rule that iTunes offers by typing a name in the blank field to match an artist.
- Change the first rule that iTunes offers by choosing a different tag from the first pop-up menu in the rule. Depending on which tag you pick, you get different options. Choose additional pop-up menu items or fill in the field as needed.
When you type in a text field, iTunes auto-completes as you type, filling in the closest result to what you’ve typed so far from the contents of your library. If it’s what you want, you can stop typing. If not, keep typing.
You can add either new or nested rules like this:
-
New rule: Click the plus
 button following a rule, and then at the top of the dialog, choose whether an item must satisfy all of the rules you have specified or any of them to be added to the list. For example, you could choose three artists—say Frank Sinatra, Dean Martin, and Sammy Davis Jr.—and have a smart playlist that chooses any one of them (any) or only tracks where all three appear (all).
 -
Nested rule: Hold down Option and click the More
 button that replaces the plus button following a rule. Within a nested rule group, you then choose whether an item must match all or any of the rules in the group to be included in the playlist.
Below the rules are some important checkboxes:
- Limit to: With this option, you can limit your smart playlist. You can choose a duration, a number of items, or a size (in file size); the latter is helpful for creating a playlist to fit on an iOS device with limited capacity. For example, to fill a 64 GB iPhone, make a smart playlist of songs limited to about 45 GB (because you never get the advertised capacity on the iPhone, and you’ll also be using space for apps, photos, videos, and more). In this section you can also tell iTunes to pick items at random or to include them based on various tags or by when, how often, or how recently they were played.
- Match only checked items: Use this checkbox to limit your smart playlist to checked tracks. (I discuss checking and unchecking tracks in the sidebar The Importance of the Little Checkboxes, shortly ahead.)
- Live updating: This checkbox tells iTunes to update the smart playlist every time a change is made in your iTunes library. Use it for playlists that look at such information as play counts and last played dates, but be aware that if you have a large library and a lot of playlists with live updating set, iTunes may lag a bit when you make changes to your library.
To make changes to your smart playlist, Control-click (right-click) it in the sidebar and choose Edit Smart Playlist or select it in the sidebar and press Command-I. You can also Option-click it in the sidebar.
What Interesting Things Can I Do with Smart Playlists?
The basics of making smart playlists are simple, but you need to figure out which ones will be useful for you. Here are some that I use, which might give you ideas:
-
Not-recently played music by specific artists: I’m a big fan of Bob Dylan, and I have a playlist of his music that I haven’t listened to in 3 months. Since there’s so much of his music—I have all his releases, bought many years ago from the iTunes Store in the “Bob Dylan Collection,” plus all his subsequent releases, for a total of more than 1,800 tracks—it takes me a while to listen to it all.
In my playlist, I set these rules; the last one is because I didn’t like the Christmas album he released in 2009:
Match [music] for [all] of the following rules[Artist] [is]Bob Dylan[Last Played] [not in the last]3[months][Album] [is not]Christmas in the HeartI limit it to contain 3 hours of music selected at random, and I select the “Live updating” checkbox.
I listen to this playlist often because I’m an inveterate Dylan fan, and because it lets me rotate randomly through his immense oeuvre (but not hear his Christmas album…). I create similar smart playlists for several of my favorite artists, and even for certain box sets of classical music. For example, I listen to a 21-disc set of Schubert lieder, recorded by Dietrich Fischer-Dieskau, in the same way, though I don’t listen to much classical music in random order.
-
My 1972 Dark Star playlist: I’m a Grateful Dead fan, and I have dozens of live Dead concerts in my iTunes library (and hundreds that aren’t in the library). 1972 was a great year, especially for their signature song Dark Star, one of the band’s best jamming vehicles. In the fall of 2011, there was an official release of the band’s entire Europe ’72 tour, with 22 shows, which contain 11 rousing versions of the song.
I have a playlist set up like this:
Match [music] for [all] of the following rules[Artist] [is]Grateful Dead[Name] [contains]Dark Star[Year] [is]1972Whenever I want to choose one of these great versions of this long song, I head to that playlist. Of course, for smart playlists like this, you need to make sure all your music has a correct Year tag.
- My super-duper audiobook playlist: In How Do I Rip an Audiobook CD?, I explained how to set up an audiobook playlist for audiobooks you’ve ripped. I use this a lot, setting up one playlist for each audiobook that I’ve ripped. It makes it easy to listen to audiobooks without having to remember which file I listened to last.
-
My spot-the-skipped-songs playlist: Whenever you listen to music in Shuffle mode, you can skip tracks you don’t feel like listening to, by pressing the Next
 button (or the right arrow key, if iTunes is the frontmost app). I have a playlist set up with
 [Skips] [is not]0; this shows me which tracks I’ve skipped. This may tell me about music I’m not that interested in listening to on the go, so I can stop syncing it to my iOS device. -
The favorite songs playlist: This one is easy: just choose
[Rating] [is greater than] [***], to have 4- or 5-star songs, or[Rating] [is] [*****], to have only 5-star songs in a single playlist. I sync this one to my iOS devices all the time. -
Studio versus live recordings: I’m a fan of jazz pianists Brad Mehldau and Bill Evans. I have both live and studio recordings from each artist. For the studio recordings, I add studio to the Comments tag and for the live recordings, I add live. Sometimes I want to listen to tighter studio recordings, and other times I want more open-ended live jams. So I have playlists for each.
For example, I have one where
[Artist] [is]Brad Mehldauand[Comments] [contains]studio, another with[Comments] [contains]live, and so on. -
Mono recordings: I’m a fan of mono recordings from the early days when stereo was just starting to become common. Back in the day, producers and engineers spent more time perfecting mono mixes of records than they did the stereo mixes, and I’ve found that many mono albums from this period sound better than the slap-dash stereo mixes. I wrote about this on my blog, in an article entitled In Praise of Mono Recordings.
I have named all my mono albums with (Mono) after the titles, and I created a smart playlist with
[Album] [contains](Mono), which lists all the one-channel recordings in my iTunes library. Sometimes, when I’m in a mono mood, I’ll head over to that playlist and spin an album by Miles Davis, Bob Dylan, The Beatles or some classical or jazz recordings from the 1940s or 1950s. -
Make playlists of artists based on the first letter of their names: If you have lots of artists in your iTunes library, you may find it annoying to browse the Artists list on iOS devices. One way to get around this is to create smart playlists that gather artists according to the first letter of their names.
To do this, create a smart playlist with the rule
[Artist] [begins with]A, and save it as, say, Artist A. Or, add rules to make a playlist with several initial letters: add[Artist] [begins with]B[Artist] [begins with]C, and save the playlist as Artists A-C. Make as many or as few as you like, choosing which letters you want each to include. They’ll update automatically as you add more music to your iTunes library. -
Find which songs are on your computer, and which are in the cloud: If you use iCloud Music Library, two conditions will allow you to pinpoint the locations of your tracks. You can use
[Location] [is] [on this computer]or[Location] [is] [iCloud]to set up playlists showing which music you have locally, and which you need to download.You can also create an
[iCloud Status]rule that has one of several possible values:[Matched],[Purchased],[Uploaded],[Ineligible],[Removed],[Error],[Duplicate],[Apple Music],[No Longer Available], or[Not Uploaded]. These conditions let you make a smart playlist based on the status of songs in your iCloud Music Library. -
Find which songs are Apple Music files: If you use Apple Music, and download files for offline listening, or if you add music from Apple Music to your music library, and the music is still in the cloud, you’ll have Apple Music files. You can find all of them by creating a smart playlist with
[iCloud Status] [is] [Apple Music].
Although the above examples only scratch the surface of what you can do with smart playlists, I hope they give you ideas about how you, too, can make your own. For more ideas, check out my Macworld article A salmagundi of smart playlists.
Do Smart Playlists Slow Down iTunes?
Funny you should ask… Many people have found that having a lot of smart playlists and a large library can lead to slowdowns, at least if the smart playlists have “Live updating” on (as the default smart playlists do). There is no empirical data to prove this, but if you are in this situation, and find that iTunes is sluggish when you change tags, import music, or perform other manipulations to your library, consider culling a few smart playlists or at least turning off live updating.
The hypothesis regarding this slowdown is that iTunes writes two files every time something in your library changes: the iTunes Library.itl file, which iTunes uses to manage its database, and the iTunes Library.xml file that iTunes allows other programs to access. This latter file is much larger (my iTunes library currently has about 70,000 tracks; the iTunes Library.itl file is 27 MB, and the iTunes Library.xml file is 133 MB). When I change something in my iTunes library, I do detect a lag, but since I switched to Macs with SSDs a few years ago, these lags are much shorter and barely noticeable. So if your iTunes files are stored on an SSD, you may find that smart playlists have little or no effect on how fast iTunes reacts.
You can force an update to a smart playlist at any time: edit the smart playlist (Control-click it in the sidebar and choose Edit Smart Playlist), enable the “Live updating” checkbox, and then click OK. Edit it again and turn “Live updating” off to return to the previous state but with the new selection of content.
How Can I Organize My Playlists?
In the sidebar, iTunes sorts playlists alphabetically in two groups: smart playlists first, then standard playlists. Within either of these groups, you can use some tricks to move certain playlists to the top of the list. I use dashes (-) before playlist names to force iTunes to put them at the top of the list.
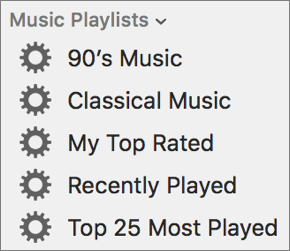
For example, these playlists, because of the dashes, sort in this order:
--Classical Rotation
--New Music
--Other Rotation
-Grateful Dead Europe 1972
-Hot Tuna live
Bob Dylan
Brad Mehldau
As you can see above, double-dashes sort before single dashes. This lets me create several levels of sorting within a list of playlists.
You can do more, though: you can use folders to organize playlists. To add a folder, choose File > New > Playlist Folder. Name the folder, and then drag any playlists you want into it. You can show or hide a folder’s contents by clicking its disclosure triangle.
If you have a lot of playlists and a lot of folders, you may want to even use subfolders. Just select a folder, then choose File > New > Playlist Folder to create a folder within the selected folder. And so on. You can have folders all the way down.
Coming back to those dashes, you can also use them to keep folders in a specific order. Playlists that aren’t in folders will display below the last folder, in alphabetical order. However, if you start using folders—if you have enough playlists that it’s necessary—you may find it best to create folders for all your playlists.
Deleting a Playlist
Click a playlist in the sidebar, and then press the Delete key. iTunes asks if you want to delete the playlist. You can check the “Do not ask me again” box if you don’t want to see this warning again. When you delete the playlist, you lose the structure of the playlist; to get it back, you must rebuild it manually, or re-create the rules for a smart playlist. However, deleting a playlist does not delete the tracks in the playlist from your iTunes library or computer.
You can delete a folder as well. This deletes all the playlists it contains.
Deleting Songs from a Playlist
In a standard playlist, select a song and press the Delete key. You get an alert, asking you to confirm the deletion. Deleting a song from a playlist removes it from the playlist, but does not delete it from your iTunes library or your computer.
You can’t delete songs from a smart playlist directly; instead, to change a smart playlist, you change its rules. One exception is in the case of a smart playlist that has the “Limit to” checkbox selected so that its tracks are constrained by a factor such as time or size. If your playlist’s conditions match more than that number of tracks, deleting one or more tracks from the smart playlist is possible (select the track in the playlist and press the Delete key). When you delete a track in this way, iTunes adds another track to meet your limit.
How Do I Delete Songs from My Library?
When you delete a song from your library, you have two options: you can delete the its entry from the library and still keep the file on your disk, or you can delete both the entry and the file. If you do the latter, make sure you have a backup (though you may not want to back up certain files, such as podcasts you’ve heard and don’t want to keep):
- Delete a song from your library: Select it in the library (i.e., not in a playlist), and press Delete. You are asked whether you want to keep the file or not. If you use iCloud Music Library, you’ll be asked if you want to remove the download and still keep the song in your library in the cloud. (If you have a local version of a song that’s stored in iCloud Music Library, and want to delete that local song, Control-click the track and choose Remove Download.)
- Delete a song from both a playlist and your library at the same time: Select it in a playlist and press Command-Option-Delete. You see the usual dialog asking you whether you want to keep the file or not.
How Does iTunes Organize My Files?
A useful aspect of iTunes is that it frees you from having to worry about organizing the actual files it manages. When you add a file to iTunes, the program stores a pointer to its location, so all you need to think about is whether you want to play the file, and how you sync it to your iOS device.
By default, iTunes stores your files in an iTunes Media folder. When you download files from the iTunes Store, they go there automatically; when you rip CDs the same thing occurs. When you add files to iTunes from your drive, assuming you’ve left the “Copy files…” checkbox enabled (it’s described just ahead), iTunes copies them from their original location, and you can delete the originals.
Curiously, this capability to organize a media library efficiently seems to irk some people, many of whom are used to manipulating files and folders from back in the DOS days. I often hear such people complain about iTunes “controlling” their files. I don’t see how this is an issue; after all, it’s quite the contrary. iTunes frees you from the worry of placing files in specific locations. But I think this attitude comes from people who are used to storing files in folders on their computers and dragging them manually to MP3 players; in other words, those who don’t use music management software to sync their devices.
While I see this only as an advantage, people who feel this way often don’t realize that iTunes doesn’t have to put files in the folders shown in Figure 79, slightly earlier. The iTunes Advanced preferences have several related options (Figure 80).

Here’s what the options do:
- iTunes Media folder location: The default location is that shown in Where Are All Those Files?, but I’ll discuss why you might change the location ahead, in Where Can I Put My Media If I Run Out of Room on My Computer?.
- Keep iTunes Media folder organized: This checkbox controls whether or not iTunes will re-file your media after you’ve initially added it to your iTunes library. With this checkbox selected, if you modify certain tags for an item in your library (including Artist, Album, Compilation, Media Kind, and Title), iTunes re-files the item so its location in the iTunes Media folder matches its tags.
- Copy files to iTunes Media folder when adding to library: Finally, you can have iTunes copy files to the iTunes Media folder. Why would you want to uncheck this box? Well, if you are uptight about letting iTunes control your files, you can put them anywhere you want (you’ll want to uncheck the first option too), then add them to your library (see How Do I Add Files I Own to iTunes?). When this option is unchecked, iTunes saves pointers to the files, but it doesn’t move them, so you can have the organization that you want, and be totally responsible for keeping files in the correct locations. But, if you manually move any files after you’ve added them to your library, iTunes won’t be able to find them again.
If you’ve prevented iTunes from copying and organizing files, but change your mind, you can enable the two checkboxes and then choose File > Library > Organize Library. iTunes will then copy all your files to the folder structure that it uses.
Where Have My Ebooks Gone?
On the Mac, ebooks are no longer stored in the iTunes library. The iBooks app has taken over. If you ever had any ebooks in the iTunes Media folder, they’ve been moved to iBooks’ own, somewhat hidden folder.
If you want to find your iBooks folder for some reason, perhaps just curiosity or perhaps to add it to your backups, go to the Finder, choose Go > Go to Folder, and enter the following:
~/Library/Containers/com.apple.BKAgentService/Data/Documents/iBooks/Books
Your books won’t have sensible filenames; you’ll see filenames like 1902DA256D5A01762609E5D6B2.epub. This makes it difficult to know which file is which—Apple does not intend for you to work with these files, and you should not drag them out of the folder or rename them.
Where Can I Put My Media If I Run Out of Room on My Computer?
If you have lots of media files—such as videos, which take up much more space than music files—you may find yourself short on space, especially if your Mac has an SSD instead of a more capacious hard disk. If you buy a few movies, and a couple of season passes for your favorite TV shows, you’ll be using up dozens of gigabytes. And if you’re a music fan, like me, you’ll definitely need more room.
Fortunately, you can store your iTunes Media folder on an external disk, or even on a network volume.
I keep my iTunes Media folder on an external disk that I use just for my media. You may reach the point where you’ll need to make this move, a process that I’ve divided into two sets of steps.
Move the folder to an external disk or network volume:
- Back up your files, using whatever method you regularly use, just in case. You do back up your files, right? (See Back Up.)
- Connect the external disk, or prepare the network disk by mounting it. If you’re short on space now, plan ahead; if a 1 TB disk will hold all your media without much extra space, get a 2 TB disk so you won’t have to change again soon. Hard disks are cheap; these days, a 4 TB external hard drive costs about $120.
- Go to the iTunes preferences, and click Advanced in the toolbar.
- If “Keep iTunes Media folder organized” is not checked, check it. (After you’ve moved your files, you can go back and uncheck this option if you so desire.)
- In the “iTunes Media folder location” section of the Advanced preferences, click Change.
- In the dialog that appears, navigate to your external disk or network volume. Continue navigating to where you want to keep your iTunes Media folder (this may be at the root level of the disk). Click New Folder, name this folder iTunes Media, and then click Open.
- Click OK to save your changes.
- Choose File > Library > Organize Library.
- In the Organize Library dialog, select “Consolidate files” and then click OK.
iTunes copies all your media files to the new location. This may take a while if you have a lot of files; go make a cup of tea or coffee. If you have a very large library, you may even have time to make lunch.
Verify the transfer, and then trash your local copy:
- When the copy has completed, check in iTunes to make sure that the files are found correctly: Control-click a file and choose Show in Finder (Mac) or Show in Windows Explorer (Windows). If the file is indeed in the correct location, then everything’s fine. (If not, you may need to repeat the process; but if you followed these instructions to the letter, you should have no problem.)
- Working on your computer’s regular disk, move the original copy of your iTunes Media folder to the Trash or Recycle Bin. (To find the folder, read Where Are All Those Files?, a few pages earlier.) Don’t delete any of the other items in your iTunes folder, such as the iTunes Library files or the Album Artwork folder.
- When you’re double-certain everything is working correctly from the new location, and when you’ve checked again (you can never be too careful; you did make a backup, right?), empty the Trash or Recycle Bin to free up the space that was used by the original files.
Now that you’ve moved these files, you’ll have a lot more room on your startup volume, but you’ll need to make sure to back up the files in this new location. I’ll talk about backing up your iTunes files in Back Up.
How Do I Move an iTunes Library from a Windows PC to a Mac?
Are you a switcher? If so, read a Macworld article I wrote, called Move an iTunes library from a Windows PC to a Mac. Although moving your library used to be a complex procedure, Apple has made it quite easy. If you want to move your iTunes library in the other direction—from Mac to Windows—follow the instructions this article, but in the opposite direction. This article is a bit old, but the process is still the same.
What’s the Best Way to Deal with My Huge Music Library?
Welcome to the club. My main iTunes library currently has some 70,000 music tracks, as well as audiobooks, podcasts, and videos. It took a long time to rip the thousands of CDs I’ve added to the library, as well as to buy music from the iTunes Store and other sites. My library has gradually increased to what is, some might say, a disturbing size. I’ve culled some music, creating a second library with, currently, another 70,000 tracks, so neither library is too unwieldy.
There are two problems with a large library: one is managing all that music in iTunes, and the second is syncing to an iOS device that can’t hold everything. (I’ll look at the latter issue in Sync.)
As far as managing music, iTunes is a pretty good program for dealing with a large library. The most important thing you can do is carefully tag your music so you can find what you want. I find that using a maximum number of genres makes it easier to sort and drill down into my music collection. I mentioned earlier, in What Are Tags?, that you can add a genre to iTunes by typing it in the Info dialog.
But do you need all that music in your iTunes library? Do you listen to it all? Maybe you should check what you don’t listen to. Make a smart playlist with the rule [Last Played] [not in the last] 6 [months] and see what comes up. I do this occasionally and then remove music I don’t listen to, placing it in a second iTunes library (see below, Can I Have More than One iTunes Library on My Computer?). Having multiple iTunes libraries doesn’t change the amount of space the files take up, but it does make my primary library less daunting. You can also back up those files to an external drive and then remove them from your disk entirely, to save space.
Another issue with a large library is that iTunes gets slower as the library gets larger; I’ve found that around the 30,000 to 50,000 track mark iTunes gets a bit sluggish (and this is more obvious on an older computer). I notice this mostly when I tag new music or rip CDs. Keeping the iTunes library slim can make the program perkier.
Can I Have More than One iTunes Library on My Computer?
Back in the day when the largest capacity iPod was 40 GB, I had one iTunes library (and one iPod) for classical music, and one for the rest of my music. I’d switch libraries to sync each iPod. When iPod capacities increased, I merged the two libraries. These days, however, I use a second library to store music that I don’t listen to often, in order to keep my main library more manageable.
If you use iCloud Music Library, you can have up to 100,000 tracks, so probably won’t need a second library unless you have a special reason, perhaps to set up a simplified library for your kids, so they can more easily find music or movies that they want.
Here’s how to make an additional library:
- Launch iTunes, and immediately press and hold the Option key. (In Windows, hold down the Shift key before launching iTunes.)
iTunes displays a dialog, as in Figure 81.

Figure 81: This dialog lets you either create a new library or choose an existing one. - Click the Create Library button, enter a name for the library, and then click Save. The name you enter will be applied to a folder.
iTunes opens with that new empty library. You can add any of your media to it and make playlists, as you can with your main library. (To populate the new library, open your original library’s iTunes Media folder, find what you want to add, and then drag it to the iTunes window.) You can make several libraries like this.
To switch back to the original library, quit iTunes, launch the program while holding down the Option key (or Shift in Windows), then click the Choose Library button and select the folder for the main library.