
Chapter 5. Add Simple Graphic Elements
Chapter at a Glance

✓ | |
✓ | |
✓ | |
✓ | |
Some documents that you create in Microsoft Word 2010 are straightforward and require nothing more than words. Others might benefit from the addition of graphic elements to reinforce their concepts, to grab the reader’s attention, or to make them more visually appealing. These graphic elements can include a wide variety of objects and effects, including:
Pictures. These objects are created outside of Word—photographs from digital cameras, clip art images, or files created on a computer with a graphics program. No matter what the origin of the picture, you can change its size and its position in relation to other content after you insert it in the Word document. For some types of pictures, you can make additional changes from within Word, such as cropping the picture or embellishing it by applying artistic effects.
Drawing objects. These objects are created within Word—text boxes, WordArt text, diagrams, charts, shapes, and other such objects. As with pictures, you can size, move, and format drawing objects from within Word.
See Also
For information about diagrams, see Chapter 7. For information about charts, see Chapter 8. For information about shapes, see Drawing and Modifying Shapes in Chapter 9.
Building blocks. You can draw attention to specific information and add graphic appeal by incorporating ready-made graphic building blocks (also called Quick Parts) into a document. These building blocks are combinations of drawing objects (and sometimes pictures) in a variety of formatting styles that you can select to insert elements such as cover pages, quotations pulled from the text (called pull quotes), and sidebars. You can also create your own building blocks, which then become available in the Quick Parts gallery.
Backgrounds. You can apply a variety of backgrounds to the pages of your document, including plain colors, gradients, textures, patterns, and pictures.
In this chapter, you’ll first insert and modify pictures in a document. You’ll experiment with page backgrounds, and then add three types of building blocks to a document. Finally, you’ll have a bit of fun with WordArt.
Practice Files
Before you can complete the exercises in this chapter, you need to copy the book’s practice files to your computer. The practice files you’ll use to complete the exercises in this chapter are in the Chapter05 practice file folder. A complete list of practice files is provided in Using the Practice Files at the beginning of this book.
Inserting and Modifying Pictures
You can insert digital photographs or pictures created in almost any program into a Word document. You specify the source of the picture you want to insert by clicking one of these two buttons, which are located in the Illustrations group on the Insert tab:
Picture Click this button to insert a picture that is saved as a file on your computer, or on a device (such as an external hard drive or a digital camera) that is connected to your computer.
Clip Art Click this button to insert one of hundreds of clip art images, such as photos and drawings of people, places, and things.
See Also
For information about clip art, see the sidebar About Clip Art later in this chapter.
After you insert a picture in a document, you can modify the image by using commands on the Format contextual tab, which is displayed only when a picture or drawing object is selected. For example, you can click buttons in the Adjust group to change the picture’s brightness and contrast, recolor it, apply artistic effects to it, and compress it to reduce the size of the document containing it. The Picture Styles group offers a wide range of picture styles that you can apply to a picture to change its shape and orientation, as well as add borders and picture effects. And finally, you can use the commands in the Size group for cropping and resizing pictures.

Troubleshooting
The appearance of buttons and groups on the ribbon changes depending on the width of the program window. For information about changing the appearance of the ribbon to match our screen images, see Modifying the Display of the Ribbon at the beginning of this book.
See Also
For information about using the commands in the Arrange group, see Arranging Objects on the Page in Chapter 10.
In this exercise, you’ll insert a couple of photographs and size and crop them. You’ll modify one of them and then copy the modifications to the other one. Then you’ll insert an illustration and apply an artistic effects to it.
Set Up
You need the Authors_start document, the Joan and Joyce photographs, and the OTSI-Logo illustration located in your Chapter05 practice file folder to complete this exercise. Open the Authors_start document, and save it as Authors. Display the rulers and formatting marks, and then follow the steps.
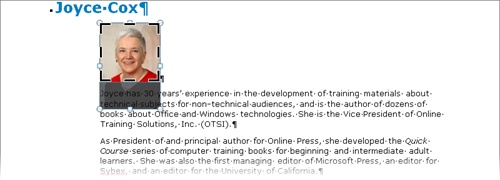
Click to the left of the Joyce has 30 years’ experience paragraph, press the Enter key, and press the Up Arrow key. Then on the Insert tab, in the Illustrations group, click the Picture button.
The Insert Picture dialog box opens, displaying the contents of your Pictures library.
Navigate to the Chapter05 practice file folder, and double-click the Joyce picture.
Word inserts the picture at the cursor and displays the Format contextual tab on the ribbon.
Troubleshooting
If Word inserts a frame the size of the picture but displays only a sliver of the picture itself, Word cannot increase the line spacing to accommodate the picture because it is set to a specific amount. To correct this problem, click the Paragraph dialog box launcher, and in the Paragraph dialog box, change the Line Spacing setting to Single.
Tip
In this exercise, you insert pictures in blank paragraphs. By default, Word inserts the picture in-line with the text, meaning that Word increases the line spacing as necessary to accommodate the picture. If you were to type text adjacent to the picture, the bottom of the picture would align with the bottom of the text on the same line. After you insert a picture, you can change its position and the way text wraps around it.
See Also
For more information about positioning objects and wrapping text around them, see Adding WordArt Text later in this chapter and Arranging Objects on the Page in Chapter 10.
In the lower-right corner of the picture, point to the handle (the circle). When the pointer changes to a double arrow, drag up and to the left until the right side of the picture’s shadow frame is in line with the 1.75 inch mark on the horizontal ruler.
When you release the mouse button, the picture assumes its new size.
On the Format contextual tab, in the Size group, click the Crop button.
Word surrounds the picture with crop handles.
Point to the bottom-middle handle, and when the pointer changes to a black T, drag upward until the picture is about 1 inch high.
Word grays out the part of the picture you have cropped away.
Click the Crop button to turn it off.
Word removes the crop handles and discards the gray part of the picture.
Click to the left of the Joan has worked paragraph, press Enter, and then press the Up Arrow key. Then repeat steps 1 through 6 to insert, size, and crop the Joan picture below the Joan Lambert heading.
With the Joan picture still selected, on the Format contextual tab, in the Adjust group, click the Color button.
The Color gallery appears.
Under Recolor in the Color gallery, preview each option, and then click the second thumbnail in the first row (Grayscale).
The picture is grayscaled—that is, each color is converted into a shade of gray.
In the Adjust group, click the Corrections button. Then in the Corrections gallery, under Brightness and Contrast, preview each option, and then click the fourth thumbnail in the top row (Brightness: +20% Contrast: -40%).
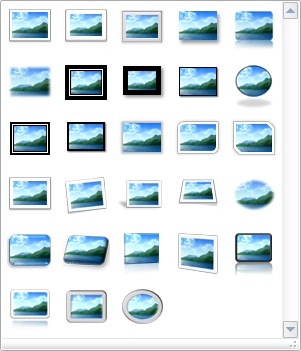
In the Picture Styles group, click the More button.
The Picture Styles gallery appears.
In the gallery, preview each thumbnail, and then click the first thumbnail in the fifth row (Bevel Rectangle). Click away from the picture to see the effect.
The photograph now has a three-dimensional appearance.
Click the Joan picture to select it, and then on the Home tab, in the Clipboard group, click the Format Painter button.
If necessary, scroll up in the document, and click the Joyce picture.
Word copies the grayscale format, color corrections, and picture style from one picture to the other.
Scroll down until the Online Training Solutions, Inc. (OTSI) heading is visible, click to the left of the OTSI specializes paragraph, press Enter, and then press Up Arrow.
On the Insert tab, in the Illustration group, click the Picture button. Then in the Chapter05 folder displayed in the Insert Picture dialog box, double-click the OTSI-Logo graphic.
With the logo selected, on the Format contextual tab, in the Adjust group, click the Artistic Effects button.
In the Artistic Effects gallery, preview each thumbnail, and then click the last thumbnail in the fifth row (Glow Edges). Click away from the picture to see the effect.
The logo now has a black-and-white stylized effect.


If you want to dress up a document with a graphic but you don’t have a suitable picture, you might want to search for a clip art image. The clip art available from within Word 2010 comes in many different styles and formats, including illustrations, photographs, videos, and audio clips. The only thing the clips have in common is that they are free and available without any copyright restrictions.
Clicking the Clip Art button displays the Clip Art task pane, where you can enter a search term to look for an image on your computer or on the Office.com Web site. When clip art images matching your search term are displayed in the task pane, you can click an image to insert it in your document. If you don’t want to insert an image at the cursor but want it to be available for use somewhere else, you can point to the image in the Clip Art task pane, click the arrow that appears, and then click Copy to store a copy of the image on the Microsoft Office Clipboard. If you find an image on Office.com and want to be able to insert it in documents when you are not online, you can point to the arrow, click Make Available Offline, and then store it in a clip art collection. You can also edit the keywords associated with an image and view its properties.
To find and insert a clip art image:
Position the cursor where you want the image to appear. Then on the Insert tab, in the Illustrations group, click the Clip Art button.
In the Clip Art task pane, select the current entry in the Search For box (or click in the box if there is no entry), and enter a keyword for the type of clip art you are looking for, such as cats. Then select the Include Office.com Content check box, and click Go.
Tip
You can restrict the search results to a particular type of clip art by selecting the type in the Results Should Be list.
The task pane displays any clip art images that have your keyword associated with them.
In the task pane, click the image you want to insert into the document.
You can then manipulate the clip art image the same way you would a picture.

Changing a Document’s Background
Whether you’re creating a document that will be printed, viewed on a computer, or published on the Internet and viewed in a Web browser, you can make your document stand out by adding a background color, texture, or picture to every page in a document. You can also add borders to every page.
See Also
For information about creating documents for the Web, see Creating and Modifying Web Documents in Chapter 11.
When it comes to backgrounds, the trick is to not overdo it. Your effects need to be subtle enough that they do not interfere with the text or other elements on the page.
In this exercise, you’ll first apply a solid background color to every page. Then you’ll create a two-color gradient across the pages. You’ll fill the pages with one of the textures that come with Word and then fill them with a picture. Finally, you’ll put a border around every page.
Set Up
You need the MarbleFloor picture located in your Chapter05 practice file folder to complete this exercise. Open a blank document, turn off the rulers and formatting marks, and then follow the steps.
In the lower-right corner of the program window, click the Zoom Level button, and set the zoom percentage to display the whole page.
On the Page Layout tab, in the Page Background group, click the Page Color button, and then under Theme Colors, in the column of green boxes, click the second box from the top (Olive Green, Accent 3, Lighter 60%).
The background of the document changes to the selected color.
In the Page Background group, click the Page Color button, and then click Fill Effects.
The Fill Effects dialog box opens.
In the Colors area, click Two colors, and then leaving Color 1 set to light green, click the Color 2 arrow, and in the fifth column of boxes, select the top box (Blue, Accent 1, Lighter 80%).
The Variants and Sample areas change to show graded combinations of the two colors.
In the Shading styles area, click each option in turn and observe the effects in the Variants and Sample areas. Then click Diagonal Up.
In the Variants area, click the option in the upper-left corner, and then click OK.
The background of the document is now shaded from light green to light blue.
Display the Fill Effects dialog box again, and click the Texture tab.
On this page, you can select from a number of texture files that come with Word.
Click the effect in the second column of the third row (White Marble), and then click OK.
The background changes to display the effect rather than the color.
Display the Fill Effects dialog box again, and click the Picture tab. Then click Select Picture, and with the contents of your Chapter05 practice file folder displayed in the Select Picture dialog box, double-click MarbleFloor. In the Fill Effects dialog box, click OK.
The background changes to display a blurred picture of a marble floor in the Doge’s Palace in Venice.
In the Page Background group, click the Page Borders button.
The Borders And Shading dialog box opens with the Page Border page active.
In the Setting area of the Borders and Shading dialog box, click Box. Then in the Color list, click the third box in the blue column (Blue, Accent 1, Lighter 40%).
In the Art list, scroll down, clicking any art option you like to see it applied to the page in the Preview pane. When you find a style you like, click OK.
We chose a classic double border near the bottom of the Art list.
Press Ctrl+Enter to insert a page break, and then scroll to the second page.
When you apply a background, it is reflected in all the pages of the document.


Inserting Building Blocks
To simplify the creation of professional-looking text elements, Word 2010 comes with ready-made visual representations of text, known as building blocks, which are available from various groups on the Insert tab. You can insert the following types of building blocks:
Cover page. You can quickly add a formatted cover page to a longer document such as a report by selecting a style from the Cover Page gallery. The cover page includes text placeholders for elements such as a title so that you can customize the page to reflect the content of the document.
Header and footer. You can display information on every page of a document in regions at the top and bottom of a page by selecting a style from the Header or Footer gallery. Word indicates the header and footer areas by displaying dotted borders and displays a Design contextual tab on the ribbon. You can enter information in the header and footer areas the same way you enter ordinary text. You can have a different header and footer on the first page of a document and different headers and footers on odd and even pages.
Tip
If your document contains section breaks, each successive section inherits the headers and footers of the preceding section unless you break the link between the two sections. You can then create a different header and footer for the current section. For information about sections, see Controlling What Appears on Each Page in Chapter 6.
Page number. You can quickly add headers and footers that include only page numbers and require no customization by selecting the style you want from one of the Page Number galleries.
Text box. To reinforce key concepts and also alleviate the monotony of page after page of plain text, you can insert text boxes such as sidebars and quote boxes by selecting a style from the Text Box gallery. The formatted text box includes placeholder text that you replace with your own.
If you frequently use a specific element in your documents, such as a formatted title-subtitle-author arrangement at the beginning of reports, you can define it as a custom building block. It is then available from the Quick Parts gallery.
See Also
For information about saving frequently used text as a custom building block, see Inserting Saved Text in Chapter 2.
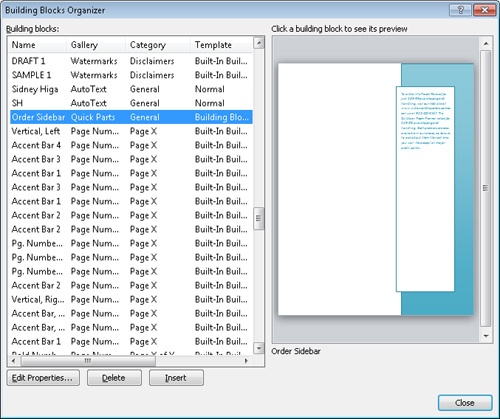
You can see a list of all the available building blocks by clicking the Quick Parts button in the Text group on the Insert tab and then clicking Building Blocks Organizer.
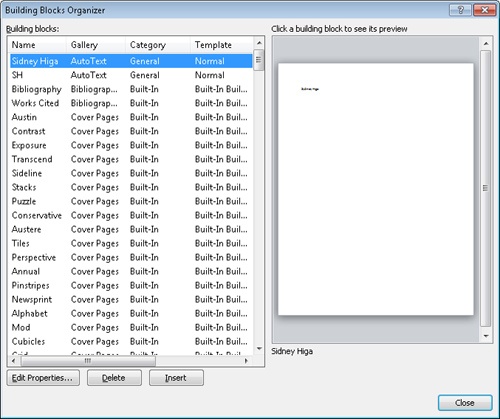
Initially the building blocks are organized by type, as reflected in the Gallery column. If you want to insert building blocks of the same design in a document, you might want to sort the list alphabetically by design name, by clicking the Name column heading. For example, a cover page, footer, header, quote box, and sidebar are all available with the Pinstripes design. Some elements, such as bibliographies, equations, tables of contents, tables, and watermarks, are not part of a design family and have their own unique names.
Tip
You can see more information about each building block by dragging the horizontal scroll box to display the right side of the Building Blocks list.
At the bottom of the Building Blocks Organizer dialog box, you can click Edit Properties to display a dialog box where you can see the information about a selected building block in a more readable format. If you are viewing the properties associated with a custom building block, you can change them in this dialog box, but we don’t recommend changing the properties assigned to a building block that came with Word.

You can delete a selected custom building block from the list by clicking Delete at the bottom of the Building Blocks Organizer dialog box, and you can insert a selected building block into the document by clicking Insert.
In this exercise, you’ll insert a cover page and add a header and footer to a document. You’ll also insert two kinds of text boxes with the same design. Finally, you’ll save a customized sidebar as a building block.
Set Up
You need the Flyer_start document located in your Chapter05 practice file folder to complete this exercise. Open the Flyer_start document, and save it as Flyer. Then follow the steps.
Click the Zoom Level button in the lower-right corner of the program window. In the Zoom dialog box, click Whole page, and then click OK.
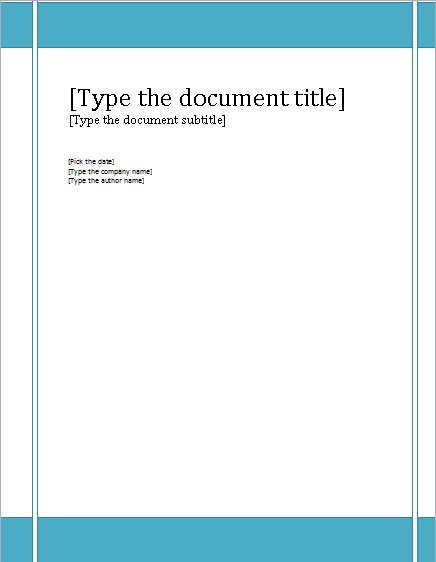
With the cursor at the top of the document, on the Insert tab, in the Pages group, click the Cover Page button.
Scroll through the Cover Page gallery to see the available options, and then click Pinstripes.
Word inserts the cover page at the beginning of the document and adds placeholders for the title, subtitle, date, company name, and author name.
Click anywhere in the title placeholder, and type Simple Room Design. Then click the Pick the date placeholder, click the arrow that appears, and in the calendar, click today’s date (indicated by a red box). Delete the remaining placeholder paragraphs.
On the Insert tab, in the Header & Footer group, click the Header button. Scroll through the Header gallery, and then click Pinstripes.
Word displays the Design contextual tab, dims the text of the document, and indicates the header and footer areas with dotted lines.
In the Navigation group, click the Next button.
Word moves to the next section of the document, which is the page after the cover page.
Type Wide World Importers. Then on the Home tab, in the Paragraph group, click the Center button.
On the Design tab, in the Navigation group, click the Go to Footer button.
The cursor moves to the footer area at the bottom of the page.
In the Header & Footer group, click the Page Number button, point to Current Position in the list, and then in the gallery, click Large Color.
Except for the first page of the document, the pages now have a header and footer.

Headers and footers can include any information you want repeated on each page in a section, including graphics.
Tip
To use a numbering scheme other than Arabic numerals, to number pages by chapter, or to control the starting number, click the Page Number button in the Header & Footer group, and then click Format Page Numbers. In the Page Number Format dialog box, click the Number Format arrow, and then in the list, click the format you want.
In the Close group, click the Close Header and Footer button.
At the top of the second page, delete Simple Room Design. Then on the Insert tab, in the Text group, click the Quick Parts button, and click Building Blocks Organizer.
The Building Blocks Organizer shown at the beginning of this topic opens. The left pane displays a complete list of all the building blocks available on your computer. Clicking a building block in the left pane displays a preview in the right pane.
Scroll through the Building blocks list, previewing a few of the building blocks. Then click the Name column heading, and scroll through the list again.
Notice that page elements of the same theme are coordinated.
In the Building blocks list, click Pinstripes Quote (the first of the Pinstripes text boxes), and then below the list, click Insert.
Word inserts the quote box halfway down the right side of the page.
Click the Zoom Out button on the Zoom Slider until you can read the text of the document. Then select and copy the last sentence of the fourth paragraph (Go with what you love...).
Click the quote box to select the placeholder text. Then on the Home tab, in the Clipboard group, click the Paste arrow, and under Paste Options, click the Keep Text Only button.
The copied text replaces the placeholder, and because it was pasted as unformatted text, it retains the formatting of the placeholder text. The quote box automatically resizes to fit its new contents.
See Also
For information about text boxes, see the sidebar Drawing Text Boxes later in this chapter.
Display the whole page again. Then scroll to the last page of the document, and click anywhere on the page.
On the Insert tab, in the Text group, click the Text Box button, scroll through the gallery, and click Pinstripes Sidebar.
Word inserts the sidebar down the right side of the page.
If necessary, zoom out so that you can see the text well enough to edit it. Then at the beginning of the last paragraph of the document, delete NOTE: (including the colon and following space).
Select the last paragraph, and on the Home tab, in the Clipboard group, click the Cut button.
See Also
For more information about keyboard shortcuts, see Appendix A at the end of this book.
Click the sidebar to select the placeholder text. Then in the Clipboard group, click the Paste arrow, and under Paste Options, click the Keep Text Only button.
The sidebar now contains the cut text.
To widen the sidebar so that the Web site address fits on one line, click the sidebar text, and drag the blue handle on the dotted line at the left side of the white box to the left, until it sits slightly to the left of the frame of the white box.
If the Web site address still doesn’t fit, adjust the width of the sidebar again.
Click at the top of the sidebar’s blue box. Then on the Insert tab, in the Text group, click the Quick Parts button, and click Save Selection to Quick Part Gallery.
Troubleshooting
If you click the text in the sidebar or elsewhere in the document after resizing the sidebar, the sidebar will no longer be selected and the Save Selection To Quick Part Gallery command will not be available.
The Create New Building Block dialog box opens.
Replace the text in the Name box with Order Sidebar, and then click OK.
You can now insert this custom sidebar from the Quick Parts gallery into other documents.
In the Text group, click the Quick Parts button.
The Quick Parts gallery appears.
Click Building Blocks Organizer, and then in the Building Blocks Organizer dialog box, click the Category column heading to sort the Building blocks list by that column.
In the Building blocks list, scroll to the General category, and click Order Sidebar once.
The building block you just created appears in the preview pane.


Clean Up
If you want, delete the building block you just created before you close the Building Blocks Organizer dialog box. Then save the Flyer document, and close it.
Important
When you exit Word after saving a custom building block, you’ll be asked whether you want to save changes to the template in which you stored the building block. If you want the building block to be available for future documents, click Save; otherwise, click Don’t Save.
If none of the predefined text-box building blocks meets your needs, you can draw your own text box. At the bottom of the Text Box gallery, click Draw Text Box, and then drag a box the size you want anywhere on the page. You can immediately start typing at the blinking cursor, and you can format the text the way you would any other text.
When a text box is surrounded by a dashed border, it’s selected for text editing. To manipulate the text box itself, you need to click its frame.

The text box on the left is selected for editing, and the one on the right is selected for manipulation.
When a text box has a solid border, you can reposition it by dragging it to another location, and you can change its size by dragging the size handles around its frame. You can change the outline and fill colors by using the commands in the Shape Styles group on the Format contextual tab.
You can link text boxes so that text flows from one to the next. To do so:
Adding WordArt Text
If you’re familiar with WordArt in earlier versions of Word, you’re in for a surprise. WordArt has matured from the fun little tool you might have used in the past to create headings in molded shapes and gaudy colors. Its capabilities are now oriented toward creating more sophisticated display-text objects that you can position anywhere on the page. Although the WordArt object is attached to the paragraph that contained the cursor when you created it, you can move it independently from the text, even positioning it over the text if you want.
To insert a WordArt object, you click the WordArt button in the Text group on the Insert tab, and click a text style in the WordArt gallery. (The WordArt styles are the same as the text effects available in the Text Effects gallery in the Font group of the Home tab.) Then you enter your text in the text box that appears. You can edit the text, adjust the character formatting in the usual ways, and change the text style at any time.
Tip
You can also select existing text before clicking the WordArt button to convert that text into a WordArt object.
See Also
For information about character formatting, see Manually Changing the Look of Characters in Chapter 3. For information about text effects, see Quickly Formatting Text in the same chapter.
When a WordArt object is selected, the Format contextual tab appears on the ribbon. You can use the commands on this tab to format the WordArt object to meet your needs. For example, from the Format tab, you can add effects such as shadows and 3-D effects, change the fill and outline colors, and change the text direction and alignment. You can also position the WordArt object in any of several predefined locations on the page, as well as specify how the text should wrap around the object.
Tip
Don’t go too wild with WordArt formatting. Many WordArt Styles and Shape Styles take up space and can involve trial and error to produce a neat effect.
In this exercise, you’ll insert a new WordArt object, modify it, and then position it on the page. Then you’ll change the way it relates to the text on the page.
Set Up
You need the Announcement_start document located in your Chapter05 practice file folder to complete this exercise. Open the Announcement_start document and save it as Announcement. Then with the rulers and formatting marks turned off, follow the steps.
On the Insert tab, in the Text group, click the WordArt button.
The WordArt gallery appears, displaying the same formatted letters you see when you click the Text Effects button.
Click the third thumbnail in the fifth row (Fill – Red, Accent 2, Warm Matte Bevel).
Word inserts a WordArt object with that text effect at the cursor. Because a graphic object is selected, the Format contextual tab appears on the ribbon.
Tip
If formatting marks are displayed, you see an anchor icon adjacent to the first paragraph. You can ignore it for now.
See Also
For information about anchoring objects, see Arranging Objects on the Page in Chapter 10.
With Your Text Here selected, type The Room Planner. (Don’t type the period.)
Without moving the cursor, on the Home tab, in the Paragraph group, click the Center button.
Click the border of the text box to select the box, and then change the zoom percentage so that you can see the whole page.
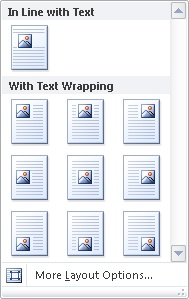
On the Format contextual tab, in the Arrange group, click the Position button.
The Position gallery appears.
Point to each thumbnail in turn to preview where each option will place the object. Then under With Text Wrapping, click the second thumbnail in the second row (Position in Middle Center with Square Text Wrapping).
The object moves to the middle of the page.
Don’t worry if the word Planner is now truncated. Because of the interaction of the object with its surrounding text, sometimes not all the WordArt text fits in its box after you position it. You’ll fix that in a minute.
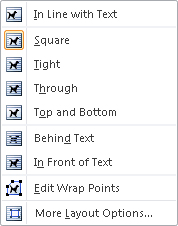
In the Arrange group, click the Wrap Text button.
The Wrap Text gallery appears.
Point to each thumbnail in turn to preview their effects, and then click Tight.
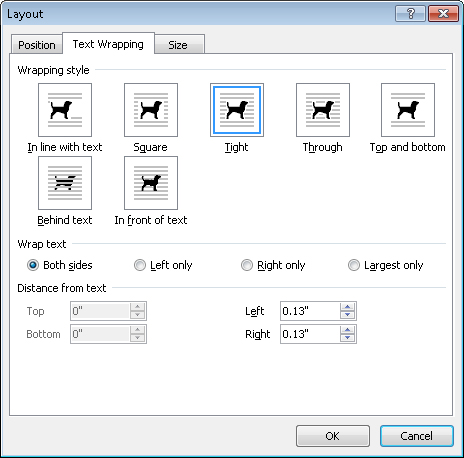
In the Arrange group, click the Wrap Text button, and then click More Layout Options.
The Layout dialog box opens with the Text Wrapping page active.
In the Distance from text area, change the Left and Right settings to 0.3”, and then click OK.
The text outside the box is no longer encroaching on the box.
If the word Planner was truncated in your box, the entire word should now be displayed. If it isn’t, try increasing the Distance From Text settings to 0.4”.
In the WordArt Styles group, display the WordArt Quick Styles gallery, and then click the fourth thumbnail in the third row (Gradient Fill – Blue, Accent 1).
In the Shape Styles group, display the Shape Styles gallery, and then click the fourth thumbnail in the fourth row (Subtle Effect – Olive Green, Accent 3).
Press Ctrl+Home.
Now you can see the effect of the WordArt text.
If you want, experiment with combinations of the styles and formatting available on the Format tab.
For example, you might want to try some of the Text Effects options, such as the molding effects available in the Transform gallery.


Key Points
You can insert illustrations created with most graphics programs, as well as digital photos, into a Word document.
A background color, texture, pattern, or picture can really give a document pizzazz, but be careful that it doesn’t overwhelm the text.
Word comes with predefined building blocks that quickly add graphic elements to a document.
Using WordArt, you can easily add fancy text to a document and then format and position it for the best effect.