
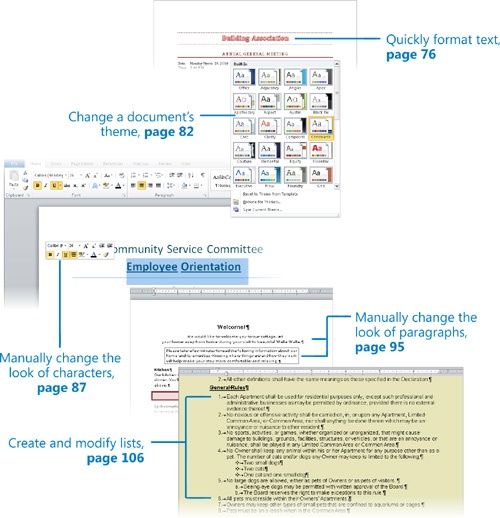
Chapter 3. Change the Look of Text
Chapter at a Glance
✓ | |
✓ | |
✓ | |
✓ | |
✓ | |
The appearance of your documents helps to convey their message. Microsoft Word 2010 can help you develop professional-looking documents whose appearance is appropriate to their contents. You can easily format the characters and paragraphs so that key points stand out and your arguments are easy to grasp. You can also change the look of major elements within a document by applying predefined sets of formatting called Quick Styles, and you can change the look of selected text by applying predefined combinations called text effects. In addition, you can change the fonts, colors, and effects throughout a document with one click by applying one of the built-in themes.
In this chapter, you’ll first experiment with built-in Quick Styles and text effects, and then you’ll change the theme applied to a document. You’ll change the look of individual words, and then you’ll change the indentation, alignment, and spacing of individual paragraphs. You’ll also add borders and shading to make paragraphs stand out. Finally, you’ll create and format both bulleted and numbered lists.
Practice Files
Before you can complete the exercises in this chapter, you need to copy the book’s practice files to your computer. The practice files you’ll use to complete the exercises in this chapter are in the Chapter03 practice file folder. A complete list of practice files is provided in Using the Practice Files at the beginning of this book.
Quickly Formatting Text
You don’t have to know much about character and paragraph formatting to be able to format your documents in ways that will make them easier to read and more professional looking. With a couple of mouse clicks, you can easily change the look of words, phrases, and paragraphs by using Quick Styles.
Word has several types of predefined Quick Styles, but the simplest are those you can apply to text.
Paragraph styles You apply these to entire paragraphs, such as headings.
Character styles You apply these to words.
Linked styles You apply these to either paragraphs or words.
By default, Word makes just a few of the predefined Quick Styles available in the Quick Styles gallery in the Styles group on the Home tab. Quick Styles apply a combination of character formatting (such as font, size, and color) and paragraph formatting (such as line spacing).

The styles displayed as thumbnails in the Quick Styles gallery have been designed to go well together, so applying styles from the gallery produces a harmonious effect. After you apply styles from the current set of styles, you can easily change the look of the entire document by switching to a different style set. The Quick Style names are the same; only their defined formatting changes. So if you have applied the Heading 1 style to a paragraph, you can change its formatting simply by changing the style set.
You display the list of available style sets by clicking the Change Styles button and then clicking Style Set.

You can point to any style set in the list to see a live preview of how the applied styles in a set will look, and you can click a style set to apply its definitions to the document.
See Also
For information about creating custom styles, see Working with Styles and Templates in Chapter 16.
In addition to applying Quick Styles to quickly change the look of paragraphs and characters, you can apply predefined text effects to a selection to add more zing. Clicking the Text Effects button in the Font group on the Home tab displays a gallery of effects to choose from.

These effects are dramatic, so you’ll probably want to restrict their use to document titles and similar elements to which you want to draw particular attention.
In this exercise, you’ll experiment with Quick Styles and text effects.
Set Up
You need the AgendaA_start document located in your Chapter03 practice file folder to complete this exercise. Open the AgendaA_start document, and save it as AgendaA. Then follow the steps.
In the lower-right corner of the program window, at the left end of the Zoom Slider, click the Zoom Out button until you can see all of the text.
For example, if your current view is 100% and your resolution is 1024x768, you can click the Zoom Out button three times to set the zoom percentage to 70%.
Ensure that the cursor is located at the top of the document, at the beginning of the Building Association paragraph. Then on the Home tab, in the Styles group, point to each thumbnail in the displayed row of the Quick Styles gallery.
The formatting of the first line changes to show you a live preview of how its text will look if you click the style you are pointing to. You don’t have to actually apply the formatting to see its effect.
Without making a selection, click the Down arrow to the right of the gallery.
The next row of the Quick Styles gallery appears.
Point to each thumbnail in this row of the Quick Styles gallery.
Only the styles that are paragraph or linked styles affect the text. You cannot see a live preview of character styles unless the cursor is within a word or multiple words are selected.
To the right of the Quick Styles gallery, click the More button.
Word displays the entire Quick Styles gallery. The style applied to the paragraph containing the cursor is surrounded by a border.
In the gallery, click the Title thumbnail.
Word applies that style to the paragraph containing the cursor.
Click anywhere in the ANNUAL GENERAL MEETING line, and then in the gallery, click the Heading 1 thumbnail.
Click anywhere in the Agenda line, and then in the gallery, click the Heading 1 thumbnail.
Notice that although you applied the same Heading 1 style to ANNUAL GENERAL MEETING and Agenda, the first heading looks bigger because of the use of all capital letters.
Point in the selection area to the left of the Preliminaries line, and click to select the line. Then hold down the Ctrl key while clicking adjacent to the following lines:
Approval of Minutes
Board Reports
Election of Board Members
New Business
Adjournment
Apply the Heading 1 style to the selected lines. Then without moving the selection, click the More button and, in the gallery, click Emphasis.
Applying the Emphasis character style on top of the Heading 1 paragraph style makes these headings italic, which looks lighter.
Select the Date and Time lines, and then in the Quick Styles gallery, click the No Spacing thumbnail.
Apply the No Spacing style to the three lines under Preliminaries, the two lines under Board Reports, and the two lines under Election of Board Members.
Press Ctrl+Home to release the selection and move the cursor to the top of the document.
As you can see, the results look very professional.
In the Styles group, click the Change Styles button, point to Style Set, and then point to each style set in turn, watching the effect on the document.
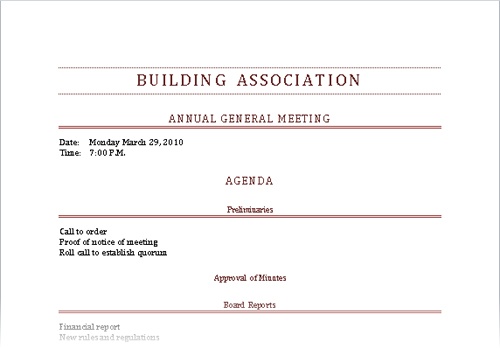
When you finish exploring, click Formal.
The formatting of the document changes and the headings and text take on the look assigned to this style set.
Select the document title. Then in the Font group, click the Text Effects button.
Word displays the Text Effects gallery.
Point to each thumbnail in the gallery, observing the effect on the title behind the gallery.
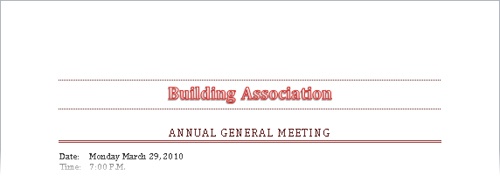
Click the right-most thumbnail in the third row (Fill - Red, Accent 2, Double Outline - Accent 2). Then click away from the title to release the selection.
The effect applied to the title makes it really stand out.


Changing a Document’s Theme
To enhance the look of a Word document whose components have been styled, you can apply a predefined theme. A theme is a combination of colors, fonts, and effects that project a certain feeling or tone. For example, the Flow theme uses a palette of blues and greens, the Calibri and Constantia fonts, and understated effects. You apply a theme to the entire document by clicking the Themes button in the Themes group on the Page Layout tab, and then making a selection from the Themes gallery.

If you like the colors of one theme and the fonts of another, you can mix and match theme elements. First apply the theme that most closely resembles the look you want, and then in the Themes group, change the colors by clicking the Theme Colors button or the fonts by clicking the Theme Fonts button.
If you create a combination of colors and fonts that you would like to be able to use with other documents, you can save the combination as a new theme. By saving the theme in the default Document Themes folder, you make the theme available in the Themes gallery. However, you don’t have to store custom themes in the Document Themes folder; you can store them anywhere on your hard disk, on removable media, or in a network location. To use a theme that is stored in a different location, you click the Themes button, and then click Browse For Themes at the bottom of the gallery. Locate the theme you want in the Choose Theme Or Themed Document dialog box, and then click Open to apply that theme to the current document.
Tip
The bottom section of the Themes gallery displays themes downloaded from the Microsoft Office Online Web site. You can visit this Web site at office.microsoft.com to find additional themes and templates created by Microsoft and by other people.
In this exercise, you’ll apply a theme to an existing document and change the colors and fonts. Then you’ll save the new combination as a custom theme.
Set Up
You need the AgendaB_start document located in your Chapter03 practice file folder to complete this exercise. Open the AgendaB_start document, and save it as AgendaB. Then follow the steps.
On the Page Layout tab, in the Themes group, click the Themes button.
The Themes gallery appears.
Point to each thumbnail in turn to display a live preview of the theme. (Scroll through the gallery so that you can explore all the themes.)
In the Themes gallery, click Trek.
The colors and fonts change to those defined for the selected theme.
In the Themes group, click the Theme Colors button.
The Theme Colors gallery appears. (The currently selected color set, which is not shown in the graphic on the next page, is indicated by a border.)
Preview any color set that interests you, and then in the gallery, click Newsprint.
The Newsprint colors replace the Trek colors, but nothing else in the document changes.
In the Themes group, click the Theme Fonts button.
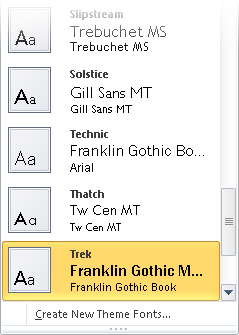
The Theme Fonts gallery appears. The currently selected font set is highlighted. Each built-in option includes a set of two fonts—the first is used for headings and the second for body text.
Preview any set of fonts that interests you, and then in the gallery, click Apex.
The Apex fonts replace the Trek fonts, but the colors remain the same.
In the Themes group, click the Themes button, and then below the gallery, click Save Current Theme.
The Save Current Theme dialog box opens and displays the contents of the Document Themes folder. (This dialog box resembles the Save As dialog box.) The Document Themes folder is the default location for saving any new themes you create.
In the File name box, replace the suggested name with My Theme, and then click Save.
In the Themes group, click the Themes button to display the gallery.
Your new theme appears in the Custom section at the top of the gallery.
Click away from the gallery to close it without making a selection.


Tip
If you want to delete the theme you created in this topic, open Windows Explorer and navigate to the C:Users<user name>AppDataRoamingMicrosoftTemplatesDocument Themes folder. (In Windows 7, you can click the Start button, type Document Themes in the Search box at the bottom of the Start menu, and then click the folder in the search results.) Then select My Theme, and press Delete.
Manually Changing the Look of Characters
As you have seen, Word 2010 makes changing the look of content in a styled document almost effortless. But styles can’t do everything. To be able to precisely control the look of your text, you need to know how to manually change individual elements.
When you type text in a document, it is displayed in a particular font. By default the font used for text in a new Word document is Calibri, but you can change the font of any element at any time. The available fonts vary from one computer to another, depending on the programs installed. Common fonts include Arial, Verdana, and Times New Roman.
You can vary the look of a font by changing the following attributes:
Size. Almost every font comes in a range of sizes, which are measured in points from the top of letters that have parts that stick up (ascenders), such as h, to the bottom of letters that have parts that drop down (descenders), such as p. A point is approximately 1/72 of an inch (about 0.04 centimeters).
Style. Almost every font comes in a range of styles. The most common are regular (or plain), italic, bold, and bold italic.
Effect. Fonts can be enhanced by applying effects, such as underlining, small capital letters (small caps), or shadows.
Color. A palette of coordinated colors is available, and you can also specify custom colors.
Character spacing. You can alter the spacing between characters by pushing them apart or squeezing them together.
Although some attributes might cancel each other out, they are usually cumulative. For example, you might use a bold font in various sizes and various shades of green to make words stand out in a newsletter. Collectively, the font and its attributes are called character formatting.
You apply character formatting from one of three locations:
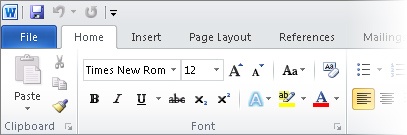
Mini Toolbar. Several common formatting buttons are available on the Mini Toolbar that appears when you point to selected text.
Font group on the Home tab. This group includes buttons for changing the font and most of the font attributes you are likely to use.
Font dialog box. If you are looking for an attribute, such as small caps, and don’t see it in the Font group, click the Font dialog box launcher. All the attributes are gathered together on the Font page of the dialog box, except character spacing, which is on the Advanced page.
In this exercise, you’ll format the text in a document by changing its font, style, size, color, and character spacing. You’ll also highlight a few words. Then you’ll return selected text to its original condition by clearing some formatting you no longer want.


Set Up
You need the OrientationDraft_start document located in your Chapter03 practice file folder to complete this exercise. Open the OrientationDraft_start document, and save it as OrientationDraft. Then follow the steps.
In the Employee Orientation heading, click anywhere in the word Orientation.
On the Home tab, in the Font group, click the Underline button.
See Also
To see a complete list of keyboard shortcuts, see Appendix A at the end of this book.
The word containing the cursor is now underlined. Notice that you did not have to select the entire word.
In the same heading, click anywhere in the word Employee, and then on the Quick Access Toolbar, click the Repeat button.
Word repeats the previous formatting command. Again, although you did not select the entire word, it is now underlined.
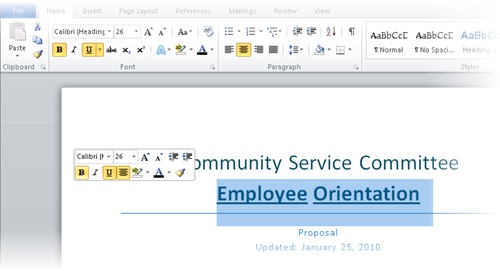
In the selection area, click adjacent to Employee Orientation to select the entire heading.
Word displays a transparent version of the Mini Toolbar. You can use the common commands on the Mini Toolbar to quickly change the look of the selection.
Point to the Mini Toolbar to make it fully visible. Then on the Mini Toolbar, click the Bold button.
The heading is now bold. The active buttons on the Mini Toolbar and in the Font group on the Home tab indicate the attributes you applied to the selection.
Troubleshooting
The appearance of buttons and groups on the ribbon changes depending on the width of the program window. For information about changing the appearance of the ribbon to match our screen images, see Modifying the Display of the Ribbon at the beginning of this book.
On the Mini Toolbar, click the Format Painter button. Then move the pointer into the selection area to the left of the Proposal heading, and click the mouse button.
Word applies the formatting of Employee Orientation to Proposal.
Select Employee Orientation, and then on the Home tab, in the Font group, click the Font arrow.
The Font gallery appears.
Scroll through the gallery of available fonts, and then click Impact.
The Employee Orientation heading now appears in the new font.
In the Font group, click the Font Size arrow, and then in the list, click 20.
The size of the heading text decreases to 20 points.
Click the Font dialog box launcher.
The Font dialog box opens.
Click the Underline style arrow, and then in the list, click (none).
In the Effects area, select the Small caps check box.
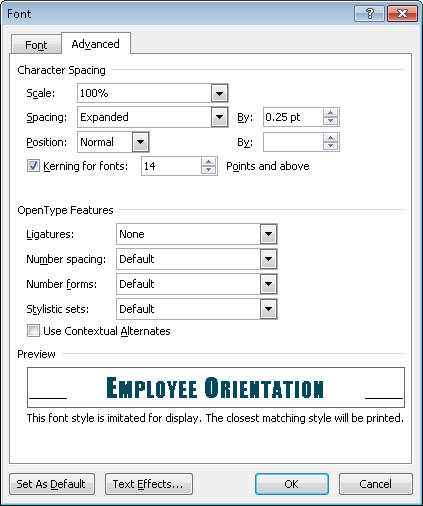
Click the Advanced tab.
Notice that the Spacing option is currently set to Expanded.
To the right of the Spacing option, in the By box, select 0.25 pt, type 10 pt (the pt stands for points), and click OK. Then press Home to release the selection.
The manually formatted text appears in small capital letters with the spacing between the characters expanded by 10 points.
Select Employee Orientation again. In the Font group, click the Font Color arrow, and then under Theme Colors in the palette, click the box at the right end of the top row (Lime, Accent 6).
The selected words are now lime green.
Tip
To apply the Font Color button’s current color, you can simply click the button (not its arrow). If you want to apply a color that is not shown under Theme Colors or Standard Colors, click More Colors at the bottom of the palette, and in the Colors dialog box, click the color you want in the color wheel.
In the first bullet point, select the phrase concept of service. Then in the Font group, click the Text Highlight Color arrow, and click the Turquoise box in the top row.
The selected phrase is now highlighted in turquoise, and the Text Highlight Color button shows turquoise as its active color.
In the fifth bullet point, double-click the word brainstorming. Then hold down the Ctrl key while double-clicking planning and leadership.
In the Font group, click the Change Case button, and click UPPERCASE. Then click away from the bullet point to release the selection.
The selected words now appear in all capital letters.
Select the Proposal line. Then on the Home tab, in the Font group, click the Clear Formatting button.
The formatting of the selected text is removed.
Tip
You cannot click the Clear Formatting button to remove highlighting. If the highlight is the same color as that shown on the Text Highlight Color button, you can select the text and click the button to remove the highlighting. If the button shows a different color, select the text, click the Text Highlight Color arrow, and then click No Color.


Manually Changing the Look of Paragraphs
As you know, you create a paragraph by typing text and then pressing the Enter key. The paragraph can consist of one word, one sentence, or multiple sentences. You can change the look of a paragraph by changing its indentation, alignment, and line spacing, as well as the space before and after it. You can also put borders around it and shade its background. Collectively, the settings you use to vary the look of a paragraph are called paragraph formatting.
In Word, you don’t define the width of paragraphs and the length of pages by defining the area occupied by the text; instead you define the size of the white space—the left, right, top, and bottom margins—around the text. You click the Margins button in the Page Setup group on the Page Layout tab to define these margins, either for the whole document or for sections of the document.
See Also
For information about setting margins, see Previewing and Adjusting Page Layout in Chapter 6. For information about sections, see Controlling What Appears on Each Page in the same chapter.
Although the left and right margins are set for a whole document or section, you can vary the position of the paragraphs between the margins. The quickest way to indent a paragraph from the left is to click the Increase Indent button; clicking the Decrease Indent button has the opposite effect.
Another way to control the indentation of lines is by dragging markers on the horizontal ruler to indicate where each line of text starts and ends.
First Line Indent. Begins a paragraph’s first line of text at this marker
Hanging Indent. Begins a paragraph’s second and subsequent lines of text at this marker at the left end of the ruler
Left Indent. Indents the text to this marker
Right Indent. Wraps the text when it reaches this marker at the right end of the ruler
You display the ruler by clicking the Ruler check box in the Show group on the View tab, or by clicking the View Ruler button located at the top of the vertical scroll bar.
Setting a right indent indicates where the lines in a paragraph should end, but sometimes you might want to specify where only one line should end. For example, you might want to break a title after a particular word to make it look balanced on the page. You can end an individual line by inserting a text wrapping break (more commonly known as a line break). After positioning the cursor where you want the break to occur, you click the Breaks button in the Page Setup group on the Page Layout tab, and then click Text Wrapping. Word indicates the line break with a bent arrow. Inserting a line break does not start a new paragraph, so when you apply paragraph formatting to a line of text that ends with a line break, the formatting is applied to the entire paragraph, not just that line.
You can also determine the positioning of a paragraph between the left and right margins by changing its alignment. You can click buttons in the Paragraph group on the Home tab to align paragraphs.
Align Left. Aligns each line of the paragraph at the left margin, with a ragged right edge
Center. Aligns the center of each line in the paragraph between the left and right margins, with ragged left and right edges
Align Right. Aligns each line of the paragraph at the right margin, with a ragged left edge
Justify. Aligns each line between the margins, creating even left and right edges
Tip
If you know that you want to create a centered paragraph, you don’t have to type the text and then align the paragraph. You can use the Click And Type feature to create appropriately aligned text. Move the pointer to the center of a blank area of the page, and when the pointer’s shape changes to an I-beam with centered text attached, double-click to insert the cursor in a centered paragraph. Similarly, you can double-click at the left edge of the page to enter left-aligned text and at the right edge to enter right-aligned text.
You can align lines of text in different locations across the page by using tab stops. The easiest way to set tab stops is to use the horizontal ruler. By default, Word sets left-aligned tab stops every half inch (1.27 centimeters), as indicated by gray marks below the ruler. To set a custom tab stop, you start by clicking the Tab button located at the left end of the ruler until the type of tab stop you want appears. You have the following options:
Left Tab. Aligns the left end of the text with the tab stop
Center Tab. Aligns the center of the text with the tab stop
Right Tab. Aligns the right end of the text with the tab stop
Decimal Tab. Aligns the decimal point in the text (usually a numeric value) with the tab stop
Bar Tab. Draws a vertical line at the position of the tab stop
After selecting the type of tab stop you want to set, you simply click the ruler where you want the tab stop to be. Word then removes any default tab stops to the left of the one you set.
This ruler has a custom left-aligned tab stop at the 1.5 inch mark and default tab stops every half inch to the right of the custom tab stop.
To change the position of an existing custom tab stop, you drag it to the left or right on the ruler. To delete a custom tab stop, you drag it away from the ruler.
To align the text to the right of the cursor with the next tab stop, you press the Tab key. The text is then aligned on the tab stop according to its type. For example, if you set a center tab stop, pressing Tab moves the text so that its center is aligned with the tab stop.
Tip
To fine-tune the position of tab stops, click the Paragraph dialog box launcher on either the Home or Page Layout tab. In the Paragraph dialog box, click Tabs to display the Tabs dialog box. You might also open this dialog box if you want to use tab leaders—visible marks such as dots or dashes connecting the text before the tab with the text after it. For example, tab leaders are useful in a table of contents to carry the eye from the text to the page number.
To make it obvious where one paragraph ends and another begins, you can add space between them by adjusting the Spacing After and Spacing Before settings in the Paragraph group on the Page Layout tab. You can adjust the spacing between the lines in a paragraph by clicking the Line And Paragraph Spacing button in the Paragraph group on the Home tab.

When you want to make several adjustments to the alignment, indentation, and spacing of selected paragraphs, it is sometimes quicker to use the Paragraph dialog box than to click buttons and drag markers. Clicking the Paragraph dialog box launcher on either the Home tab or the Page Layout tab opens the Paragraph dialog box.

You can do a lot with the options in the Paragraph dialog box, but to make a paragraph really stand out, you might want to put a border around it or shade its background. (For real drama, you can do both.) Clicking the Border arrow in the Paragraph group on the Home tab displays a gallery of border options.
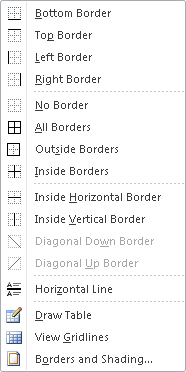
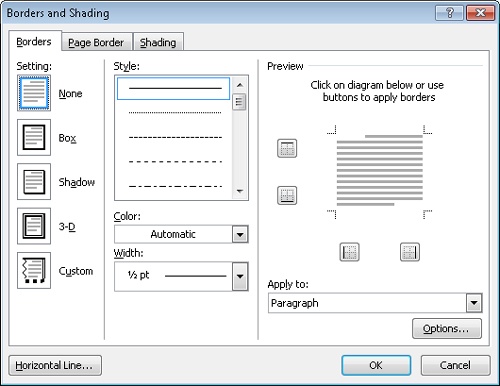
Clicking Borders And Shading at the bottom of the list displays the Borders And Shading dialog box, where you can select the style, color, width, and location of the border.
In this exercise, you’ll change text alignment and indentation, insert and modify tab stops, modify paragraph and line spacing, and add borders and shading to paragraphs.
Set Up
You need the Information_start document located in your Chapter03 practice file folder to complete this exercise. Open the Information_start document, and save it as Information. Then click the Show/Hide ¶ button to turn on the display of formatting marks, and follow the steps.
Set the zoom percentage so that you can see almost all of the paragraphs in the document. Then on the View tab, in the Show group, select the Ruler check box.
Tip
In the following steps, we give measurements in inches. You can substitute approximate measurements in your own measuring system. If you want to change the measuring system Word uses, display the Backstage view, click Options, and in the Word Options dialog box, display the Advanced page. Then under Display, click the system you want in the Show Measurements In Units Of list, and click OK.
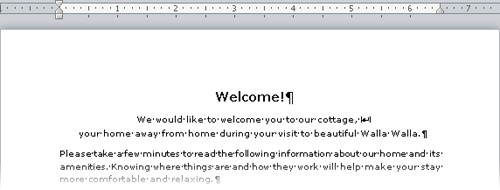
Select the first two paragraphs (Welcome! and the next paragraph). Then on the Home tab, in the Paragraph group, click the Center button.
The lines are now centered between the margins.
After the comma in the second paragraph, click to the left of your. Then on the Page Layout tab, in the Page Setup group, click the Breaks button, and click Text Wrapping.
Word inserts a line break character and moves the part of the paragraph that follows that character to the next line.
See Also
For information about page and section breaks, see Controlling What Appears on Each Page in Chapter 6.
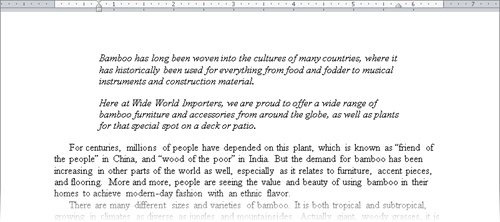
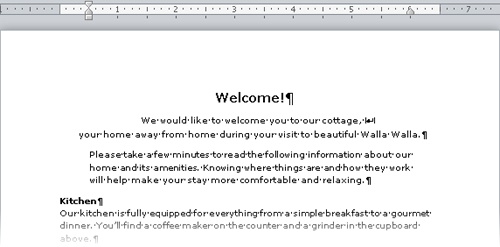
Click anywhere in the next paragraph, and then on the Home tab, in the Paragraph group, click the Justify button.
Word inserts space between the words in the lines of the paragraph so that the edges of the paragraph are flush against both the left and right margins.
Without moving the cursor, on the horizontal ruler, drag the Left Indent marker to the 0.5 inch mark.
The First Line Indent and Hanging Indent markers move with the Left Indent marker.
At the right end of the ruler, drag the Right Indent marker to the 6 inch mark.
The paragraph is now indented a half inch in from each of the side margins.
Click in the Be careful paragraph, and then in the Paragraph group, click the Increase Indent button.
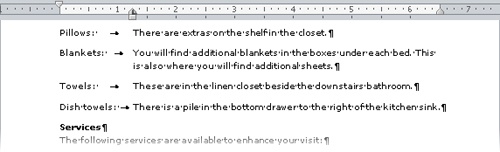
Select the Pillows, Blankets, Towels, and Dish towels paragraphs, and with the Left Tab stop active at the left end of the ruler, click the ruler at the 2 mark.
Word removes the default tab stops (indicated by gray lines below the ruler) up to the 2-inch mark and inserts a custom left-aligned tab at that location on the ruler.
Click to the left of There in the Pillows paragraph, and press the Tab key. Then insert tabs to the left of You, These, and There in the next three paragraphs.
The part of each paragraph that follows the colon is now aligned at the 2-inch mark, producing more space than you need.
Select the four paragraphs containing tabs, and on the ruler, drag the Left Tab stop to the 1.25 mark.
Without changing the selection, on the ruler, drag the Hanging Indent marker to the 1.25 mark. Then press Home to release the selection.
The Left Indent marker has moved as well, causing the second line of the second selected paragraph to start in the same location as the tab stop.
At the bottom of the document, select the three paragraphs containing dollar amounts. Where the horizontal and vertical rulers meet, click the Tab button until the Decimal Tab button is displayed and then click the ruler at the 3 mark.
Insert a tab to the left of each dollar amount.
Word aligns the three paragraphs on the decimals.
Select the first paragraph containing tabs (Pillows), hold down the Ctrl key, and then select the paragraphs that begin with the following:
Blankets
Towels
Limousine winery tour
In-home massage
On the Home tab, in the Paragraph group, click the Line Spacing button, and click Remove Space After Paragraph. Then press the Home key.
Now only the last paragraphs of the two lists have extra space after them.
Scroll up until the top of the document is in view, and click anywhere in the Please take a few minutes paragraph. On the Home tab, in the Paragraph group, click the Border arrow, and then click Outside Borders.
Click anywhere in the Be careful paragraph, click the Border arrow, and then at the bottom of the list, click Borders and Shading.
The Borders And Shading dialog box opens, with the Borders page displayed.
Under Setting, click the 3-D icon to select that border style. Scroll through the Style list and click the fourth style from the bottom. Then click the Color arrow, and under Theme Colors in the palette, click the Red, Accent 2 box.
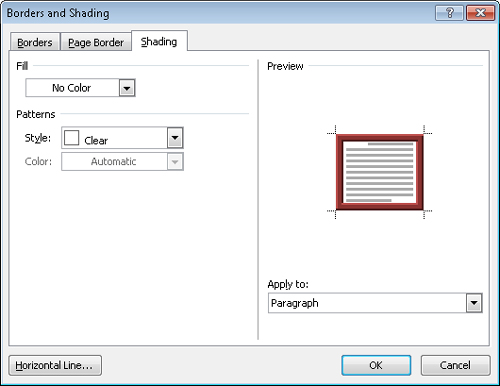
Click the Shading tab.
You can use the options on this page to format the background of the selected paragraph.
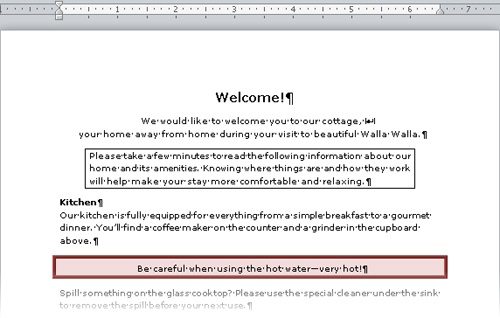
Click the Fill arrow, and under Theme Colors, click the lightest color in the red column (Red, Accent 2, Lighter 80%). Then click OK to close the Borders and Shading dialog box.
A border surrounds the paragraph, and a light red color fills its background. The border stretches all the way to the right margin.
To achieve a more balanced look, in the Paragraph group, click the Decrease Indent button. Then click the Center button.
The paragraph is now centered between the page margins and within its surrounding box.

Creating and Modifying Lists
Lists are paragraphs that are usually formatted with a hanging indent so that the first line of each paragraph is longer than subsequent lines. Fortunately, Word takes care of the formatting of lists for you. You simply indicate the type of list you want to create. When the order of items is not important—for example, for a list of supplies needed to carry out a task—a bulleted list is the best choice. And when the order is important—for example, for the steps in a procedure—you will probably want to create a numbered list.
You can indicate the start of a list as follows:
Bulleted list. Type * (an asterisk) at the beginning of a paragraph, and then press the Spacebar or the Tab key before entering the list item text. Or click the Bullets button in the Paragraph group on the Home tab.
Numbered list. Type 1. (the number 1 followed by a period) at the beginning of a paragraph, and then press the Spacebar or the Tab key before entering the list item text. Or click the Numbering button in the Paragraph group on the Home tab.
When you start a list in this fashion, Word automatically formats it as a bulleted or numbered list. When you press Enter to start a new item, Word continues the formatting to the new paragraph. Typing items and pressing Enter adds subsequent bulleted or numbered items. To end the list, press Enter twice; or click the Bullets arrow or Numbering arrow in the Paragraph group on the Home tab, and then in the library, click None.
Tip
If you want to start a paragraph with an asterisk or number but don’t want to format the paragraph as a bulleted or numbered list, click the AutoCorrect Options button that appears after Word changes the formatting, and then in the list, click the appropriate Undo option. You can also click the Undo button on the Quick Access Toolbar.
If you want to create a list that has multiple levels, you start off by creating the list in the usual way. Then when you want the next paragraph to be a level lower (indented more), you press the Tab key after pressing Enter and before you type the text of the item. If you want the next paragraph to be a level higher (indented less), you press Shift+Tab after pressing Enter. In the case of a bulleted list, Word changes the bullet character for each item level. In the case of a numbered list, Word changes the type of numbering used, based on a predefined numbering scheme.
Tip
To create a multilevel numbered list with a scheme that is different from the default, you can click the Multilevel List button in the Paragraph group of the Home tab and then select a scheme from the List gallery. You can also define your own scheme.
If you type a set of paragraphs containing a series of items and then decide you want to turn the set into a list, you can select the paragraphs and then click the Bullets or Numbering button.
After you create a list, you can modify, format, and customize the list as follows:
You can move items around in a list, insert new items, or delete unwanted items. If the list is numbered, Word automatically updates the numbers.
You can sort items in a bulleted list into ascending or descending order by clicking the Sort button in the Paragraph group on the Home tab.
For a bulleted list, you can change the bullet symbol by clicking the Bullets arrow in the Paragraph group and making a selection from the Bullets gallery. You can also define a custom bullet (even a picture bullet) by clicking Define New Bullet.
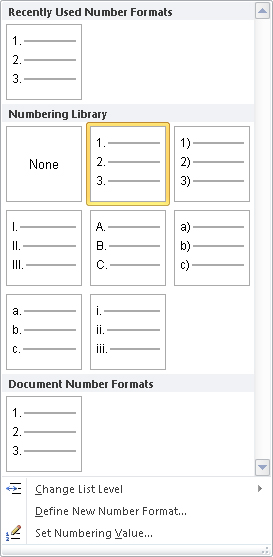
For a numbered list, you can change the number style by clicking the Numbering arrow in the Paragraph group and making a selection from the Numbering gallery. You can also define a custom style by clicking Define New Number Format.
You can modify the indentation of the list by dragging the indent markers on the horizontal ruler. You can change both the overall indentation of the list and the relationship of the first line to the other lines.
See Also
For information about paragraph indentation, see Manually Changing the Look of Paragraphs earlier in this chapter.
In this exercise, you’ll create a bulleted list and a numbered list and then modify lists in various ways.
Set Up
You need the RulesDraft_start document located in your Chapter03 practice file folder to complete this exercise. Open the RulesDraft_start document, and save it as RulesDraft. Then follow the steps.
With formatting marks and the rulers displayed, select the first four paragraphs under The rules fall into four categories, and then on the Home tab, in the Paragraph group, click the Bullets button.
The selected paragraphs are reformatted as a bulleted list. Word indents the list and precedes each item with a bullet and a tab. The program also removes the space after all paragraphs except the last one.
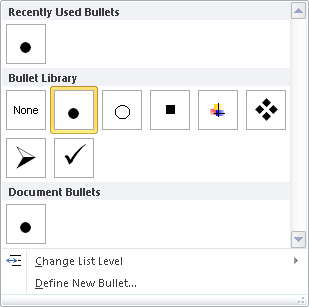
With the paragraphs still selected, in the Paragraph group, click the Bullets arrow.
The Bullets gallery appears.
Under Bullet Library, point to each bullet character to display a live preview of its effect on the selected list items, and then click the bullet composed of four diamonds.
The bullet character that begins each item in the selected list changes.
Select the two paragraphs below the Definitions heading, and then in the Paragraph group, click the Numbering button.
Word numbers the two selected paragraphs sequentially.
Select the first four paragraphs below the General Rules heading, and then click the Numbering button.
Word restarts the second numbered list from 1.
Select the next three paragraphs, and then in the Paragraph group, click the Bullets button.
Word formats the paragraphs as a bulleted list, using the symbol you specified earlier. These three bullets are a second-level list of the preceding numbered item and should be indented.
With the three bulleted items still selected, in the Paragraph group, click the Increase Indent button.
The bulleted paragraphs move to the right.
Select the remaining three paragraphs, and click the Numbering button.
Word restarts this numbered list from 1, but you want it to continue the sequence of the previous numbered list.
Click anywhere in the No large dogs item, and then click the Numbering arrow.
The Numbering gallery appears.
At the bottom of the gallery, click Set Numbering Value.
The Set Numbering Value dialog box opens.
Change the Set value to setting to 5, and then click OK.
Word renumbers the list after the bullet items so that it continues from the previous list.
In the No large dogs numbered item, click to the left of Seeing, press Enter, and then press Tab.
Word first creates a new number 6 item and renumbers all subsequent items. However, when you press Tab to make the item second level, Word changes the 6 to a, indents the item, and restores the original numbers to the subsequent items.
Press the End key, and then press Enter. Then type The Board reserves the right to make exceptions to this rule. (type the period), and press Enter.
Click the Numbering arrow, click Change List Level at the bottom of the gallery, and click the first 1. option. Then in the new first-level item, type All pets must reside within their Owners’ Apartments.
The lists are now organized hierarchically.
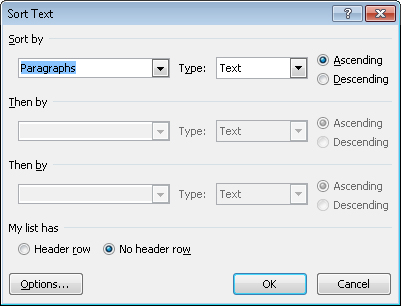
Select the three bulleted paragraphs, and then in the Paragraph group, click the Sort button.
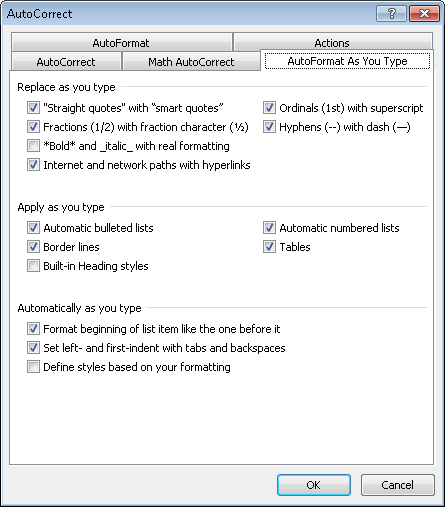
The Word list capabilities are just one example of the program’s ability to intuit how you want to format an element based on what you type. You can learn more about these and other AutoFormatting options by exploring the AutoCorrect dialog box. Display the Backstage view, click Options, click Proofing in the left pane of the Word Options dialog box, and then on the Proofing page, click AutoCorrect Options.
On the AutoFormat As You Type page, you can see the options Word implements by default, including bulleted and numbered lists. You can select and clear options to control AutoFormatting behavior.
One interesting option is Border Lines. When this check box is selected, typing three consecutive hyphens (-) or three consecutive underscores (_) and pressing Enter draws a single line across the page. Three consecutive equal signs (=) draw a double line, and three consecutive tildes (~) draw a zigzag line.
With the Ascending option selected, click OK.
The order of the bulleted items changes to ascending alphabetical order.


Key Points
Quick Styles and style sets make it simple to apply combinations of character and paragraph formatting to give your documents a professional look.
The same document can look very different depending on the theme applied to it. Colors, fonts, and effects can be combined to create just the look you want.
You can format characters with an almost limitless number of combinations of font, size, style, and effect. For best results, resist the temptation to use more than a handful of combinations.
You can change the look of paragraphs by varying their indentation, spacing, and alignment and by setting tab stops and applying borders and shading. Use these formatting options judiciously to create a balanced, uncluttered look.
Bulleted and numbered lists are a great way to present information in an easy-to-read, easy-to-understand format. If the built-in bulleted and numbered formats don’t provide what you need, you can define your own formats.