
Chapter 4. Organize Information in Columns and Tables
Chapter at a Glance
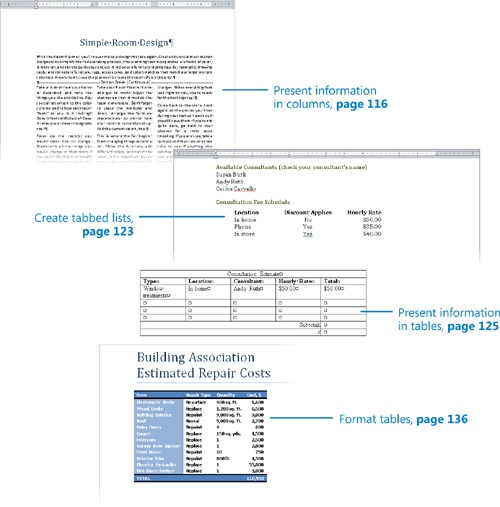
✓ | |
✓ | |
✓ | |
✓ | |
Information in documents is most commonly presented as paragraphs of text. To make a text-heavy document more legible, you can flow the text in two or more columns, or you can display information in a table. For example, flowing text in multiple columns is a common practice in newsletters, flyers, and brochures; and presenting information in tables is common in reports.
When you need to present data in a document, using a table is often more efficient than describing the data in a paragraph, particularly when the data consists of numeric values. Tables make the data easier to read and understand. A small amount of data can be displayed in simple columns separated by tabs, which creates a tabbed list. A larger amount of data, or more complex data, is better presented in a table, which is a structure of rows and columns, frequently with row and column headings.
In this chapter, you’ll first create and modify columns of text. Then you’ll create a simple tabbed list. Finally, you’ll create tables from scratch and from existing text, and format a table in various ways.
Practice Files
Before you can complete the exercises in this chapter, you need to copy the book’s practice files to your computer. The practice files you’ll use to complete the exercises in this chapter are in the Chapter04 practice file folder. A complete list of practice files is provided in Using the Practice Files at the beginning of this book.
Presenting Information in Columns
By default, Microsoft Word 2010 displays text in one column that spans the width of the page between the left and right margins. You can specify that text be displayed in two, three, or more columns to create layouts like those used in newspapers and magazines. When you format text to flow in columns, the text fills the first column on each page and then moves to the top of the next column. You can manually indicate where you want the text within each column to end.
The Columns gallery in the Page Setup group on the Page Layout tab displays several standard options for dividing text into columns. You can choose one, two, or three columns of equal width or two columns of unequal width. If the standard options don’t suit your needs, you can specify the number and width of columns. The number of columns is limited by the width and margins of the page, and each column must be at least a half inch wide.

No matter how you set up the columns initially, you can change the layout or column widths at any time.
You can format an entire document or a section of a document in columns. When you select a section of text and format it as columns, Word inserts section breaks at the beginning and end of the selected text to delineate the area in which the columnar formatting is applied. Within the columnar text, you can insert column breaks to specify where you want to end one column and start another. Section and column breaks are visible when you display formatting marks in the document.
Tip
You can apply many types of formatting, including page orientation, to content within a specific section of a document without affecting the surrounding text. For information about sections, see Controlling What Appears on Each Page in Chapter 6.
See Also
For information about formatting marks, see Viewing Documents in Different Ways in Chapter 1.
You can apply character and paragraph formatting to columnar text in the same way you would any text. Here are some formatting tips for columnar text:
When presenting text in narrow columns, you can justify the paragraphs (align the text with the left and right edges) to achieve a neat and clean appearance. To justify the paragraphs, Word adjusts the spacing between words, essentially moving the empty space that would normally appear at the end of the line into the gaps between words.
To more completely fill columns, you can have Word hyphenate the text to break words into syllables to fill up the gaps.
In this exercise, you’ll flow the text in one section of a document into three columns. You’ll justify the text in the columns, change the column spacing, and hyphenate the text. You’ll then break a column at a specific location instead of allowing the text to flow naturally from one column to the next.
Set Up
You need the RoomPlanner_start document located in your Chapter04 practice file folder to complete this exercise. Open the RoomPlanner_start document, and save it as RoomPlanner. Then display formatting marks and the rulers, and follow the steps.
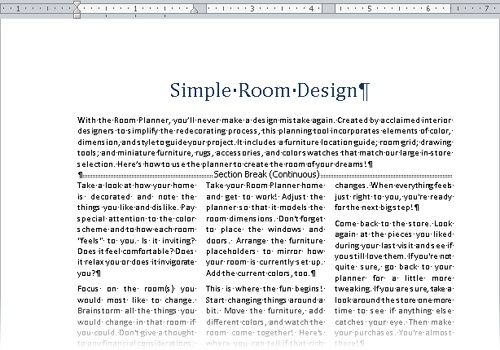
Click at the beginning of the paragraph that begins Take a look (do not click in the selection area). Then scroll down until you can see the end of the document, hold down the Shift key, and click to the right of the paragraph mark after credit cards.
Word selects the text from the Take a look paragraph through the end of the last paragraph (but not the empty paragraph).
On the Page Layout tab, in the Page Setup group, click the Columns button, and then in the Columns gallery, click Three.
Word inserts a section break above the selected text and flows the text within the section into three columns.
Press Ctrl+Home to move to the top of the document.
The section break is visible above the columns.
On the Home tab, in the Editing group, click the Select button, and then click Select All.
See Also
To see a complete list of keyboard shortcuts, see Appendix A at the end of this book.
In the Paragraph group, click the Justify button.
The spacing between the words changes to align all the paragraphs in the document with both the left and right margins. Because you applied the formatting to the entire document, the title is no longer centered. However, it is often quicker to apply formatting globally and then deal with the exceptions.
Press Ctrl+Home to move to the paragraph containing the document title. Then in the Paragraph group, click the Center button.
Word centers the document title between the left and right margins.
Adjust the zoom percentage until you can see about two-thirds of the first page of the document.
See Also
For information about adjusting the zoom percentage, see Viewing Documents in Different Ways in Chapter 1.
Click anywhere in the first column.
On the horizontal ruler, Word indicates the margins of the columns.
On the Page Layout tab, display the Columns gallery, and click More Columns.
The Columns dialog box opens. The spacing between columns is set by default to a half inch.
In the Width and spacing area, in the Spacing box for column 1, type or select 0.2”.
Word changes the measurement in the Spacing box for column 2, and widens all the columns in the Preview area to reflect the new setting.
Click OK.
Word reflows the columns to fit their new margins.
Click at the beginning of the Take a look paragraph. Then in the Page Setup group, click the Hyphenation button, and click Automatic.
Word hyphenates the text of the document, which fills in some of the large gaps between words.
Click anywhere in the NOTE paragraph in the third column.
On the horizontal ruler, at the left end of the third column, drag the Hanging Indent marker 0.25 inch (two marks) to the right.
All the lines in the NOTE paragraph except the first are now indented, offsetting the note from the paragraphs above and below it.
Display the bottom of page 1. In the first column on page 1, click at the beginning of the Take your Room Planner home paragraph. Then in the Page Setup group, click the Breaks button, and click Column.
Word inserts a column break. The text that follows the column break moves to the top of the second column.
At the bottom of the third column on page 1, click at the beginning of the If you’re not sure paragraph, and then on the Quick Access Toolbar, click the Repeat Insertion button to insert another column break.
Word inserts a column break. The text that follows the column break moves to the top of the first column on page 2.


Creating Tabbed Lists
If you have a relatively small amount of data to present, you might choose to display it in a tabbed list, which arranges text in simple columns separated by tabs. You can align the text within the columns by using left, right, centered, or decimal tab stops.
See Also
For more information about setting tab stops, see Manually Changing the Look of Paragraphs in Chapter 3.
When entering text in a tabbed list, inexperienced Word users have a tendency to press the Tab key multiple times to align the columns of the list with the default tab stops. If you do this, you have no control over the column widths. To be able to fine-tune the columns, you need to set custom tab stops rather than relying on the default ones.
When setting up a tabbed list, you should press Tab only once between the items that you want to appear in separate columns. Next you apply any necessary formatting. And finally, you set the custom tab stops. Set left, right, centered, and decimal tabs to control the alignment of the column content, or set a bar tab to add a vertical line to visually separate list columns. By setting the tabs in order from left to right, you can check the alignment of the text within each column as you go.
In this exercise, you’ll first enter text separated by tabs and format the text. Then you’ll set custom tab stops to create a tabbed list.
Set Up
You need the ConsultationA_start document located in your Chapter04 practice file folder to complete this exercise. Open the ConsultationA_start document, and save it as ConsultationA. Then display formatting marks and the rulers, and follow the steps.
Set the zoom percentage to a level that is comfortable for you, and then press Ctrl+End to move the cursor to the blank line at the end of the document.
Type Location, press Tab, type Discount Applies, press Tab, type Hourly Rate, and then press Enter.
Add three more lines to the list by typing the following text, pressing the Tab and Enter keys where indicated.
In home Tab No Tab $50.00 Enter
Phone Tab Yes Tab $35.00 Enter
In store Tab Yes Tab $40.00 Enter
The tab characters push the items to the next default tab stop, but because some items are longer than others, they do not line up.
Select the first line of the tabbed list, and then on the Mini Toolbar that appears, click the Bold button.
Select all four lines of the tabbed list, and then on the Mini Toolbar, click the Increase Indent button.
With the tabbed list still selected, on the Page Layout tab, in the Paragraph group, under Spacing, change the After setting to 0 pt.
Click the tab setting button at the junction of the horizontal and vertical rulers until the Center Tab button is active. (You will probably have to click only once.) Then click the 2.5 inch mark on the horizontal ruler.
On the ruler, Word sets a center-aligned tab stop that looks like the Center Tab icon. The items in the second column of the tabbed list center themselves at that position.
Click the tab setting button once.
The Right Tab button is now active.
With the Right Tab button active, click the horizontal ruler at the 4.5 inch mark.
On the ruler, Word sets a right-aligned tab stop that looks like the Right Tab icon. The items in the third column of the tabbed list right-align themselves at that position.
On the Home tab, in the Paragraph group, click the Show/Hide ¶ button to hide the tabs, paragraph marks, and other formatting marks. Then click away from the tabbed list to see the results.
The tabbed list resembles a simple table.


Presenting Information in Tables
A table is a structure of vertical columns and horizontal rows. Each column and each row can be named with a heading, although some tables have only column headings or only row headings. At the junction of each column and row is a box called a cell in which data (text or numeric information) is stored.
You can create empty or predefined tables in a Word document in the following ways:
The Insert Table gallery, which is available from the Tables group on the Insert tab, displays a simple grid.
Clicking a cell in the grid inserts an empty table the width of the text column. The table has the number of rows and columns you indicated in the grid, with all the rows one line high and all the columns of an equal width.
To insert a more customized empty table, you can click Insert Table on the menu at the bottom of the Insert Table gallery to open the Insert Table dialog box, in which you can specify the number of rows and columns and customize the column width.
To insert a less clearly defined empty table, you can click Draw Table below the grid in the Insert Table gallery. This command displays a pencil with which you can draw cells directly in the Word document to create a table. The cells you draw connect by snapping to a grid, but you have some control over the size and spacing of the rows and columns.
See Also
For information about drawing tables, see Using Tables to Control Page Layout in Chapter 10.
In addition to empty tables, you can insert any of the available Quick Tables, which are predefined tables of formatted data that you can replace with your own information. Built-in Quick Tables include a variety of calendars, simple tables, tables with subheadings, and tabbed lists. You can also save your own custom tables to the Quick Tables gallery so that you can easily insert a frequently used table structure and data into any document.


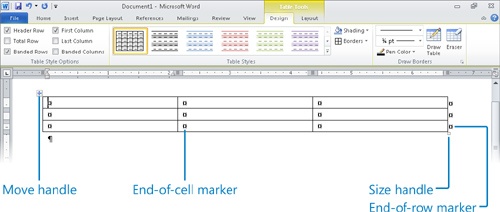
A new table appears in the document as a set of cells, usually bordered by gridlines. (In some Quick Tables, the gridlines are turned off.) Each cell contains an end-of-cell marker, and each row ends with an end-of-row marker. (The end-of-cell markers and end-of-row markers are identical in appearance, and are visible only when you display formatting marks in the document.) When you point to a table, a move handle appears in its upper-left corner and a size handle in its lower-right corner. When the cursor is in a table, two Table Tools contextual tabs—Design and Layout—appear on the ribbon.
After you create a table, you can enter data (such as text, numbers, or graphics) into the table cells and press the Tab key to move the cursor from cell to cell. Pressing Tab when the cursor is in the last cell of a row moves the cursor to the first cell of the next row. Pressing Tab when the cursor is in the last cell of the last row adds a new row to the table and moves the cursor to the first cell of that row.
Tip
You can move and position the cursor by pressing the Tab key or the Arrow keys, or by clicking in a table cell.
If the data you want to present in a table already exists in the document, either as regular text or as a tabbed list, you can convert the text to a table by selecting it and then clicking Convert Text To Table in the Insert Table gallery. Conversely, you can convert an active table to regular text by clicking the Convert To Text button in the Data group on the Layout tab.
You can modify a table’s structure by changing the size of the table, changing the size of one or more columns or rows, or adding or removing rows, columns, or individual cells.
Tip
To change a table’s structure, you often need to select the entire table or a specific column or row. The simplest way to do this is to position the cursor in the table, column, or row, click the Select button in the Table group on the Layout tab, and then click the table element you want. Alternatively, you can point to the top edge of a column or left edge of a row and, when the pointer changes to an arrow, click to select the column or row.
The basic methods for manipulating a table or its contents are as follows:
Insert a row or column Click anywhere in a row or column adjacent to where you want to make the insertion. Then on the Layout tab, in the Rows & Columns group, click the Insert Above, Insert Below, Insert Left, or Insert Right button.
Selecting more than one row or column before you click an Insert button inserts that number of rows or columns in the table.
Delete a row or column Click anywhere in the row or column, and in the Rows & Columns group, click the Delete button. Then click Delete Cells, Delete Columns, Delete Rows, or Delete Table.
Resize an entire table Drag the size handle.
Resize a single column or row Without selecting the column, drag its right border to the left or right. Without selecting the row, drag its bottom border up or down. (If you select a column or row and then drag its border, only the selected column or row changes.)
Move a table Point to the table, and then drag the move handle that appears in its upper-left corner to a new location. Or use the Cut and Paste commands in the Clipboard group on the Home tab to move the table.
Merge cells Create cells that span multiple columns or rows by selecting the cells you want to merge and clicking the Merge Cells button in the Merge group on the Layout tab. For example, to center a title in the first row of a table, you can merge all the cells in the row to create one merged cell that spans the table’s width.
Split cells Divide one cell into multiple cells by clicking the Split Cells button in the Merge group on the Layout tab and then specifying the number of columns and rows you want.
Sort information Click the Sort button in the Data group on the Layout tab to sort the rows in ascending or descending order by the data in any column. For example, in a table that has the column headings Name, Address, ZIP Code, and Phone Number, you can sort on any one of those columns to arrange the information in alphabetical or numerical order.

In this exercise, you’ll work with two tables. First you’ll create an empty table, enter and align text in the table cells, add rows to the table, and merge cells. Then you’ll create a second table by converting an existing tabbed list, change the width of a column, and change the width of the entire table.
Set Up
You need the ConsultationB_start document located in your Chapter04 practice file folder to complete this exercise. Open the ConsultationB_start document, and save it as ConsultationB. Then display formatting marks and the rulers, and follow the steps.
Click to the left of the second blank paragraph below Please complete this form.
On the Insert tab, in the Tables group, click the Table button. Then in the Insert Table gallery, point to (don’t click) the cell that is five columns to the right and five rows down from the upper-left corner of the grid.
Word highlights the cells that will be in the table, indicates the table dimensions in the gallery header, and creates a temporary table in the document.
Word creates a blank table consisting of five columns and five rows. The cursor is located in the first cell. Because the table is active, Word displays the Design and Layout contextual tabs.
In the selection area to the left of the table, point to the first row of the table, and then click once to select it.
On the Layout contextual tab, in the Merge group, click the Merge Cells button.
Word combines the five cells in the first row into one cell.
With the merged cell selected, in the Alignment group, click the Align Center button.
The end-of-cell marker moves to the exact center of the merged cell to indicate that anything you type there will be centered both horizontally and vertically.
Type Consultation Estimate.
The table now has content that looks like a table title.
Click the first cell in the second row, type Type, and then press Tab.
Type Location, Consultant, Hourly Rate, and Total, pressing Tab after each entry.
Pressing Tab after the Total heading moves the cursor to the first cell of the third row. The table now has a row of column headings.
Select the column heading row, and then on the Mini Toolbar, click the Bold button.
In the third row, type Window treatments, In home, Andy Ruth, $50.00, and $50.00, pressing Tab after each entry.
You have entered a complete row of data.
Select the last two rows, and then on the Layout tab, in the Rows & Columns group, click the Insert Below button.
Word adds two new rows and selects them.
In the last row, click the first cell, hold down the Shift key, and then press the Right Arrow key four times to select the first four cells in the row.
In the Merge group, click the Merge Cells button.
Word combines the selected cells into one cell.
In the Alignment group, click the Align Center Right button.
Type Subtotal, and then press Tab twice.
Word adds a new row with the same structure to the bottom of the table.
Type Add trip fee, press Tab twice to add a new row, and then type Total.
Now you’ll create a different table by converting existing text.
Scroll down to the bottom of the document, and select the rows of the tabbed list beginning with Distance and ending with $20.00.
On the Insert tab, in the Tables group, click the Table button, and then click Convert Text to Table.
The Convert Text To Table dialog box opens.
Verify that the Number of columns box displays 2, and then click OK.
The selected text appears in a table with two columns and six rows.
Click anywhere in the table to release the selection, and then point to the right border of the table. When the pointer changes to two opposing arrows, double-click the border.
Word adjusts the width of the right column to accommodate its longest cell entry.
Point to the In-Home Trip Charge table.
Word displays the move handle in the upper-left corner and the size handle in the lower-right corner.
Drag the size handle to the right, releasing the mouse button when the right edge of the table aligns approximately with the 4 inch mark on the horizontal ruler.
The width of the table expands.


When you want to perform calculations with the numbers in a Word table, you can create a formula that uses a built-in mathematical function. You construct a formula by using the tools in the Formula dialog box, which you display by clicking the Formula button in the Data group on the Layout contextual tab.

A formula consists of an equal sign (=), followed by a function name (such as SUM), followed by parentheses containing the location of the cells you want to use for the calculation. For example, the formula =SUM(Left) totals the cells to the left of the cell containing the formula.
To use a function other than SUM in the Formula dialog box, you click the function you want in the Paste Function list. You can use built-in functions to perform a number of calculations, including averaging (AVERAGE) a set of values, counting (COUNT) the number of values in a column or row, or finding the maximum (MAX) or minimum (MIN) value in a series of cells.
Although formulas commonly refer to the cells above or to the left of the active cell, you can also use the contents of specified cells or constant values in formulas. To use the contents of a cell, you type the cell address in the parentheses following the function name. The cell address is a combination of the column letter and the row number—for example, A1 is the cell at the intersection of the first column and the first row. A series of cells in a row can be addressed as a range consisting of the first cell and the last cell separated by a colon, such as A1:D1. For example, the formula =SUM(A1:D1) totals the values in row 1 of columns A through D. A series of cells in a column can be addressed in the same way. For example, the formula =SUM(A1:A4) totals the values in column A of rows 1 through 4.
Formatting Tables
Formatting a table to best convey its data can be a process of trial and error. With Word 2010, you can quickly get started by applying one of the table styles available in the Table Styles gallery on the Design contextual tab.
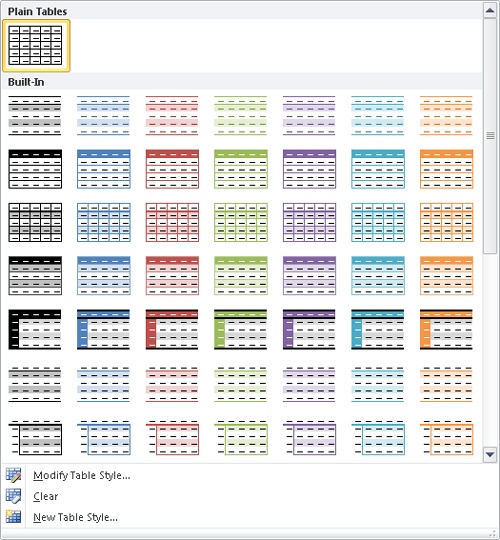
The table styles include a variety of borders, colors, and other attributes to give the table a professional look.
If you want to control the appearance of a table more precisely, you can use the commands on the Design and Layout tabs. You can also format the table content. As you saw in the previous exercise, you can apply character formatting to the text in tables just as you would to regular text, by clicking buttons on the Mini Toolbar. You can also click the buttons in the Font group on the Home tab. You can apply paragraph formatting, such as alignment and spacing, by clicking buttons in the Paragraph group on the Home tab. And you can apply both character and paragraph styles from the Quick Styles gallery.
In this exercise, you’ll first apply a table style to a table. Then you’ll format a table row and column. You’ll also apply character and paragraph formatting to various cells so that the table’s appearance helps the reader understand its data.
Set Up
You need the RepairCosts_start document located in your Chapter04 practice file folder to complete this exercise. Open the RepairCosts_start document, and save it as RepairCosts. If formatting marks are displayed, hide them, and then follow the steps.
Click anywhere in the table, and then on the Design tab, point to each thumbnail in the first row of the Table Styles gallery to see its live preview.
In the Table Style Options group, clear the Banded Rows check box, and select the Total Row check box.
The table style thumbnails no longer have banded rows, reflecting your changes.
In the Table Styles group, click the More button.
The Table Styles gallery appears.
Preview all the styles in the gallery. When you finish exploring, click the second thumbnail in the fifth row (Medium Shading 2 – Accent 1).
The style needs to be modified to suit the data, but it’s a good starting point.
Select all the cells in the last row by clicking in the selection area to its left. Then in the Table Styles group, click the Borders arrow, and click Borders and Shading.
The Borders And Shading dialog box opens, displaying the borders applied to the selected cells.
On the Borders page of the dialog box, scroll to the top of the Style list, and click the thick black border.
In the Preview area, click the top border button once to remove the current border, and click again to apply the thick black border.
Click the Shading tab, and click the Fill arrow. Under Theme Colors in the palette, click the fifth box in the top row (Blue, Accent 1). Then click OK.
Without moving the selection, on the Home tab, in the Font group, click the Font Color arrow, and under Theme Colors in the palette, click the white box. Then press Home to release the selection.
The table now has the same border at the top and bottom.
Point to the left side of the Elastomeric Decks cell, and when the pointer changes to a black right-pointing arrow, drag downward to select all the cells in the Item column except the TOTAL cell.
On the Design tab, in the Table Styles group, click the Shading arrow, and under Theme Colors, click the third box in the blue column (Blue, Accent 1, Lighter 40%).
Select all the cells containing amounts in the Cost, $ column, including the cell with the total. Then on the Layout tab, in the Alignment group, click the Align Center Right button.
Tip
If the first row of your table has several long headings that make it difficult to fit the table on one page, you can turn the headings sideways. Simply select the heading row and click the Text Direction button in the Alignment group on the Layout tab.
Now you can judge how well the table displays its data.
Tip
If you will need to use this formatted table with different data in the future, you can save it as a Quick Table. For information about saving customized tables for future use, see the sidebar Quick Tables on the next page.


With Word 2010, you can create Quick Tables—preformatted tables with sample data that you can customize. To create a Quick Table:
On the Insert tab, in the Tables group, click the Table button, and then point to Quick Tables.
The Quick Tables gallery appears.
Scroll through the gallery, noticing the types of tables that are available, and then click the one you want.
For example, this is the Matrix Quick Table.
On the Design tab, apply formatting to tailor the Quick Table to your needs.
For example, here’s the Matrix Quick Table after we formatted it.
If you will use the table again, you can save it in the Quick Tables gallery. Select the table, display the Quick Tables gallery, and click Save Selection To Quick Tables Gallery. Then in the Create New Building Block dialog box, assign a name to the table, and click OK. Provided you save the Building Blocks template when Word prompts you to, the table will be available in the Quick Tables gallery for future use.
See Also
For information about building blocks, see Inserting Building Blocks in Chapter 5.


Key Points
To vary the layout of a document, you can divide text into columns. You can control the number of columns, the width of the columns, and the space between the columns.
To clearly present a simple set of data, you can use tabs to create a tabbed list, with custom tab stops controlling the width and alignment of columns.
You can create a table from scratch, or convert existing text to a table. You can control the size of the table and its individual structural elements.
By using the built-in table styles, you can quickly apply professional-looking cell and character formatting to a table and its contents.
You can enhance a table and its contents by applying text attributes, borders, and shading.