Publisher provides tools for creating several types of shapes, including lines, arrows, ovals, rectangles, stars, banners, and many more. With a little imagination, you will discover countless ways to create drawings by combining shapes.
To create a shape in Publisher, you click a shape button on the Objects toolbar and then drag the crosshair pointer across the page to define the size of the shape. After you draw the shape, it is surrounded by a set of handles, indicating that it is selected. (You can select a shape at any time by simply clicking it.)
Tip
To draw a circle or square, click the Oval or Rectangle shape, and hold down the Shift key while you drag.
You can easily add text to a shape. Simply select the shape by clicking it, and start typing. You can then format the text by clicking buttons on the Formatting toolbar or by making selections in the Font dialog box.
To move a shape from one location to another on the same page, you simply point to the shape, and when the pointer becomes a four-headed arrow, drag the shape to its new location, using the coordinates shown on the status bar to position it precisely. (You can create a copy of a selected shape by dragging it while holding down the Ctrl key.) You can also reposition a shape by changing settings on the Layout tab of the Format AutoShape dialog box.
Tip
If you hold down the Shift key while moving a shape, you can move it only horizontally or vertically in a straight line.
The handles around a selected shape serve the same sizing and rotating purposes as those around any other object. You can use the dimensions shown on the status bar to adjust the size precisely, or you can set the size of the shape on the Size tab of the Format AutoShape dialog box. You can rotate it by using the Rotate Or Flip command on the Arrange menu.
After drawing a shape, you can fill it with color by using the settings on the Colors And Lines tab of the Format AutoShape dialog box or by selecting a color from the palette displayed when you click the Fill Color arrow on the Formatting toolbar. You can change the color and width of the border on the Color And Lines tab of the Format AutoShape dialog box, or change only its width by clicking the Line/Border Style button on the Formatting toolbar.
Tip
Having made changes to one shape, you can easily apply the same attributes to another shape by clicking the shape that has the desired attributes, clicking the Format Painter button on the Standard toolbar, and then clicking the shape to which you want to copy the attributes.
If you want to apply the attributes of a shape to all future shapes in the same publication (for example, if you want all shapes to be red), double-click the shape, and on the Colors And Lines tab of the Format AutoShape dialog box, select the Apply Settings To New AutoShapes check box.
To show a relationship between two shapes, you can connect them with a line by joining special handles called connection points. Moving a connected shape also moves the line, maintaining the relationship between the connected shapes.
When you create a drawing composed of multiple shapes, you can group them so that you can edit, copy, and move them as a unit. You can select an individual shape within the group and change its attributes—for example, its color or the weight of its border. You can ungroup the grouped shapes at any time and regroup them after making changes.
In this exercise, you will draw several shapes of the same color. Then you will connect two shapes and format the connection line. Finally, you will group and ungroup the shapes. There is no practice file for this exercise.
On the Objects toolbar, click the AutoShapes button, point to Basic Shapes, and then click the third shape in the second row (Isosceles Triangle).
Move the pointer over the page, and starting about 1 inch below the top margin guide, drag to draw a triangle about 1 inch tall and 1/2 inch wide.
On the Arrange menu, point to Rotate or Flip, and then click Flip Vertical.
The triangle is now upside down.
Double-click the shape, and on the Colors and Lines tab of the Format AutoShape dialog box, change the Color setting under Fill to Orange. Then select the Apply settings to new AutoShapes check box, and click OK.
On the Objects toolbar, click the Oval button, hold down the
 key, and drag a circle above the triangle with a diameter slightly smaller than the triangle’s side.
When you release the mouse button, Publisher fills the circle with the orange color you specified for all shapes in this publication.
On the Objects toolbar, click the Oval button, and drag an oval about 1.5 inches wide to the right of the circle.
On the Objects toolbar, click the AutoShapes button, point to Connectors, and then click the first shape in the third row (Curved Connector).
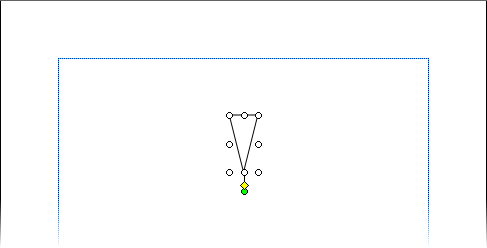
Point to the triangle, and when blue handles appear, drag a line from the upper-right handle of the triangle to the bottom handle of the oval.
Publisher joins the two shapes with a curved connecting line. Red handles appear at each end of the line, indicating that the shapes are connected. A yellow diamond-shaped handle in the center of the line provides a means to adjust the curve of the line.
Double-click the line (not its handle), and under Line on the Colors and Lines tab of the Format AutoShape dialog box, change the Color to Orange and the Weight to 6 pt. Then click OK.
Click the oval, and move it to the left, close to the circle.
Publisher adjusts the length and curve of the connecting line.
Click the line, and drag the yellow diamond handle down to create a smooth curve. Then click a blank area of the page to see the results.
Select the four shapes by holding down the
key as you click each one in turn.Notice that each shape has its own set of handles.
On the Arrange menu, click Group.
Publisher groups the shapes together with only one set of handles around the edge of the entire group. When the group is selected, the Ungroup Objects button appears below it so that you can ungroup the shapes at any time.
Point to any shape in the group, and when the pointer changes to a four-headed arrow, drag the grouped object to the upper-left corner of the page until the coordinates are 1.000, 1.000 in.
The entire group moves.
Click away from the individual shape to release the selection, and then click the grouped shape to select it. Point to the lower-right handle and drag up and to the left until the dimensions of the grouped object are 1.500 × 1.000 in.
Click the grouped shape to select it, and then click the Ungroup Objects button.
Publisher ungroups the object into individual shapes, which are all selected, and displays the Group Objects button. You can now adjust the size and position of individual shapes.
Click the Group Objects button.
Publisher regroups the shapes. Now suppose you want to add a shape to the group.
On the Objects toolbar, click the AutoShape button, point to Basic Shapes, and then click the third shape in the first row (Trapezoid).
Draw a tiny "cup" on top of the oval "tray," hold down the
key, click any of the other shapes, and then click the Group button.Publisher adds the cup shape to the group.