Publisher 2007 provides access to hundreds of professionally designed pieces of clip art—license-free graphics that often take the form of cartoons, sketches, or symbolic images, but can also include photographs, audio and video clips, and more sophisticated artwork. In a publication, you can use clip art to illustrate a point you are making or as eye-pleasing accompaniments to text. For example, you might insert an icon of an envelope to draw attention to an e-mail address, or a picture of mountains to set a "back to nature" tone.
To search for a clip art image, you display the Clip Art task pane and enter a keyword. You can search a specific Microsoft Clip Organizer collection, search for specific media types, such as photographs, and search for images on the Microsoft Office Online Web site.
See Also
For information about creating collections of images, see the sidebar titled Clip Organizer, later in this chapter.
You can add illustrations created and saved in other programs or scanned photographs and illustrations to your publications. We refer to these types of graphics as pictures. Like clip art, pictures can be used to make your publications more attractive and visually interesting. However, pictures can also convey information in a way that words cannot. For example, you might display photographs of your company’s products in a catalog or brochure.
After you insert a graphic into a publication, you can move and size it just as you can any other object. You can also do the following:
Tip
The file size of a publication that contains graphics can become quite large. You can shrink the size of a graphic file (without affecting the displayed graphic) by using the Compress Pictures feature. Depending on the resolution setting, you might lose some visual quality when you compress a picture. You choose the resolution you want for the pictures based on where or how the presentation will be viewed—for example, on the Web or printed. You can also set other options, such as deleting cropped areas of a picture, to achieve the best balance between quality and file size. This is especially important when you intend to distribute a publication electronically, because the file size affects how long it takes to transmit or download.
When a graphic object is selected, Publisher displays the Picture toolbar. You can use the buttons on this toolbar to modify the appearance of the selected graphic in various ways, including the following:
And if you decide you don’t like the changes you have made to a graphic, you can restore the original settings by clicking the Reset Picture button.
In this exercise, you will insert and modify a clip art image, and then insert and crop a picture. Then you will decrease the file sizes of the two graphics by compressing them.
Note
USE the Birthday at the Ritz picture file. This practice file is located in the DocumentsMicrosoft PressSBS_Publisher2007VisualInterest folder.
OPEN a blank publication.
On the Objects toolbar, click the Picture Frame button, and then click Clip Art.
Tip
If you are designing the layout of a publication and know you will want to insert some sort of graphic later, you can click Empty Picture Frame to insert a graphic placeholder.
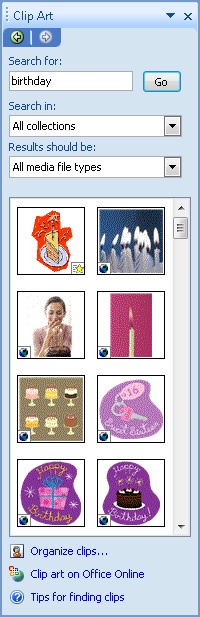
The Clip Art task pane opens.
In the Search for box at the top of the task pane, type birthday. Click the Search in arrow, and select the Everywhere check box. Then click Go.
Thumbnails of clip art, photographs, movies, and sounds with the keyword birthday appear in the task pane.
Troubleshooting
Images sourced from Microsoft Office Online are indicated by an Internet icon in the lower-left corner of the image thumbnail. If you do not have an active Internet connection, you might not see all the clip art images shown here. In that case, pick any clip art image to follow the steps in this exercise.
Scroll the thumbnail list box, and point to any stylized drawing of a cake with candles.
A ScreenTip displays the beginning of the list of keywords associated with the image, its dimensions and file size, and its format.
See Also
For information about common graphic formats, see the sidebar titled Graphic Formats, earlier in this chapter.
Toward the bottom of the list box, click one of the one-color cake silhouettes.
Publisher inserts the image into the publication and displays the Picture toolbar.
With the clip art image still selected, on the Picture toolbar, click the Format Picture button.
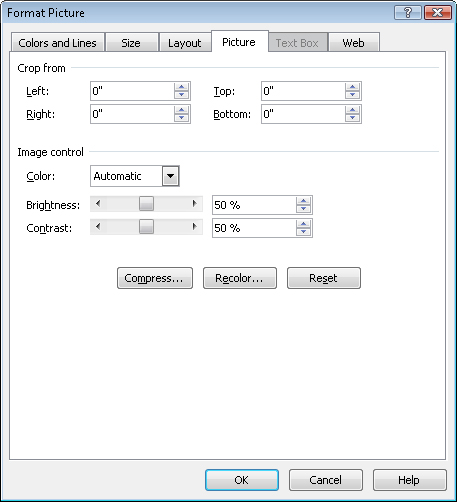
The Format Picture dialog box opens.
Under Image control on the Picture tab, click the Recolor button.
In the Recolor Picture dialog box, click the Color arrow, and in the default color palette, click the Purple box. Then click OK.
In the Format Picture dialog box, change the Brightness setting to 25% and the Contrast setting to 75%.
Click the Colors and Lines tab, and under Fill, click the Color arrow, and click the Gray box. Then under Line, click the Color arrow, and click the Purple box.
Click the Size tab, and under Scale, change the Height setting to 75%. Then click the Width box.
The Width setting changes to 75% because the aspect ratio of the graphic is locked. You can change the proportions of the image by clearing the Lock Aspect Ratio check box.
Click the Layout tab, and under Position on page, change the Horizontal setting to 1" and the Vertical setting to 1". Then click OK.
The small graphic jumps to the upper-left corner of the page, displaying its new purple and gray color scheme. (If necessary, move the toolbar to see the image.)
Click a blank area of the page to release the selection, and then close the Clip Art task pane.
On the Objects toolbar, click the Picture Frame button, and then click Picture from File.
Move the pointer over the page below the clip art image, and drag to create a frame about 4 inches square. (Use the rulers or the size indicator on the status bar to guide you.)
When you release the mouse button, Publisher displays the Insert Picture dialog box.
See Also
For information about how to move around in dialog boxes such as this one, see Saving and Closing Publications in Chapter 1.
If the contents of the VisualInterest folder are not displayed, navigate to the DocumentsMicrosoft PressSBS_Publisher2007VisualInterest folder, and double-click the Birthday at the Ritz picture.
Publisher inserts the picture in the frame you drew on the page and displays the Picture toolbar.
If necessary, move the Picture toolbar out of the way. Then drag the lower-right handle of the frame down and to the right until the picture fills the width of the page.
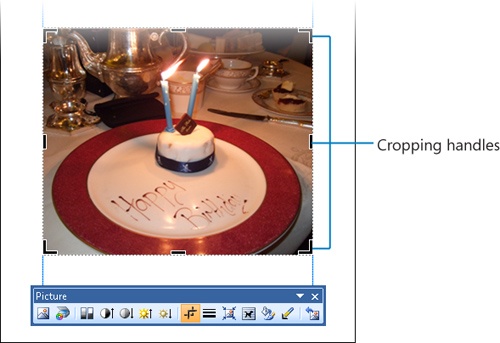
With the picture still selected, on the Picture toolbar, click the Crop button.
Cropping handles appear in the corners and on the sides of the picture.
Drag the top cropping handle down to the top of the candle flames. Then drag the left and right cropping handles to tightly focus the picture on the plate and the little cake.
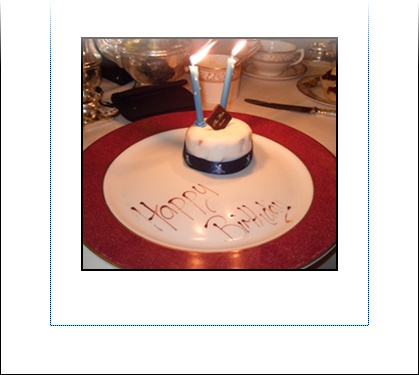
Click the Crop button to hide the cropping handles.
With the picture still selected, on the Picture toolbar, click the Line/Border Style button, and in the list, click the 3 pt line. Then click a blank area of the page to see the results.
Click the picture, and then on the Picture toolbar, click the Compress Pictures button.
The Compress Pictures dialog box opens.
Notice the current size of the image files and the estimated size after compression using the default settings. Unless you select the Apply To Selected Pictures Only check box, Publisher will compress all the pictures in the publication, not only the selected picture.
Under Compression options, leave all the check boxes selected. Under Target Output, click Web.
Notice that the estimated size after compression using the new settings is much smaller. The resolution for displaying graphics on the Web is much lower than the resolution for printing.
Click Compress. Then click Yes to apply picture optimization.
Publisher compresses the pictures and deletes the cropped parts of the picture. If you were to save the file now, the compressed pictures would result in a smaller file size.