For convenience, we have gathered together information about techniques for ensuring the accuracy of your text in the last topic of this chapter. However, editing and proofing are processes that are on-going throughout the development of a publication. The language you choose to convey your message should be polished, targeted to your audience, and error-free.
If you are familiar with Microsoft Office Word, you might be more comfortable crafting text by using Word tools and techniques than within a publication. Provided you have Word installed on your computer, you can simply right-click any text in a publication, point to Change Text, and then click Edit Story In Microsoft Word. A Word document containing the formatted text of the story opens, and Publisher indicates with cross-hatching that the text box(es) containing the story are unavailable for editing.

You can make content and formatting changes within the Word document. All the usual Word functions, including spelling and grammar review and word count, are available. When you finish, you close the document to return to Publisher. There is no need to save the document. (In fact, you cannot actually save the document, only a copy of it.) Your changes are immediately visible in the publication.
Before publishing a document, it is important to confirm that it contains no spelling errors. In this electronic age, there are few excuses for the spelling errors that frequently occur in professionally printed materials. (This seems to be a particularly prevalent issue with restaurant menus!) Even in a short publication—but much more so in a long publication—err on the safe side, and use the tools that the 2007 Microsoft Office system places at your disposal.
Publisher provides two tools to help you with the chore of eliminating spelling errors: the AutoCorrect and Spelling features. It doesn’t include the grammar-checking feature available in Microsoft Office Word and Microsoft Office Outlook. However, if you display a story in Word as discussed earlier in this topic, you can run the full Spelling And Grammar feature. This is another great benefit of the easy interaction between Publisher and Word.
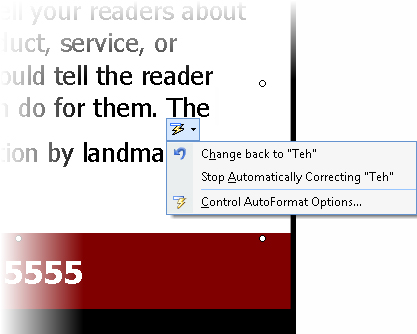
Have you noticed that Publisher automatically corrects some misspellings (such as teh to the) when you type them? This is the work of the AutoCorrect feature. AutoCorrect fixes common spelling and typing errors so that you don’t have to. AutoCorrect comes with a long list of frequently mistyped words and their correct spellings.
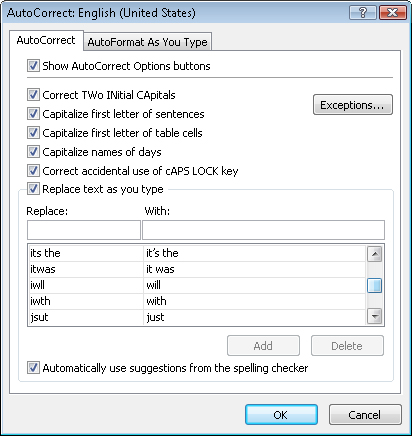
If you frequently mistype a word that AutoCorrect doesn’t change, such as a difficult last name, you can add it to the list in the AutoCorrect dialog box.
If you deliberately mistype a word and don’t want to accept the AutoCorrect change, you can undo the change by clicking the Undo button on the Standard toolbar or by pointing to the corrected word, clicking the AutoCorrect Options button that appears, and then clicking Change Back.
A great time-saving trick for longer publications is to use the AutoCorrect feature to avoid having to manually enter phrases that occur frequently in your publications. For example, if you work on a project in which you often have to type For more information, see followed by a topic or chapter reference, you can enter a short combination of letters that does not form a word, such as fmi, and the full phrase to the list in the AutoCorrect dialog box. Thereafter, when you type fmi and press the Spacebar, AutoCorrect replaces the letter combination with the full phrase.
Although AutoCorrect ensures that your documents are free of common misspellings, it cannot detect random typographical errors. To help you detect this type of error, Publisher includes the same spell-checking feature found in other Office programs. By default, Publisher checks your spelling as you type and indicates suspected spelling errors with red wavy underlines. You can correct an individual error by right-clicking it and selecting a suggested alternative, or you can check the spelling of a single story or the entire publication by clicking Spelling on the Tools menu and correcting errors in the Check Spelling dialog box.
Over-reliance on spelling checkers has led to a modern-day misspelling epidemic. People seem to believe that just because a publication has passed a spell-check, it must be OK, but there are numerous common mistakes in word usage, for example using "their" instead of "there," that will pass a spell-check. In critical publications, take the time to use the Word grammar checker, which will catch many of these. The grammar checker indicates questionable usage with a green wavy underline.
Many Publisher templates use text boxes to emulate the kinds of skinny-column layouts used in newspapers and magazines. To avoid leaving ugly gaps at the ends of lines and to make more content fit in less vertical space, Publisher automatically hyphenates multi-syllable words that fall within 0.25 inches of the edge of the text box.
For each story, you can change the width of the default hyphenation zone, or you can turn off this feature entirely by right-clicking the story you want to change, pointing to Proofing Tools, and then clicking Hyphenation to display the Hyphenation dialog box.

Clicking Manual displays a dialog box that moves from one hyphenated word to the next, allowing you to specify which words you want to hyphenate and how you want to hyphenate them.
Tip
If you are going to manually hyphenate a story, ensure that all editing, including spell-checking, is complete before you begin. It is a waste of time to fine-tune hyphenation if later changes might rewrap lines and necessitate another round of adjustments.
To check the hyphenation settings of a story, you can click Options on the Tools menu, and then in the Options dialog box, click the Edit tab.

Changing the settings under Hyphenation on this tab affects only new text boxes, not existing ones.
In this exercise, you will create an advertisement, edit its content in Word, and check the spelling of the advertisement text. There is no practice file for this exercise.
In the Publication Types list, click Advertisements.
Publisher offers six monochromatic designs, each available in square and rectangular versions. If the active information set includes a logo, the design previews display the logo as well as the company name.
Under Microsoft Office Online Templates, click View templates from Microsoft Office Online.
If you have an active Internet connection, additional color advertisement templates provided by Microsoft (and possibly others) appear. Each Internet template is of a fixed size, and has a rating based on feedback from Office Online visitors.
Select a template you like, and then click Create.
Publisher creates the selected advertisement. Placeholder text suggests the type of information you might include in each area of the advertisement. Blue dashes indicate placeholders linked to the information set.
Right-click the main placeholder text, point to Change Text, and then click Edit Story in Microsoft Word.
Troubleshooting
If Word is not installed on your computer, skip to step 5, and then follow along with the rest of this exercise in Publisher.
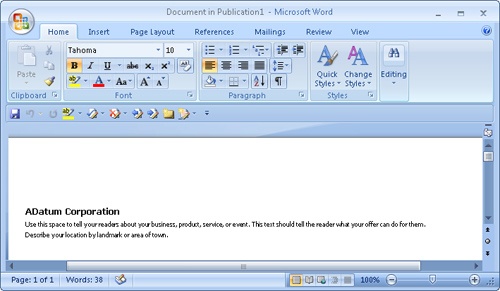
The text box becomes unavailable, and Word opens, displaying the placeholder text.
See Also
For information about working in Word 2007, refer to our book Microsoft Office Word 2007 Step by Step (Microsoft Press, 2007).
Your Word window might look different than the one shown here, depending on your settings.
In the text displayed in the document, remove a space from between two words to create a spelling error.
Word immediately indicates the error with a red wavy underline.
Close the document to return to Publisher. After a short pause, the changed text appears in the advertisement.
Publisher also indicates the misspelling with a red wavy underline.
On the Tools menu, point to Spelling, and then click Spelling.
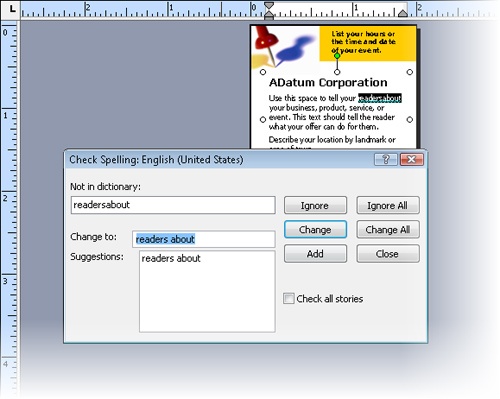
The Check Spelling dialog box opens, prompting you to correct the error. Your publication is visible behind the dialog box so that you can easily locate the indicated error in context—not important in a small publication such as this one, but very helpful in a longer publication.
You can accept the suggested correction or enter any replacement text you want in the Change To box. Then click Change to effect the replacement and move to the next detected error in the story (if there is one). After checking the story, Publisher offers to check the remainder of the publication.
Finish checking the spelling of the publication content, and then in the Microsoft Office Publisher dialog box that appears when the spelling check is complete, click OK.