
- Selecting the right store scope.
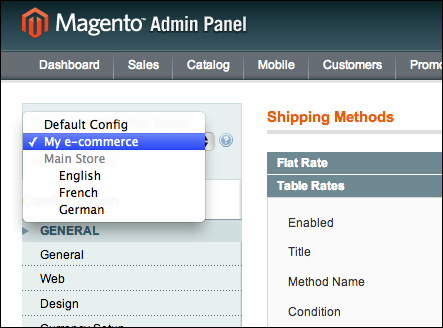
Go to System | Configuration | Shipping Methods and click on the Table Rates section. Magento's configuration has a drop-down list, which sets the store scope. By default, you are editing configuration values for all the Stores and Store Views in your Magento installation. If you want to configure this shipping method, you have to choose your website using the scope drop-down list in the top-left corner of the configuration section. You can't fully set up this shipping method if you have not chosen the Store or Store View for which you are editing the settings. The store scope drop-down list can be seen follows:
- Exporting the
CSVfile.After you have set the scope drop-down list to the website, you can see a button for exporting a
CSVfile and a button for uploading aCSVfile. ACSVfile is a Comma Separated Values file and it is the file format often used in information systems to transmit rows of data.Select your desired way of determining the shipping price (either based on weight, number of articles, or order value), and click on Save Config. After that, click on the Export CSV button.
- Opening and editing the
CSVfile.The resulting
CSVfile can be opened in Microsoft Excel or other spreadsheet software such as LibreOffice. If you have chosen weight as the deciding factor, theCSVfile looks like the following Excel screenshot: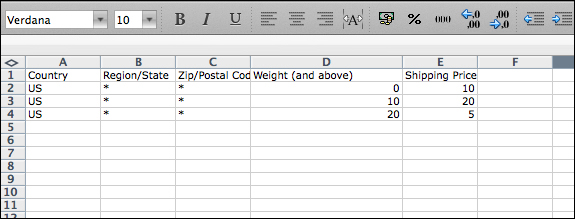
Each row is a different shipping rate for a combination of weight and destination. The Weight (and above) column signifies from which weight the shipping price is applied. In the example, orders with a total weight of 0-9 will get a shipping price of 10, orders with a total weight of 10-19 will get a shipping price of 20, and orders with a total weight of 20 and above will get a shipping price of 5. The units of weight can be anything you want such as kilograms or pounds. The important thing is that you use the same convention for all your products. The unit for the price you enter will be the base currency you have set for your store, in System | Configuration | Currency Setup.
- Saving and uploading the
CSVfile.When you are done setting the table rates in the spreadsheet, save it as a
CSVfile. After that you can go back to the admin in System | Configuration | Shipping Methods. Click on the Table Rates section, select the relevant store, and click on the Browse files button. A dialog similar to the one below will be shown: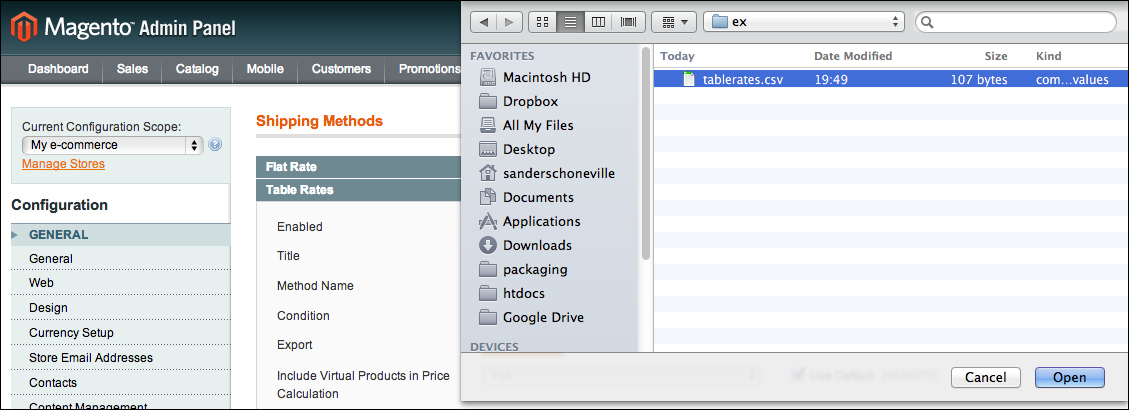
Select the
CSVfile and click on the Import button. After uploading the file, and enabling the shipping method, Magento will show the relevant rate to your customers. An example of an order with a weight of 1 can be seen in the following screenshot below: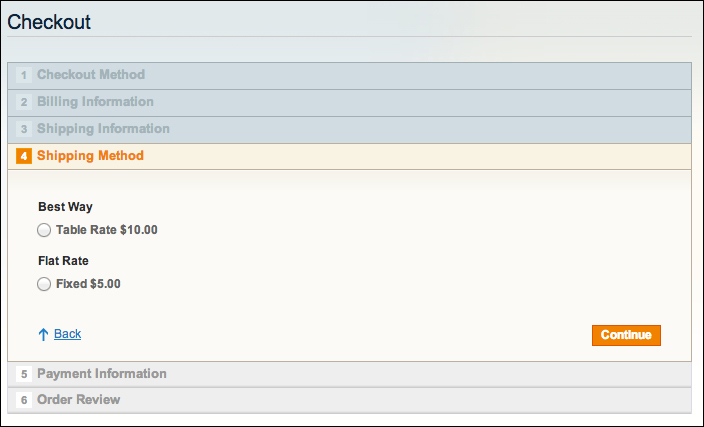
The Table Rate shipping method has many configuration fields that should be familiar from the Flat Rate shipping method. The following fields work in the same fashion as in the Flat Rate shipping method: Enabled, Title , Method Name, Handling Fee, Displayed Error Message, Ship to Applicable Countries, and Sort Order.
The CSV file that can be opened in Excel contains the following columns if you choose weight versus destination as the criteria for the Table Rate:
- Country: This is the two-letter country code for the country that this rate applies to (according to the ISO 3166 standard). You can find these country codes at: http://www.iso.org/iso/country_codes/iso_3166_code_lists/country_names_and_code_elements.htm. If the rate you are setting applies to all countries, you can enter a
*character here. - Region/State: If the rate you are entering applies to all regions within a country, fill in a
*character here. If you need different rates for different regions of a country, in this column, an ISO 3166-2 letter abbreviation for the specific region has to be entered. You can find these letter combinations for each region quickest through this Wikipedia article: http://en.wikipedia.org/wiki/ISO_3166-2. - Zip/Postal Code: This is the zip code for which the shipping rate is applied to. Usually inputting a
*character will suffice here, which means that the zip code applies to all regions in a country. - Weight (and above): This is the weight for the shipping price of the zip code, region, and country of the particular row in the spreadsheet. Note that the "and above", means that when you input
1as a value, the rate will apply to weights 1, 2, 5, 10, 100, and so on. - Shipping Price: This is the price, entered as a regular decimal value without currency symbol.
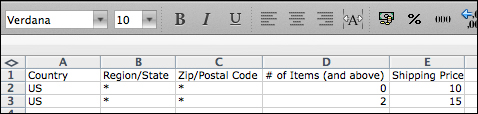
When choosing the number of articles as the determining factor, the spreadsheet looks similar. The major difference is the # of Items (and above) column. In the following example, an order with 1 article will have a shipping cost of 10 and an order with 2 articles or more will have a shipping cost of 15. The following Excel screenshot shows a spreadsheet example with these values:
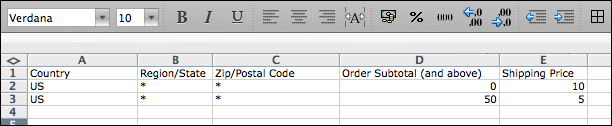
For the final possibility with Table Rates, base them on the order value, and the spreadsheet looks as follows. In this example, the important column is Order Subtotal (and above). The following example would result in orders with a value from 0-49 having a shipping cost of 10 and orders with a value of 50 or higher having a shipping price of 5. This kind of construction is often employed by stores to drive visitors to higher average order sizes in order to reduce their shipping costs. See the following screenshot for an example of Table Rates spreadsheet based on Order Subtotal (and above):
In our example, we added shipping rates for the US. Logically, the next step is to add shipping costs for other countries by yourself. Alternatively, try to make variants in shipping costs for different regions and zip codes. Remember to look up the ISO codes for countries and regions through the Wikipedia pages mentioned previously.
Q1. There are several steps to take when setting Table Rates. For each of the following actions, indicate whether or not the action is mandatory:
- Uploading your
CSVfile - Adding extra lines to the
CSVfile - Setting your store scope in the Magento configuration section
- Opening the
CSVfile in Excel