
Chapter 2
Improving JavaScript and AJAX with jQuery
In This Chapter
![]() Downloading and including the jQuery library
Downloading and including the jQuery library
![]() Making an AJAX request with jQuery
Making an AJAX request with jQuery
![]() Using component selectors
Using component selectors
![]() Adding events to components
Adding events to components
![]() Creating a simple content management system with jQuery
Creating a simple content management system with jQuery
JavaScript has amazing capabilities. It's useful on its own, and when you add AJAX, it becomes incredibly powerful. However, JavaScript can be tedious. You have a lot to remember, and it can be a real pain to handle multiplatform issues. Some tasks (like AJAX) are a bit complex and require a lot of steps. Regardless of the task, you always have browser-compatibility issues to deal with.
For these reasons, web programmers began to compile commonly used functions into reusable libraries. These libraries became more powerful over time, and some of them have now become fundamental to web development.
As these libraries became more powerful, they not only added AJAX capabilities, but many of them also added features to JavaScript/DOM programming that were once available only in traditional programming languages. Many of these libraries allow a new visual aesthetic as well as enhanced technical capabilities.
A number of very powerful JavaScript/AJAX libraries are available. All make basic JavaScript easier, and each has its own learning curve. No library writes code for you, but a good library can handle some of the drudgery and let you work instead on the creative aspects of your program. JavaScript libraries can let you work at a higher level than plain JavaScript, writing more elaborate pages in less time.
Several important JavaScript/AJAX libraries are available. Here are a few of the most prominent:
- DOJO: A very powerful library that includes a series of user interface widgets (like those in Visual Basic and Java) as well as AJAX features.
- Prototype: One of the first AJAX libraries to become popular. It includes great support for AJAX and extensions for user interface objects (through the scriptaculous extension).
- Yahoo User Interface (YUI): This is used by Yahoo! for all its AJAX applications. Yahoo! has released this impressive library as open source.
- jQuery: This has emerged as one of the more popular JavaScript and AJAX libraries. It is the library emphasized in this book.
Introducing jQuery
This book focuses on the jQuery library. Although many outstanding AJAX/JavaScript libraries are available, jQuery has quickly become one of the most prominent. Here are some reasons for the popularity of jQuery:
- It's a powerful library. The jQuery system is incredibly powerful. It can do all kinds of impressive things to make your JavaScript easier to write.
- It's lightweight. You need to include a reference to your library in every file that needs it. The entire jQuery library fits in 55K, which is smaller than many image files. It won't have a significant impact on download speed.
- It supports a flexible selection mechanism. jQuery greatly simplifies and expands the document.getElementById mechanism that's central to DOM manipulation.
- It has great animation support. You can use jQuery to make elements appear and fade, move and slide.
- It makes AJAX queries trivial. You'll be shocked at how easy AJAX is with jQuery.
- It has an enhanced event mechanism. JavaScript has very limited support for events. jQuery adds a very powerful tool for adding event handlers to nearly any element.
- It provides cross-platform support. The jQuery library tries to manage browser-compatibility issues for you, so you don't have to stress so much about exactly which browser is being used.
- It supports user interface widgets. jQuery comes with a powerful user interface library, including tools HTML doesn't have, like drag-and-drop controls, sliders, and date pickers.
- It's highly extensible. jQuery has a plug-in library that supports all kinds of optional features, including new widgets and tools like audio integration, image galleries, menus, and much more.
- It introduces powerful new programming ideas. jQuery is a great tool for learning about some really interesting ideas like functional programming and chainable objects. I explain these as you encounter them, mainly in Chapter 4 of this minibook.
- It's free and open source. It's available under an open-source license, which means it costs nothing to use, and you can look it over and change it if you wish.
- It's reasonably typical. If you choose to use a different AJAX library, you can still transfer the ideas you learned in jQuery.
Installing jQuery
The jQuery library is easy to install and use. Follow these steps:
- Go tojquery.com.
- Download the current version.
As of this writing, the most current version is 1.10.2. There is a 2.X series, but these versions do not support older browsers, so will not be adopted until the older browsers (particularly IE 6 and less) are no longer used at all.
 You may be able to choose from a number of versions of the file. I recommend the minimized version for actual use. To make this file as small as possible, every unnecessary character (including spaces and carriage returns) was removed. This file is very compact but difficult to read. Download the nonminimized version if you want to actually read the code, but it's generally better to include the minimized version in your programs.
 - Store the resulting .js file to your working directory.
jQuery-1.10.2.min.js is the current file.
To incorporate the library in your pages, simply link to it as an external JavaScript file:
<script type = "text/javascript"
src = "jquery-1.10.2.min.js"></script>
 Be sure to include the preceding code before you write or include other code that refers to jQuery.
Importing jQuery from Google
Easy as it is to add jQuery support, you have another great way to add jQuery (and other AJAX library) support to your pages without downloading anything. Google has a publicly available version of several important libraries (including jQuery) that you can download from its servers.
This has a couple of interesting advantages:
- You don't have to install any libraries. All the library files stay on the Google server.
- The library is automatically updated. You always have access to the latest version of the library without making any changes to your code.
- The library may load faster. The first time one of your pages reads the library from Google's servers, you have to wait for the full download, but then the library is stored in a cache (a form of browser memory) so that subsequent requests are essentially immediate.
Here's how you do it:
<script type = "text/javascript"
src="http://www.google.com/jsapi"></script>
<script type = "text/javacript">
// Load jQuery
google.load("jquery", "1");
//your code here
</script>
Essentially, loading jQuery from Google is a two-step process:
- Load the Google API from Google.
Use the first <script> tag to refer to the Google AJAX API server. This gives you access to the google.load() function.
- Invoke google.load()to load jQuery.
- The first parameter is the name of the library you want to load.
- The second parameter is the version number. If you leave this parameter blank, you get the latest version. If you specify a number, Google gives you the latest variation of that version. In my example, I want the latest variation of version 1, but not version 2.
Note that you don't need to install any files locally to use the Google approach.
 All these options for managing jQuery can be dizzying. Use whichever technique works best for you. I prefer using the local code rather than the Google solution because I find it easier, and this method works even if I'm offline. For smaller projects (like the demonstrations in this chapter), I don't like the online requirement of Google. In this chapter, I simply refer to a local copy of the jQuery file.
Your First jQuery App
As an introduction to jQuery, build an application that you can already create in JavaScript/DOM. This introduces you to some powerful features of jQuery. Figure 2-1 illustrates the change.html page at work, but the interesting stuff (as usual) is under the hood.

Figure 2-1: The content of this page is modified with jQuery.
Setting up the page
At first, the jQuery app doesn't look much different than any other HTML/JavaScript code you've already written, but the JavaScript code is a bit different:
<!DOCTYPE html>
<html lang = "en-US">
<head>
<title>change.html</title>
<script type = "text/javascript"
src = "jquery-1.10.2.min.js"></script>
<script type = "text/javascript">
function changeMe(){
$("#output").html("I changed");
}
</script>
</head>
<body onload = "changeMe()">
<h1>Basic jQuery demo</h1>
<div id = "output">
Did this change?
</div>
</body>
</html>
 If you're already knowledgeable about jQuery, you may be horrified at my use of body onload in this example. jQuery provides a wonderful alternative to the onload mechanism, but I want to introduce only one big, new idea at a time. The next example illustrates the jQuery alternative to body onload and explains why it is such an improvement.
The basic features of changeme.html are utterly unsurprising:
- The HTML has a div named output. This div initially says, “Did this change?” The code should change the content to something else.
- The HTML calls a function called changeMe()when the body finishes loading. This is a mechanism used frequently in DOM programming, although you see a new way to call an initial function in the next section.
- There is a reference to the jQuery library. Any page that uses jQuery must load it using one of the mechanisms described earlier in this chapter.
- The changeMe()function looks really crazy. When you run the program, you can tell what it does. The code gets a reference to the output div and changes its innerHTML property to reflect a new value (“I've changed.”). However, the syntax is really new. All that functionality got packed into one line of (funky-looking) code.
$("#output").html("I changed");
Meet the jQuery node object
The secret behind jQuery's power is the underlying data model. jQuery has a unique way of looking at the DOM that's more powerful than the standard object model. Understanding the way this works is the key to powerful programming with jQuery.
The jQuery node is a special object that adds a lot of functionality to the ordinary DOM element. Any element on the web page (any link, div, heading, or whatever) can be defined as a jQuery node. You can also make a list of jQuery nodes based on tag types, so you can have a jQuery object that stores a list of all the paragraphs on the page or all the objects with a particular class name. The jQuery object has very useful methods like html( ), which is used to change the innerHTML property of an element.
The jQuery node is based on the basic DOM node, so it can be created from any DOM element. However, it also adds significant new features. This is a good example of the object-oriented philosophy.
Creating a jQuery object
You have many ways to create a jQuery object, but the simplest is through the special $() function. You can place an identifier (very similar to CSS identifiers) inside the function to build a jQuery object based on an element. For example,
var jQoutput = $("#output");
creates a variable called jQoutput, which contains a jQuery object-based on the output element. It's similar to the following:
var DOMoutput = document.getElementById("output");
The jQuery approach is a little cleaner, and it doesn't get a reference to a DOM object (as the getElementById technique does), but it makes a new jQuery object that is based on the DOM element. Don't worry if this is a little hard to understand. It gets easier as you get used to it.
Enjoying your new jQuery node object
Because jQoutput is a jQuery object, it has some powerful methods. For example, you can change the content of the object with the html() method. The following two lines are equivalent:
jQoutput.html("I've changed"); //jQuery version
DOMoutput.innerHTML = "I've changed"; //ordinary JS / DOM
jQuery doesn't require you to create variables for each object, so the code in the changeMe() function can look like this:
//build a variable and then modify it
var jQoutput = $("#output");
jQoutput.html("I've changed");
Or you can shorten it like this:
$("#output").html("I've changed");
This last version is how the program is actually written. It's very common to refer to an object with the $() mechanism and immediately perform a method on that object as I've done here.
Creating an Initialization Function
Many pages require an initialization function. This is a function that's run early to set up the rest of the page. The body onload mechanism is frequently used in DOM/JavaScript to make pages load as soon as the document has begun loading. This technique is described in Book IV, Chapter 7. While body onload does this job well, a couple of problems exist with the traditional technique:
- It requires making a change to the HTML. The JavaScript code should be completely separated from HTML. You shouldn't have to change your HTML to make it work with JavaScript.
- The timing still isn't quite right. The code specified in body onload doesn't execute until after the entire page is displayed. It would be better if the code was registered after the DOM is loaded but before the page displays.
Using $(document).ready()
jQuery has a great alternative to body onload that overcomes these shortcomings. Take a look at the code for ready.html to see how it works:
<!DOCTYPE html>
<html lang = "en-US">
<head>
<title>ready.html</title>
<script type = "text/javascript"
src = "jquery-1.10.2.min.js"></script>
<script type = "text/javascript">
$(document).ready(changeMe);
function changeMe(){
$("#output").html("I changed");
}
</script>
</head>
<body>
<h1>Using the document.ready mechanism</h1>
<div id = "output">
Did this change?
</div>
</body>
</html>
This code is much like change.html, but it uses the jQuery technique for running initialization code:
- The body tag no longer has an onload attribute. This is a common feature of jQuery programming. The HTML no longer has direct links to the JavaScript because jQuery lets the JavaScript code attach itself to the web page.
- The initialization function is created with the $(document).ready()function. This technique tells the browser to execute a function when the DOM has finished loading (so that it has access to all elements of the form) but before the page is displayed (so that any effects of the form appear instantaneous to the user).
- $(document)makes a jQuery object from the whole document. The entire document can be turned into a jQuery object by specifying document inside the $() function. Note that you don't use quotation marks in this case.
- The function specified is automatically run. In this particular case, I want to run the changeMe() function, so I place it in the parameter of the ready() method. Note that I'm referring to changeMe as a variable, so it has no quotation marks or parentheses. (Look at Book IV, Chapter 7 for more discussion of referring to functions as variables.)
You see several other places (particularly in event handling) where jQuery expects a function as a parameter. Such a function is frequently referred to as a callback function because it's called after some sort of event has occurred. You also see callback functions that respond to keyboard events, mouse motion, and the completion of an AJAX request.
Alternatives to document.ready
You sometimes see a couple of shortcuts because it's so common to run initialization code. You can shorten
$(document).ready(changeMe);
to the following code:
$(changeMe);
If this code is not defined inside a function and changeMe is a function defined on the page, jQuery automatically runs the function directly just like the document.ready approach.
You can also create an anonymous function directly:
$(document).ready(function(){
$("#output").html("I changed");
});
I think this (anonymous function) method is cumbersome, but you frequently see jQuery code using this technique. Personally, I tend to create a function called init() and call it with a line like this:
$(init);
I think this technique is simple and easy to understand but you may encounter the other variations as you examine code on the web.
Investigating the jQuery Object
The jQuery object is interesting because it is easy to create from a variety of DOM elements, and because it adds wonderful, new features to these elements.
Changing the style of an element
If you can dynamically change the CSS of an element, you can do quite a lot to it. jQuery makes this process quite easy. After you have a jQuery object, you can use the css() method to add or change any CSS attributes of the object. Take a look at styleElements.html, shown in Figure 2-2, as an example.

Figure 2-2: All the styles here are applied dynamically by jQuery functions.
The code displays a terseness common to jQuery code:
<!DOCTYPE html>
<title>styleElements.html</title>
<meta charset="UTF-8">
<script type = "text/javascript"
src = "jquery-1.10.2.min.js"></script>
<script type = "text/javascript">
$(init);
function init(){
$("h1").css("backgroundColor", "yellow");
$("#myParagraph").css({"backgroundColor":"black",
"color":"white"});
$(".bordered").css("border", "1px solid black");
}
</script>
</head>
<body>
<h1>I'm a level one heading</h1>
<p id = "myParagraph">
I'm a paragraph with the id "myParagraph."
</p>
<h2 class = "bordered">
I have a border.
</h2>
<p class = "bordered">
I have a border too.
</p>
</body>
</html>
You find a few interesting things in this program. First, take a look at the HTML:
- It contains an H1 tag. I'm aware that's not too exciting, but I use it to show how to target elements by DOM type.
- There's a paragraph with the ID myParagraph. This will be used to illustrate how to target an element by ID.
- There are two elements with the class bordered. You have no easy way in ordinary DOM work to apply code to all elements of a particular class, but jQuery makes it easy.
- Several elements have custom CSS, but no CSS is defined. The jQuery code changes all the CSS dynamically.
The init() function is identified as the function to be run when the document is ready. In this function, I use the powerful CSS method to change each element's CSS dynamically. I come back to the CSS in a moment, but first notice how the various elements are targeted.
Selecting jQuery objects
jQuery gives you several alternatives for creating jQuery objects from the DOM elements. In general, you use the same rules to select objects in jQuery as you do in CSS:
- DOM elements are targeted as is. You can include any DOM element inside the $(““) mechanism to target all similar elements. For example, use $(“h1”) to refer to all H1 objects or $(“p”) to refer to all paragraphs.
- Use the # identifier to target a particular ID. This works exactly the same as in CSS. If you have an element with the ID myThing, use the code $(“#myThing”).
- Use the . identifier to target members of a class. Again, this is the same mechanism that you use in CSS, so all elements with the class bordered attached to them can be modified with the code $(“.bordered”).
- You can even use complex identifiers. You can even use complex CSS identifiers like $(“li img”);. This identifier only targets images inside a list item.
These selection methods (all borrowed from familiar CSS notation) add incredible flexibility to your code. You can now easily select elements in your JavaScript code according to the same rules you use to identify elements in CSS.
Modifying the style
After you've identified an object or a set of objects, you can apply jQuery methods. One very powerful and easy method is the css() method. The basic form of this method takes two parameters: a style rule and value.
For example, to make the background color of all H1 objects yellow, I use the following code:
$("h1").css("backgroundColor", "yellow");
If you apply a style rule to a collection of objects (like all H1 objects or all objects with the bordered class), the same rule is instantly applied to all the objects.
A more powerful variation of the style rule exists that allows you to apply several CSS styles at once. It takes a single object in JSON notation as its argument:
$("#myParagraph").css({"backgroundColor":"black",
"color":"white"});
This example uses a JSON object defined as a series of rule/value pairs. If you need a refresher on how JSON objects work, look at Book IV, Chapter 4.
Adding Events to Objects
The jQuery library adds another extremely powerful capability to JavaScript. It allows you to easily attach events to any jQuery object. As an example, take a look at hover.html, as shown in Figure 2-3.

Figure 2-3: A border appears around each list item when your cursor is over it.
When you move your cursor over any list item, a border appears around the item. This isn't a difficult effect to achieve in ordinary CSS but it's even easier in jQuery.
Adding a hover event
Look at the code to see how it works:
<!DOCTYPE html>
<html lang="en">
<head>
<title>hover.html</title>
<meta charset="UTF-8">
<script type = "text/javascript"
src = "jquery-1.10.2.min.js"></script>
<script type = "text/javascript">
$(init);
function init(){
$("li").hover(border, noBorder);
} // end init
function border(){
$(this).css("border", "1px solid black");
}
function noBorder(){
$(this).css("border", "0px none black");
}
</script>
</head>
<body>
<h1>Hover Demo</h1>
<ul>
<li>alpha</li>
<li>beta</li>
<li>gamma</li>
<li>delta</li>
</ul>
</body>
</html>
The HTML couldn't be simpler. It's simply an unordered list. The JavaScript isn't much more complex. It consists of three one-line functions:
- init()is called when the document is ready. It makes jQuery objects of all list items and attaches the hover event to them. The hover() function accepts two parameters:
- The first is a function to be called when the cursor hovers over the object.
- The second is a function to be called when the cursor leaves the object.
- border()draws a border around the current element. The $(this) identifier is used to specify the current object. In this example, I use the css function to draw a border around the object.
- noBorder()is a function that is very similar to the border()function, but it removes a border from the current object.
In this example, I used three different functions. Many jQuery programmers prefer to use anonymous functions (sometimes called lambda functions) to enclose the entire functionality in one long line:
$("li").hover(
function(){
$(this).css("border", "1px solid black");
},
function(){
$(this).css("border", "0px none black");
}
);
Note that this is still technically a single line of code. Instead of referencing two functions that have already been created, I build the functions immediately where they are needed. Each function definition is a parameter to the hover() method.
If you're a computer scientist, you might argue that this is not a perfect example of a lambda function, and you would be correct. The important thing is to notice that some ideas of functional programming (such as lambda functions) are creeping into mainstream AJAX programming, and that's an exciting development. If you just mutter “lambda” and then walk away, people will assume that you're some kind of geeky computer scientist. What could be more fun than that?
Although I'm perfectly comfortable with anonymous functions, I often find the named-function approach easier to read, so I tend to use complete named functions more often. All those braces inside parentheses make me dizzy.
Changing classes on the fly
jQuery supports another wonderful feature. You can define a CSS style and then add or remove that style from an element dynamically. Figure 2-4 shows a page that can dynamically modify the border of any list item.
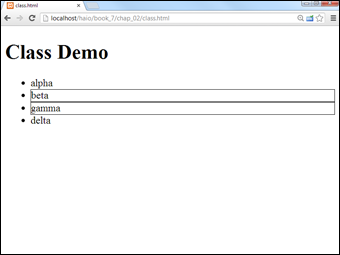
Figure 2-4: Click list items, and their borders toggle on and off.
The code shows how easy this kind of feature is to add:
<!DOCTYPE html>
<html lang="en">
<head>
<title>class.html</title>
<meta charset="UTF-8">
<style type = "text/css">
.bordered {
border: 1px solid black;
}
</style>
<script type = "text/javascript"
src = "jquery-1.10.2.min.js"></script>
<script type = "text/javascript">
$(init);
function init(){
$("li").click(toggleBorder);
} // end init
function toggleBorder(){
$(this).toggleClass("bordered");
}
</script>
</head>
<body>
<h1>Class Demo</h1>
<ul>
<li>alpha</li>
<li>beta</li>
<li>gamma</li>
<li>delta</li>
</ul>
</body>
</html>
Here's how to make this program:
- Begin with a basic HTML page.
All the interesting stuff happens in CSS and JavaScript, so the actual contents of the page aren't that critical.
- Create a class you want to add and remove.
I build a CSS class called bordered that simply draws a border around the element. Of course, you can make a much more sophisticated CSS class with all kinds of formatting if you prefer.
- Link an init()method.
As you're beginning to see, most jQuery applications require some sort of initialization. I normally call the first function init().
- Call the toggleBorder()function whenever the user clicks a list item.
The init() method simply sets up an event handler. Whenever a list item receives the click event (that is, it is clicked) the toggleBorder() function should be activated. The toggleBorder() function, well, toggles the border.
jQuery has several methods for manipulating the class of an element:
- addClass() assigns a class to the element.
- removeClass() removes a class definition from an element.
- toggleClass() switches the class (adds it if it isn't currently attached or removes it otherwise).
Making an AJAX Request with jQuery
The primary purpose of an AJAX library like jQuery is to simplify AJAX requests. It's hard to believe how easy this can be with jQuery. Figure 2-5 shows ajax.html, a page with a basic AJAX query.
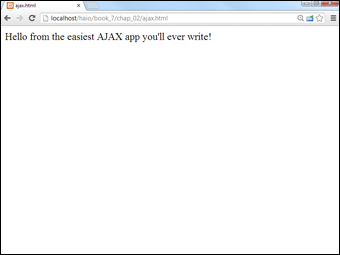
Figure 2-5: The text file is requested with an AJAX call.
Including a text file with AJAX
This program is very similar in function to the asynch.html program described in Chapter 1 of this minibook, but the code is much cleaner:
<!DOCTYPE html>
<html lang="en">
<head>
<meta charset="UTF-8">
<title>ajax.html</title>
<script type = "text/javascript"
src = "jquery-1.10.2.min.js"></script>
<script type = "text/javascript">
$(document).ready(getAJAX);
function getAJAX(){
$("#output").load("hello.txt");
}
</script>
</head>
<body>
<div id = "output"></div>
</body>
</html>
The HTML is very clean (as you should be expecting from jQuery examples). It simply creates an empty div called output.
The JavaScript code isn't much more complex. A standard $(document).ready function calls the getAJAX() function as soon as the document is ready. The getAJAX() function simply creates a jQuery node based on the output div and loads the hello.txt file through a basic AJAX request.
This example does use AJAX, so if it isn't working, you might need to remember some details about how AJAX works. A program using AJAX should be run through a web server, not just from a local file. Also, the file being read should be on the same server as the program making the AJAX request.
The load() mechanism described here is suitable for a basic situation where you want to load a plain-text or HTML code snippet into your pages. You read about much more sophisticated AJAX techniques in Chapter 6 of this minibook.
Building a poor man's CMS with AJAX
AJAX and jQuery can be a very useful way to build efficient websites, even without server-side programming. Frequently a website is based on a series of smaller elements that can be swapped and reused. You can use AJAX to build a framework that allows easy reuse and modification of web content.
As an example, take a look at cmsAJAX, shown in Figure 2-6.

Figure 2-6: This page is created dynamically with AJAX and jQuery.
Although nothing is all that shocking about the page from the user's perspective, a look at the code can show some surprises:
<!DOCTYPE html>
<html lang = "en">
<head>
<meta charset = "UTF-8">
<title>CMS Using AJAX</title>
<link rel = "stylesheet"
type = "text/css"
href = "cmsStd.css" />
<script type = "text/javascript"
src = "jquery-1.10.2.min.js"></script>
<script type = "text/javascript">
$(init);
function init(){
$("#heading").load("head.html");
$("#menu").load("menu.html");
$("#content1").load("story1.html");
$("#content2").load("story2.html");
$("#footer").load("footer.html");
};
</script>
</head>
<body>
<div id = "all">
<!-- This div centers a fixed-width layout -->
<div id = "heading">
</div><!-- end heading div -->
<div id = "menu">
</div> <!-- end menu div -->
<div class = "content"
id = "content1">
</div> <!-- end content div -->
<div class = "content"
id = "content2">
</div> <!-- end content div -->
<div id = "footer">
</div> <!-- end footer div -->
</div> <!-- end all div -->
</body>
</html>
Look over the code, and you can see these interesting features:
- The page has no content! All the divs are empty. None of the text shown in the screen shot is present in this document, but all is pulled from smaller files dynamically.
- The page consists of empty named divs. Rather than any particular content, the page consists of placeholders with IDs.
- It uses jQuery. The jQuery library is used to vastly simplify loading data through AJAX calls.
- All contents are in separate files. Look through the directory, and you can see very simple HTML files that contain small parts of the page. For example, story1.html looks like this:
<h2>Book I - Creating the HTML Foundation</h3>
<ol>
<li>Sound HTML Foundations</li>
<li>It's All About Validation</li>
<li>Choosing your Tools</li>
<li>Managing Information with Lists and Tables</li>
<li>Making Connections with Links</li>
<li>Adding Images</li>
<li>Creating forms</li>
</ol> - The init()method runs on document.ready. When the document is ready, the page runs the init() method.
- The init()method uses AJAX calls to dynamically load content. It's nothing more than a series of jQuery load() methods.
This approach may seem like a lot of work, but it has some very interesting characteristics:
- If you're building a large site with several pages, you usually want to design the visual appearance once and reuse the same general template repeatedly.
- Also, you'll probably have some elements (such as the menu and heading) that will be consistent over several pages. You could simply create a default document and copy and paste it for each page, but this approach gets messy. What happens if you have created 100 pages according to a template and then need to add something to the menu or change the header? You need to make the change on 100 different pages. (In fact, this happened. This is the third edition of this book, and the title has changed slightly in each edition. I only needed to change the title one time.)
The advantage of the template-style approach is code reuse. Just like the use of an external style allows you to multiply a style sheet across hundreds of documents, designing a template without content allows you to store code snippets in smaller files and reuse them. All 100 pages point to the same menu file, so if you want to change the menu, you change one file and everything changes with it.
Here's how you use this sort of approach:
- Create a single template for your entire site.
Build basic HTML and CSS to manage the overall look and feel for your entire site. Don't worry about content yet. Just build placeholders for all the components of your page. Be sure to give each element an ID and write the CSS to get things positioned as you want.
- Add jQuery support.
Make a link to the jQuery library, and make a default init() method. Put in code to handle populating those parts of the page that will always be consistent. (I use the template shown here exactly as it is.)
- Duplicate the template.
After you have a sense of how the template will work, make a copy for each page of your site.
- Customize each page by changing the init()function.
The only part of the template that changes is the init() function. All your pages will be identical, except they have customized init() functions that load different content.
- Load custom content into the divs with AJAX.
Use the init() function to load content into each div. Build more content as small files to create new pages.
This is a great way to manage content, but it isn't quite a full-blown content-management system. Even AJAX can't quite allow you to store content on the web. More complex content management systems also use databases rather than files to handle content. You'll need some sort of server-side programming (like PHP, covered throughout Book V) and usually a database (like mySQL, covered in Book VI) to handle this sort of work. Content-management systems and complex site design are covered in Book VIII.