
Chapter 7
Animation with the Canvas
In This Chapter
![]() Working with images
Working with images
![]() Managing transformations
Managing transformations
![]() Handling keyboard input
Handling keyboard input
![]() Building basic animations
Building basic animations
The <canvas> tag (introduced in Chapter 6 of this minibook) adds some long-needed graphical support to HTML. In this chapter, you see how to extend these ideas to create interesting animations and even user interaction.
Transformations
Transformations are math operations that can be applied to any drawing or image to change the appearance. There are three major transformations:
- translation: Move a particular amount in X and Y
- rotation: Rotate around a particular point
- scale:Change the size of the drawing in X and Y
The <canvas> element allows all these operations on any type of drawing. However, the way the <canvas> element does this gets a little closer to math than you may have gotten before. Transformations in the canvas element can be hard to understand until you understand a little about how they really work.
In math, you don't really transform objects. Instead, you modify the coordinate system, and draw your image in the newly transformed coordinate system. It's common in a vector-drawing application to have several hidden coordinate systems working at once. That's important because it's the way canvas transformations work. Essentially when you want to perform transformations on an object, you'll do the following:
- Announce the beginning of a temporary coordinate system.
The main image already has its own coordinate system that won't change. Before you can transform anything, you need to build a new coordinate system to hold those changes. The (poorly named) save() command indicates the beginning of a new coordinate system definition.
- Move the center with translate().
The origin (0, 0) starts in the upper-left corner of the canvas by default. Normally you'll build your transformed objects on the (new) origin and move the origin to place the object. If you translate(50, 50) and then draw an image at (0, 0), the image is drawn at the origin of the temporary coordinate system, which is at (50, 50) in the main canvas.
- Rotate the coordinate system with rotate().
The rotate() command rotates the new coordinate system around its origin. The rotation parameter is a degree in radians.
- Scale the coordinate system in X and Y.
You can also alter the new coordinate system by applying X and Y scale values. This allows you to create stretched and squashed images.
- Create elements in the new coordinate system.
After you've applied all the transformations you want, you can use all the ordinary canvas drawing techniques. However, these drawings will be drawn in the “virtual” coordinate system you just made, not in the canvas's main coordinate system.
- Close the temporary coordinate system.
Generally you'll want to apply different transformations to different parts of your canvas. When you're finished with a particular transformation, use the restore() command to close out the new coordinate system. All subsequent drawing commands will use the default coordinate system of the <canvas> object.
Building a transformed image
A real example is easier to follow, so look at the code below:
function draw(){
//from transform.html
var drawing = document.getElementById("drawing");
var con = drawing.getContext("2d");
var goofyPic = document.getElementById("goofyPic");
con.save();
con.translate(100, 100);
con.rotate(Math.PI / 4);
con.scale(3.0, 1.5);
con.drawImage(goofyPic, -25, -25, 50, 50);
con.restore();
//draw a rectangle using the ordinary coordinate system
con.strokeStyle = "red";
con.lineWidth = 5;
con.strokeRect(0, 0, 200, 200);
} // end draw
This program creates a new coordinate system containing a translation, rotation, and scale. It draws an image in the new coordinate system. It then reverts to the standard coordinate system and draws a rectangular frame.
This program will display like Figure 7-1.

Figure 7-1: This canvas features several transformations.
Here's how to build this type of image:
- Get access to an image object.
Load the image from the main site as explained in Chapter 6 of this mini-book.
- Start the transformation with the save()method.
The save() method has (if you ask me) a very confusing name. This method does not save the canvas to a file. Instead, it saves the current coordinate system settings in memory and allows you to define a new coordinate system. I would have called this method beginTransform().
- Apply any translations you wish.
Remember, translations move the entire coordinate system. If you translate the coordinate system by (100, 100) as I did in this example, that means any subsequent drawings at (0, 0) will actually appear in the center of my 200×200 canvas
- Rotate the coordinate system if you wish.
You can apply a rotation to the coordinate system if you prefer. The system will rotate around its origin. Typically, to get the behavior you want, design your images so they are centered on the origin, and translate the origin to move the image. Rotation angles are defined in radians. If you're more comfortable with degrees, you can use this formula to convert: radians = degrees * (Math.PI / 180).
- Scale the coordinate system by X and Y.
You can change the apparent width and height of your new coordinate system by indicating new scale values. Scaling is a multiplication operation. If the scale is one, the element stays the same size. If the scale is 2, the element is double the original size, and .5 is half the original size. You can even scale by a negative number to invert the image.
- Draw your image.
Draw on the canvas after you've applied all the transformations. You can use any canvas-drawing techniques you want: paths, rectangles, images, text, or whatever. The drawing will be modified by the indicated transformations.
- End the transformation.
The restore() method should be called endTransform(). (If you're listening, W3C, I'm available to help you come up with better names for things. Let me know when the meetings are scheduled.) Regardless, this method indicates that you're done thinking about all the transformations that have been declared in this transform, and you're ready to return to the default coordinate system. The term restore really means “return to the coordinate state that was saved with the save command that was called to begin this transformation.”
- Subsequent drawings will use the default coordinates.
In my example, I draw an ordinary rectangle around the image. This rectangle should use the regular coordinates of the canvas — I don't want it rotated or scaled like the image. Because these drawing commands exist outside the context of the save()/restore() pair, they use the regular coordinate system.
A few thoughts about transformations
Transformations are an incredibly powerful tool set, and they're among the most anticipated features of HTML5. However, they do hide a certain amount of math. You can use them without understanding linear algebra (the underlying mathematical theory), but there's still a few key ideas to keep in mind:
- Each transformation is stored as a matrix: There's an underlying structure called a matrix (that's even cooler than the movie) that stores all the translations, rotations, and scales in a single mathematical structure. You can work with the transformation matrix directly if you prefer, with the context objects’ transform() method.
- The order of transformations makes a difference: Try this experiment. Stand in the center of the room. Now go forward five steps and turn left 90 degrees. Look at where you are. Now go back to the same starting point. This time, turn left 90 degrees and then go forward five steps. Are you in the same place? You might need to experiment a bit to get things working the way you expect.
- Transform the system then draw on the origin: Most of the drawing commands in canvas allow you to draw things anywhere on the canvas. If you're not using transformations, you can use this mechanism to place things wherever you wish. However, if you're using a transformation, it's much easier to transform the entire coordinate system and then draw your elements at the origin (0, 0). Otherwise you'll get some very strange results (especially with combined rotations and translations).
Animation
Of course, the big question about the HTML5 canvas tag is whether it can replace Flash as a mechanism for implementing games and animations in the browser. The answer is absolutely. I wrote a whole book about it: HTML5 Game Development For Dummies (published by John Wiley & Sons). Check it out for much more on how to build games and animations including user input collision-checking and instructions on building many types of games.
The key to games and animations is to use the animation features already built into the browser.
Overview of the animation loop
An animation generally requires a special organization called an animation loop. The basic structure of the animation loop works the same in any language:
- Initialization.
Create the assets, including the background and any of the objects you will be using. Objects that will be manipulated in real time are normally called sprites. Generally this is done when the program first runs, to save time during the main execution. You may also set constants for image size, display size, frame rate, and other values that will not change during the execution of the game.
- Determining a frame rate.
Animations and games work by calling a function repeatedly at a prescribed rate. In general, you'll have some sort of function that is called repeatedly. In JavaScript, you typically use the setInterval() function to specify a function that will be called repeatedly. The frame rate indicates how often the specified function will be called. Games and animations typically run at frame rates between 10 and 30 frames per second. A faster frame rate is smoother, but may not be maintainable with some hardware.
- Evaluating the current state.
Each sprite is really a data element. During every frame, determine if anything important has happened: Did the user press a key? Is an element supposed to move? Did a sprite leave the screen? Did two sprites conk into each other?
- Modifying sprite data.
Each sprite generally has position or rotation data that can be modified during each frame. Usually this is done through transformations (translation, rotation, and scale), although sometimes you may switch between images instead.
- Clearing the background.
An animation is really a series of images drawn rapidly in the same place. Usually you'll need to clear the background at the beginning of each frame to clear out the last frame's image.
- Redrawing all sprites.
Each sprite is redrawn using its new data. The sprites appear to move because they're drawn in a new location or orientation.
 Typically I would display a screen shot here, but a still image of an animation won't be fun to look at in this book. Please look at autoRotate.html on this book's companion website to see the program running in real time. While you're at it, check out all the other great stuff I've got on that site for you. You can find out more about the book's companion website in the Introduction.
Setting up the constants
As an example, build a program that rotates an image inside a canvas. The complete code is in several parts. I'll use a basic image as a sprite. The first job is to set up the various variables and constants that describe the problem. The following code is created outside any functions because it describes values that will be shared among functions:
var drawing;
var con;
var goofyPic;
var angle = 0;
CANV_HEIGHT = 200;
CANV_WIDTH = 200;
SPR_HEIGHT = 50;
SPR_WIDTH = 40;
The drawing variable will refer to the canvas element. The con variable will be the drawing context, goofyPic is the image to be rotated, and angle will be used to determine how much the image is currently rotated. The other values are constants used to describe the height and width of the canvas as well as the sprite.
Initializing the animation
As usual, the body onload mechanism will be used to start up some code as soon as the page has finished loading. However, the page now has two functions. The init() function handles initialization, and the draw() function is called repeatedly to handle the actual animation. Here's the code in the init() function:
function init(){
drawing = document.getElementById("drawing");
con = drawing.getContext("2d");
goofyPic = document.getElementById("goofyPic");
setInterval(draw, 100);
} // end init
The job of the init() function is to initialize things. In this particular example, I load up the various elements (the canvas, the context, and the image) into JavaScript variables and set up the animation. The setInterval() function is used to set up the main animation loop. It takes two parameters:
- A repeatable function: The first parameter is the name of a function which will be called repeatedly. In this case, I will be calling the draw function many times.
- A delay value: The second parameter indicates how often the function should be called in milliseconds (one-thousandths of a second.) A delay of 100 will create a frame rate of 10 frames per second. A delay of 50 will cause a frame rate of 20 frames per second, and so on.
Animate the current frame
The draw() function will be called many times in succession. In general, its task is to clear the frame, calculate new sprite states, and redraw the sprite. Here's the code:
function draw(){
//clear background
con.fillStyle = "white";
con.fillRect(0, 0, CANV_HEIGHT, CANV_WIDTH);
//draw border
con.strokeStyle = "red";
con.lineWidth = "5";
con.strokeRect(0, 0, CANV_WIDTH, CANV_HEIGHT);
//change the rotation angle
angle += .25;
if (angle > Math.PI * 2){
angle = 0;
}
//start a new transformation system
con.save();
con.translate(100, 100);
con.rotate(angle);
//draw the image
con.drawImage(goofyPic,
SPR_WIDTH/-2, SPR_HEIGHT/-2,
SPR_WIDTH, SPR_HEIGHT);
con.restore();
} // end draw
Although the code may seem a little involved, it doesn't do really do anything new. Here's what it does, step by step:
- Clears the background.
Remember that animation is repeated drawing. If you don't clear the background at the beginning of every frame, you'll see the previous frame drawings. Use the context's clearRect() function to draw a fresh background, or one of the other drawing tools to use a more complex background image. You must clear the background first, so subsequent drawings will happen on a fresh palette.
- Draws any non-sprite content.
In this example, I want a red border around the frame. Just use ordinary canvas elements for this. I used strokeStyle, lineWidth, and strokeRect() to build a red rectangular frame around my canvas. Note that I used the CANV_HEIGHT and CANV_WIDTH constants to refer to the current canvas size.
- Modifies sprite state.
In this example, I want to modify the rotation angle of the image. I already created a variable called angle outside the function. (It's important that angle was created outside the function context so it can retain its value between calls to the function.) I add a small amount to angle every frame. Whenever you change a variable (especially in a virtually endless loop like an animation), you should check for boundary conditions. In this example, I'm changing angles. The largest permissible angle value (in radians) is 2 * π. If the angle gets larger than 2 * π, it is reset to zero.
- Builds a transformation.
Many animations are really modifications of a transformation. That's the case here. I'm actually not changing the image at all, but the transformation which contains the image. Set up a new transformation with the save() method, and use the rotate() and translate() functions to transform a temporary coordinate system. (See the section called “Transformations” at the beginning of this chapter for how transformations relate to temporary coordinate systems.
- Draws the image at the center of the new transformation.
Remember, the drawImage() command draws the image based on the top left corner of an image. If you draw the image at (0, 0) of the new transformation, the image appears to rotate around its top left corner. Usually you'll want an image to rotate around its center point. Simply draw the image so its center is at the origin. Set X to zero minus half the image's width, and Y to zero minus half the image's height.
- Closes the transformation.
Use the restore() method to finish defining the temporary coordinate system.
Moving an element
Often you'll prefer to move an element. This process is actually very similar to the rotation mechanism. Here's some code that moves an image and wraps it to the other side when it leaves the canvas.
//from wrap.html
var drawing;
var con;
var goofyPic;
CANV_HEIGHT = 200;
CANV_WIDTH = 200;
SPR_HEIGHT = 50;
SPR_WIDTH = 40;
var x = 0;
var y = 100;
var dx = 10;
var dy = 7;
function init(){
drawing = document.getElementById("drawing");
con = drawing.getContext("2d");
goofyPic = document.getElementById("goofyPic");
setInterval(draw, 100);
}
function draw(){
//clear background
con.clearRect(0, 0, 200, 200);
//move the element
x += dx;
y += dy;
//check for boundaries
wrap();
//draw the image
con.drawImage(goofyPic, x, y, SPR_WIDTH, SPR_HEIGHT);
//draw a rectangle
con.strokeStyle = "red";
con.lineWidth = 5;
con.strokeRect(0, 0, CANV_WIDTH, CANV_HEIGHT);
} // end draw
function wrap(){
if (x > CANV_WIDTH){
x = 0;
}
if (x < 0){
x = CANV_WIDTH;
}
if (y > CANV_HEIGHT){
y = 0;
} // end if
if (y < 0){
y = CANV_HEIGHT;
}
} // end wrap
The wrap code is very similar to the rotation program. It has a few different features. Here's what it does:
- Keeps track of the sprite position.
The sprite's position will change now, so the important variables are X and Y, used to track where the sprite is.
- Contains variables for the sprite's motion.
The dx variable stands for difference in x, and it is used to show how much the x value changes each frame. Likewise, dy is used to show how much the y value changes in each frame. x, y, dx, and dy are all created outside the function context.
- Moves the element values.
In every frame (in the draw() function), add dx to x and add dy to y.
- Checks for boundaries.
I created a new function called wrap() to check for boundary conditions.
The code is pretty straightforward. If the sprite's x value exceeds the width of the canvas (meaning it has moved to the right border of the canvas), reset the x value to 0 (moving it to the left). Use a similar calculation to check the other borders and reset the image to the opposite side. A still image won't do justice to this animation. Please look at wrap.html on the companion website to see an example. The bounce.html page shows the following example.
Bouncing off the walls
If you prefer to have your sprite bounce off the walls, just replace the wrap() function with a bounce() function that works like this:
function bounce(){
//from bounce.html
if (x > CANV_WIDTH - SPR_WIDTH){
dx *= -1;
}
if (x < 0){
dx *= -1;
}
if (y > CANV_HEIGHT - SPR_HEIGHT){
dy *= -1;
}
if (y < 0){
dy *= -1;
}
} // end bounce
Reading the Keyboard
The keyboard is a primary input technology, especially for desktop machines. The standard way to read the keyboard is to set up special functions called event-handlers. JavaScript has a number of pre-defined event handlers you can implement. The keyDemo.html program illustrates a basic keyboard handler in action.
<!DOCTYPE HTML>
<html lang="en-US">
<head>
<meta charset="UTF-8">
<title>keyDemo.html</title>
<script type="text/javascript">
//var keysDown = new Array(256);
var output;
function init(){
output = document.getElementById("output");
document.onkeydown = updateKeys;
} // end init
updateKeys = function(e){
//set current key
currentKey = e.keyCode;
output.innerHTML = "current key: " + currentKey;
}
//keyboard constants simplify working with the keyboard
K_A = 65; K_B = 66; K_C = 67; K_D = 68; K_E = 69; K_F = 70; K_G = 71;
K_H = 72; K_I = 73; K_J = 74; K_K = 75; K_L = 76; K_M = 77; K_N = 78;
K_O = 79; K_P = 80; K_Q = 81; K_R = 82; K_S = 83; K_T = 84; K_U = 85;
K_V = 86; K_W = 87; K_X = 88; K_Y = 89; K_Z = 90;
K_LEFT = 37; K_RIGHT = 39; K_UP = 38;K_DOWN = 40; K_SPACE = 32;
K_ESC = 27; K_PGUP = 33; K_PGDOWN = 34; K_HOME = 36; K_END = 35;
K_0 = 48; K_1 = 49; K_2 = 50; K_3 = 51; K_4 = 52; K_5 = 53;
K_6 = 54; K_7 = 55; K_8 = 56; K_9 = 57;
</script>
</head>
<body onload = "init()">
<div id = "output">
Press a key to see its code
</div>
</body>
</html>
Figure 7-2 illustrates basic keyboard input (but it's interactive, so you should really look at it on the companion website).

Figure 7-2: This page reports which key you pressed.
Managing basic keyboard input
This particular example demonstrates basic keyboard-checking as well as the more sophisticated technique used in simpleGame. Here's how the basic version works:
- Assigns a function to onkeydown.
The document.onkeydown attribute is a special property. If you assign a function to this property, that function will be automatically called each time the operating system recognizes a key press. In this example, I assign the function updateKeys.
- Creates the function, including an event parameter.
The updateKeys() function will automatically be given an event object (normally called e).
- Determines which key was pressed.
The e.keyCode property returns a numeric code indicating which key was pressed. In the keyDemo program (as well as simpleGame), the currentKey variable holds this numeric value.
- Compares the key to one of the keyboard constants.
It's hard to remember which keys are associated with which numeric values, so keyDemo and simpleGame provide a list of keyboard constants. They are easy to remember: K_A is the A key, and K_SPACE is the space bar. Of course, you can add other keys if there's some key you want to use that isn't available. Although I didn't actually use the keyboard constants in this example, they are useful so you can easily determine which key was pressed.
Moving an image with the keyboard
You can achieve a form of interactivity by having an image move in response to keyboard motion. Figure 7-3 illustrates this technique, but it really isn't satisfying to see in a book. As usual, you need to play with this on the website.
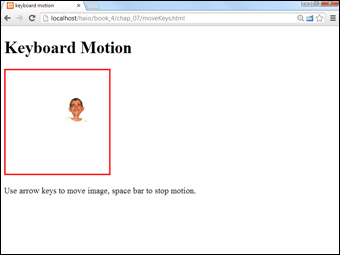
Figure 7-3: Move the image around with the arrow keys.
Essentially moving an image involves combining key ideas from keyDemo.html (for keyboard input) and wrap.html (to set up the canvas and make the object move under timer control). Here's the code:
<!DOCTYPE HTML>
<html lang = "en">
<head>
<title>keyboar motion</title>
<meta charset = "UTF-8" />
<style type = "text/css">
.hidden{
display: none;
}
</style>
<script type = "text/javascript">
//move based on keyboard input
var drawing;
var con;
var goofyPic;
CANV_HEIGHT = 200;
CANV_WIDTH = 200;
SPR_HEIGHT = 50;
SPR_WIDTH = 40;
var x = 0;
var y = 100;
var dx = 0;
var dy = 0;
var currentKey;
function init(){
drawing = document.getElementById("drawing");
con = drawing.getContext("2d");
goofyPic = document.getElementById("goofyPic");
document.onkeydown = updateKeys;
setInterval(draw, 100);
}
function updateKeys(e){
currentKey = e.keyCode;
if (currentKey == K_LEFT){
dx = -5;
}
if (currentKey == K_RIGHT){
dx = 5;
}
if (currentKey == K_UP){
dy = -5;
}
if (currentKey == K_DOWN){
dy = 5;
}
if (currentKey == K_SPACE){
dx = 0;
dy = 0;
}
} // end updateKeys
function draw(){
//clear background
con.clearRect(0, 0, 200, 200);
currentKey = null;
//move the element
x += dx;
y += dy;
//check for boundaries
wrap();
//draw the image
con.drawImage(goofyPic, x, y, SPR_WIDTH, SPR_HEIGHT);
//draw a rectangle
con.strokeStyle = "red";
con.lineWidth = 5;
con.strokeRect(0, 0, CANV_WIDTH, CANV_HEIGHT);
} // end draw
function wrap(){
if (x > CANV_WIDTH){
x = 0;
}
if (x < 0){
x = CANV_WIDTH;
}
if (y > CANV_HEIGHT){
y = 0;
} // end if
if (y < 0){
y = CANV_HEIGHT;
}
} // end wrap
//keyboard constants
K_LEFT = 37; K_RIGHT = 39; K_UP = 38;K_DOWN = 40; K_SPACE = 32;
</script>
</head>
<body onload = "init()">
<h1>Keyboard Motion</h1>
<img class = "hidden"
id = "goofyPic"
src = "andyGoofy.gif"
alt = "Goofy pic of me" />
<canvas id = "drawing"
height = "200"
width = "200">
<p>Canvas not supported</p>
</canvas>
<p>
Use arrow keys to move image, space bar to stop motion.
</p>
</body>
</html>
This program is essentially wrap.html with the following changes:
- Sets up updateKeys()as an event handler.
Because this program reads the keyboard in real time, you have to assign an event handler.
- Determines which key was pressed.
Store the last key pressed in a variable called currentKey.
- Compares currentKey with keyboard constants.
Use constants to compare currentKey with whatever keys you're interested in — for now, the arrow keys and space bar.
- Changes dx and dy based on the current key value.
When you know which key is pressed, use this information to modify the dx and dy values, which determines how the image moves.
- The draw()function still does the drawing.
The draw() function is called on a regular interval. It's common to separate input (keyPressed) from animation (draw).
 This is a very simple keyboard input mechanism. It's fine for basic user input, but in gaming we use much more sophisticated input techniques including a mechanism called polling, which allows multiple keys at a time. In addition, the modern web includes mobile devices, which have interesting new features including touch interface and tilt control. Please see my book HTML5 Game Development For Dummies for information on these advanced input techniques. You'll also see other forms of animation including image-swapping and sprite sheet animation.