


Installing Oracle and creating a database 11.2.0.3 on Red Hat Enterprise Linux 6
|
Attention: Linux commands that are running as non-root are prefixed with $ in this appendix.
|
This appendix describes the steps to install Oracle and create a single instance database. This task follows the installation of a Linux guest with Red Hat Enterprise Linux 6 (RHEL 6), as described in Appendix A, “Setting up Red Hat Enterprise Linux 6.3 for Oracle” on page 311 and completing the Linux customization for RHEL 6, as described in 4.2, “Installing Oracle 11.2.0.3 on a Red Hat Enterprise Linux 6 guest” on page 58.
The following overall steps are taken after the Linux setup:
1. Obtain the Oracle code
2. Install the Oracle code
3. Install the latest patch set update
4. Create a database
Not all of the panels are included here. A detailed installation is described in the Oracle documentation and the Red Hat documentation.
This appendix includes the following topics:
B.1 Obtaining the Oracle code and documentation
Download Oracle 11.2.0.3 for Linux on System z from this website:
You need the following files:
•p10404530_112030_Linux-zSer_1of6.zip 1.4 GB
•p10404530_112030_Linux-zSer_2of6.zip 1.0 GB
Oracle Database 11.2.0.3 is a complete replacement for the 11.2.0.2 version, so you do not need to perform an upgrade for a fresh installation.
It is recommended that you install the latest quarterly patch set update (the 11.2.0.3.4 patch set at the time of this writing). Patch 14275605: DATABASE PATCH SET UPDATE 11.2.0.3.4 (INCLUDES CPUOCT2012) was made available October 16th, 2012.
The Oracle 11.2.0.3 Release note and Installation Guide is available at this website:
B.2 Installing the Oracle code
The first step is to install 11.2.0.3. When you install 11.2.0.3 on RHEL 6, the OUI fails because it does not pass the prerequisite test. If you start the OUI with the ignoreSysPrereqs option, you can proceed, as shown in Figure B-1. Use the following command:
./runInstaller -ignoreSysPrereqs
|
[oracle@pazxxt04 ~]$ echo $ORACLE_BASE
/u01/app/
[oracle@pazxxt04 ~]$ cd /scratch/Products/oracle/database/
[oracle@pazxxt04 database]$ ./runInstaller -ignoreSysPrereqs
Starting Oracle Universal Installer...
Checking Temp space: must be greater than 80 MB. Actual 2840 MB Passed
Checking swap space: must be greater than 150 MB. Actual 2047 MB Passed
Preparing to launch Oracle Universal Installer from /tmp/OraInstall2012-10-31_08-19-13 AM. Please wait ... [oracle@pazxxt04 database]$
|
Figure B-1 Running runInstaller to install Oracle binaries.
The steps of the installation are shown in the following figures.
Step 1, Register for Security Updates, is shown in Figure B-2.
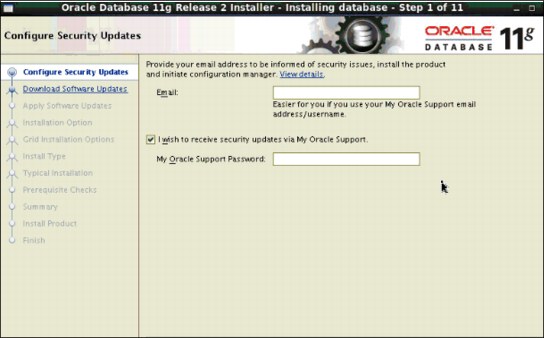
Figure B-2 Step 1: Register for Security Updates
The panels that are shown in Figure B-3 are new with 11gR2.
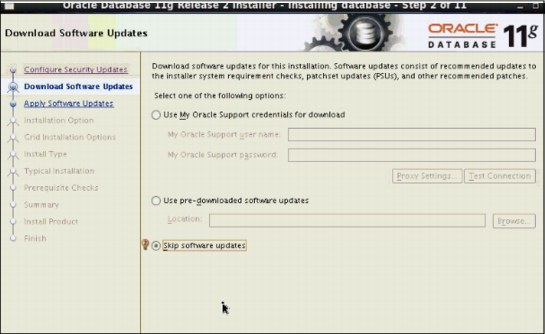
Figure B-3 Step 2: Register for Software Updates
An error message that you receive is shown in Figure B-4.

Figure B-4 Error message you receive for RHEL 6 as it is a new version
Because RHEL 6 is a new version of Linux, the verification file is not included and you see an error in the install_log file.
Select the type of installation you want, as shown in Figure B-5. In our case, we selected to install the software only for a single instance database.
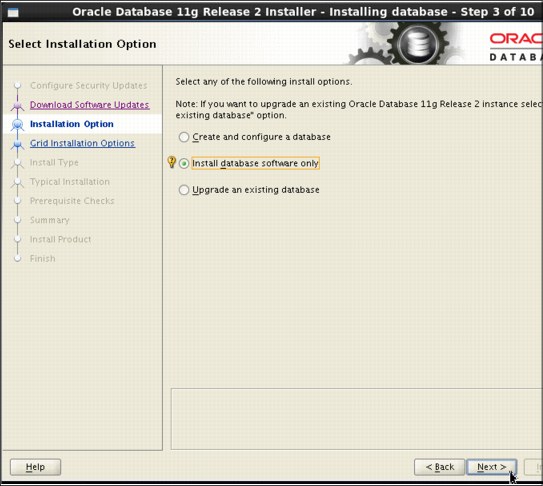
Figure B-5 Step 3: Selecting the type of installation
Step 4 of the process is shown in Figure B-6.

Figure B-6 Step 4: Selecting the Grid Installation Options
Step 5 is shown in Figure B-7. We choose English.
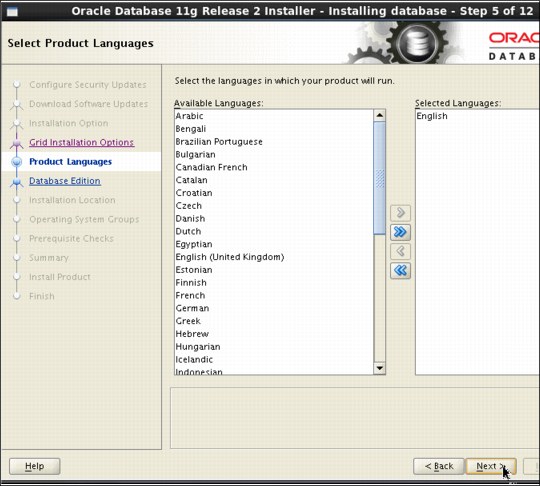
Figure B-7 Step 5: Choose the Language
As shown in Figure B-8, we choose the Enterprise Edition.

Figure B-8 Step 6: Choose the database edition

Figure B-9 Step 7: Specify the location for the installation
We specify the location for the inventory, as shown in Figure B-10.

Figure B-10 Location for the inventory
We choose the Group ID, as shown in Figure B-11. We used group dba.

Figure B-11 Step 8: Choose the Group ID
If you entered ignoreSysprequisites, the process skips Step 9.
As shown in Figure B-12, a prerequisite check is performed.

Figure B-12 Prerequisite check
A summary of your choices is shown, as shown in Figure B-13.

Figure B-13 Step 9 Summary of choices
As shown in Figure B-14, the Oracle binaries are installed.

Figure B-14 Step 11: Installing the Oracle binaries
A request run root.sh is shown in Figure B-15.

Figure B-15 Request to run root.sh
Figure B-16 shows the result of running root.sh.

Figure B-16 Run root.sh
The 11.2.0.3 installation runs to completion, as shown in Figure B-17.

Figure B-17 Step 12: Installation complete
B.3 Upgrading to the latest patch set update level
As a best practice, the next step should be to install the latest patch set update to ensure that the Oracle Database code is the current version.
As of 4Q 2102, the latest DATABASE PATCH SET UPDATE is 11.2.0.3.4, which includes CPUOCT2012. The patch set is 14275605.
The next step is to use DBCA to create a 11.2.0.3.4 database.
B.4 Creating an Oracle database
After 11.2.0.3.4 is installed, you can create a database by using DBCA by running the following command:
$ cd $ORACLE_HOME/bin
$ ./dbca
After steps in the DBCA installation process are completed, Figure B-18 shows that the database was successfully created.

Figure B-18 Database Configuration Assistant
Oracle Database 11gR2 code was installed and a single instance database was created.
..................Content has been hidden....................
You can't read the all page of ebook, please click here login for view all page.