
The jnigraphics library provides a C-based interface for native code to access the pixel buffers of Java bitmap objects, which is available as a stable native API on Android 2.2 system images and higher. This recipe discusses how to use the jnigraphics library.
Readers are expected to know how to create an Android NDK project. We can refer to the Writing a Hello NDK program recipe of Chapter 1, Hello NDK for detailed instructions.
The following steps describe how to create a simple Android application which demonstrates the usage of the jnigraphics library:
- Create an Android application named
JNIGraphics. Set the package name ascookbook.chapter7.JNIGraphics. Refer to the Loading native libraries and registering native methods recipe of Chapter 2, Java Native Interface for more detailed instructions. - Right-click on the project JNIGraphics, select Android Tools | Add Native Support.
- Add two Java files named
MainActivity.javaandRenderView.javain thecookbook.chapter7.JNIGraphicspackage. TheRenderView.javaloads theJNIGraphicsnative library, calls the nativenaDemoJniGraphicsmethod to process a bitmap, and finally display the bitmap. TheMainActivity.javafiles creates a bitmap, passes it to theRenderViewclass, and sets theRenderViewclass as its content view. - Add
mylog.handJNIGraphics.cppfiles under thejnifolder. Themylog.hcontains the Android nativelogcatutility functions, while theJNIGraphics.cppfile contains the native code to process the bitmap with thejnigraphicslibrary functions. A part of the code in theJNIGraphics.cppfile is shown as follows:void naDemoJniGraphics(JNIEnv* pEnv, jclass clazz, jobject pBitmap) { int lRet, i, j; AndroidBitmapInfo lInfo; void* lBitmap; //1. retrieve information about the bitmap if ((lRet = AndroidBitmap_getInfo(pEnv, pBitmap, &lInfo)) < 0) { return; } if (lInfo.format != ANDROID_BITMAP_FORMAT_RGBA_8888) { return; } //2. lock the pixel buffer and retrieve a pointer to it if ((lRet = AndroidBitmap_lockPixels(pEnv, pBitmap, &lBitmap)) < 0) { LOGE(1, "AndroidBitmap_lockPixels() failed! error = %d", lRet); } //3. manipulate the pixel buffer unsigned char *pixelBuf = (unsigned char*)lBitmap; for (i = 0; i < lInfo.height; ++i) { for (j = 0; j < lInfo.width; ++j) { unsigned char *pixelP = pixelBuf + i*lInfo.stride + j*4; *pixelP = (unsigned char)0x00; //remove R component // *(pixelP+1) = (unsigned char)0x00; //remove G component // *(pixelP+2) = (unsigned char)0x00; //remove B component // LOGI(1, "%d:%d:%d:%d", *pixelP, *(pixelP+1), *(pixelP+2), *(pixelP+3));} } //4. unlock the bitmap AndroidBitmap_unlockPixels(pEnv, pBitmap); } - Add an
Android.mkfile in thejnifolder with the following content:LOCAL_PATH := $(call my-dir) include $(CLEAR_VARS) LOCAL_MODULE := JNIGraphics LOCAL_SRC_FILES := JNIGraphics.cpp LOCAL_LDLIBS := -llog -ljnigraphics include $(BUILD_SHARED_LIBRARY)
- Build and run the Android project. We can enable code to remove different components from the bitmap. The following screenshots show the original picture and the ones with red, green, and blue component removed respectively:
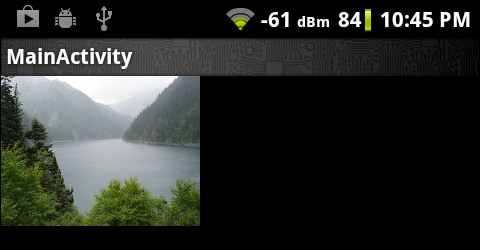
In our sample project, we modified the bitmap passed to the native naDemoJniGraphics function by setting one of its RGB components to zero.
The following steps should be followed to use the
jnigraphics library:
- Include the
<android/bitmap.h>header in the source code where we use thejnigraphicsAPI. - Link to the
jnigraphicslibrary by including the following line in theAndroid.mkfile.LOCAL_LDLIBS += -ljnigraphics
- In the source code, call
AndroidBitmap_getInfoto retrieve the information about a bitmap object. TheAndroidBitmap_getInfofunction has the following prototype:int AndroidBitmap_getInfo(JNIEnv* env, jobject jbitmap, AndroidBitmapInfo* info);
The function accepts a pointer to the
JNIEnvstructure, a reference to the bitmap object, and a pointer to theAndroidBitmapInfostructure. If the call is successful, the data structure pointed byinfowill be filled.The
AndroidBitmapInfois defined as follows:typedef struct { uint32_t width; uint32_t height; uint32_t stride; int32_t format; uint32_t flags; } AndroidBitmapInfo;widthandheightindicate the pixel width and height of the bitmap.striderefers to the number of bytes to skip between rows of the pixel buffer. The number must be no less than the width in bytes. In most cases,strideis the same aswidth. However, sometimes pixel buffer contains paddings so stride can be bigger than bitmapwidth.The
formatis the color format, which can beANDROID_BITMAP_FORMAT_RGBA_8888,ANDROID_BITMAP_FORMAT_RGB_565,ANDROID_BITMAP_FORMAT_RGBA_4444,ANDROID_BITMAP_FORMAT_A_8, orANDROID_BITMAP_FORMAT_NONEas defined in thebitmap.hheader file.In our example, we used
ANDROID_BITMAP_FORMAT_RGBA_8888as the bitmap format. Therefore, every pixel takes 4 bytes. - Lock the pixel address by calling the
AndroidBitmap_lockPixelsfunction:int AndroidBitmap_lockPixels(JNIEnv* env, jobject jbitmap, void** addrPtr);
If the call succeeds, the
*addrPtrpointer will point to the pixels of the bitmap. Once the pixel address is locked, the memory for the pixels will not move until the pixel address is unlocked. - Manipulate the pixel buffer in the native code.
- Unlock the pixel address by calling
AndroidBitmap_unlockPixels:int AndroidBitmap_unlockPixels(JNIEnv* env, jobject jbitmap);
Note that this function must be called if the
AndroidBitmap_lockPixelsfunction succeeds.
Recall that we used the jnigraphics library to load textures in the Mapping texture to 3D objects with OpenGL ES 1.x API recipe in Chapter 4, Android NDK OpenGL ES API. We can revisit the recipe for another example of how we use the jnigraphics library.