
Native code is compiled into binaries. Therefore, one set of binaries can only run on a specific architecture. Android NDK comes with techniques and tools to allow developers to compile the same source code for multiple architectures easily.
An Application Binary Interface (ABI) defines how the Android application's machine code is supposed to interact with the system at runtime, including the CPU instruction set, endianness, alignment of memory, and so on. An ABI basically defines a type of architecture.
The following table briefly summarizes the four ABIs supported by Android:
|
ABI name |
Support |
Not support |
Optional |
|---|---|---|---|
|
Hardware-assisted floating point computation | ||
|
| ||
|
| ||
|
|
armeabi and armeabi-v7a are the two most commonly used ABIs for Android devices. ABI armeabi-v7a is compatible with armeabi, which means applications compiled for armeabi can run on armeabi-v7a too. But the reverse is not true, since armeabi-v7a includes additional features. In the following section, we briefly introduce some technical terms referred to frequently in armeabi and armeabi-v7a:
- Thumb: This instruction set consists of 16-bit instructions, which is a subset of the 32-bit instruction set of the standard ARM. Some instructions in the 32-bit instruction set are not available for Thumb, but can be simulated with several Thumb instructions. The narrower 16-bit instruction set can offer memory advantages.
Thumb-2 extends Thumb-1 by adding some 32-bit instructions, which results in a variable-length instruction set. Thumb-2 aims to attain code density like to Thumb-1 and performance similar to standard ARM instruction set on a 32-bit memory.
Android NDK generates the thumb code by default, unless
LOCAL_ARM_MODEis defined in theAndroid.mkfile. - Vector Floating Point (VFP): It is an extension to the ARM processor, which provides low cost floating point computation.
- VFPv3-D16 and VFPv3-D32: VFPv3-D16 refers to 16 dedicated 64-bit floating point registers. Similarly, VFPv3-D32 means there are 32 64-bit floating point registers. These registers speed up floating point computation.
- NEON: NEON is the nickname for the ARM Advanced Single Instruction Multiple Data (SIMD) instruction set extension. It requires VFPv3-D32, which means 32 hardware FPU 64-bit registers will be used. It provides a set of scalar/vector instructions and registers, which are comparable to MMX/SSE/SDNow! in the x86 world. It is not supported by all Android devices, but many new devices have NEON support. NEON can accelerate media and signal processing applications significantly by executing up to 16 operations simultaneously.
One can refer to ARM documentation website at http://infocenter.arm.com/help/index.jsp for more detailed information. We don't discuss x86 and mips ABI here, because few Android devices run on these architecture.
Read the Building Android NDK Application at Eclipse recipe before going through this one.
The following steps build an Android project for different ABIs:
- Create an Android application named
HelloNDKMultipleABI. Set the package name ascookbook.chapter3. Create an activity namedHelloNDKMultipleABIActivity. - Right-click on the
HelloNDKMultipleABIproject, select Android Tools | Add Native Support. A window appears, click on Finish to dismiss it. This will add ajnifolder with two files (HelloNDKMultipleABI.cppandAndroid.mk) inside, and switch Eclipse to the C/C++ perspective. - Add the following content to the
HelloNDKMultipleABI.cppfile:#include <jni.h> jstring getString(JNIEnv* env) { return env->NewStringUTF("Hello NDK"); } extern "C" { JNIEXPORT jstring JNICALL Java_cookbook_chapter3_HelloNDKMultipleABIActivity_getString(JNIEnv* env, jobject o){ return getString(env); } } - Change the
HelloNDKMultipleABIActivity.javafile to the following content:package cookbook.chapter3; import android.os.Bundle; import android.app.Activity; import android.widget.TextView; public class HelloNDKMultipleABIActivity extends Activity { @Override public void onCreate(Bundle savedInstanceState) { super.onCreate(savedInstanceState); TextView tv = new TextView(this); tv.setTextSize(30); tv.setText(getString()); this.setContentView(tv); } public native String getString(); static { System.loadLibrary("HelloNDKMultipleABI"); } } - Add a new file named
Application.mkunder the project'sjnifolder with the following content:APP_ABI := armeabi armeabi-v7a
- Right-click on the
HelloNDKMultipleABIActivityproject, and select Build Project. This will build the native library for us. - Create two emulators, with ABI set to
armeabiandarmeabi-v7arespectively. The following screenshot depicts how an emulator is created with thearmeabiABI:
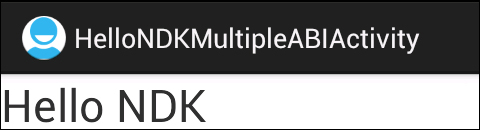
- Run the sample Android application on the two emulators. The same result is shown on both of them:
- Change the content of
Application.mkto the following code snippet and run the sample application on the two emulators. The application will still work on both the emulators:#APP_ABI := armeabi armeabi-v7a APP_ABI := armeabi
- Change the content of
Application.mkas follows:#APP_ABI := armeabi armeabi-v7a #APP_ABI := armeabi APP_ABI := armeabi-v7a
- Run the sample application on the two emulators. The application works on the
armeabi-v7aemulator, but crashes onarmeabiemulator, as shown in the following screenshot:
An Android device can define one or two ABIs. For typical x86-, MIPS-, ARMv5-, and ARMv6-based devices, there's only a primary ABI. Based on the platform, it can be x86, mips, or armeabi. For a typical ARMv7-based device, the primary ABI is usually armeabi-v7a, and it also has a secondary ABI as armeabi. This enables binaries compiled for either armeabi or armeabi-v7a to run on ARMv7 devices. In our example, we demonstrated that the app can work on both armeabi and armeabi-v7a emulators when built against only armeabi.
At installation, the Android package manager searches for native libraries built for the primary ABI and copies them to the application's data directory. If not found, it then searches the native libraries built for the secondary ABI. This ensures that only the proper native libraries are installed.
In our example, when we compile the binary against armeabi-v7a only, the native library won't get installed on the armeabi emulator, subsequently the native library cannot be loaded, and a crash will be shown.