
Though Eclipse is the recommended IDE for Android development, sometimes we want to build an Android application in the command line so that the process can be automated easily and become part of a continuous integration process. This recipe focuses on how to build an Android DNK application at the command line.
Apache Ant is a tool mainly used for building Java applications. It accepts an XML file to describe the build, deploy and test processes, manage the processes, and to automatically keep a track of the dependencies.
We are going to use Apache Ant to build and deploy our sample project. If you don't have it installed yet, you can follow these commands to install it:
- If you're on Ubuntu Linux, use the following command:
$ sudo apt-get install ant1.8 - If you're using a Mac, use the following command:
$ sudo port install apache-ant - If you're using Windows, you can download the
winantinstaller from http://code.google.com/p/winant/downloads/list, and install it.
Readers are supposed to have the NDK development environment set up and read the Writing a Hello NDK program recipe in Chapter 1, Hello NDK, before going through this one.
The following steps create and build a sample
HelloNDK application:
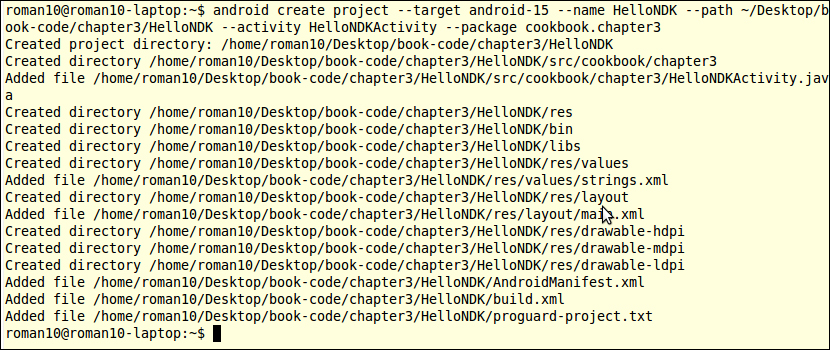
- Create the project. Start a command-line console and enter the following command:
$ android create project
--target android-15
--name HelloNDK
--path ~/Desktop/book-code/chapter3/HelloNDK
--activity HelloNDKActivity
--package cookbook.chapter3
Tip
The
androidtool can be found under thetools/directory of the Android SDK folder. If you have followed Chapter 1, Hello NDK, to set up the SDK and NDK development withPATHconfigured properly, you can execute theandroidcommand directly from the command line. Otherwise, you will need to enter the relative or full path to theandroidprogram. This also applies to other SDK and NDK tools used in the book.The following is a screenshot of the command output:
- Go to the
HelloNDKproject folder and create a folder namedjniby using the following command:$ cd ~/Desktop/book-code/chapter3/HelloNDK $ mkdir jni
- Create a file named
hello.cunder thejnifolder, and add the following content to it:#include <string.h> #include <jni.h> jstring Java_cookbook_chapter3_HelloNDKActivity_naGetHelloNDKStr(JNIEnv* pEnv, jobject pObj) { return (*pEnv)->NewStringUTF(pEnv, "Hello NDK!"); } - Create a file named
Android.mkunder thejnifolder with the following content:LOCAL_PATH := $(call my-dir) include $(CLEAR_VARS) LOCAL_MODULE := hello LOCAL_SRC_FILES := hello.c include $(BUILD_SHARED_LIBRARY)
- Build the native library using the following command:
$ ndk-build - Modify the
HelloNDKActivity.javafile to the following content:package cookbook.chapter3; import android.app.Activity; import android.os.Bundle; import android.widget.TextView; public class HelloNDKActivity extends Activity { @Override public void onCreate(Bundle savedInstanceState) { super.onCreate(savedInstanceState); TextView tv = new TextView(this); tv.setTextSize(30); tv.setText(naGetHelloNDKStr()); this.setContentView(tv); } public native String naGetHelloNDKStr(); static { System.loadLibrary("hello"); } } - Update the project. We have added a native library, so we need to update the project with the following command. Note that this command is only needed once unless we change the project settings, while the previous
ndk-buildcommand needs to be executed every time we update the native code:$ android update project --target android-15 --name HelloNDK --path ~/Desktop/book-code/chapter3/HelloNDK
The following is a screenshot of the command output:

- Go to the project
rootfolder, and build our project in the debug mode using the following command:$ ant debugIn the following screenshot, we show the last few lines of the output, which indicates a successful build is:
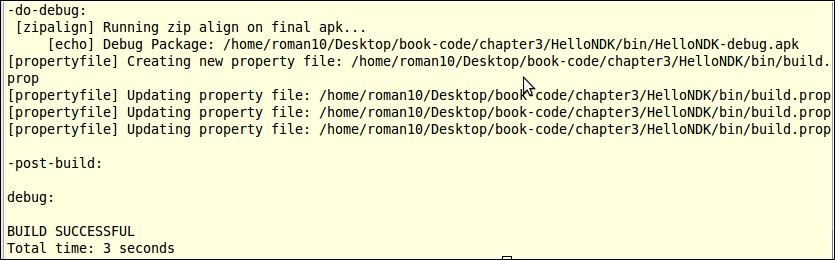
The output
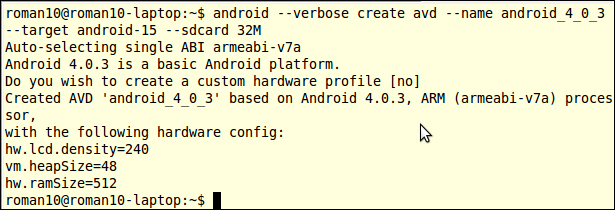
apkwill be produced atbin/HelloNDK-debug.apk. - Create an emulator using the following command:
$ android --verbose create avd --name android_4_0_3
--target android-15 --sdcard 32M
The following is a screenshot of the command output:
- Start the emulator, using the following command:
$ emulator -wipe-data -avd android_4_0_3Alternatively, we can start the Android Virtual Device Manager window by using the command "
android avd", and then choosing an emulator to launch, as follows: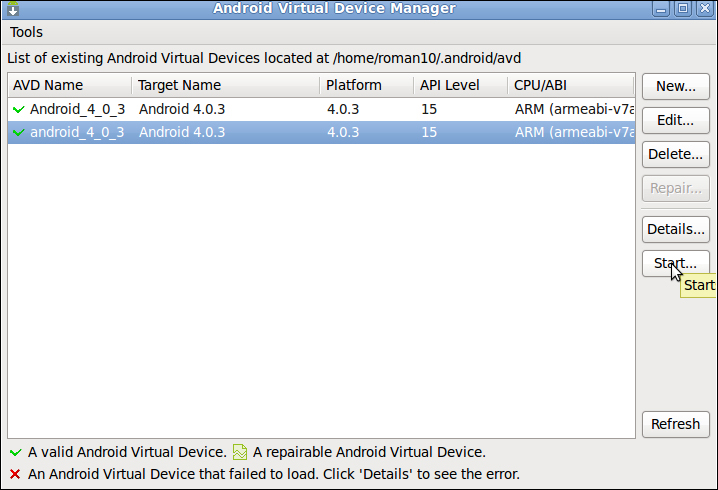
- Install the app on the emulator. We first check the device serial number by using the following command:
$ adb devicesThe following is a screenshot of the command output:

- We then install the
debug.apkfile to the emulator by using the following command:$ adb -s emulator-5554 install bin/HelloNDK-debug.apk
- Start the
HelloNDKapp on the emulator using the command in the following format:$ adb shell am start -n com.package.name/com.package.name.ActivityNameIn our example, we use the following ommand:
$ adb -s emulator-5554 shell am start -n cookbook.chapter3/cookbook.chapter3.HelloNDKActivity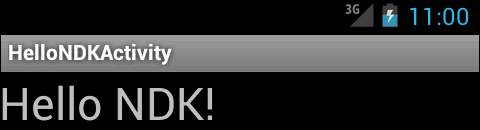
- Run the app on a device.
Suppose the device serial number is
HT21HTD09025, then we can use the following command to install the app on an Android device.$ adb -s HT21HTD09025 install bin/HelloNDK-debug.apkIn our example, we use the following command to start the app:
$ adb -s HT21HTD09025 shell am start -n cookbook.chapter3/cookbook.chapter3.HelloNDKActivity - Create a release package.
Once we confirm that our application can run successfully, we may want to create a release package for uploading to the Android market. You can perform the following steps to achieve this:
- Create a keystore. An Android app must be signed using a key from a keystore. A keystore is a collection of private keys. We can use the following command to create a keystore with a private key:
$ keytool -genkey -v -keystore release_key.keystore
-alias androidkey
-keyalg RSA -keysize 2048 -validity 10000
-dname "CN=MyCompany, OU=MyAndroidDev, O=MyOrg, L=Singapore, S=Singapore, C=65"
-storepass testkspw -keypass testkpw
The following is a screenshot of the command output:

As shown, a keystore with password as
testkwpwis created, and a RSA key pair with password astestkpwis added to the keystore. - Type the command "
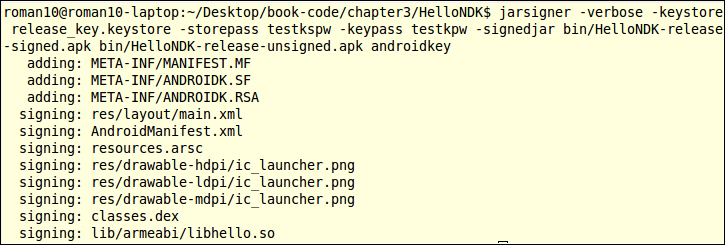
ant release" to build anapkfor the app. The output can be found in the bin folder asHelloNDK-release-unsigned.apk. - Sign the
apkby using the following command:$ jarsigner -verbose -keystore <keystore name> -storepass <store password> -keypass <key password> -signedjar <name of the signed output> <unsigned input file name> <alias>For our sample application, the command and output are as follows:
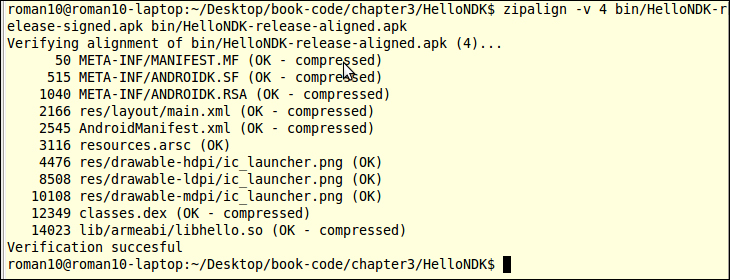
- Zip-align the
apkfile. Thezipaligntool aligns the data inside anapkfile for performance optimization. The following command can be used to align a signedapk:$ zipalign -v 4 <app apk file name> <aligned apk file name>For our sample application, the command and output are as follows:
This recipe discusses how to build an Android NDK application from the command line.
Android NDK provides a build system with the following goals:
- Simplicity: It handles most of the heavy lifting stuff for developers, and we only need to write brief build files (
Android.mkandApplication.mk) to describe the sources need to be compiled. - Compatibility: More build tools, platforms, and so on, may be added to NDK in future releases, but no changes are required for the build files.
Android NDK comes with a set of cross toolchains, including cross-compilers, cross-linkers, cross-assemblers, and so on. These tools can be found under toolchains folder of the NDK root directory. They can be used to generate binaries on different Android platforms (ARM, x86, or MIPS) on Linux, Mac OS, or Windows. Although it is possible to use the toolchains directly to build native code for Android, it is not recommended unless we're porting a project with its own build scripts. In this case, we may only need to change the original compiler to the NDK cross compiler to build it for Android.
In most cases, we'll describe the sources in Android.mk and specify the ABIs on Application.mk. Android NDK's ndk-build script will internally invoke the cross toolchain to build the native code for us. The following is a list of commonly used ndk-build options:
ndk-build: It is used to build binaries.ndk-build clean: It cleans the generated binaries.ndk-build V=1: This builds binaries and displays the build commands. It is handy when we want to find out how things are built or checked for build bugs.ndk-build -B: This command forces a rebuild.ndk-build NDK_DEBUG=1: It generates debuggable build.ndk-build NDK_DEBUG=0: It generates a release build.
This recipe uses a lot of command-line tools in the Android SDK. This allows us to present complete instructions of how to create, build, and deploy an Android NDK project. However, we won't provide the details about these tools in this book since this book is dedicated to Android NDK. You may read more about those tools at http://developer.android.com/tools/help/index.html.
Taking a screenshot from command line can be handy to record the display results for an automated test. However, Android does not provide a command-line tool to take a screenshot currently.
A Java program found at development oolsscreenshotsrccomandroidscreenshot of the Android source code can be used to take screenshot. The code uses a similar method as the Eclipse DDMS plugin to take a screenshot, but from the command line. We incorporated the preceding code into an Eclipse Java project named screenshot, which can be downloaded from the website.
One can import the project and export an executable JAR file to use the tool. Suppose the exported JAR file is named screenshot.jar, then the following sample command uses it to take a screenshot from an emulator:
