
Many Android devices have built-in sensors to detect and measure motion, orientation, and other environmental conditions. It is possible to access sensors in Android NDK. This recipe will discuss how to do it in detail.
The example provided in this recipe is based on the sample code in the previous two recipes. Readers are recommended to read them first:
- Managing native windows at Android NDK
- Detecting and handling input events at Android NDK
The following steps develop the sample Android application, which demonstrates how to access sensors from Android NDK:
- Create an Android application named
nativesensors. Set the package name ascookbook.chapter5.nativesensors. Please refer to the Loading native libraries and registering native methods recipe of Chapter 2, Java Native Interface, if you want more detailed instructions. - Right-click on the
nativesensorsproject, select Android Tools | Add Native Support. - Update
AndroidManifest.xml. Please refer to previous recipe or the downloaded code for details. Note that the metadataandroid.app.lib_namemust have a value asnativesensors. - Add two files named
nativesensors.cppandmylog.hunder thejnifolder. Let's show a part of the code innativesensors.cpp.handle_activity_lifecycle_events: This function handles activity lifecycle events. We enable the sensor when the activity is in focus and disable it when the activity loses its focus. This saves the battery life by avoiding reading sensors when our activity is not in focus:void handle_activity_lifecycle_events(struct android_app* app, int32_t cmd) { USERDATA* userData; switch (cmd) { …... case APP_CMD_SAVE_STATE: // save current state userData = (USERDATA*)(app->userData); app->savedState = malloc(sizeof(SAVED_USERDATA)); *((SAVED_USERDATA*)app->savedState) = userData->drawingData; app->savedStateSize = sizeof(SAVED_USERDATA); break; case APP_CMD_GAINED_FOCUS: userData = (USERDATA*)(app->userData); if (NULL != userData->accelerometerSensor) { ASensorEventQueue_enableSensor(userData->sensorEventQueue, userData->accelerometerSensor); ASensorEventQueue_setEventRate(userData->sensorEventQueue, userData->accelerometerSensor, (1000L/60)*1000); } break; case APP_CMD_LOST_FOCUS: USERDATA userData = *(USERDATA*) app->userData; if (NULL!=userData.accelerometerSensor) { ASensorEventQueue_disableSensor(userData.sensorEventQueue, userData.accelerometerSensor); } break; } }android_main: We continuously poll for events and handle the sensor events identified by theLOOPER_ID_USERidentifier:void android_main(struct android_app* app) { … ... while (0==app->destroyRequested) { int ident, events; struct android_poll_source* source; if ((ident=ALooper_pollOnce(-1, NULL, &events, (void**)&source)) >= 0) { if (LOOPER_ID_USER == ident) { ASensorEvent event; while (ASensorEventQueue_getEvents(userData.sensorEventQueue, &event, 1) > 0) { int64_t currentTime = get_time(); … ... if ((currentTime - lastTime) > TIME_THRESHOLD) { long diff = currentTime - lastTime; float speedX = (event.acceleration.x - lastX)/diff*10000; float speedY = (event.acceleration.y - lastY)/diff*10000; float speedZ = (event.acceleration.z - lastZ)/diff*10000; float speed = fabs(speedX + speedY + speedZ); …... } } } } }
- Add the
Android.mkfile under thejnifolder, which is similar to the one used in the previous recipe. We just need to replace the module name asnativesensorsand the source file asnativesensors.cpp. - Build the Android application and run it on an emulator or device. We can shake the device to see the rectangle moving horizontally:
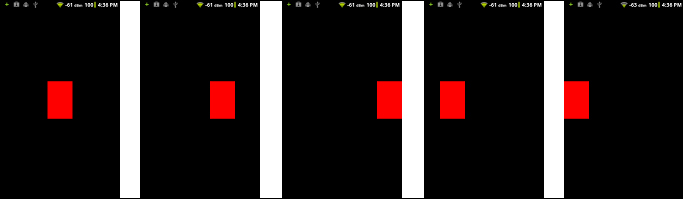
In our example, we used the accelerometer sensor to detect phone shaking. Then, based on the phone shaking speed, we move the red rectangle to one side of the phone screen. Once the rectangle reaches an edge of the phone screen, it starts to move to the other edge.
The example code provides a simple algorithm to determine
whether a shake has happened or not. More complex and accurate algorithms exist and can be implemented. We can also adjust the SHAKE_TIMEOUT and SHAKE_COUNT_THRESHOLD constants to fine tune the algorithm.
The important part of the example is how to access sensors. Let's summarize the steps:
- Get a reference to the sensor manager: This is done by using the following function:
ASensorManager* ASensorManager_getInstance();
- Get the default sensor of a given type: We can also get a list of all available sensors. This is done by using the following two functions respectively:
ASensor const* ASensorManager_getDefaultSensor(ASensorManager* manager, int type);
int ASensorManager_getSensorList(ASensorManager* manager, ASensorList* list);
The available types are defined in
android/sensor.h. In our example, we print all sensor names and types but only useASENSOR_TYPE_ACCELEROMETER. - Create a new sensor queue and attach it to the looper of the thread: This is done by using the
ASensorManager_createEventQueuefunction as follows:ASensorEventQueue* ASensorManager_createEventQueue(ASensorManager* manager, ALooper* looper, int ident, ALooper_callbackFunc callback, void* data);
The usage of this function is similar to the usagw of the
ALooper_addFdfunction in the Creating a native activity with the Android native app glue recipe andAInputQueue_attachLooperin the Detecting and handling input events at Android NDK recipe. In our example, we set theidentasLOOPER_ID_USER. Note that we may also define a new looper ID by changing the code ofandroid_native_app_glue.hand setting it here. - Enable and configure the sensor:
int ASensorEventQueue_enableSensor(ASensorEventQueue* queue, ASensor const* sensor);
int ASensorEventQueue_setEventRate(ASensorEventQueue* queue, ASensor const* sensor, int32_t usec);
The first function enables the sensor referred by the sensor input argument. The second function sets the delivery rate of the events, in microseconds, for the sensor referred by the sensor input argument. In our example, we called these two functions when the activity gained focus.
- Poll for events and get the available events from the queue: The polling is done by calling
ALooper_pollOnce, as shown in the previous recipe. If the event identifier returned isLOOPER_ID_USER, we know that it is a sensor event and we can use the following function to get it:ssize_t ASensorEventQueue_getEvents(ASensorEventQueue* queue, ASensorEvent* events, size_t count);
countindicates the maximum number of available events we want to get. In our example, we set it to1. It is also possible to define an array ofASensorEventand get multiple events at one time. - Handle sensor events: The sensor event is represented by the
ASensorEventdata structure, which can be found atandroid/sensor.h(the exact path to the file is<Android NDK root dir>/platforms/android-<version>/arch-arm/usr/include/android/sensor.h). In our example, we accessed the acceleration readings at the x, y, and z axes, and used the readings to determine if a phone shake has happened. - Disable the sensor: After you are done accessing the sensors, you can disable it with the following function:
int ASensorEventQueue_disableSensor(ASensorEventQueue* queue, ASensor const* sensor);
- Destroy the sensor event queue and free all resources associated with it:
int ASensorManager_destroyEventQueue(ASensorManager* manager, ASensorEventQueue* queue);