
Besides the GLSurfaceView display mechanism we
described in the previous recipe, it is also possible to display OpenGL graphics using EGL.
Readers are recommended to read the Drawing 3D Graphics and Lighting up the Scene with OpenGL ES 1.x API recipe before going through this one.
The following steps describe how to create an Android project that demonstrates the usage of EGL:
- Create an Android application named
EGLDemo. Set the package name ascookbook.chapter4.egl. Please refer to the Loading native libraries and registering native methods recipe in Chapter 2, Java Native Interface, if you want more detailed instructions. - Right-click on the project
EGLDemo, select Android Tools | Add Native Support. - Add two Java files, namely
EGLDemoActivity.javaandMySurfaceView.java.EGLDemoActivity.javasetsContentViewas an instance ofMySurfaceView, and starts and stops rendering at the Android activity callback functions:… … public void onCreate(Bundle savedInstanceState) { super.onCreate(savedInstanceState); myView = new MySurfaceView(this); this.setContentView(myView); } protected void onResume() { super.onResume(); myView.startRenderer(); } … … protected void onStop() { super.onStop(); myView.destroyRender(); } … … MySurfaceView.javaperforms role similar toGLSurfaceView. It interacts with the the native renderer to manage the display surface and handle touch events:public class MySurfaceView extends SurfaceView implements SurfaceHolder.Callback { … … public MySurfaceView(Context context) { super(context); this.getHolder().addCallback(this); } … … public boolean onTouchEvent(final MotionEvent event) { float x = event.getX(); float y = event.getY(); switch (event.getAction()) { case MotionEvent.ACTION_MOVE: float dx = x - mPreviousX; float dy = y - mPreviousY; mAngleX += dx * TOUCH_SCALE_FACTOR; mAngleY += dy * TOUCH_SCALE_FACTOR; naRequestRenderer(mAngleX, mAngleY); } mPreviousX = x; mPreviousY = y; return true; } @Override public void surfaceChanged(SurfaceHolder holder, int format, int width,int height) { naSurfaceChanged(holder.getSurface()); } @Override public void surfaceCreated(SurfaceHolder holder) {} @Override public void surfaceDestroyed(SurfaceHolder holder) { naSurfaceDestroyed(); } }- The following code should be added to the
jnifolder:- Cube.cpp and Cube.h: Use the OpenGL 1.x API to draw a 3D cube.
- OldRenderMethods.cpp and OldRenderMethods.h: Initialize OpenGL 1.x, perform transforms, draw graphics, and so on. This is similar to the corresponding methods in the Drawing 3D Graphics in OpenGL 1.x recipe.
- Renderer.cpp and Renderer.h: Simulate
android.opengl.GLSurfaceView.Renderer. It sets up the EGL context, manages the display, and so on. renderAFrame: It sets the event type, and then signals the rendering thread to handle the event:void Renderer::renderAFrame(float pAngleX, float pAngleY) { pthread_mutex_lock(&mMutex); mAngleX = pAngleX; mAngleY = pAngleY; mRendererEvent = RTE_DRAW_FRAME; pthread_mutex_unlock(&mMutex); pthread_cond_signal(&mCondVar); }renderThreadRun: It runs in a separate thread to handle various events, including surface change, draw a frame, and so on:void Renderer::renderThreadRun() { bool ifRendering = true; while (ifRendering) { pthread_mutex_lock(&mMutex); pthread_cond_wait(&mCondVar, &mMutex); switch (mRendererEvent) { … … case RTE_DRAW_FRAME: mRendererEvent = RTE_NONE; pthread_mutex_unlock(&mMutex); if (EGL_NO_DISPLAY!=mDisplay) { naDrawGraphics(mAngleX, mAngleY); eglSwapBuffers(mDisplay, mSurface); } } break; …… } } }initDisplay: It sets up the EGL context:bool Renderer::initDisplay() { const EGLint attribs[] = { EGL_SURFACE_TYPE, EGL_WINDOW_BIT, EGL_BLUE_SIZE, 8, EGL_GREEN_SIZE, 8, EGL_RED_SIZE, 8, EGL_NONE}; EGLint width, height, format; EGLint numConfigs; EGLConfig config; EGLSurface surface; EGLContext context; EGLDisplay display = eglGetDisplay(EGL_DEFAULT_DISPLAY); eglInitialize(display, 0, 0); eglChooseConfig(display, attribs, &config, 1, &numConfigs); eglGetConfigAttrib(display, config, EGL_NATIVE_VISUAL_ID, &format); ANativeWindow_setBuffersGeometry(mWindow, 0, 0, format); surface = eglCreateWindowSurface(display, config, mWindow, NULL); context = eglCreateContext(display, config, NULL, NULL); if (eglMakeCurrent(display, surface, surface, context) == EGL_FALSE) { return -1; } eglQuerySurface(display, surface, EGL_WIDTH, &width); eglQuerySurface(display, surface, EGL_HEIGHT, &height); … ... }EGLDemo.cpp: It registers the native methods and wraps the native code. The following two methods are used:naSurfaceChanged: It gets the native window associated with a JavaSurfaceobject and initializes EGL and OpenGL:void naSurfaceChanged(JNIEnv* env, jclass clazz, jobject pSurface) { gWindow = ANativeWindow_fromSurface(env, pSurface); gRenderer->initEGLAndOpenGL1x(gWindow); }naRequestRenderer: It renders a frame, which is called by thetouchevent handler inMySurfaceView:void naRequestRenderer(JNIEnv* env, jclass clazz, float pAngleX, float pAngleY) { gRenderer->renderAFrame(pAngleX, pAngleY); }
- Add the
Android.mkfile under thejnifolder with the following content:LOCAL_PATH := $(call my-dir) include $(CLEAR_VARS) LOCAL_MODULE := EGLDemo LOCAL_SRC_FILES := Cube.cpp OldRenderMethods.cpp Renderer.cpp EGLDemo.cpp LOCAL_LDLIBS := -llog -landroid -lEGL -lGLESv1_CM include $(BUILD_SHARED_LIBRARY)
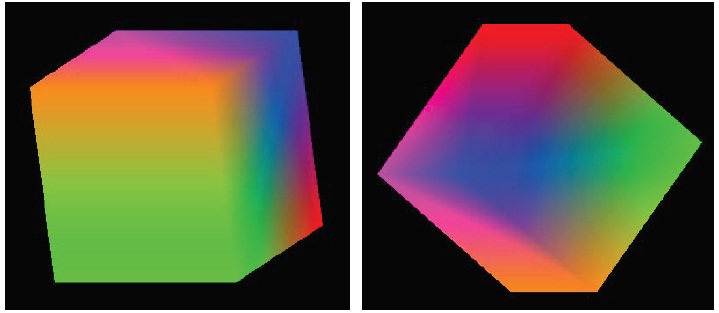
- Build the Android NDK application and run it on an Android device. The app will display a cube, which we can touch to rotate it:
EGL is an interface between OpenGL ES and the underlying native window system. According to Khronos EGL web page (http://www.khronos.org/egl), graphics context management, surface binding, and rendering synchronization for rendering with other Khronos 2D and 3D APIs, including OpenGL ES are handled by it.
Tip
EGL is a cross-platform API widely used in embedded systems, including Android and iPhone (the EGL implementation from Apple is called EAGL). Many desktop platforms also support EGL. Different implementations may not be 100 percent compatible, but the porting effort will usually not be substantial for the EGL code.
The following steps describe how to set up and manipulate EGL and its integration with OpenGL:
- Get and initialize the display connection: EGL needs to know where the content should be displayed, therefore we will need to get a display connection and initialize it. This is done using the following two methods:
eglGetDisplay: It obtains the EGL display connection for the native display. If the input argument isEGL_DEFAULT_DISPLAY, a default display connection is returned.eglInitialize: It initializes an EGL display connection obtained byeglGetDisplay.
- Configure EGL: This is done through
eglChooseConfig.eglChooseConfigreturns a list of EGL frame buffer configurations that match the requirements specified by theattrib_listargument. The attribute is an array with pairs of attributes and corresponding desired values, and it is terminated byEGL_NONE. In our code, we simply specifyEGL_SURFACE_TYPEasEGL_WINDOW_BIT, and color components sizes as 8 bit. - Create a render surface where the display content will be placed: This is done through
eglCreateWindowSurface.eglCreateWindowSurface, given the EGL display connection, the EGL frame buffer configuration and native window returns a new EGL window surface.In our code, we start from
SurfaceViewand pass its associatedandroid.view.Surfacevalue to the native code. In the native code, we obtain its native window, and finally create the EGL window surface for OpenGL drawing. - Create the EGL rendering context and make it the current: This is done by
eglCreateContextandeglMakeCurrent. - OpenGL drawing: This is covered in previous recipes.
- Swap the EGL surface internal buffers to display the content: This is done by the
eglSwapBufferscall.eglSwapBuffersposts the EGL surface color buffer to a native window. This effectively displays the drawing content on the screen.EGL internally maintains two buffers. The content of the front buffer is displayed, while the drawing can be done on the back buffer. At the time we decided to display the new drawing, we swap the two buffers.
- At time we want to stop rendering. Release the EGL context, destroy the EGL surface, and terminate the EGL display connection:
eglMakeCurrentwithEGL_NO_SURFACEandEGL_NO_CONTEXTreleases the current contexteglDestroySurfacedestroys an EGL surfaceeglTerminateterminates the EGL display connection
Our code uses the Android native window management API calls to obtain a native window and configure it. The following methods are called:
ANativeWindow_fromSurface: It returns a native window associated with the Java surface object. The returned reference should be passed toANativeWindow_releaseto ensure there's no leaking.ANativeWindow_setBuffersGeometry: It sets the size and format of window buffers. In our code, we specified width and height as0, in which case the window's base value will be used.
Note that we'll need to link to the Android library in the Android.mk file (LOCAL_LDLIBS := -landroid), because it is a part of the Android native application API, which we will cover more in the next chapter.
The renderer runs an event loop in a separate thread. We used the
POSIX thread (pthreads) calls to create a native thread, synchronize it with the main thread, and so on. We'll cover pthread in detail in Chapter 6, Android NDK Multithreading.