
With the environment set up, let's start writing the code in NDK. This recipe walks through a Hello NDK program.
The NDK development environment needs to be set up properly before starting to write the Hello NDK program. Please refer to previous recipes in this chapter, depending upon the platform of your choice.
Follow these steps to write, compile, and run the Hello NDK program:
- Start Eclipse, and select File | New | Android Project. Enter
HelloNDKas the value for Project Name. Select Create new project in workspace. Then click on Next:
- In the next window, select an Android version that you want to target. Usually, the latest version is recommended. Then click on Next.
- In the next window, specify your package name as
cookbook.chapter1. Select the Create Activity box, and specify the name asHelloNDKActivity. Set the value for Minimum SDK as5 (Android 2.0). Click on Finish: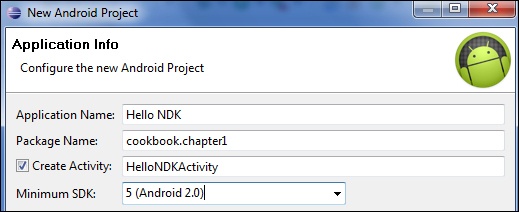
- In the Eclipse package explorer, right-click on the
HelloNDKproject, and select New | Folder. Enter the namejniin the pop-up window, then click on Finish: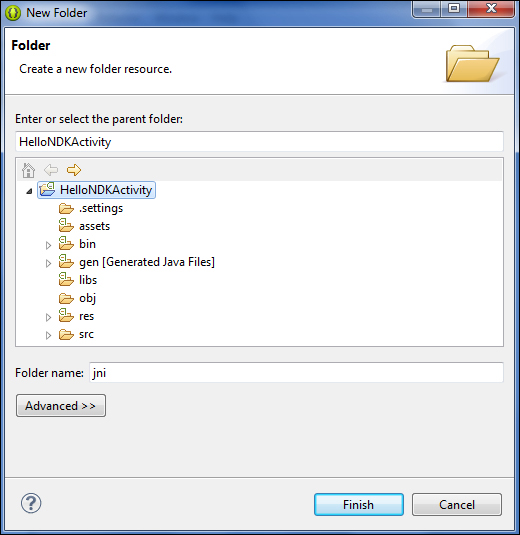
- Right-click on the newly-created
jnifolder under theHelloNDKproject. Select New | File, enterhello.cas the value for File name, then click on Finish. Type the following code in thehello.cfile:#include <string.h> #include <jni.h> jstring Java_cookbook_chapter1_HelloNDKActivity_naGetHelloNDKStr(JNIEnv* pEnv, jobject pObj) { return (*pEnv)->NewStringUTF(pEnv, "Hello NDK!"); } - Right-click on the
jnifolder. Select New | File, enterAndroid.mkas the value for File name, then click on Finish. Type the following code in theAndroid.mkfile:LOCAL_PATH := $(call my-dir) include $(CLEAR_VARS) LOCAL_MODULE := hello LOCAL_SRC_FILES := hello.c include $(BUILD_SHARED_LIBRARY)
- Start a terminal, go to the
jnifolder, and typendk-buildto build thehello.cprogram as a native library. - Edit the
HelloNDKActivity.javafile. The file should contain the following content:public class HelloNDKActivity extends Activity { @Override public void onCreate(Bundle savedInstanceState) { super.onCreate(savedInstanceState); TextView tv = new TextView(this); tv.setTextSize(30); tv.setText(naGetHelloNDKStr()); this.setContentView(tv); } public native String naGetHelloNDKStr(); static { System.loadLibrary("hello"); } } - Right-click on the
HelloNDKproject in Eclipse. Select Run As | Android Application. Your Android phone or emulator will be displayed with something similar to the following screenshot: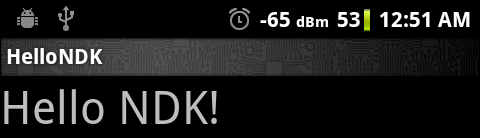
This recipe demonstrated how to write a Hello NDK program on Android.
- Native code: The Hello NDK program consists of both the native C code and Java code. The native function
naGetHelloNDKStrreturns theHello NDKstring to the caller, as indicated in both the native code function definition and Java code method declaration. The native function name must follow a specific pattern for a package name, class name, and method name. The package and class name must agree with the package and class name of the Java class from which the native method is called, while the method name must be the same as the method name declared in that Java class.This helps the Dalvik VM to locate the native function at runtime. Failing to follow the rule will result in
UnsatisfiedLinkErrorat runtime.The native function has two parameters, which are standard for all native functions. Additional parameters can be defined based on needs. The first parameter is a pointer to
JNIEnv, which is the gateway to access various JNI functions. The meaning of the second parameter depends on whether the native method is a static or an instance method. If it's a static method, the second parameter is a reference to the class where the method is defined. If it's an instance method, the second parameter is a reference to the object on which the native method is invoked. We will discuss JNI in detail in Chapter 2, Java Native Interface. - Compilation of the native code: The Android NDK build system frees developers from writing
makefile. The build system accepts anAndroid.mkfile, which simply describes the sources. It will parse the file to generatemakefileand do all the heavy lifting for us.We will cover details of how to write the
Android.mkfile or even write our ownmakefilein Chapter 3, Build and Debug NDK Applications.Once we compile the native code, a folder named
libswill be created under our project and alibhello.solibrary will be generated under thearmeabisubdirectory. - Java code: Three steps are followed to call the native method:
- Load the native library: This is done by calling
System.loadLibrary("hello"). Note that instead oflibhello, we should usehello. The Dalvik VM will fail to locate the library iflibhellois specified. - Declare the method: We declare the method with a native keyword to indicate that it is a native method.
- Invoke the method: We call the method just like any normal Java method.
- Load the native library: This is done by calling
The name of a native method is lengthy and writing it manually is error-prone. Fortunately, the javah program from JDK can help us generate the header file, which includes the method name. The following steps should be followed to use javah:
- Write the Java code, including the native method definition.
- Compile the Java code and make sure the class file appears under the
bin/classes/ folder of our project. - Start a terminal and go to the
jnifolder, and enter the following command:$ javah -classpath ../bin/classes –o <output file name> <java package name>.<java class anme>In our
HelloNDKexample, the command should be as follows:$ javah -classpath ../bin/classes –o hello.h cookbook.chapter1.HelloNDKActivityThis will generate a file named
hello.hwith its function definition as follows:JNIEXPORT jstring JNICALL Java_cookbook_chapter1_HelloNDKActivity_naGetHelloNDKStr (JNIEnv *, jobject);