
This recipe depicts how to set up an Android NDK development environment in Ubuntu Linux.
Check your Ubuntu version and make sure it is version 8.04 or later.
GNU C Library (glibc) 2.7 or above is required. It is usually installed with Linux by default. Two simple methods can check the version of glibc:
- Start a terminal, and enter
ldd --version. This will print the version oflddandglibc:
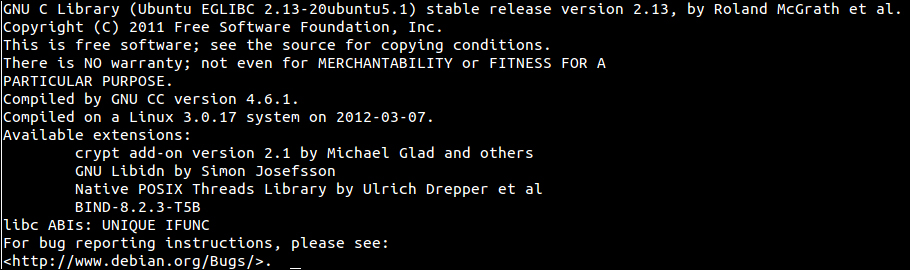
- We can execute the library as an application. Start a terminal, locate the library location, and then enter the following command:
<glibc library location>/<glibc library>.The following output will be displayed:
- We need to enable 32-bit application execution if we are using a 64-bit machine. Start a terminal, and enter the following command:
sudo apt-get install ia32-libs - Install JDK 6 or above. At a terminal, enter the command
sudo apt-get install openjdk-6-jdk, or alternatively we can entersudo apt-get install sun-java6-jdk. After installation, we need to add the JDK path to thePATHenvironment variable by adding the following lines to~/.bashrc:export JDK_PATH=/usr/local/jdk1.7.0/bin export PATH=$PATH:$JDK_PATH
We will use Eclipse as our IDE. Please refer to the Setting up an Android NDK development environment in Windows recipe for instructions.
The following steps indicate the procedure of setting up an Android NDK development environment on Ubuntu Linux:
- Follow steps 1 to 6 of the Setting up an Android NDK development environment in Windows recipe to install the ADT plugin for Eclipse.
- Download Android SDK from http://developer.android.com/sdk/index.html, then extract the downloaded package.
- Append the following lines to
~/.bashrc:export ANDROID_SDK=<path to Android SDK directory> export PATH=$PATH:$ ANDROID_SDK/tools:$ANDROID_SDK/platform-tools
- Follow steps 9 and 10 of the Setting up an Android NDK development environment in Windows recipe to configure the SDK path at Eclipse, and download additional packages.
- Download the latest version of Android NDK from http://developer.android.com/tools/sdk/ndk/index.html, then extract the downloaded file.
- Change the lines that you appended to
~/.bashrcin step 3:export ANDROID_SDK=<path to Android SDK directory> export ANDROID_NDK=<path to Android NDK directory> export PATH=$PATH:$ANDROID_SDK/tools:$ANDROID_SDK/platform-tools:$ANDROID_NDK
- Start a new terminal, then go to the
samples/hello-jnidirectory in NDK. Type the commandndk-build. If the build is successful, it proves that the NDK environment is set up correctly:
We first set up Android SDK and then Android NDK. Ensure that the path is set properly, so that the tools can be accessed without referring to the SDK and NDK directories.
The .bashrc file is a startup file read by the bash shell
when you start a new terminal. The export commands appended the Android SDK and NDK directory locations to the environment variable PATH. Therefore, every time a new bash shell starts, PATH is set properly for SDK and NDK tools.
The following are a few more tips on setting up an NDK development environment:
- Configure Path at Startup File: We append to the SDK and NDK paths to the
PATHenvironment variable at~/.bashrcfile. This assumes that our Linux system uses the bash shell. However, if your system uses another shell, the startup file used may be different. The startup files used by some commonly used shells are listed as follows:- For C shell (
csh), the startup file to use is~/.cshrc. - For
ksh, the startup file to use can be obtained using the commandecho $ENV. - For
sh, the startup file to use is~/.profile. The user needs to log out of the current session and log in again for it to take effect.
- For C shell (
- Switch JDK: In Android development, we can either use Oracle Java JDK or OpenJDK. In case we run into issues with any one of the JDKs, we can switch to another Java JDK, if we have installed both of them.
- To check which JDK the system is currently using, use the following command:
$update-java-alternatives -l - To switch between two JDKs, use the following command:
$sudo update-java-alternatives -s <java name>
The following is an example for switching to Oracle JDK 1.6.0:
$sudo update-java-alternatives -s java-1.6.0-sun - To check which JDK the system is currently using, use the following command: