
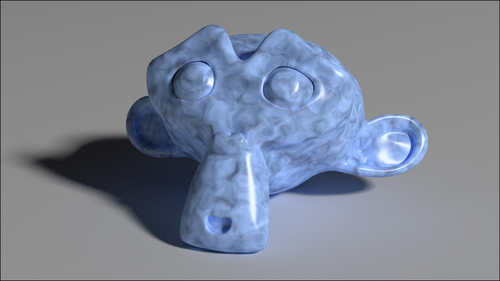
Bakelite is a very common type of plastic and can be found in a lot of different colorations and patterns. In this recipe we will create the black type that was once commonly used for, among other things, the classic home telephone.

- Start Blender and load again the file
1301OS_04_start.blend. - Select the Suzanne mesh and press T; in the Object Tools panel on the left, select Flat from the Shading option; press T again to get rid of the Object Tools panel.
- Go to the Object Modifiers window in the Properties panel and set the Subdivision Surface modifier levels both for View and Render to
1.
Now we are going to create the material:
- Go to the Material window and click on New (or do it, as usual, in the Node Editor header). Rename the material
Plastic_bakelite_black. - Set Viewport Shading of the Camera view to Rendered.
- Switch the Diffuse shader with a Mix Shader node. In the first Shader slot select a Diffuse BSDF shader, in the second Shader slot select Glossy BSDF.
- Change the Diffuse shader color to a pure black and the Glossy shader color to a light gray (RGB 0.253); set the Roughness value of the Glossy shader to
0.100and the Factor value of the Mix Shader node to0.800. - Press Shift + D to duplicate the Mix Shader node and paste it between the Glossy shader and the first Mix Shader node.
- Place the mouse cursor in the Node Editor window and press N; select the first Mix Shader node and in the Active Node panel on the right, and in the Label slot, write
Mix Shader1; select the second one and in the Label slot, writeMix Shader2. - Add an Anisotropic BSDF shader (press Shift + A and go to Shader | Anisotropic BSDF) and connect its output to the second input socket of the Mix Shader (2) node.
- Set the Mix Shader (2) factor value to
0.500. Set the Anisotropic color to the same light gray as for the Glossy shader (that is, RGB 0.253), the Roughness to0.100and the Rotation to0.500.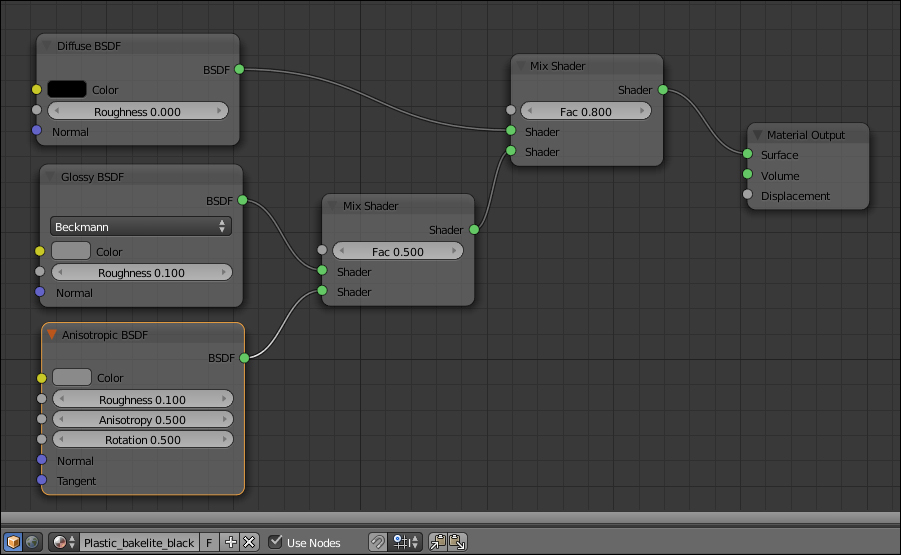
Basically we made the same kind of material as the former green plastic, but this time we enhanced the reflectivity (mirror) by lowering the Roughness value. We also added an Anisotropic specularity effect with the same Roughness value and color as for the Glossy shader.
The Rotation value of the Anisotropic shader set the flow of the highlights on the mesh, the direction of the specularity rotates as this value increases from 0.000 to 1.000.
Let's try now, starting from the black one, to make a differently processed kind of bakelite material:
- Select the Diffuse, Glossy, Anisotropic, and the second Mix Shader nodes and press Ctrl + G to make a group; rename it
Bakelite. - Click and drag the Diffuse shader's Color socket to expose it; drag also the Fac socket of the Mix Shader2 node and rename it as
Aniso. This will drive the influence of the Anisotropic shader on the Glossy one. Click and drag also the Fac socket of the Mix Shader1 and rename itSpec: this will drive up the amount of final specularity of the shader. Press Tab to close the group.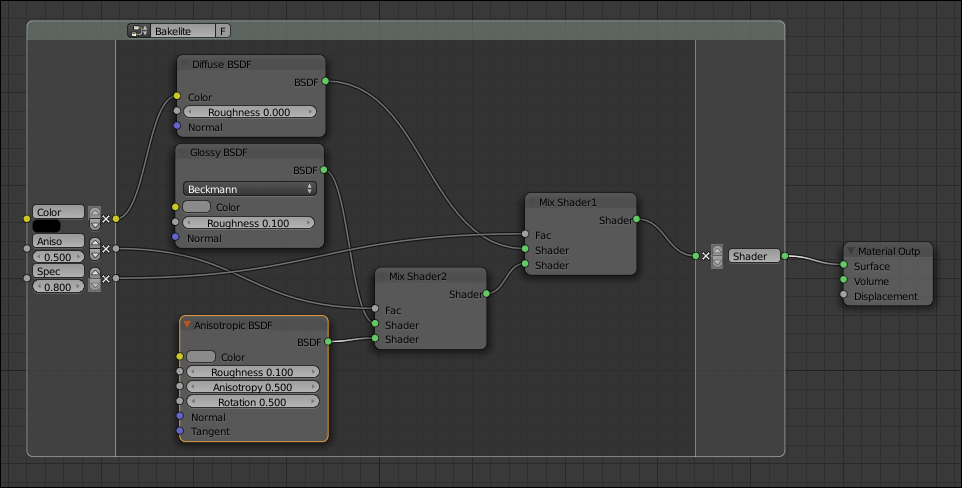
- Now add: a Texture Coordinate node (press Shift + A and go to Input | Texture Coordinate); a Mapping node (Shift + A and go to Vector | Mapping); a Noise Texture node (press Shift + A and go to Texture | Noise Texture); a ColorRamp node (press Shift + A and go to Converter | ColorRamp); and a Mix node (press Shift + A and go to Color | Mix).
- Connect the Object output of the Texture Coordinate node to the Vector input of the Mapping node, then connect the output of this to the Noise Texture node input. Connect the Color output of the Noise Texture to the ColorRamp input socket, Fac and the Color output of the latter one to the Color1 input socket of the Mix node. Connect the Color output of the Mix node to the Color input of the Bakelite node group.
- Set the Noise Texture node Scale to
4.000, Detail to4.200and Distortion to1.700. - Set the ColorRamp node interpolation to B-Spline, moving the black color marker one-fourth to the right and the white color marker one-fourth to the left.
- Set the Mix node's Blend Type to Divide (but experiment also with others types), the Fac value to
0.600and the Color2 value toR 0.799,G 0.442, andB 0.220. - In the Bakelite node group interface, set the Spec value to
0.300.
- Optionally, smooth the Suzanne mesh in the Object Tools panel (T) and increase the subdivision levels of the Subdivision Surface modifier to
2.