
Chapter 3
Animating jQuery
In This Chapter
![]() Hiding and showing elements with jQuery
Hiding and showing elements with jQuery
![]() Fading elements in and out
Fading elements in and out
![]() Adding a callback function to a transition
Adding a callback function to a transition
![]() Element animation
Element animation
![]() Object chaining
Object chaining
![]() Using selection filters
Using selection filters
![]() Adding and removing elements
Adding and removing elements
The jQuery library simplifies a lot of JavaScript coding. One of its best features is how it adds features that would be difficult to achieve in ordinary JavaScript and DOM programming. This chapter teaches you to shake and bake your programs by identifying specific objects, moving them around, and making them appear, slide, and fade.
Playing Hide and Seek
To get it all started, take a look at hideShow.html shown in Figure 3-1.

Figure 3-1: This page allows you to hide and show elements. At first, it reveals nothing much.
The hideShow program looks simple at first, but it does some quite interesting things. All of the level-two headings are actually buttons, so when you click them, interesting things happen:
- The show button displays a previously hidden element. Figure 3-2 demonstrates the revealed content.

Figure 3-2: The content element is now visible.
- The hide button hides the content. The behavior of the hide button is pretty obvious. If the content is showing, it disappears instantly.
- The toggle button swaps the visibility of the content. If the content is currently visible, it is hidden. If it is hidden, it appears.
- The slide down button makes the content transition in. The slide down transition acts like a window shade being pulled down to make the content visible through a basic animation.
- The slide up button transitions the content out. This animation looks like a window shade being pulled up to hide the content.
- The speed of the animation can be controlled. It's possible to adjust how quickly the transition animation plays. This example plays the slide down animation slowly, and the slide up animation more quickly. It's possible to specify exactly how long the transition takes in milliseconds (1/1000ths of a second).
- The fade in button allows the element to dissolve into visibility. This looks much like a fade effect used in video. As in the sliding animations, the speed of the animation can be controlled.
- The fade out button fades the element to the background color. This technique gradually modifies the opacity of the element so that it eventually disappears.
You can adjust how quickly the transition animation plays. You can specify exactly how long the transition takes in milliseconds (1/1000 of a second). Also, any transition can have a callback function attached.
 Of course, this example relies on animation, which you can't see in a static book. Be sure to look at this and all other example pages on my website: www.aharrisbooks.net. Better yet, install them on your own machine and play around with my code until they make sense to you.
The animations shown in this example are useful when you want to selectively hide and display parts of your page:
- Menus are one obvious use. You might choose to store your menu structure as a series of nested lists and only display parts of the menu when the parent is activated.
- Small teaser sentences expand to show more information when the user clicks or hovers over them. This technique is commonly used on blog and news sites to let users preview a large number of topics, kind of like a text-based thumbnail image.
Getting transition support
The jQuery library has built-in support for transitions that make these effects pretty easy to produce. Look over the entire program before digging into the details:
<!DOCTYPE html>
<html lang = "en-US">
<head>
<title>hideShow.html</title>
<meta charset = "UTF-8">
<style type = "text/css">
#content {
width: 400px;
height: 200px;
font-size: 200%;
padding-left:1em;
background-color: yellow;
position: absolute;
left: 300px;
top: 100px;
}
h2 {
width: 10em;
border: 3px outset black;
background-color: lightgray;
text-align: center;
font-family: sans-serif;
border-radius: 5px;
box-shadow: 5px 5px 5px gray;
}
</style>
<script type = "text/javascript"
src = "jquery-1.10.2.min.js"></script>
<script type = "text/javascript">
$(init);
function init(){
//styleContent();
$("#content").hide();
$("#show").click(showContent);
$("#hide").click(hideContent);
$("#toggle").click(toggleContent);
$("#slideDown").click(slideDown);
$("#slideUp").click(slideUp);
$("#fadeIn").click(fadeIn);
$("#fadeOut").click(fadeOut);
} // end init
function showContent(){
$("#content").show();
} // end showContent
function hideContent(){
$("#content").hide();
} // end hideContent
function toggleContent(){
$("#content").toggle();
} // end toggleContent
function slideDown(){
$("#content").slideDown("medium");
} // end slideDown
function slideUp(){
$("#content").slideUp(500);
} // end slideUp
function fadeIn(){
$("#content").fadeIn("slow", present);
} // end fadeIn
function fadeOut(){
$("#content").fadeOut("fast");
} // end fadeOut.
function present(){
alert("I'm here");
} // end present
</script>
</head>
<body>
<h1>Hide and show</h1>
<h2 id = "show">Show</h2>
<h2 id = "hide">Hide</h2>
<h2 id = "toggle">Toggle</h2>
<h2 id = "slideDown">Slide Down</h2>
<h2 id = "slideUp">Slide Up</h2>
<h2 id = "fadeIn">Fade In</h2>
<h2 id = "fadeOut">Fade Out</h2>
<p id = "content">
This is the content. It is hidden at first, but it is hidden and
shown with jQuery techniques.
</p>
</body>
</html>
This example may look long and complicated when you view it all at once, but it really isn't hard to understand when you break it into pieces.
Writing the HTML and CSS foundation
The HTML used in this example is minimal, as is common in jQuery development:
- A single level-one heading
- A series of level-two headings
- A paragraph
The level-two headings will be used as buttons in this example. I use a CSS style to make the H2 tags look more like buttons (adding a border and background color). I added an ID attribute to every button so that I can add jQuery events later.
 If I wanted the H2 elements to look and act like buttons, why didn't I just make them with button tags in the first place? In this example, I wanted to focus on the jQuery and keep the HTML as simple as possible. jQuery helps make any element act like a button easily, so that's what I did. Users don't expect H2 elements to be clickable, so you need to do some styling (as I did) to help them understand that the element can be clicked. For comparison purposes, the other two examples in this chapter use actual HTML buttons.
The other interesting part of the HTML is the content div. In this example, the actual content isn't really important, but I did add some CSS to make the content easy to see when it pops up.
 The most critical part of the HTML from a programming perspective is the inclusion of the ID attribute. This makes it easy for a jQuery script to manipulate the component, making it hide and reappear in various ways. Note that the HTML and CSS do nothing to hide the content. It will be hidden (and revealed) entirely through jQuery code.
Initializing the page
The initialization sequence simply sets the stage and assigns a series of event handlers:
$(init);
function init(){
//styleContent();
$("#content").hide();
$("#show").click(showContent);
$("#hide").click(hideContent);
$("#toggle").click(toggleContent);
$("#slideDown").click(slideDown);
$("#slideUp").click(slideUp);
$("#fadeIn").click(fadeIn);
$("#fadeOut").click(fadeOut);
} // end init
The pattern for working with jQuery should be familiar:
- Set up an initialization function.
Use the $(document).ready() mechanism (described in Chapter 2 of this minibook) or this cleaner shortcut to specify an initialization function.
- Hide the content div.
When the user first encounters the page, the content div should be hidden.
- Attach event handlers to each H2 button.
This program is a series of small functions. The init() function attaches each function to the corresponding button. Note how I carefully named the functions and buttons to make all the connections easy to understand.
Hiding and showing the content
All the effects on this page are based on hiding and showing the content div. The hide() and show() methods illustrate how jQuery animation works:
function showContent(){
$("#content").show();
} // end showContent
function hideContent(){
$("#content").hide();
} // end hideContent
Each of these functions works in the same basic manner:
- Identifies the content div: Creates a jQuery node based on the content div.
- Hides or shows the node: The jQuery object has built-in methods for hiding and showing.
The hide and show methods act instantly. If the element is currently visible, the show() method has no effect. Likewise, hide() has no effect on an element that's already hidden.
Toggling visibility
In addition to hide() and show(), the jQuery object supports a toggle() method. This method takes a look at the current status of the element and changes it. If the element is currently hidden, it becomes visible. If it's currently visible, it is hidden. The toggleContent() function illustrates how to use this method:
function toggleContent(){
$("#content").toggle();
} // end toggleContent
Sliding an element
jQuery supports effects that allow you to animate the appearance and disappearance of your element. The general approach is very similar to hide() and show(), but you find one additional twist:
function slideDown(){
$("#content").slideDown("medium");
} // end slideDown
function slideUp(){
$("#content").slideUp(500);
} // end slideUp
The slideDown() method makes an element appear like a window shade being pulled down. The slideUp() method makes an element disappear in a similar manner.
These functions take a speed parameter that indicates how quickly the animation occurs. If you omit the speed parameter, the default value is medium. The speed can be these string values:
- Fast
- Medium
- Slow
- A numeric value in milliseconds (1/1000 of a second; the value 500 means 500 milliseconds, or half a second)
The show(), hide(), and toggle() methods also accept a speed parameter. In these functions, the object shrinks and grows at the indicated speed.
A slideToggle() function is also available that toggles the visibility of the element, but using the sliding animation technique.
Fading an element in and out
A third type of “now you see it” animation is provided by the fade methods. These techniques adjust the opacity of the element. The code should look quite familiar by now:
function fadeIn(){
$("#content").fadeIn("slow", present);
} // end fadeIn
function fadeOut(){
$("#content").fadeOut("fast");
} // end fadeOut.
function present(){
alert("I'm here");
} // end present
fadeIn() and fadeout() work just like the hide() and slide() techniques. The fading techniques adjust the opacity of the element and then remove it, rather than dynamically changing the size of the element as the slide and show techniques do.
I've added one more element to the fadeIn() function. If you supply the fadeIn() method (or indeed any of the animation methods described in this section) with a function name as a second parameter, that function is called upon completion of the animation. When you click the fade-in button, the content div slowly fades in, and then when it is completely visible, the present() function gets called. This function doesn't do a lot in this example but simply pops up an alert, but it could be used to handle some sort of instructions after the element is visible. A function used in this way is a callback function.
If the element is already visible, the callback method is triggered immediately.
Changing Position with jQuery
The jQuery library also has interesting features for changing any of an element's characteristics, including its position. The animate.html page featured in Figure 3-3 illustrates a number of interesting animation techniques.
You know what I'm going to say, right? This program moves things around. You can't see that in a book. Be sure to look at the actual page. Trust me, it's a lot more fun than it looks in this screen shot.
This page illustrates how to move a jQuery element by modifying its CSS. It also illustrates an important jQuery technique called object chaining and a very useful animation method that allows you to create smooth motion over time. As usual, look over the entire code first; I break it into sections for more careful review.

Figure 3-3: Click the buttons, and the element moves.
<!DOCTYPE html>
<html lang = "en-US">
<head>
<title>Animate.html</title>
<meta charset="UTF-8">
<style type = "text/css">
#content {
width: 300px;
height: 200px;
font-size: 200%;
background-color: yellow;
position: absolute;
left: 300px;
top: 100px;
padding-left: .5em;
}
</style>
<script type = "text/javascript"
src = "jquery-1.10.2.min.js"></script>
<script type = "text/javascript">
$(init);
function init(){
$("#move").click(move2);
$("#glide").click(glide);
$("#left").click(left);
$("#right").click(right);
} // end init
function move2(){
$("#content").css("left", "50px");
$("#content").css("top", "100px");
} // end move2
function move(){
$("#content").css("left", "50px")
.css("top", "100px");
} // end move
function glide(){
//move to initial spot
$("#content").css("left", "50px")
.css("top", "100px");
//slide to new spot
$("#content").animate({
"left": "400px",
"top": "200px"
}, 2000);
} // end glide
function left(){
$("#content").animate({"left": "-=10px"}, 100);
} // end left
function right(){
$("#content").animate({"left": "+=10px"}, 100);
} // end left
</script>
</head>
<body>
<h1>Animation Demo</h1>
<form action = "">
<fieldset>
<button type = "button"
id = "move">
move
</button>
<button type = "button"
id = "glide">
glide
</button>
<button type = "button"
id = "left">
<--
</button>
<button type = "button"
id = "right">
-->
</button>
</fieldset>
</form>
<p id = "content">
This content will move in response to the controls.
</p>
</body>
</html>
Creating the framework
The HTML always forms the foundation. This page is similar to the hideShow page, but I decided to use a real form with buttons as the control panel. Buttons are not difficult to use, but they are a little more tedious to code because they must be inside a form element as well as a block-level element, and they require more coding to produce than H2 elements.
Note that I used < in one of the button captions. This HTML attribute displays the less-than symbol. Had I used the actual symbol (<), the browser would have thought I was beginning a new HTML tag and would have been confused.
The buttons all have id attributes, but I didn't attach functions to them with the onclick attribute. After you're using jQuery, it makes sense to commit to a jQuery approach and use the jQuery event techniques.
 The only other important HTML element is the content div. Once again, this element is simply a placeholder, but I added CSS styling to make it obvious when it moves around. This element must be set to be absolutely positioned because the position will be changed dynamically in the code.
Setting up the events
The initialization is all about setting up the event handlers for the various buttons. An init() function is called when the document is ready. That function contains function pointers for the various events, directing traffic to the right functions when a button is pressed:
function init(){
$("#move").click(move);
$("#glide").click(glide);
$("#left").click(left);
$("#right").click(right);
} // end init
As usual, naming conventions makes it easy to see what's going on.
Don't go chaining . . . okay, do it all you want
The move() function isn't really that radical. All it does is use the css() method described in Book VII, Chapter 2 to alter the position of the element. After all, position is just a CSS attribute, right? Well, it's a little more complex than that.
The position of an element is actually stored in two attributes, top and left.
Your first attempt at a move() function would probably look like this:
function move(){
$("#content").css("left", "50px");
$("#content").css("top", "100px");
} // end move
Although this approach certainly works, it has a subtle problem. It moves the element in two separate steps. Although most browsers are fast enough to avoid making this an issue, jQuery supports a really neat feature called node chaining that allows you to combine many jQuery steps into a single line.
Almost all jQuery methods return a jQuery object as a side effect. So, the line
$("#content").text("changed");
not only changes the text of the content node but also makes a new node. You can attach that node to a variable like this if you want:
var newNode = $("#content").text("changed");
However, what most jQuery programmers do is simply attach new functionality onto the end of the previously defined node, like this:
$("#content").text("changed").click(hiThere);
This new line takes the node created by $(“#content”) and changes its text value. It then takes this new node (the one with changed text) and adds a click event to it, calling the hiThere() function when the content element is clicked. In this way, you build an ever-more complex node by chaining nodes on top of each other.
These node chains can be hard to read because they can result in a lot of code on one physical line. JavaScript doesn't care about carriage returns, though, because it uses the semicolon to determine the end of a logical line. You can change the complex chained line so that it fits on several lines of the text editor like this:
$("#content")
.text("changed")
.click(hiThere);
Note that only the last line has a semicolon because it's all one line of logic even though it occurs on three lines in the editor.
Building the move() function with chaining
Object chaining makes it easy to build the move() function so that it shifts the content's left and top properties simultaneously:
function move(){
$("#content").css("left", "50px")
.css("top", "100px");
} // end move
This function uses the css() method to change the left property to 50px. The resulting object is given a second css() method call to change the top property to 100px. The top and left elements are changed at the same time as far as the user is concerned.
Building time-based animation with animate()
Using the css() method is a great way to move an element around on the screen, but the motion is instantaneous. jQuery supports a powerful method called animate() that allows you to change any DOM characteristics over a specified span of time. The glide button on animate.html smoothly moves the content div from (50, 100) to (400, 200) over two seconds:
function glide(){
//move to initial spot
$("#content").css("left", "50px")
.css("top", "100px");
//slide to new spot
$("#content").animate({
"left": "400px",
"top": "200px"
}, 2000);
} // end glide
The function begins by moving the element immediately to its initial spot with chained css() methods. It then uses the animate() method to control the animation. This method can have up to three parameters:
- A JSON object describing attributes to animate: The first parameter is an object in JSON notation describing name/value attribute pairs. In this example, I'm telling jQuery to change the left attribute from its current value to 400px, and the top value to 200px. Any numeric value that you can change through the DOM can be included in this JSON object. Instead of a numerical value, you can use “hide,” “show,” or “toggle” to specify an action. Review Book IV, Chapter 4 for more details on JSON objects.
- A speed attribute: The speed parameter is defined in the same way as the speed for fade and slide animations. You find three predefined speeds: slow, medium, and fast. You can also indicate speed in milliseconds; for example, 2000 means two seconds.
- A callback function: This optional parameter describes a function to be called when the animation is complete. The use of callback functions is described earlier in this chapter in the section “Fading an element in and out.”
Move a little bit: Relative motion
You can also use the animation mechanism to move an object relative to its current position. The arrow buttons and their associated functions perform this task:
function left(){
$("#content").animate({"left": "-=10px"}, 100);
} // end left
function right(){
$("#content").animate({"left": "+=10px"}, 100);
} // end left
These functions also use the animate() method, but you see a small difference in the position parameters. The += and –= modifiers indicate that I want to add to or subtract from (respectively) the value rather than indicating an absolute position. Of course, you can add as many parameters to the JSON object as you want, but these are a good start.
Note that because I'm moving a small amount (10 pixels), I want the motion to be relatively quick. Each motion lasts 100 milliseconds, or 1/10 of a second.
Modifying Elements on the Fly
The jQuery library supports a third major way of modifying the page: the ability to add and remove contents dynamically. This is a powerful way to work with a page. The key to this feature is another of jQuery's most capable tools — its flexible selection engine. You can also use numerous attributes to modify nodes. The changeContent.html page, shown in Figure 3-4, demonstrates some of the power of these tools.

Figure 3-4: The default state of change-Content is a little dull.
Of course, the buttons allow the user to make changes to the page dynamically. Clicking the Add Text button adds more text to the content area, as you can see in Figure 3-5.
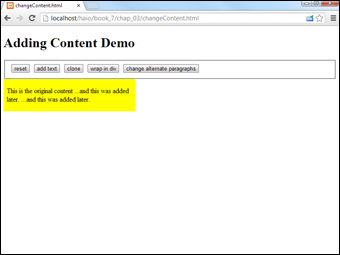
Figure 3-5: More text can be appended inside any content area.
- The clone button is interesting because it allows you to make a copy of an element and place it somewhere else in the document hierarchy. Clicking the clone button a few times can give you a page like that shown in Figure 3-6.

Figure 3-6: I've made several clones of the original content.
- The Wrap in Div button lets you wrap an HTML element around any existing element. The Wrap in Div button puts a div (with a red border) around every cloned element. You can click this button multiple times to add multiple wrappings to any element. Figure 3-7 shows what happens after I wrap a few times.

Figure 3-7: Now you see a red-bordered div around all the cloned elements.
- The Change Alternate Paragraphs button increases readability; Sometimes you want to be able to alternate styles of lists and tables. jQuery has an easy way to select every other element in a group and give it a style. The Change Alternate Paragraphs button activates some code that turns all odd-numbered paragraphs into white text with a green background. Look at Figure 3-8 for a demonstration.

Figure 3-8: All odd-numbered paragraphs have a new style.
- The Reset button resets all the changes you made with the other buttons.
The code for changeDocument.html seems complex, but it follows the same general patterns you've seen in jQuery programming. As always, look over the entire code first and then read how it breaks down:
<!DOCTYPE html>
<html lang = "en-US">
<head>
<title>changeContent.html</title>
<meta charset = "UTF-8">
<style type = "text/css">
#content {
width: 300px;
background-color: yellow;
left: 300px;
top: 100px;
padding-left: .5em;
border: 0px none black;
}
div {
border: 3px solid red;
padding: 2px;
}
</style>
<script type = "text/javascript"
src = "jquery-1.10.2.min.js"></script>
<script type = "text/javascript">
$(init);
function init(){
$("#reset").click(reset);
$("#addText").click(addText);
$("#wrap").click(wrap);
$("#clone").click(clone);
$("#oddGreen").click(oddGreen);
} // end init
function reset(){
//remove all but the original content
$("p:gt(0)").remove();
$("div:not(#content)").remove();
//reset the text of the original content
$("#content").html("<p>This is the original content</p>");
} // end reset
function addText(){
$("p:first").append(" …and this was added later.");
} // end addContent
function wrap(){
$("p:gt(0)").wrap("<div></div>");
} // end wrap
function clone(){
$("p:first").clone()
.insertAfter("p:last")
.css("backgroundColor", "lightblue");
} // end clone
function oddGreen(){
//turn alternate (odd numbered) paragraph elements green
$("p:odd").css("backgroundColor", "green")
.css("color", "white");
} // end oddGreen
</script>
</head>
<body>
<h1>Adding Content Demo</h1>
<form action = "">
<fieldset>
<button type = "button"
id = "reset">
reset
</button>
<button type = "button"
id = "addText">
add text
</button>
<button type = "button"
id = "clone">
clone
</button>
<button type = "button"
id = "wrap">
wrap in div
</button>
<button type = "button"
id = "oddGreen">
change alternate paragraphs
</button>
</fieldset>
</form>
<div id = "content">
<p>
This is the original content
</p>
</div>
</body>
</html>
Admittedly you see a lot of code here, but when you consider how much functionality this page has, it really isn't too bad. Look at it in smaller pieces, and it all makes sense.
Building the basic page
As usual, begin by inspecting the HTML. The basic code for this page sets up the playground:
- Create a form with buttons.
This form will become the control panel. Add a button for each function you want to add. Make sure that each button has an ID, but you don't need to specify an onclick() function because the init() function takes care of that.
- Build a prototype content div.
Build a div called content, and add a paragraph to the div.
Be careful with your initial HTML structure. The manipulation and selection tricks you experiment with in this chapter rely on a thorough understanding of the beginning page structure. Be sure that you understand exactly how the page is set up so that you understand how to manipulate it. If your standard HTML page (before any JavaScript/jQuery code is added) doesn't validate, it's unlikely your code will work as expected.
Initializing the code
The initialization section is pretty straightforward. Set up an init() function, and use it to assign event handlers to all the buttons:
$(init);
function init(){
$("#reset").click(reset);
$("#addText").click(addText);
$("#wrap").click(wrap);
$("#clone").click(clone);
$("#oddGreen").click(oddGreen);
} // end init
Adding text
It's pretty easy to add text to a component. The append() method attaches text to the end of a jQuery node. Table 3-1 shows a number of other methods for adding text to a node.
Table 3-1 Methods That Add Text to a Node
|
Method |
Description |
|
append(text) |
Adds the text (or HTML) to the end of the selected element(s) |
|
prepend(text) |
Adds the content at the beginning of the selected element(s) |
|
insertAfter(text) |
Adds the text after the selected element (outside the element) |
|
insertBefore(text) |
Adds the text before the selected element (outside the element) |
More methods are available, but these are the ones I find most useful. Be sure to check out the official documentation at http://docs.jquery.com to see the other options.
function addText(){
$("p:first").append(" …and this was added later.");
} // end addContent
The append() method adds text to the end of the element, but inside the element (rather than after the end of the element). In this example, the text will become part of the paragraph contained inside the content div. The more interesting part of this code is the selector. It could read like this:
$("p").append(" …and this was added later.");
That would add the text to the end of the paragraph. The default text has only one paragraph, so that makes lots of sense. If there are more paragraphs (and there will be), the p selector can select them all, adding the text to all the paragraphs simultaneously. By specifying p:first, I'm using a special filter to determine exactly which paragraph should be affected.
Many of the examples on this page use jQuery filters, so I describe them elsewhere in the following sections. For now, note that p:first means the first paragraph. Of course, you also see p:last and many more. Read on. . . .
Attack of the clones
You can clone (copy) anything you can identify as a jQuery node. This makes a copy of the node without changing the original. The cloned node isn't immediately visible on the screen. You need to place it somewhere, usually with an append(), prepend(), insertBefore(), or insertAfter() method.
Take a look at the clone() function to see how it works:
function clone(){
$("p:first").clone()
.insertAfter("p:last")
.css("backgroundColor", "lightblue");
} // end clone
- Select the first paragraph.
The first paragraph is the one I want to copy. (In the beginning, only one exists, but that will change soon.)
- Use the clone()method to make a copy.
Now you've made a copy, but it still isn't visible. Use chaining to do some interesting things to this copy.
- Add the new element to the page after the last paragraph.
The p:last identifier is the last paragraph, so insertAfter(“p:last”) means put the new paragraph after the last paragraph available in the document.
- Change the CSS.
Just for grins, chain the css() method onto the new element and change the background color to light blue. This just reinforces the fact that you can continue adding commands to a node through chaining.
Note that the paragraphs are inside content. Of course, I could have put them elsewhere with careful use of selectors, but I put them where I want them.
It's hard to keep track of changes to the page because a standard view source command shows you the original source code, not the code that's been changed by your jQuery magic. jQuery changes the HTML of your page in memory but doesn't change the text file that contains your page. If your page is not doing what you expect, you need to look at the script-generated source code to see what's really going on.
The debugger tools in Chrome or Firebug are the key to debugging all kinds of web coding, especially as things get complex with JavaScript and jQuery. Use the Inspect Element tool to see the actual content of the page. If your jQuery isn't working, be sure to check the console to see if it has sent any error messages. Debugging with the debug tool is described in Book IV, Chapter 3.
Note that the content of the first paragraph is cloned with its current content and style information copied to the new element. If you clone the paragraph and then add content to it and clone it again, the first clone has the default text and the second clone will contain the additional text. If you modify the CSS style of an element and then clone it, the clone also inherits any of the style characteristics of the original node.
It's a wrap
Sometimes you want to embed an object inside another element (or two). For example, the wrap button on the changeContent page surrounds each cloned paragraph with a <div></div> pair. I've defined the div tag in my CSS to include a red border. Repeatedly clicking the wrap button surrounds all cloned paragraphs with red borders. This would be a very tedious effect to achieve in ordinary DOM and JavaScript, but jQuery makes it pretty easy to do:
function wrap(){
$("p:gt(0)").wrap("<div></div>");
} // end wrap
The wrap() method is pretty easy to understand. If you feed it any container tag, it wraps that container around the selected node. You can also use multiple elements, so if you wanted to enclose a paragraph in a single item list, you could do something like this:
$("p").wrap("<ul><li></li></ul>");
The resulting code would surround each paragraph with an unordered list and list item.
Returning to the wrap() function, I've decided not to wrap every paragraph with a div, just the ones that have been cloned. (Mainly I'm doing this so that I can show you some other cool selection filters.) The p:gt(0) selector means to select all paragraphs with an index greater than 0. In other words, ignore the first paragraph, but apply the following methods to all other paragraphs. You also find these filters:
- Less-than (:lt) isolates elements before a certain index.
- Equals (:eq) isolates an element with a certain index.
Alternating styles
It's a common effect to alternate background colors on long lists or tables of data, but this can be a tedious effect to achieve in ordinary CSS and JavaScript. Not surprisingly, jQuery selectors make this a pretty easy job:
function oddGreen(){
//turn alternate (odd numbered) paragraph elements green
$("p:odd").css("backgroundColor", "green")
.css("color", "white");
} // end oddGreen
The :odd selector only chooses elements with an odd index and returns a jQuery node that can be further manipulated with chaining. Of course, you also see an :even selector for handling the even-numbered nodes. The rest of this code is simply CSS styling.
Resetting the page
You need to be able to restore the page to its pristine state. A quick jQuery function can easily do the trick:
function reset(){
//remove all but the original content
$("p:gt(0)").remove();
$("div:not(#content)").remove();
//reset the text of the original content
$("#content").html("<p>This is the original content</p>");
} // end reset
This function reviews many of the jQuery and selection tricks shown in this chapter:
- Remove all but the first paragraph.
Any paragraph with an index greater than 0 is a clone, so it needs to go away. The remove() method removes all jQuery nodes associated with the current selector.
- Remove all divs but the original content.
I could have used the :gt selector again, but instead I use another interesting selector — :not. This removes every div that isn't the primary content div. This removes all divs added through the wrap() function.
- Reset the original content div to its default text.
Set the default text back to its original status so that the page is reset.
All I really need here is the last line of code. Changing the HTML of the content div replaces the current contents with whatever is included, so the first two lines aren't entirely necessary in this particular context. Still, it's useful to know how to remove elements when you need to do so.
More fun with selectors and filters
The jQuery selectors and filters are really fun and powerful. Table 3-2 describes a few more filters and indicates how they might be used.
Note that this is a representative list. Be sure to check out the official documentation at http://docs.jquery.com for a more complete list of filters.
Table 3-2 Selected jQuery Filters
|
Filter |
Description |
|
:header |
Any header tag (H1, H2, H3). |
|
:animated |
Any element that is currently being animated. |
|
:contains(text) |
Any element that contains the indicated text. |
|
:empty |
The element is empty. |
|
:parent |
This element contains some other element. |
|
:attribute=value |
The element has an attribute with the specified value. |