
One of the challenges of designing a Web site is ensuring that buttons, copyright notices, and other cross-site features always remain consistent. Fortunately, Dreamweaver offers a useful feature called Library items that helps you insert repeating elements, such as a navigation bar or a company logo, into every Web page you create. With one command, you can update and maintain Library items efficiently and productively.
In this chapter, you examine the nature and the importance of repeating elements and learn how to effectively use the Dreamweaver Library feature for all your sites. In addition, you see how to use server-side includes—generally known as SSIs—to integrate code and content at both design time and runtime.
Library items within Dreamweaver are another means for you, as a designer, to maintain consistency throughout your site. Imagine that you have a navigation bar on every page that contains links to all the other pages on your site. It's highly likely that you'll eventually (probably more than once) need to make changes to the navigation bar. In a traditional Web development environment, you must modify every single page. This creates numerous opportunities for making mistakes, missing pages, and adding code in the wrong place. Moreover, the whole process is tedious—ask anyone who has had to modify the copyright notice at the bottom of every Web page for a site with more than 1,000 pages.
One traditional method of updating repeating elements is to use server-side includes. A server-side include causes the server to place a component, such as a copyright notice, in a specified area of a Web page when it's sent to the user. This arrangement, however, increases the strain on your already overworked Web server, and many hosting computers do not permit server-side includes for this reason. To add to the designer's frustrations, you can't lay out a Web page in a WYSIWYG (What You See Is What You Get) format and simultaneously see the server-side scripts (unless you're using Dreamweaver). Therefore, you either take the time to calculate the specific amount of space the server-side script takes up on the Web page, or you cross your fingers and guess.
Dreamweaver offers you a better way. You can use an important innovation called the Library. The Library is designed to make repetitive updating quick, easy, and as error-free as possible. The Library's key features include the following:
Any item—whether text or graphic—that goes into the body of your Web page can be designated as a Library item.
After they are created, Library items can be placed instantly in any Web page in your site, without your having to retype, reinsert, or reformat text and graphics.
Library items can be altered at any time. After the editing is complete, Dreamweaver gives you the option to update the Web site immediately or postpone the update until later.
If you are making a number of alterations to your Library items, you can wait until you're finished with all the updates and then make the changes across the board in one operation.
You can update one page at a time, or you can update the entire site all at once.
A Library item can be converted back to a regular non-Library element of a Web page at any time.
Library items can be copied from one site to another.
Library items can combine Dreamweaver behaviors—and their underlying JavaScript code—with onscreen elements, so you don't have to rebuild the same navigation bar every time, reapplying the behaviors repeatedly.
Dreamweaver's Library control center is located on the Assets panel in the Library category. Here you find the tools for creating, modifying, updating, and managing your Library items. Shown in Figure 29-1, the Library category is as flexible and easy to use as Dreamweaver's other primary panels, with straightforward command buttons, a listing of all available Library items, and a handy Preview area.
You have two ways to access the Library items:
Choose Window

Click the Library icon on the Assets panel.
Warning
To use Library items, you must first create a site root folder for Dreamweaver, as explained in Chapter 5; Library items cannot be modified when you are working directly with an FTP or RDS server. A separate Library folder is automatically created to hold the individual Library items and is used by Dreamweaver during the updating process.
Ideally, you save the most time by creating all your Library items before you begin constructing your Web pages, but most Web designers don't work that way. Feel free to include, modify, and update your Library items as often as necessary as your Web site evolves—that's part of the power and flexibility you gain through Dreamweaver's Library.

Figure 29-1. With the Dreamweaver Library feature, you can easily add and modify objects on an entire Web site.
Before you can insert or update a Library item, that item must be designated as a Library item within the Web page. To add an item to your site's Library, follow these steps:
Select any part of the Web page that you want to make into a Library item.
Open the Library category of the Assets panel.
From the Library category (refer again to Figure 29-1), click the New Library Item button.
The selected page element is displayed in the preview area of the Library category. In the Site list—the Library item list—a new entry is highlighted with the default name Untitled.
Note
If the text you've selected has been styled by a CSS rule, Dreamweaver warns you that the appearance may be different because the style rule is not included in the Library item. To ensure that the appearance is the same, include the Library item only on those pages with the appropriate CSS styles.
Enter a unique name for your new Library item and press Enter (Return). The Library item list is re-sorted alphabetically, if necessary, and the new item is included.
When a portion of your Web page has been designated as a Library item, yellow highlighting is displayed over the entire item within the Document window. The highlighting helps you to quickly recognize a Library item. If you find the effect distracting, you can disable it. Go to Edit
Warning
Dreamweaver can include Library items only in the <body> section of an HTML document. You cannot, for instance, create a series of <meta> tags for your pages that must go in the <head> section.
Although Library items are specific to each site, they can be used in more than one site. When you make your first Library item, Dreamweaver creates a folder called Library in the local root folder for the current site. To move the Library item to a new site, follow these steps:
Open the Library category from the Assets panel.
Right-click (Control+click) the Library item you want to move.
Put your mouse over the Copy to Site section of the context menu, and then choose the site you want to copy the Library item to.
Warning
Be sure to move any dependent files or other assets, such as images and media files associated with Library items. The Copy to Site function does not move dependent files.
When you create a Web site, you always need to incorporate certain features, including a standard set of link buttons along the top, a consistent banner on various pages, and a copyright notice along the bottom. Adding these items to a page with the Library items can be as easy as dragging and dropping them.
You must first create a Web site and then designate Library items (as explained in the preceding section). After these items exist, you can add the items to any page created within your site. To add Library items to a document, follow these steps:
Position the cursor where you want the Library item to appear.
From the Library category, select the item you want to use.
Click the Insert button. The highlighted Library item appears on the Web page.
Tip
As noted earlier, you can also use the drag-and-drop method to place Library items in the Document window.
When you add a Library item to a page, you notice a number of immediate changes. As mentioned, the added Library item is highlighted. If you click anywhere on the item, the entire Library item is selected.
Dreamweaver treats the entire Library item entry as an external object being linked to the current page. You cannot modify Library items directly on a page. For information about editing Library entries, see the section "Editing a Library Item," later in this chapter.
While the Library item is highlighted, notice that the Property inspector also changes. Instead of displaying the properties for the HTML object that is selected, the item is identified as a Library item, as shown in Figure 29-2.

Figure 29-2. The Library Item Property inspector identifies the source file for any selected Library entry.
You can also see evidence of Library items in the HTML for the current page. Open the Code inspector, and you can see that several lines of code have been added. The following code example indicates one Library item:
<!-- #BeginLibraryItem "/Library/Copyright.lbi" --><span @ta class="fineprint">Copyright © 2007</span><!-- #EndLibraryItem -->
In this case, the Library item happens to be a phrase: Copyright (c) 2007. (The character entity © is used to represent the c-in-a-circle copyright mark in HTML.) In addition to the span wrapping the copyright, notice the text before and after the HTML code. These are commands within the comments that tell Dreamweaver it is looking at a Library item. One line marks the beginning of the Library item:
<!-- #BeginLibraryItem "/Library/Copyright.lbi" -->
and another marks the end:
<!-- #EndLibraryItem -->
Two items are of interest here. First, notice how the Library demarcation surrounds not just the text (Copyright (c) 2007) but all its formatting attributes as well. Library items can do far more than just cut and paste raw text. The second thing to note is that the Library markers are placed discretely within HTML comments. Web browsers ignore the Library markers and render the code in between them.
The value in the opening Library code, "/Library/Copyright.lbi", is the source file for the Library entry. This file is located in the Library folder, inside of the current site root folder. Library source (.lbi) files can be opened with a text editor or in Dreamweaver; they consist of plain HTML code without the <html> and <body> tags.
The .lbi file for the title example contains the following:
<span class="fineprint">Copyright © 2007</span>
The power of repeating elements is that they are simply HTML. You need not learn proprietary languages to customize Library items. Anything, except for information found in the header of a Web page, can be included in a Library file.
The importance of the <!-- #BeginLibraryItem> and <!-- #EndLibraryItem> tags becomes evident when you start to update Library items for a site. You examine how Dreamweaver can be used to automatically update your entire Web site in the section "Updating Your Web Sites with Libraries," later in this chapter.
Removing an entry from your site's Library is a two-step process. First, you must delete the item from the Library category. Second, if you want to keep the item on your page, you must make it editable again. Before you complete the second step, Dreamweaver maintains the Library highlighting and, more importantly, prevents you from modifying the element.
To delete an item from the Library, follow these steps:
Open the Web page containing the Library item you want to delete.
Open the Library category by choosing Window
Select the Library item in the Site list, and click the Delete button.
Dreamweaver asks if you are sure you want to delete the item. Click Yes, and the entry is removed from the Library item list. (Or click No to cancel.)
In the Document window, select the element you are removing from the Library.
In the Property inspector, click Detach from Original.
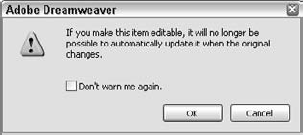
As shown in Figure 29-3, Dreamweaver warns you that if you proceed, the item cannot be automatically updated (as a Library element). Click OK to proceed. The yellow Library highlighting vanishes, and the element can now be modified individually. Check the Don't Warn Me Again box to disable any future warnings about detaching Library items.
Note
Should you unintentionally delete a Library item in the Library category, you can restore it if you still have the entry included in a Web page. Select the element within the page and, in the Property inspector, click the Recreate button. Dreamweaver restores the item, with the original Library name, to the Library item list.
It's easy to rename a Library item, both in the Assets panel and across your site. Dreamweaver automatically updates the name for any embedded Library item. To give an existing Library entry a new name, open the Library category and click the name of the item twice, slowly—do not double-click. Alternatively, you can select Rename from the context menu of the Assets panel. The name is highlighted, and a small box appears around it. Enter the new name and press Enter (Return).
Dreamweaver then displays the Update Files dialog box with a list of files in which the renamed Library item is contained. Select Update to rename the Library item across the site. If you select Don't Update, the Library item is renamed only in the Library category. Furthermore, your embedded Library items are orphaned—that is, no master Library item is associated with them, and they are not updatable.
Building a Library Item
One of the most common—and useful—applications for a Library item concerns site navigation. In this Dreamweaver Technique, you create a Library item for the bottom, text-based navigation and apply it to a number of pages.
From the Techniques site, expand the 28_Library_Items folder and open the
library_items_start1.htmfile.In Design view, move to the bottom of the page and place your cursor in the footer area text navigation.
In the Tag Selector, select the
<p>tag.Although you can create a Library item out of any code fragment, it's generally best to work with a complete tag.
From the Files panel group, click the Assets tab.
Choose the Library category, the last icon on the left side of the Assets panel.
Click New Library Item from the bottom row of the Assets panel.
Dreamweaver reminds you that the Library item may not look the same when inserted in other pages because of the associated CSS; click OK to acknowledge the reminder.
Your selection is converted into a Library item and displayed in the Assets panel.
Replace the Untitled Library item name with textNavigation, and press Enter (Return).
Dreamweaver asks if you'd like to update the links in the current
.lbifile; click Update.
Save your page.
If you have Invisible Elements enabled, you might notice a light yellow highlight around the text navigation now; this indicates that it is no longer directly editable and is now a Library item.
Rarely do you create a Library item that is perfect from the beginning and never needs to be changed. Whether because of site redesign or the addition of new sections to a site, you'll find yourself going back to Library items and modifying them, sometimes repeatedly. You can use the full power of Dreamweaver's design capabilities to alter your Library items, within the restraints of Library items in general. In other words, you can modify an image, reformat a body of text, or add new material to a boilerplate paragraph, and the resulting changes are reflected across your Web site. However, you cannot add anything not contained in the HTML <body> tags to a Library item.
To modify Library items, Dreamweaver uses a special editing window identifiable by the double-angle-brackets surrounding the phrase Library Item in the title bar. You access this editing window through the Library category or the Property inspector. Follow these steps to modify an existing Library item:
In the Library category of the Assets panel, select the item you want to modify from the list of available entries.
Click the Open Library Item button. The Library editing window opens with the selected entry, as shown in Figure 29-4.
Make any necessary modifications to the Library entry.
When you are finished with your changes, choose File
Dreamweaver notes that your Library item has been modified and then asks if you would like to update all the Web pages in your site that contain the item. Click Yes to update all the Library items, including the one just modified, or click No to postpone the update. (See the next section, "Updating Your Web Sites with Libraries," for a more in-depth explanation of the updating process.)
Close the editing window by clicking the Close button or choosing File

After you've completed the editing operation and closed the editing window, you can open any Web page containing the modified Library item to view the changes.
Tip
If your Library item is styled with an external style sheet and you'd like to see how it renders while editing, use Dreamweaver's Design Time Style Sheet feature. From the CSS Styles panel Option menu, select Design Time; when the Design Time Style Sheet dialog opens, select the style sheet from the Show Only at Design Time area.
Dreamweaver now allows you to use native Dreamweaver behaviors inside Library items. That means you can place a navigation bar, a link for a pop-up window, or any other Dreamweaver behavior inside your Library item. When the Library item is added to the page, the accompanying JavaScript is also added.
Warning
You cannot use some features to the fullest extent when editing Library items. These include custom JavaScript and styles. Each of these modifications requires a function or link to be placed in the <head> tags of a page—a task that the Dreamweaver Library function cannot handle for styles and custom JavaScript.
The effectiveness of the Dreamweaver Library feature becomes more significant when it comes time to update an entire multipage site. Dreamweaver offers two opportunities for you to update your site:
Immediately after modifying a Library item, as explained in the preceding steps for editing a Library item
At a time of your choosing, through the Modify
You can immediately update every page on your site when you edit a Library item. After you save the alterations, Dreamweaver asks if you'd like to apply the update to Web pages in your site. If you click Yes, Dreamweaver not only applies the current modification to all pages in the site, but it also applies any other alterations that you have made previously in this Library.
The second way to modify a Library item is by using the Modify
To update just the current page, choose Modify
To update an entire Web site, follow these steps:
Choose Modify
If you want Dreamweaver to update all the Library items in all the Web pages in your site, select Entire Site from the Look In drop-down list and choose the name of your site in the drop-down list on the right. You can also have Dreamweaver update only the pages in your site that contain a specific Library item. Select the Files That Use option from the Look In drop-down list and then select the Library item that you would like to have updated across your site from the drop-down list on the right.
If you want to see the results from the update process, leave the Show Log checkbox selected. (Turning off the Show Log option reduces the size of the Site Update dialog box.)
Click the Start button. Dreamweaver processes the entire site for Library updates. Any Library items contained are modified to reflect the changes.

Note
Although Dreamweaver does modify Library items on currently open pages during an Update Site operation, you have to save the pages to accept the changes.
The Update Pages log displays any errors encountered in the update operation. The following log notation indicates that one Web page contains a reference to a Library item that has been removed:
item LibraryUntitled2.lbi -- not updated, library item not found
Although this is not a critical error, you might want to use Dreamweaver's Find and Replace feature to search your Web site for the code and remove it.
Note
When updating Library items, every page is physically changed with the necessary Library item code. This means that every file containing a Library item must be uploaded to the server.
Applying and Modifying Library Items
In this Technique, you see how easy it is to add a Library item to the page and update them as necessary.
From the Techniques site, open the
library_items_start2.htmfile from the 28_Library_Items folder.Place your cursor at the bottom of the page in the
#footerdiv.Select the placeholder
<p>tag there and remove it by pressing Delete.From the Assets panel, select the Library category if necessary.
Choose the textNavigation entry.
Click Insert at the bottom of the Assets panel.
You can also drag Library items onto the page.
Save your page.
Now that you have the same Library item in a couple of locations, alter it. Double-click the textNavigation Library item.
Dreamweaver opens the Library item file in its own window.
Place your cursor after the About Us link and enter the following: - Guides.
Select the word Guides and, from the Property inspector's Link field, drag the Point to File icon to the file guides.htm in the 29_Library_Items folder.
It's always best to let Dreamweaver create the links for templates and Library items.
Choose File
Dreamweaver displays the Update Library Items dialog box with the pages containing the current Library item. Click Update.
While Dreamweaver processes the modifications, the Update Pages dialog box is displayed; click Close when it's finished.

Close the
textNavigation.lbifile.Notice that the
library_items_start2.htmfile has been modified and the new item is now available from the text navigation.Choose File
If you like, you can open the original file, library_items_start1.htm, to verify that it, too, has been updated.
In some ways, the server-side include (SSI) is the predecessor of the Dreamweaver Library item. The difference between them is that Dreamweaver updates the Web pages with Library items at design time; whereas, the server handles the updating with server-side includes at runtime (when the files are actually served to the user). Server-side includes can also include server variables, such as the current date and time (both local and Greenwich mean time) or the date on which the current file was last saved.
Because server-side includes are integrated in the standard HTML code, a special file extension identifies pages using them. Any page with server-side includes is most often saved with either the .shtml or .shtm extension on UNIX servers and .asp or .aspx on Windows servers. When a server encounters such a file, the file is read and processed by the server.
Warning
Not all servers support server-side includes. Some Web-hosting companies disable the function because of potential security risks and performance issues. Each .shtml page requires additional processing time, and if a site uses many SSI pages, the server can slow down significantly. Be sure to check with your Web host as to its policy before including SSIs in your Web pages.
Server-side includes are often used to insert header or footer items into the <body> of an HTML page. Typically, the server-side include itself is just a file with HTML. To insert a file, use SSI code like the following:
<!-- #include file="footer.html" -->
Note how the HTML comment structure is used to wrap around the SSI directive. This ensures that browsers ignore the code but servers do not. The file attribute defines the pathname of the file to be included, relative to the current page. To include a file relative to the current site root, use the virtual attribute, as follows:
<!-- #include virtual= "/main/images/spaceman.jpg" -->
As evident in this example, you can use SSIs to include more than just HTML files—you can also include graphics.
With Dreamweaver's translator mechanism, server-side includes are visible in the Document window during the design process. In Dreamweaver, server-side–include translation is now automatic as long as the Show Contents of Included File option, found in the Invisible Elements category of Preferences, remains enabled.
One of the major benefits of SSIs is that information can be inserted from the server itself, such as the current file size or time. One tag, <!-- #echo -->, is used to define a custom variable that is returned when the SSI is called, as well as numerous environmental variables. An environmental variable is information available to the server, such as the date a file was last modified or its URL.
Table 29-1 details the possible server tags and their attributes.
Table 29-1. Server-Side–Include Variables
Tag | Attribute | Description |
|---|---|---|
|
| Used to customize error messages, file size, or time and date displays |
|
| Returns the specified variable |
|
| Executes a system command or CGI program |
|
| Displays the last modified date of a file other than the current one |
|
| Displays the size of a file other than the current one |
|
| Inserts the contents of the specified file into the current one |
Dreamweaver has made inserting a server-side include in your Web page straightforward. You can use a Dreamweaver object to easily select and bring in the files to be included. Any other type of SSI, such as declaring a variable, must be entered by hand, but you can use the Comment object to do so without opening the Code view.
To use server-side includes to incorporate a file, follow these steps:
In the Document window, place your cursor at the location where you would like to add the server-side include.
Choose Insert
In the Select File dialog box, type the URL of the HTML page you would like to include in the File Name text box or use the Browse button to locate the file. Click OK when you're finished.
Note
Through the Select File dialog box, you can also select a data source for a dynamically inserted SSI or link to an SSI already published on a server through the Sites and Servers interface. However, SSIs inserted in this manner can be previewed in Dreamweaver only in the Live Data view.
Dreamweaver displays the contents of the HTML file at the desired location in your page. Should the Property inspector be available, the SSI Property inspector is displayed (see Figure 29-6).
In the Property inspector, if the server-side include calls a file-relative document path, select the Type File option. Alternatively, if the SSI calls a site-root–relative file, choose the Type Virtual option.

As is the case with Library items, you cannot directly edit files that have been inserted into a Web page using server-side includes. In fact, should you try, the entire text block highlights as one. The text for a server-side–included file is not editable through Dreamweaver's Code view, although the SSI code is.
To edit the contents of the server-side–included file, follow these steps:
Select the server-side include in the Document window.
Click the Edit button in the SSI Property inspector. The file opens in a new Dreamweaver window for editing.
When you've finished altering the file, choose File
Close the file editing window by choosing File
Dreamweaver automatically reflects the changes in your currently open document.
Unlike when you are editing Library items, Dreamweaver does not ask if any other linked files should be updated because all blending of regular HTML and SSIs happens at runtime or when the file is open in Dreamweaver and the SSI translator is engaged.
In this chapter, you learned how you can easily and effectively create Library items that can be repeated throughout an entire site to help maintain consistency. When you work with Library items, keep these points in mind:
Library items can consist of any text, object, or HTML code contained in the
<body>of a Web page.The quickest method to create a Library item is to drag the code from the Dreamweaver Document window into the Library category's list area.
Editing Library items is also easy: Just click the Edit button in the Assets panel or choose Open from the Property inspector, and you can swiftly make all your changes in a separate Dreamweaver Library Item window.
The Modify
Server-side includes enable the server to insert files into the final HTML at runtime. Dreamweaver's translation feature enables you to preview these effects.
In the next chapter, you learn how to ensure cross-browser compatibility with Dreamweaver.