
Using the Timelines panel
Incorporating timelines
Dreamweaver Technique: Setting Up a Slideshow
Automatically starting and looping a timeline
Altering timelines with keyframes
Putting behaviors into timelines
Dreamweaver Technique: Making the Slideshow Interactive
Motion implies time. A static object, such as an ordinary HTML Web page, can exist either in a single moment or over a period of time. Conversely, moving objects (such as Dynamic HTML AP elements flying across the screen) need a few seconds to complete their path. All of Dreamweaver's Dynamic HTML animation effects use the Timeline feature to manage this conjunction of movement and time.
Timelines can do much more than move an AP element across a Web page, however. A timeline can coordinate an entire presentation: starting the background music, scrolling the opening rolling credits, and cueing the voice-over narration on top of a slideshow. These actions are all possible with Dreamweaver because, in addition to controlling an AP element's position, timelines can also trigger any of Dreamweaver's JavaScript behaviors on a specific frame.
This chapter explores the full and varied world of timelines. After an introductory section brings you up to speed on the underlying concepts of timelines, you learn how to insert and modify timelines to achieve cutting-edge effects. From complex animations to slideshow presentations, you can do it all with Dreamweaver timelines.
Note
Because timelines are so intricately intertwined with AP elements and behaviors, you need to have a good grasp of these concepts. If you're not familiar with the topics of AP elements and behaviors, be sure to read Chapters 11 and 12.
Dreamweaver timelines are implemented in HTML code. For the movement of one AP element straight across a Web page, Dreamweaver generates about 70 lines of code devoted to initializing and playing the timeline. But just what is a timeline? A timeline is composed of a series of frames. A frame is a snapshot of what the Web page—more specifically, the objects on the timeline—looks like at a particular moment. You probably know that a movie is made up of a series of still pictures; when viewed quickly, the pictures create the illusion of movement. Each individual picture is a frame; movies show 24 frames per second (fps), and video uses about 30 fps. Web animation, on the other hand, generally displays about 15 fps. Not surprisingly, Dreamweaver's timeline is similar to the one used in Adobe's timeline-based, multimedia authoring tool and animation package, Director.
If you have to draw each frame of a 30-second animation, even at 15 fps, you won't have time for other work. Dreamweaver uses the concept of keyframes to make a simple AP element movement workable. Each keyframe contains a change in the timeline object's properties, such as position. For example, suppose you want your AP element to start at the upper left (represented by the coordinates 0,0) and travel to the lower right (at 750,550). To accomplish this task, you need only specify the AP element's position for the two keyframes—the start and the finish—and Dreamweaver generates all the frames in between.
Timelines have three primary roles:
A timeline can alter an AP element's position, dimensions, visibility, and depth.
Timelines can change the source for any image on a Web page and cause another graphic of the same height and width to appear in the same location.
Any of Dreamweaver's JavaScript behaviors can be triggered on any frame of a timeline.
Keep the following basic guidelines in mind when you're using timelines in the Web pages you create with Dreamweaver:
Timelines require a 4.0 or later browser.
When testing locally on Internet Explorer 6 or 7 on Windows XP with Service Pack 2 or Internet Explorer 7 on Vista, the browser blocks the active content as a security measure. Designers can choose Commands

For a timeline to animate an object, such as text, the object must be within an AP element. If you try to create a timeline with an element that is not in an AP element, Dreamweaver warns you and prevents you from adding the object to the timeline.
Events don't have to start at the beginning of a timeline. If you want to have an action begin 5 seconds after a page has loaded, and you have a frame rate of 15 fps, for example, you can set the behavior on frame 60 of the timeline.
The selected frame rate is a "best-case scenario" because the actual frame rate depends on the user's system. A slower system or one that is simultaneously running numerous other programs can easily degrade the frame rate.
You can include multiple animations on one timeline. The only restriction is that you can't have two animations affecting the same AP element at the same time. Dreamweaver prevents you from making this error.
You can have multiple timelines that animate different AP elements simultaneously or the same AP element at different times. Although you can set two or more timelines to animate the same AP element at the same time, the results are difficult to predict and generally unintended.
Note
If you move a timeline's JavaScript code from its file of origin into an external JS file, serious timeline execution problems can occur in some browsers. For this reason, I heartily recommend leaving all your timeline code in its original file.
Dreamweaver provides an excellent tool for managing timelines—the Timelines panel. Open it by choosing Window
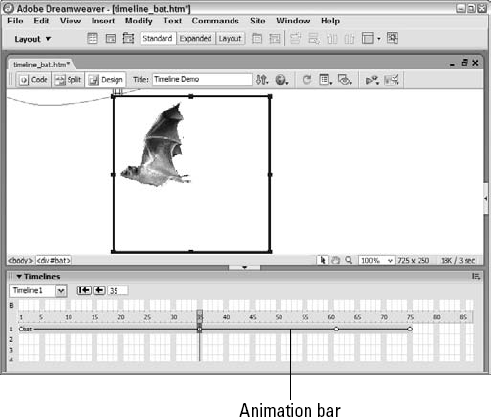
The Timelines panel (see Figure 17-1) uses VCR-style controls combined with a playback head, which is a visual representation showing which frame is the current one. It gives you full control over any of the timeline functions.

Figure 17-1. Dreamweaver's Timelines panel enables you to quickly and easily master animation control.
The Timelines panel has four major areas:
Timeline controls: Includes the Timeline drop-down list for selecting the current timeline; the Rewind, Back, and Play buttons; the fps (frame rate) text box; and the Autoplay and Loop checkboxes
Behavior channel: Shows the placement of any behaviors attached to specific frames of the timeline
Frames: Displays the frame numbers for all timelines and the playback head showing the current frame number
Animation channels: Represents the animations for any included AP elements and images
As with many of Dreamweaver's functions, you can add an AP element or an image to the Timelines panel in more than one way. You can insert an AP element into a timeline through the menus (Modify
Choose Window
In the Document window, select the AP element or image you want to add to the timeline.
Bear in mind that you can use timelines to move an AP element around the browser window, but not to move an image (unless it is contained in an AP element). The only thing timelines can do with respect to an image is to change its source, causing another graphic of the same height and width to appear in the same location.
Choose Modify
To add another object, repeat steps 2 and 3. As previously noted, you can add as many objects to a timeline as you desire. Each additional animation bar is inserted beneath the preceding bar.
Note
The first time you add an image or AP element to the Timelines panel, Dreamweaver displays an alert message that details the limitations of timelines. If you don't want to see this alert, turn it off by checking the Don't Show Me This Message Again checkbox.
You have a little more flexibility when you add an object by dragging it into the timeline. Instead of the animation bar always beginning at frame 1, you can drop the object in to begin on any frame. This approach is useful, especially if you are putting more than one object into the same animation channel. To place an object in a timeline with the drag-and-drop method, follow these steps:
Open the Timelines panel by choosing Window
In the Document window, select the object—AP element or image—that you want to add to the timeline and drag it to the Timelines panel. As soon as the object is over the Timelines panel, a 15-frame animation bar appears.
Holding the mouse button down, position the animation bar so that the animation begins in the desired frame. Release the mouse button to drop the object into the timeline.
Note
Your placement does not have to be exact; you can modify it later.
Placing an AP element or image on a timeline is just the first step. To begin using your timeline in depth, you have to make changes to the object for the keyframes and customize the timeline.
Setting Up a Slideshow
In this Technique, you create a user-controlled slideshow, with the capability to play, pause, and stop. The first step is to set up the timeline and appropriate keyframes.
Warning
This Technique works only in Windows.
In the Files panel, switch to the Dreamweaver Bible working site previously created.
Go to Techniques17_Timelines and open the file timelines_start.htm.
Choose Window
Drag the image above the slideshow controls down onto the timeline; be sure to position the timeline so that it starts at frame 1.
This particular example cycles three images through the slideshow; by design, the image will change every 10 frames, so you'll need 30 frames to complete the show. Drag the final keyframe to frame 30 to extend the timeline.
Select frame 10, right-click (Control-click), and choose Add Keyframe.
Repeat step 6 on frame 20.
Next, you set the Src property of the image on the timeline for each keyframe. Select frame 10 and, in the Property inspector, set the Src value to apt_view2.jpg in the images folder at the site root.
Repeat step 8 for frame 20 setting the Src value to apt_view3.jpg in the images folder at the site root.
Make sure that the frame 30 Src value is set to apt_view1.jpg.
Save your page.
The final keyframe could either be set to the last image in the series or the first. In the next Dreamweaver Technique, you set the timeline to loop as well as add player interactivity.
When you add an object—either an image or an AP element—to a timeline, notice that the animation bar has an open circle at its beginning and end. An open circle marks a keyframe. As previously explained, the designer specifies a change in the state of the timeline object in a keyframe. For example, when you first insert an AP element, the two generated keyframes have identical properties—the AP element's position, size, visibility, and depth are unchanged. For any animation to occur, you have to change one of the AP element's properties for one of the keyframes. For example, to move an AP element quickly across the screen, follow these steps:
Create an AP element. If you like, add an image or a background color so that the AP element is more noticeable.
Open the Timelines panel.
Drag the AP element into the Timelines panel and release the mouse button.
Select the ending keyframe of the AP element's animation bar.
The playback head (red rectangle) moves to the new frame.
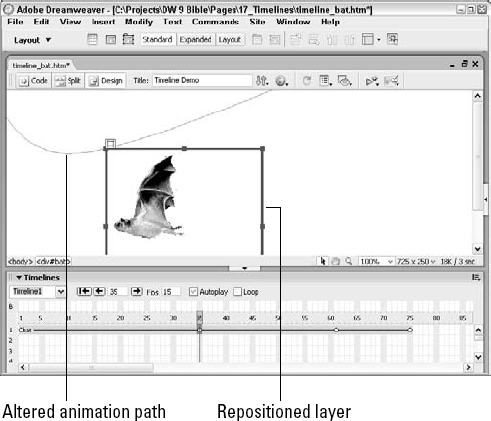
In the Document window, grab the AP element's selection handle and drag the AP element to a new location. A thin line connects the starting position of the AP element to the ending position, as shown in Figure 17-3. This line is the animation path.
To preview your animation, first click the Rewind button in the Timelines panel and then click and hold down the Play button.
If you want to change the beginning position of your AP element's animation path, select the starting keyframe and then move the AP element in the Document window. To alter the final position of the AP element's animation path, select the ending keyframe and then move the AP element.
Note
For more precise control of your AP element's position in a timeline, select a keyframe and, in the AP element's Property inspector, change the Left and/or Top values. You can also select the AP element and use the arrow keys to move it.
A Web designer can easily stretch or alter the range of frames occupied by an AP element or image in an animation bar. You can make an animation longer or smoother, or have it start at an entirely different time. You can also move the AP element to a different animation channel so it runs before or after another animation.
Use the mouse to drag an animation bar around the timeline. Click any part of the bar except the keyframe indicators and move it as needed. To change the length of an animation, select the first or final keyframe and drag it forward or backward to a new frame.

Use either of the following techniques to remove (delete) an animation bar:
Select the animation bar by clicking anywhere on it, and choose Modify
Right-click (Control+click) the animation bar and choose Remove Object from the context menu.
As you probably noticed if you worked through the example in the preceding section, you don't have to use a browser to preview a timeline. The Timeline controls shown in Figure 17-4 enable you to fine-tune your animations before you view them through a browser.
Tip
If you're using the Timelines panel controls to play a timeline animation that moves below the visible portion of the Document window, you can press F4 to hide the Timelines panel (and all other Dreamweaver panels) to maximize screen space. To redisplay your panels, press F4 again.
At the top-left corner is the Timeline drop-down list, which is used to indicate the current timeline. By default, every new timeline is given the name Timelinen, where n indicates how many timelines have been created. You can rename the timeline by selecting it and typing in the new name. It's a good practice to give each timeline a descriptive, recognizable name; you'll appreciate it as you accumulate and use more timelines.

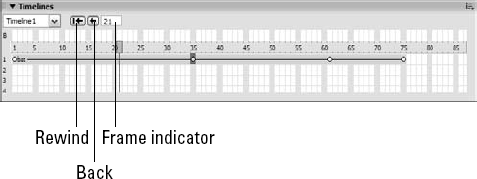
Figure 17-4. The Timeline controls enable you to move back and forth in your timeline, easily and precisely.
Note
A timeline name must have an alphanumeric, one-word name that begins with a letter, such as FlyingBat2.
The next three buttons in the control bar enable you to move through the frames of a timeline. From left to right:
Rewind: Moves the playback head to the first frame of the timeline.
Back: Moves the playback head to the previous frame of the timeline. You can hold down the Back button to play the timeline in reverse. This behavior loops: When the first frame is reached, the playback head automatically moves to the last frame of the timeline and continues playing it.
Play: Moves the playback head to the next frame; hold down the Play button to play the timeline normally. As with the Back button, this behavior loops: When the last frame is reached, the playback head moves to the first frame of the current timeline and continues.
The field between the Back and Play buttons is the Frame Indicator text box. To jump to any specific frame, enter the frame number in this box.
The next item in the control bar is the Fps (frames per second) text box. To change the frame rate, enter a new value in the Fps text box and press Tab or Enter (Return). The frame rate you set is an ideal number that a user's browser attempts to reach. The default rate of 15 frames per second is a good balance for both Macintosh and Windows systems.
Tip
Because browsers play every frame regardless of the frame rate setting, increasing the frame rate does not necessarily make your animations smoother. A better way to create smooth animations is to drag the end keyframe farther out, which increases the number of frames used by your animation.
The next two checkboxes, Autoplay and Loop, affect how the animation is played.
If you enable the Autoplay option, the timeline begins playing as soon as the Web page is fully downloaded. Dreamweaver alerts you to this arrangement by telling you that the Play Timeline action is attached to an onLoad event. Autoplay is achieved by inserting code that looks similar to the following into the <body> tag:
Note
<body bgcolor="#FFFFFF" onload="MM_timelinePlay('Timeline1')">
Warning
If you don't use the Autoplay feature, you must attach the Play Timeline action to another event and tag, such as onClick and a button graphic. Otherwise, the timeline will not play. Note that if your Show Events For option is set to 3.0 and Later Browsers, the only available event is onMouseOver. To make onClick and other events available, change the Show Events For to 4.0 and Later Browsers by choosing Add (+) from the Behaviors panel, then selecting Show Events For
Mark the Loop checkbox if you want an animation to repeat once it has reached the final frame. When Loop is enabled, the default causes the AP element to replay itself an infinite numbers of times, although you can change this setting.
When you first enable the Loop checkbox, Dreamweaver alerts you that it is placing a Go To Timeline Frame action after the last frame of your timeline. To set the number of repetitions for a looping timeline, follow these steps:
In the Timelines panel, check the Loop checkbox.
Dreamweaver displays an alert informing you that the Go To Timeline Frame action is being added one frame past your current final frame. To disable these alerts, select the Don't Show Me This Message Again option.
In the Behaviors channel (the Timeline channel marked with a B, as shown in Figure 17-1), double-click the behavior you just added.
Note
When you first add a behavior to a timeline, Dreamweaver presents a dialog box reminding you how to perform this action. Select the Don't Show Me This Message Again option when you've mastered the technique.
The Behaviors panel opens, with an
onFrameevent in the Events column and a Go To Timeline Frame action in the Actions pane.Double-click the
onFrameevent. The Go To Timeline Frame dialog box opens (see Figure 17-5).Enter a positive number in the Loop text box to set the number of times you want your timeline to repeat. To keep the animation repeating continuously, leave the Loop text box blank.
Click OK when you are finished.
Animating a timeline can go far beyond moving your AP element from point A to point B. AP elements (and the content within them) can dip, swirl, zigzag, and generally move in any fashion—all made possible by keyframes in which you have entered some change for the object. Dreamweaver calculates all the differences between each keyframe, whether the change is in an AP element's position or size. Each timeline starts with two keyframes: the beginning and the end; you have to add other keyframes before you can insert the desired changes.
You can add a keyframe to a timeline in two different ways. The first method uses the Add Keyframe command (as practiced in the preceding Dreamweaver Technique), and the second method uses the mouse to click a keyframe into place.
Note
Do not confuse the Add Keyframe command with the Add Frame command, both of which are found in the Modify
To add a keyframe with the Add Keyframe command, follow these steps:
In the Timelines panel, select the animation bar for the object with which you are working.
Select the frame in which you want to add a keyframe.
Add your keyframe by one of the following methods:
Choose Modify
Right-click (Control+click) the frame in the animation bar and, from the context menu, choose Add Keyframe.
A new keyframe is added on the selected frame, signified by the open circle in the animation bar.
While your new keyframe is selected, you can alter the AP element's position, size, visibility, or depth. For example, if your animation involves moving an AP element across the screen, you can drag the AP element to a new position while the new keyframe is selected. The animation path is redrawn to incorporate this new position, as illustrated in Figure 17-6.
The second method is quicker. To add a keyframe using the mouse, simply hold down the Ctrl (Command) key and click anywhere in the animation bar. Your cursor turns into a small open circle when it is over the Timeline window to show that it is ready to add a new keyframe.
What if you want to move the keyframe? Simply click and drag the keyframe to a new frame, sliding it along the animation bar in the Timelines panel.
Tip
If, after plotting out an elaborate animation with an AP element, you discover that you need to shift the entire animation—for example, 6 pixels to the right—you don't have to redo all your work. Just select the animation bar in the Timelines panel and then, in the Document window, move the AP element in question. Dreamweaver shifts the entire animation to your new location.
To remove an element from the Timelines panel:
Select the element that you want to remove.
Choose Modify
For example, to remove a keyframe, select the keyframe and choose Modify
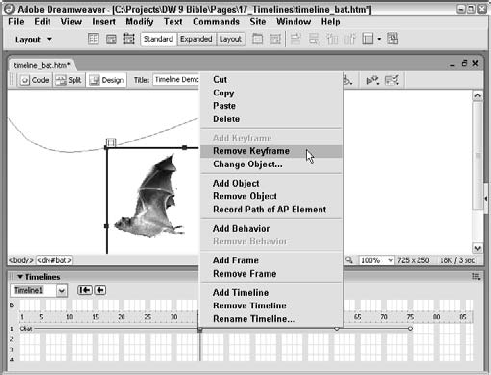
The context menu in the Timelines panel also contains all the removal commands. Right-click (Control+click) the Timelines panel element you want to remove and, in the context menu (see Figure 17-7), choose the desired removal command: Remove Keyframe, Remove Object, Remove Behavior, Remove Frame, or Remove Timeline. Alternatively, right-click (Control+click) the element and simply choose Delete from the context menu.
You can alter your Dynamic HTML animation speed with two different methods that can be used separately or together:
Drag out the final keyframe in the animation bar to cover additional frames, or drag it back to cover fewer frames. Any keyframes within the animation bar are kept proportional to their original settings. This method works well in conjunction with altering the speed of an individual animation bar.
Change the frames per second value in the Fps text box of the Timelines panel. Increasing the number of frames per second accelerates the animation, and vice versa. Adjusting the Fps value affects every AP element contained within the timeline; you cannot use this method for individual AP elements.
Warning
Browsers play every frame of a Dynamic HTML animation, regardless of the system resources. As a result, some systems play the same animation faster or slower than others. Don't assume every system has the same timing.
Plotting keyframes and repositioning your AP elements works well when you need to follow a pixel-precise path, but it can be extremely tedious when you're trying to move an AP element more freely on the screen. Luckily, Dreamweaver provides you with an easier method for defining an AP element's movement path. You can simply drag your AP element around the screen to create a path, and refine the path or its timing afterward.
The Record Path of AP Element command automatically creates the necessary series of keyframes, calculated from your dragging of the AP element. To fine-tune your work, you can select any of these keyframes and reposition the AP element or even delete it entirely. This feature is a definite time-saver for DHTML animationists.
Keep in mind that a timeline represents not only positions but also positions over time and, therefore, movement. The Record Path of AP Element command is very smart when it comes to time; the slower you drag the AP element, the more keyframes are plotted. You can vary the positioning of the keyframes by changing the tempo of your dragging. Moreover, the duration of the recorded timeline reflects the length of time spent dragging the AP element. To record an AP element's path, perform the following steps:
In the Document window, select the AP element you are going to move.
Warning
Make sure that you've selected the AP element itself and not its contents. If you've correctly selected the AP element, it has eight selection boxes around it.
Drag the AP element to the location in the document where you want it to be at the start of the movement.
Right-click (Control+click) the selected AP element and choose Record Path from the context menu. If it's not already open, the Timelines panel appears.
Click the AP element and drag it around onscreen to define the movement. As you drag the AP element, Dreamweaver draws a gray line that indicates the path it is creating (see Figure 17-8).
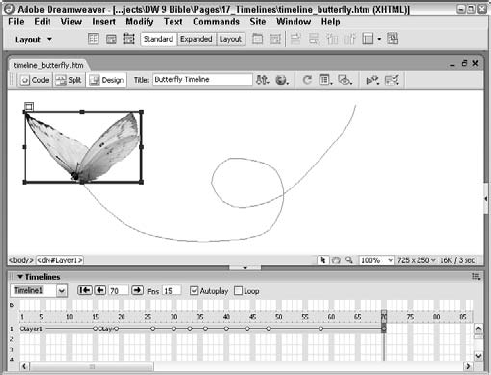
Figure 17-8. To record an AP element's path, Select Modify
TimelineRecord Path of AP Element and drag your AP element in the Document window.Each gray dot represents a keyframe. The slower you draw, the closer the keyframes are placed; moving quickly across the Document window causes Dreamweaver to space out the keyframes.
Release the mouse to end the recording.
Dreamweaver displays an alert reminding you of the capabilities of the Timelines panel. Select the Don't Show Me This Message Again option to prevent this dialog box from reappearing.
After you've finished recording an AP element's movement, you see a new animation bar in the Timelines panel, representing the motion you just recorded. The duration of the new timeline matches the duration of your dragging of the AP element. The keyframes that define your AP element's movement (as described in the preceding paragraphs) are inserted in this animation bar. You can use any of the procedures previously described in this chapter to modify the timeline or its keyframes. If you select the same AP element at the end of the generated timeline and perform the Record Path operation again, another animation bar is added at the end of the current timeline.
Warning
Any new paths recorded with the same AP element are added after the last animation bar. You can't select a keyframe in the middle of a path and then record a path from that point; the starting keyframe of the newly recorded path corresponds to the position of the AP element in the last keyframe.
Adding a behavior to a timeline is similar to adding a behavior to any object on a Web page. Because timelines are written in JavaScript, they behave exactly the same as any object enhanced with JavaScript.
Use the Behaviors channel section of the Timelines panel to work with behaviors in timelines. You can attach a behavior to a timeline in four ways:
Select the frame in which you want to have the behavior, then right-click (Control+click) and select Add Behavior from the context menu.
Select the frame in which you want to activate the behavior and choose Modify
Open the Behaviors panel and click the frame you want to modify in the Behaviors channel.
Double-click the frame for which you want to add a behavior in the Behaviors channel.
When you attach a behavior to a frame, you can see in the Behaviors panel that the event inserted in the Events column is related to a frame number—for example, onFrame20. Each frame can trigger multiple actions.
Note
For more specifics about Dreamweaver behaviors, see Chapter 12.
Behaviors are essential to timelines. Without behaviors, you cannot play or stop your timeline-based animations. Even when you select the Autoplay or Loop options in the Timelines panel, you are enabling a behavior. The three behaviors always deployed for timelines are Play Timeline, Stop Timeline, and Go To Timeline Frame.
If you are not using the Autoplay feature for your timeline, you must explicitly attach a Play Timeline behavior to an interactive or other event on your Web page. For example, a timeline is typically set to start playing once a specific picture has loaded, or once the user has entered a value in a form's text box, or—more frequently—once the user selects a Play button. You could use the Stop Timeline behavior to pause an animation temporarily.
To use the Play Timeline or Stop Timeline behavior, follow these steps:
In the Document window, select a tag, link, or image that you want to trigger the event.
Choose Window
In the Behaviors panel, click the Add (+) button, and from the drop-down list, choose either of the following methods:
Timeline
Timeline
In the Play Timeline or Stop Timeline dialog box (see Figure 17-9), choose the timeline that you want to play (or stop) from the Timeline drop-down list.
Click OK when you are finished.
Select an event to trigger the behavior from the drop-down list in the Events column in the Behaviors panel.

Note
As mentioned earlier, if your Show Events For option is set to 3.0 and Later Browsers, the only available event is onMouseOver. To make onClick and other events available, change the Show Events For to 4.0 and Later Browsers by choosing Add (+) from the Behaviors panel, then selecting Show Events For
When you select the option to loop your timeline, Dreamweaver automatically inserts a Go To Timeline Frame behavior with the first frame set as the target. You can display any frame on your timeline by inserting the Go To Timeline Frame behavior manually. To use the Go To Timeline Frame behavior, follow these steps:
In the Document window, select a tag, link, or image that you want to trigger the event.
Choose Window
In the Behaviors panel, click the Add (+) button and choose Timeline
In the Timeline field of the Go To Timeline Frame dialog box, choose the timeline you want to affect.
Enter the desired frame number in the Go To Frame text box.
If you'd like the timeline to loop a set number of times, enter a value in the Loop text box. Click OK when you are finished.
Remember that if you don't enter a value, the timeline loops endlessly.
Tip
Depending on the type of effect desired, you may want to use two of the timeline behaviors together. To ensure that your timeline always starts from the same point, first attach a Go To Timeline Frame behavior to the event and then attach the Play Timeline behavior to the same event.
Making the Slideshow Interactive
In this Technique, you add behaviors to control the timeline, both automatically and under user operation.
Warning
This Technique works only in Windows.
Re-open the previously saved file, timelines_start.htm.
In the Timelines panel, select the Loop option.
When the dialog appears that informs you the Go To Timeline Frame action is being added to frame 31, click OK.
The slideshow is now set to automatically repeat at the end of the timeline. Next, you add behaviors to add user control.
Select the Play image on the page.
From the Behaviors panel, click Add (+) and select Timelines
In the Play Timeline dialog box, make sure that Timeline 1 is displayed in the list and click OK.
Select the Pause image on the page.
From the Behaviors panel, click Add (+) and select Timelines
In the Stop Timeline dialog box, choose Timeline 1 from the drop-down list and click OK.
Choose the Stop image on the page and repeat steps 8 and 9.
To make the stop button's effect different from that of the pause button, add a second behavior to reset the timeline. From the Behaviors panel, click Add (+) and select Timelines
In the Go To Timeline Frame dialog box, choose Timeline 1 from the drop-down list, make sure the Go To Frame value is set to 1 and that the Loop option is blank; click OK when you're done.
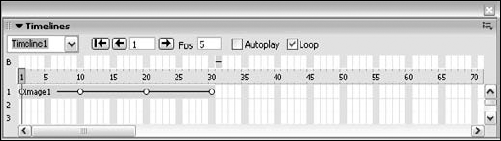
The slideshow is almost done; the last step is to slow down the speed of the timeline. In the Timelines panel, set the Fps (Frames per Second) value to 5.
Save your page and preview in a browser to test.
You can add as many images to your slideshow as you like by extending the timeline and including additional keyframes.
Timelines are effective tools for developing pages in which events need to be triggered at specific points in time.
Timelines can affect particular attributes of AP elements and images, or they can start any Dreamweaver behavior.
Use the Timelines panel to set an animation to play automatically, to have it loop indefinitely, and to change the frames-per-second display rate of the timeline.
You must use one of the timeline behaviors to activate your timeline if you don't use the Autoplay feature.
In the next chapter, you begin working with dynamic content by learning the basics of establishing database connections and building recordsets.