
Chapter 20. OpenGL on Mac OS X
WHAT YOU’LL LEARN IN THIS CHAPTER:

OpenGL is the native and preferred 3D rendering API on the Mac OS X platform. In fact, OpenGL is used at the lowest levels of the operating system for the desktop, GUI, and Mac OS X’s own 2D graphics APIs and compositing engine (Quartz). The importance of OpenGL on the Mac platform cannot be overstated. With its favored status in the eyes of Apple (somewhat analogous to Direct3D’s status with Microsoft), it enjoys significant support, and investment by Apple in continual tuning and extension to the API.
There are four programming interfaces to OpenGL on the Mac, each with its own personality. Which one you use will vary greatly depending on how you prefer to create applications on the Mac, and for your specific rendering needs. Table 20.1 lists these four interfaces. We will cover the first three of these in some detail.
Table 20.1. OpenGL Interface Technologies in OS X

We use these interfaces to do the setup for OpenGL in a window, or on a display device. After that is out of the way, OpenGL is just OpenGL!
Remember, this chapter is not about OS X programming, but about using OpenGL on OS X. If you are brand new to the Mac, the GLUT section should get you going. The sections following that will assume some prior Mac programming experience. You can probably still get things up and going, but the material will offer less insight into how to develop on OS X than it will on how to use OpenGL.
GLUT
Both the simplest and most portable access to OpenGL on the Mac comes via the GLUT library. Nearly all the samples in this book are written using the GLUT library, because it is available for not only the Mac, but also Windows, and nearly every variant of UNIX as well. GLUT is included in OS X automatically, so there is nothing else to install besides the standard Apple developer tools. When browsing the source distribution for the book, you’ll find a /Projects/Apple folder containing Xcode project files for every chapter, except the non–Apple operating system specific chapters in Part III, “The Apocrypha.” For your reference, all the screen shots in this chapter were made using Xcode version 2.4.1, running under OS X version 10.4.8.
Setting Up a GLUT Project
Since the majority of examples in this book are GLUT projects, we aren’t going to go through the actual programming involved in using GLUT, because this was pretty well covered in Chapter 2, “Using OpenGL,” not to mention nearly every chapter since! We will, however, at least walk you through setting up a brand-new Xcode GLUT project. This is undoubtedly the simplest way to get going if you just want to experiment with OpenGL on a Mac. Less experienced programmers seeking to get started right away with OpenGL should definitely start with GLUT. More experienced Mac programmers can probably skip right ahead to one of the next sections, OpenGL with Carbon or OpenGL with Cocoa.
To begin with, start Xcode (Xcode is Apple’s free development environment for the Mac, and comes on every OS X installation CD). Select New Project from the main menu, and specify a Cocoa application as shown in Figure 20.1.
Figure 20.1. GLUT-based programs start life as a Cocoa application.

GLUT is actually layered on top of the Cocoa interface, which we’ll discuss later. The New Project Assistant will then create a simple Cocoa skeleton application for us. We’ll need to make some changes to the defaults, however, before we can get started coding.
Application Frameworks
To begin with, we need to add a couple of application frameworks. An application framework is a dynamically loaded “plug-in” for Mac applications. If you are already familiar with Windows programming, these are analogous to DLLs, except they also contain all the headers and other resources you need to program with them. To add a library of functionality to your application, you add that library’s framework. A large number of frameworks ship standard on OS X, including GLUT and OpenGL.
To see the default frameworks included in your project, expand the Frameworks folder in the Groups & Files pane, as shown in Figure 20.2.
Figure 20.2. The initial project screen for a new GLUT-based program.

To add the GLUT and OpenGL frameworks, right-click (or Ctrl-click) on the Frameworks folder, select Add, and then select Existing Frameworks from the pop-up menu. The frameworks are stored in the /System/Library/Frameworks folder. Frameworks are actually whole folders containing all the data needed to include the library into your application. Select and add both the GLUT and the OpenGL frameworks. You can also perform a multiple selection by holding down the Apple key while clicking the framework name.
Ditching Cocoa
Finally, we just need the source code for our GLUT-based program. First we have to get rid of the default Cocoa source module created for us. Click on the main.m file in the Other Sources folder, also shown in Figure 20.2, and press the Delete key. A confirmation dialog will appear; click Delete References & Files. This not only removes the file from the project, but deletes the file itself.
Of course, now we have no source code for our program! You can add a new or existing C or C++ file to the project with a right-click (or Ctrl-click) on the Other Sources folder. You can select one of the sample programs in source distribution or create your own fresh new program.
If you are not using our gltools helper functions and classes, you need to know what standard headers you need to include for GLUT. These headers below bring in OpenGL, the utility library, and GLUT functions:
#include <OpenGL/gl.h> // Apple OpenGL headers
#include <OpenGL/glu.h> // OpenGL Utilities
#include <Glut/glut.h> // Apple's Implementation of GLUT
Finally, if you are new to the Mac platform, one of the most frustrating things to figure out on your own is where files go. If you perform a standard C runtime fopen, for example, where is the working directory? For GLUT-based programs, the current active directory is located inside the application bundle in the /Resources folder. This folder is not set to the current working directory until after you call glutInit. If you are going to load textures or data files, you place these files here (see most of the previous chapters’ sample programs for an example of this).
To open an application’s bundle and look inside, right-click (or Ctrl-click) and select Show Package Contents. Application bundles on the Mac are nothing more than a standard application folder hierarchy. You can also directly add files to this folder as part of the Xcode build process. Right-click on the Resources folder and select Add Existing Files. Select any data files or textures you want packaged automatically, and you’re ready to go!
OpenGL with Carbon
Carbon is the name of an application development technology for OS X. Carbon is essentially just an API, but it is a comprehensive API used for creating C and C++ applications on Mac OS X. Carbon was the primary means by which application developers moved old OS 9 applications to the new more modern and UNIX-based OS X. Carbon-based applications (I don’t know why, but I just love that term!) usually access OpenGL via the agl (Apple GL) framework.
We’ll begin our first sample program, CARBONGL, with a simple Carbon-based program that displays an empty window. To make things a little more interesting, we’ll port our vertex buffer object–based THUNDERBIRD sample program in Chapter 11 from GLUT to Carbon.
Setting Up for OpenGL
Before we can begin, we must add the OpenGL framework just as we did in the preceding section. However, instead of GLUT, you also need to add the AGL framework. The AGL library is Apple’s API glue that brings OpenGL into Carbon managed windows. Adding these frameworks brings in the libraries during the link phase when you build your Xcode projects. To include the functions from these libraries, you also need to include these two headers:
#include <OpenGL/gl.h>
#include <Agl/agl.h>
In all of our GLUT-based sample programs, the /Resources folder inside the application bundle was automatically set as the default working directory for the program. This is extremely convenient, but not the default for OS X programs. GLUT did the heavy lifting for us, but now we must have a little cheat to set this ourselves. These first few lines after our main function will do the trick:
int main(int argc, char* argv[])
{
. . .
// Little cheat to get working directory back
// to /Resources like it is in GLUT
char *parentdir;
char *c;
parentdir = strdup(argv[0]);
c = (char*) parentdir;
while (*c != '�') // go to end
c++;
while (*c != '/') // back up to parent
c--;
*c++ = '�'; // cut off last part (binary name)
// Change to Resources directory. Any files need to be placed there
chdir(parentdir);
chdir("../Resources");
free(parentdir);
There are four main things that every windowed OpenGL program must perform: setup, shutdown, rendering, and handling window size changes. In GLUT we registered callback functions for these tasks that were called at the appropriate time. In every platform-specific program these same tasks are still the foundation of a sound rendering framework. Setup occurs sometime after the window is created (often immediately), with shutdown occurring when the window is being destroyed. OpenGL rendering is wired into the normal event-driven paint or draw messages. Finally, when notified that a window has changed size, it’s time to reset the viewport and potentially the projection as well.
With Carbon, we can register for notifications of some of these events. We’ll bring OpenGL to life right after we create the window. Then we register for the following carbon events in the window’s event handler: kEventWindowClose, kEventWindowDrawContent, and kEventWindowBoundsChanged. Listing 20.1 shows a modified version of the standard Carbon window creation code produced by the New Project Assistant in Xcode. This specific code is used in our CARBONGL sample program for this chapter. We have added tokens for our additional event notifications, and note the call to SetupGL that is called right after we have created the window. We are going to look at that next.
Listing 20.1. Initializing the Carbon Window


Setting the Pixel Format
Before OpenGL can be initialized for a window, you must first select an appropriate pixel format. A pixel format describes the hardware buffer configuration for 3D rendering, things like the depth of the color buffer, the size of the stencil buffer, and whether the buffer is onscreen (the default) or offscreen. The pixel format is described by the AGL data type AGLPixelFormat.
To select an appropriate pixel format for your needs, you first construct an array of integer attributes. For example, the following array requests a double-buffered pixel format with red, green, blue, and alpha components in the destination buffer, and a 16-bit depth buffer. You may get other attributes as well, but you are essentially saying these are all you really care about:
static GLint glAttributes[] = {
AGL_DOUBLEBUFFER, GL_TRUE, // Double buffered
AGL_RGBA, GL_TRUE, // Four-component color
AGL_DEPTH_SIZE, 16, // 16-bit (at least) depth buffer
AGL_NONE }; // Terminator
Note that you must terminate the array with AGL_NONE. Next, you pass this array to aglChoosePixelFormat. This function searches for an appropriate specific pixel format that matches your request as closely as possible. This returns either a valid AGLPixelFormat, or NULL if the request could not be fulfilled.
AGLPixelFormat openGLFormat = aglChoosePixelFormat(NULL, 0, glAttributes);
if(openGLFormat == NULL)
// Something has gone wrong...deal with it!
Most attributes are followed by either a Boolean flag or an integer value. For example, AGL_DEPTH_SIZE is expected to be followed by an integer value that specifies the number of bits desired for the depth buffer. The available attributes and their meanings are listed in Table 20.2.
Table 20.2. AGL Pixel Format Attribute List Constants


The Rendering Context
After an appropriate pixel format is selected, it is used to create an OpenGL rendering context. The rendering context can be thought of as a handle to a live and running OpenGL state machine and renderer; it is the conduit through which your OpenGL commands reach the hardware. The AGLContext data type represents the AGL OpenGL rendering context:
static AGLContext openGLContext = NULL; // OpenGL rendering context
In our CARBONGL sample program, this is a module global variable in the main.cpp file. The setup after the selection of the pixel format continues:
// Create the context
openGLContext = aglCreateContext(openGLFormat, NULL);
if(openGLContext == NULL)
return false; // Handle failure gracefully please!
// No longer needed
aglDestroyPixelFormat(openGLFormat);
// Point to window and make current
aglSetDrawable(openGLContext, GetWindowPort(windowRef));
aglSetCurrentContext(openGLContext);
// OpenGL is up...go load up geometry and stuff
SetupRC();
The aglCreateContext takes the pixel format as the first argument, and NULL as the second parameter. This second parameter may optionally be a preexisting rendering context that will share its object state (all display lists, texture objects, vertex buffers, etc.) with the new context. After the rendering context is created, the pixel format is no longer needed, and can be destroyed with aglDestroyPixelFormat.
Finally, we set the rendering context to point to our carbon window, and make it current:
// Point to window and make current
aglSetDrawable(openGLContext, GetWindowPort(windowRef));
aglSetCurrentContext(openGLContext);
The AGL interface allows for multiple OpenGL rendering contexts, each of which can be set to render to different windows. However, only one context may be current at any one time. All OpenGL commands on the current thread will render to whichever rendering context is currently current.
Now that OpenGL is alive and well, it is ready to accept commands. The SetupRC function is in thundergl.cpp, which has been borrowed from the THUNDERGL sample program in Chapter 11, “It’s All About the Pipeline: Faster Geometry Throughput.” If you recall, this function loads all the needed textures, and sets up the vertex buffer objects for the Thunderbird model.
Cleanup
Before we get to rendering, let’s talk about cleanup while the startup is still fresh on your mind. When the window is being destroyed, we first want to call the ShutdownRC function in thundergl.cpp to free the texture objects and other data:
ShutdownRC();
Then we must set the current context to NULL, and set the context’s drawable to NULL. Finally, we can destroy the context altogether:
// Unbind to context
aglSetCurrentContext (NULL);
// Remove drawable
aglSetDrawable (openGLContext, NULL);
aglDestroyContext (openGLContext);
The Big Event!
Now it’s time for the big event, or perhaps events would be more appropriate. In the event handler for the CARBONGL sample program’s main window, there are three events that pertain directly to our rendering needs. The first is received whenever the window changes size:
// Size of window has changed
case kEventWindowBoundsChanged:
if(openGLContext)
{
aglUpdateContext(openGLContext);
GetWindowPortBounds(window, &windowRect);
ChangeSize(windowRect.right - windowRect.left,
windowRect.bottom - windowRect.top);
InvalWindowRect(window, &windowRect);
}
break;
In addition to calling ChangeSize (which, as you recall from THUNDERGL, simply resets the viewport and projection), you must also call aglUpdateContext anytime something about the window or screen changes. This includes size changes, and screen resolution mode changes. The call to the function InvalWindowRect ensures that the window gets redrawn whenever the window size changes. Drawing or redrawing (there is no real difference!) is handled by the following bit of code:
// Draw/Render contents
case kEventWindowDrawContent:
{
RenderScene();
aglSwapBuffers(openGLContext);
GetWindowPortBounds(window, &windowRect);
InvalWindowRect(window, &windowRect);
}
break;
The RenderScene function is again simply brought over from the GLUT-based THUNDERGL sample program. Since we have previously established a double-buffered context, we must issue a command to perform the buffer swap after rendering:
aglSwapBuffers(openGLContext);
The only argument to this function is the previously created OpenGL rendering context identifier. In order to facilitate the animated effect, the last thing the drawing handler does is request another draw event!
GetWindowPortBounds(window, &windowRect);
InvalWindowRect(window, &windowRect);
This provides a fairly high frame rate, rendering about as fast as is possible without hacking outside of the carbon event framework. One of the reasons we do this, really, is so that that we have something to show off in the next section! In the meantime, you can see the fruits of our labor in Figure 20.3.
Figure 20.3. The CARBONGL sample showing THUNDERGL ported from GLUT to native Carbon.

Bitmap Fonts
Another useful feature of the AGL framework is support for bitmap fonts in OpenGL. Essentially, the function aglUseFont will take an existing font and convert it into a series of display lists, each containing a glBitmap call (see Chapter 7, “Imaging with OpenGL”) for a single character, followed by an advance of the raster position. Setting up a set of font bitmaps could not be much easier:
short fontID;
GetFNum((const unsigned char *)"/pTimes", &fontID);
fontStart = glGenLists(96);
aglUseFont(openGLContext, fontID, bold, 14, ' ', 96, fontStart);
Setting Up the Font
On OS X, fonts are identified by a unique short integer. The GetFNum takes the font face name, and returns this value. Before generating the font bitmap display lists, we call glGenLists to reserve a range of display list IDs (see Chapter 11) large enough to hold the range of characters we are interested in. The aglUseFont function is listed here for convenience:
GLboolean aglUseFont(AGLcontext ctx, GLint fontID, Style face,
GLint size, GLint first, GLint count, GLint base);
The first two parameters are the AGL OpenGL rendering context pointer, and the font identifier. The face parameter can be one of the typical font face styles: normal, bold, italic, underline, outline, shadow, condense, or extend. These face styles can also be logically or’d together (e.g., italic | underline). These are followed by the point size of the font.
The last three parameters specify the first character to begin with (in our sample, we started with the space ' ', the number of characters to include in our font set (96 which is usually the majority of normally printable characters), and finally the display list ID to use as the starting point for our list of display lists.
Using the Font
In the CARBONGLFONTS sample program, we have reused our previous carbon framework, but have added a frame rate display. The frame rate is simply the average number of frames rendered per second, estimated by averaging the time to render 100 frames. This is done repeatedly, and a static string containing the information is displayed constantly. To begin, we make sure the current color is white, and set the raster position:
glColor3f(1.0f, 1.0f, 1.0f); // Just in case it gets changed
glWindowPos2f(10.0f, 10.0f);
Font rendering via this mechanism is based on display lists, so we must be careful when mixing these font bitmaps with any other code that uses display lists. First we must set the display list base to the beginning of our display list range, but subtract the first character’s ASCII value.
glListBase(fontStart - ' '),
Then we use the glCallLists function to render an array of display list names. This array just happens to be the ASCII text of the string we want to display. Each character’s ASCII numerical value is added to the list base value, and the resulting display list is executed:
glCallLists(strlen(cBuffer), GL_BYTE, cBuffer);
The result is a sequence of display lists being called, each of which displays a single letter from the string and advances the raster position for the next letter. The final result is seen in Figure 20.4, which shows a single frame of the animation along with the average frame rate of the last 100 frames displayed in the lower-left corner.
Figure 20.4. The CARBONGLFONT sample with frame rate display.

OpenGL with Cocoa
There are many programming languages available to developers on Mac OS X. One very popular language on the Mac (but not quite so popular elsewhere) is Objective-C. To the uninitiated, Objective-C may appear as a strange blend of C and C++ with some completely new syntax thrown in. But Objective-C is also the foundation of a very popular application development technology called Cocoa.
Cocoa is best described as both a collection of application framework classes and a visual programming paradigm. Developers do quite a bit of work in Interface Builder, designing user interfaces, assigning properties, and even making connections between events. Objective-C classes are subclassed from controls, or are created from scratch to add application functionality. Fortunately, OpenGL is a first-class citizen in this development environment.
Creating a Cocoa Program
A Cocoa-based program can be created using the New Project Assistant in Xcode. Figure 20.1 shows how we did this when we created our first GLUT-based program. This time, however, we will not replace the generated project with GLUT-based code. Figure 20.5 shows our newly created COCOAGL project.
Figure 20.5. The initial COCOAGL project.

Adding an OpenGL View
Cocoa applications store resources and GUI layouts in a NIB file (which for historic reasons stands for NEXTSTEP Interface Builder). Double-click the MainMenu.nib file under the Resources folder. This will start Interface Builder and open the main nib for editing. You should see a screen similar to that shown in Figure 20.6, with the main window already open.
Figure 20.6. Interface Builder—ready to go!

If the tool palette does not already have the Cocoa-GraphicsView displayed, advance by clicking the far-right toolbar button. Click and drag an OpenGL view from the palette to the main window and resize it to fill most of the main window. Just to make the OpenGL view stand out, we have also changed the main window background to metallic (or textured, depending on the version of your tools). You can see in Figure 20.7 that we now have an NSOpenGLView ready to go in the center of the window.
Figure 20.7. A very basic interface window.

Creating a Custom OpenGL Class
The next task is to create a custom class derived from NSOpenGLView and associate it with the OpenGL view in the window. Click the MainMenu.nib window and click the Classes button. In the search edit control type NSOpenGLView. Right-click on this class and select Subclass NSOpenGLView, as shown in Figure 20.8. For this sample program, we will again be reusing the Thunderbird demo, so call the new subclass ThunderGLView.
Figure 20.8. Subclassing the NSOpenGLView.

Right-click again, and select Create Files for ThunderGLView. Save both the ThunderGLView.h and the ThunderGLView.m files. Finally, we must associate this new class with the NSOpenGLView in the main window.
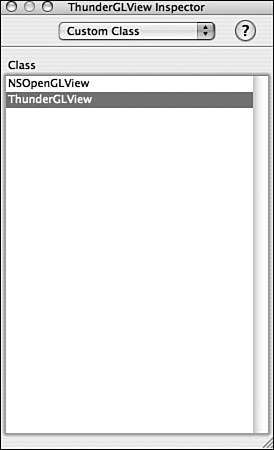
To do this, select the NSOpenGLView window and bring up the Inspector (Tools, Show Inspector on the main menu). Change the combo box on the inspector to Custom Class and highlight the ThunderGLView class, as shown in Figure 20.9.
Figure 20.9. Assigning the custom class to the NSOpenGLView.
Now save the interface file and close Interface Builder. Time to write some code!
Wiring It All Together
Back in the Xcode project window, you’ll see the ThunderGLView header and implementation files. These contain the stubbed definition of the ThunderGLView class, derived from NSOpenGLView. Interface builder has already wired this class to our OpenGL view in the main window, and we now only need to add the class framework and OpenGL rendering code.
The edited header file for the new class is trivial and simply contains a member pointer to an NSTimer that will be used for animation:
#import <Cocoa/Cocoa.h>
@interface ThunderGLView : NSOpenGLView
{
NSTimer *pTimer;
}
@end
In the implementation file, we add an idle function, and again the same four top-level rendering tasks wired into the Cocoa framework that every other sample in this book has needed: initialization, shutdown, render a frame, and handle window size changes. The entire source to ThunderGLView.m is given in Listing 20.2.
Listing 20.2. Implementation of the ThunderGLView Class


Note that we had to declare the following functions, which are in the original ThunderGL.cpp file:
// Functions in ThunderGL.cpp
void SetupRC(void);
void ShutdownRC(void);
void RenderScene(void);
void ChangeSize(int w, int h);
Fortunately, it is possible to call C and C++ code from Objective-C. There are a few caveats to doing this, but the least troublesome to follow through on is to keep your C/C++ source code separate from your Objective-C source code by placing them in different source files, and provide a C-only API between code modules. It is possible to share C++ classes between the two languages as well, but many developers find this more trouble than it’s worth. Consequently, we will need to declare the preceding four functions in thundergl.cpp as having the “C” calling convention.
This is simple to do; we just place the following declarations near the top of thundergl.cpp:
extern "C" {
void SetupRC(void);
void ShutdownRC(void);
void RenderScene(void);
void ChangeSize(int w, int h);
}
Figure 20.10 shows our completed Cocoa based project.
Figure 20.10. OpenGL in a Cocoa view.

Hang on a Second There!
At this point in time, the astute reader may be imagining the sound of screeching tires on pavement. Was that a glFlush you saw after RenderScene in Listing 20.2 instead of some sort of buffer swap call? Indeed it was, and this brings us to an interesting subtlety of OpenGL on Mac OS X (as well as a nice segue into the next section).
On Mac OS X, the entire desktop is actually OpenGL accelerated. Anytime you are rendering with OpenGL, you are always rendering to an offscreen buffer. A buffer swap does nothing but signal the OS that your rendering is ready to be composited with the rest of the desktop. You can think of the desktop compositing engine as your front buffer. Thus, in windowed OpenGL applications (this applies to both Cocoa and Carbon), all OpenGL windows are really single buffered. Depending on how you look at it, it would also be okay to say that all OpenGL windows are really double buffered, with the desktop composite being the front buffer. Pick whichever one helps you sleep best at night! In fact, if you were to execute a glDrawBuffer(GL_FRONT), the drivers on the Mac actually would fall into a triple-buffered mode! In reality, all OpenGL windows on the Mac should be treated as single buffered. The buffer swap calls are really just doing a glFlush, unless you are working with a full screen context. For this (and many others—the least of which is that you are bypassing the driver’s own good sense as to when to flush) you should avoid glFlush in Cocoa views until you have completed all of your OpenGL rendering.
Full-Screen Rendering
Many OpenGL applications will need to render to the entire screen, rather than live within the confines of a window. This would include many games, media players, Kiosk hosted applications, and other specialized types of applications. One way to accomplish this is to simply make a large window that is the size of the entire display. This, however, is not the most optimal approach.
In the previous section, we discussed the fact that OpenGL windows are copied and composited into the Mac OS X desktop at either the buffer swap or a call to glFlush or glFinish. This operation can result in a large amount of memory being moved and operated on. All of the OpenGL interface technologies listed in Table 20.1 have support for full-screen rendering. In full-screen mode, the application completely takes over the screen and no other windows can be displayed until the application releases the screen. Rendering occurs in the back buffer, and a buffer swap occurs to display the next frame. Full-screen rendering can be significantly faster than windowed rendering as long as your performance is not already geometry or CPU bound.
Managing the Display
A handful of the Quartz Display Services functions come in handy when we’re performing full-screen rendering. We may want to change the display mode, for example; and if not, we still will need a way to determine the screen resolution for our perspective projection computations. We cannot rely on window bounds changes because when we’re rendering to a full-screen context, there actually is no window!
For simplicity, we are going to ignore the complex issue of multiple monitors and display devices, and restrict our interests to the main display (the one with the menu bar). We must first get a display ID that uniquely identifies a particular display. To get the main display, this is one simple function call:
CGDirectDisplayID gCGDisplayID = CGMainDisplayID();
The display ID can now be used to query the display services and determine what resolution the display is currently operating at:
int nScreenWidth = CGDisplayPixelsWide(gCGDisplayID);
int nScreenHeight = CGDisplayPixelsHigh(gCGDisplayID);
If you are content to run full-screen at the default resolution, you can stop there. Each display mode has again a unique reference. You can search for the best matching display mode with this function:
CFDictionaryRef refDisplayMode =
CGDisplayBestModeForParameters(
gCGDisplayID, 32, nWidth, nHeight, NULL);
Here we set nWidth and nHeight to the desired screen resolution. As long as refDisplayMode doesn’t come back as zero, you have a valid identifier for the requested display mode. Note, you may not get exactly what you want with this function. For example, if you request a screen resolution of 725×590, you are likely to just get 800×600 since that is the nearest valid display mode.
With a valid display mode in hand, we can change the display mode with a single function call. However, before you do that, you should capture the display:
CGDisplayCapture(gCGDisplayID);
Capturing the display tells the operating system that your application is in charge of the display. If you do not call this when you change the display mode, all other running applications will receive display change notifications, and will likely resize their windows appropriately. This often leaves a mess on your desktop when your application terminates. To release the display when your program terminates, call this:
CGReleaseAllDisplays();
Now that you know how to behave yourself when changing display modes, you can do so:
CGDisplaySwitchToMode(gCGDisplayID, refDisplayMode);
When your application terminates, the display mode will automatically be restored. This is a nice feature, in case your program does happen to crash; it’s just not polite to leave behind a mess on the desktop.
AGL Full-Screen Support
With the display mode querying and changing out of the way, it’s time to get back to creating our OpenGL context. Since our last AGL-based program contained a frame rate display, we will go the AGL route for creating a full-screen rendering context. You will easily be able to see for yourself the difference in frame rate between a maximized window and a real full-screen context.
Retrofitting the previous CARBONGL sample program to the new FULLSCREEN sample program is fairly straightforward. Start by adding a few new variables at the top to hold the screen width and height, and a flag for whether we want the display mode changed:
static AGLContext openGLContext = NULL; // OpenGL rendering context
static int nScreenWidth = 800; // Set these to what you "want"
static int nScreenHeight = 600;
// Set to false to ignore above and keep current resolution.
static bool bChangeDisplayMode = false;
If the bChangeDisplayMode flag is left false, the values of nScreenWidth and nScreenHeight are reset to the current display’s resolution. Aside from removing the kEventWindowBoundsChanged handler, all the changes are in the SetupGL function, shown in Listing 20.3.
Listing 20.3. The New AGL-Based Setup for Full-Screen Rendering


AGL Changes
The glAttributes list contains a few new tokens. The AGL_FULLSCREEN token requests a full-screen pixel format, and the AGL_NO_RECOVERY says we are uninterested in a software fallback that does not support full-screen.
At lower resolutions, aliasing artifacts are especially noticeable, so this seems a good place to show off multisampling as well. Uncomment the two lines containing AGL_SAMPLE_BUFFERS_ARB and AGL_SAMPLES_ARB to request a multisampling pixel format. You will also notice that frame rates are noticeably smaller when this is enabled.
Also, different in this version is the call to aglChoosePixelFormat. Here you see that the AGLDevice parameter cannot be NULL for full-screen contexts, but must contain an array of devices. For our purposes, we pass in only the main display device ID:
GDHandle gdevice = GetMainDevice();
openGLFormat = aglChoosePixelFormat(&gdevice, 1, glAttributes);
Finally, we tell AGL that we want to go full-screen.
aglEnable(openGLContext, AGL_FS_CAPTURE_SINGLE);
aglSetFullScreen(openGLContext, 0, 0, 0, 0);
The first line tells AGL to “capture” the screen when it goes full-screen, and the second line makes the change to full-screen mode. After this, all OpenGL rendering goes to the full-screen context, and any application windows you or any other application have open will not be visible.
These two lines of code can actually be used to capture the screen and change the display mode (by filling in some of those zeros). However, if you specify an invalid display resolution, the display mode will not change. The previous approach using CGDisplayBestModeForParameters is better since it is more likely to “guess” a valid display mode based on your request.
Final Touches
Finally, our last OpenGL-related modification is to call the ChangeSize function with the (potentially) new screen width and height:
ChangeSize(nScreenWidth, nScreenHeight);
Also, for games and many full-screen applications, the mouse cursor is an unnecessary distraction. You can turn that off easily:
HideCursor();
Turning it back on is equally obvious:
ShowCursor();
Summary
We have taken a whirlwind tour of the most important OpenGL technologies available on Mac OS X. We started with GLUT, which is the toolkit we used for most of this book’s sample programs. You now even know how to start your own GLUT-based masterpiece from scratch with Xcode. We followed that up with coverage for the more experienced Mac programmers using either Carbon or the Cocoa application frameworks. We finished with an example of full-screen rendering, and explained why it was inherently faster than rendering in any window would be.
OpenGL is a core foundational technology for the Macintosh. A basic understanding of OpenGL, and how applications can natively interact with it, is an essential skill for any Mac OS X developer. This chapter only scratched the surface of a potentially deep and complex topic. We have purposely stayed in the shallow end of the pool, as it were, so that you can get going quickly and experiment as much as possible with OpenGL on this wonderful platform. In Appendix A, “Further Reading/References,” you’ll find some additional great coverage of this exciting topic.