4. Drupal Administration Explained
This chapter explains the basic concepts of your Drupal site. When you finish, you’ll understand how to navigate around your site and how administrators manage your site.
At the end of this chapter, you should be able to
![]() Understand the difference between the administrator and visitor areas of your Drupal site.
Understand the difference between the administrator and visitor areas of your Drupal site.
![]() Understand the visitor area of your Drupal site.
Understand the visitor area of your Drupal site.
![]() Understand the administrator area of your Drupal site.
Understand the administrator area of your Drupal site.
![]() Make your first Drupal site changes.
Make your first Drupal site changes.
The Administration Menu Explained
At the end of Chapter 3, “Drupal Installations Explained,” you installed your new Drupal site and logged in. Congratulations! You’re now ready to explore your Drupal site.
Across the top of the site, you now see a horizontal, black administration menu, as shown in Figure 4.1. This menu is the most important part of your site. Almost everything you want to change and modify on your site can be accessed from here.

The links in this menu are organized according to how often they’re used.
On the left side of your menu, you can see a Home icon, plus a Dashboard and Content link. These are three of the links you click most often.
On the right side of your menu, you can see Configuration, Reports, and Help links. Configuration and Reports are links that are used less frequently. These contain settings and maintenance functions. The Help link contains documentation.
Now take a look at each link in turn.
Home Icon
Click the Home icon, as shown in Figure 4.2.

Whenever you click this Home icon, you’ll always be taken back to your site’s front page, as shown in Figure 4.3.

Dashboard
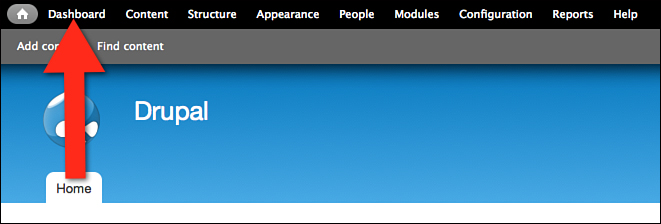
Click the Dashboard link, as shown in Figure 4.4.
You can now see three boxes on the screen, as shown in Figure 4.5. This screen gives you helpful information about what’s going on with your site:
![]() The Recent Content box shows what’s new.
The Recent Content box shows what’s new.
![]() The Search Form box enables you to search for any content on the site.
The Search Form box enables you to search for any content on the site.
![]() The Who’s New box shows you new site members.
The Who’s New box shows you new site members.

You can also customize this screen to show the information that you want. To do so, follow these steps:
1. Click the Customize dashboard link that you see in the top-left corner of Figure 4.5. You now see a screen, as shown in Figure 4.6. There are two more boxes available: Recent Comments and Who’s Online.

2. Drag and drop the Recent Comments and Who’s Online boxes into the main area so it now looks like Figure 4.7.

3. Click the Done button to finish customizing the dashboard.
It is also possible to add more boxes to this screen. We’ll show you how to create those boxes, called “blocks,” in Chapter 10, “Drupal Blocks Explained.”
Content
Click the Content link, as shown in Figure 4.8.

You can now see the screen shown in Figure 4.9.

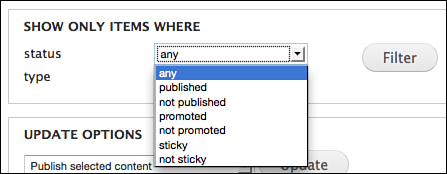
This screen gives you a list of all the content that has been added to your site. At the moment, that’s a grand total of zero content items. However, if you have a lot of content, you can use the filters at the top of the page to find content easily. Figure 4.10 shows how you can search by the status of the content.
You can also search for content of a particular type, as shown in Figure 4.11. Chapter 5, “Drupal Content Explained,” explains the difference between an Article and a Basic page. In Chapter 5 you also see how to create more types of content.

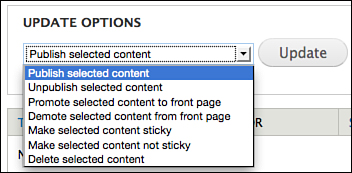
On this screen, you can find and manage your content. The Update Options drop-down, as shown in Figure 4.12, enables you to manage your content in bulk.
Finally, on this screen, you can manage comments on your site. You can access the comments area via the tab in the top-right corner, as shown in Figure 4.13.

You can see tabs like this often during this book. It’s a common method of navigation in Drupal 7.
Click the Comments tab. You’ll now see the screen, as shown in Figure 4.14.

In the top-right corner, there are also some smaller links, as shown in Figure 4.15. These enable you to access either Published Comments or Unapproved Comments.

You can also see smaller links like this throughout this book. Be careful and look out for these because they’re often easy to miss.
There are also two other Content links in the administration menu: Add Content and Find Content. These are marked in Figure 4.16.
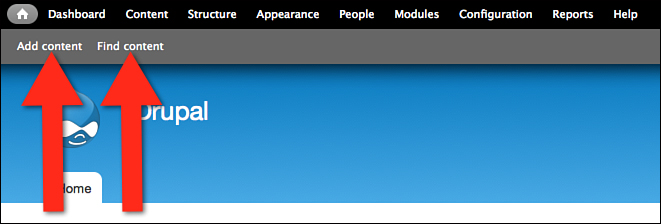
The Find content link takes you back to the Content screen you have been looking at already.
The Add Content link is the most important link in the entire site. After all, you are using a Content Management System (CMS). Everything you do with Drupal in this book is designed to help you add content to your website.
Click Add Content, and you see a screen like Figure 4.17. As mentioned earlier, Drupal provides two types of content: Article and Basic page.

Underneath the two content types, you see a brief explanation of what their purposes are. The Article is described as being for time-sensitive content such as news, press releases, or blog posts. The Basic page is described as being for your static content, such as an About Us page.
The next chapter creates several examples so that you can understand the difference between these two.
Structure
Click the Structure link, as shown in Figure 4.18.

You can now see the screen shown in Figure 4.19. By default, the Structure screen has four links: Blocks, Content types, Menus, and Taxonomy.

The short explanation of this Structure screen is that it contains the main fundamental building blocks of your site.
The long explanation of this Structure screen will take several chapters. You explore blocks in Chapter 10, “Drupal Blocks Explained,” Content types in Chapter 5, “Drupal Content Explained”, menus in Chapter 8, “Drupal Menus Explained,” and taxonomy in Chapter 6, “Drupal Fields Explained.” In this book, you also add several links to this page.
For now, notice that, as with the Add content screen, there are short explanations under each link:
![]() Blocks: Configure what content appears in your site’s sidebars and other regions.
Blocks: Configure what content appears in your site’s sidebars and other regions.
![]() Content types: Manage content types, including default status, front page promotion, comment settings, and so on.
Content types: Manage content types, including default status, front page promotion, comment settings, and so on.
![]() Menus: Add new menus to your site, edit existing menus, and rename and reorganize menu links.
Menus: Add new menus to your site, edit existing menus, and rename and reorganize menu links.
![]() Taxonomy: Manage tagging, categorization, and classification of your content.
Taxonomy: Manage tagging, categorization, and classification of your content.
Appearance
Click the Appearance link in the administration menu. You can now see the screen shown in Figure 4.20.

This screen contains the design for your site. Designs are provided by themes.
Bartik is the theme used by your site at the moment. Bartik is responsible for the blue-and-white color scheme, plus your site’s layout.
Seven is the theme used for your administration area. Seven is responsible for the white background and gray tabs in the top-right corner.
Drupal provides you with two more options for your colors and layout: Garland and Stark. Both are currently in the Disabled Themes area.
Chapter 9, “Drupal Themes Explained,” shows you how to modify and replace your theme.
People
Click the People link in the administration menu. You now see the screen shown in Figure 4.21.

This People screen has a list of all the users who are registered on your site.
You can create new user accounts via the Add User link.
As with the Content screen, there are filters at the top to help you search for users, and there also Update Options to help you manage users. These are shown in Figure 4.22.

Finally, there is a top-right tab called Permissions. Chapter 13, “Drupal Users Explained,” goes into that area and shows you how to control user permissions on your site.
Modules
Click the Modules link in the administration menu. You can now see the screen shown in Figure 4.23. This area contains all the features on your Drupal site. Each module has a description beside it showing what it does.
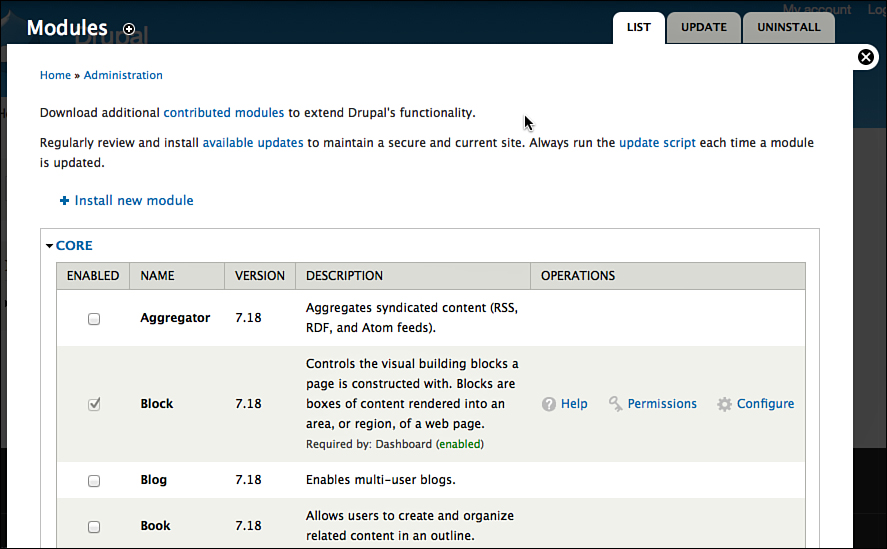
This list is sorted alphabetically at the moment, so it starts with Aggregator and ends with User. Your version of Drupal might have more modules than this lower down the page; however, the modules between Aggregator and User are the default modules shared by all Drupal sites.
You can add more modules via the Install New Module link in the top-left corner. You see how to do that in Chapter 6, “Drupal Fields Explained,” and then Chapter 7, “Drupal Modules Explained,” gives you even more details.
For now, take a look at one module in detail. The Comment module is shown in Figure 4.24. There are eight pieces of information or useful links:
1. Check box: Is this module enabled? If you don’t want anyone commenting on your site, you can uncheck this box and click Save Configuration at the bottom of the screen. Comments will be instantly turned off for your whole site.
2. Comment: The module’s name!
3. 7.18: The module’s version number. This will increase while you use Drupal because new versions will be released with improvements and bug fixes. You see how to update to those new versions in Chapter 14, “Drupal Site Management Explained.”
4. Description: This explains what the module does. This explanation is fairly clear; although, not all descriptions will be so easy to understand.
5. Requires and Required By: This area tells you if the Comment module needs other modules to operate. This area also tells you if the Comment module is needed by other modules to function.
6. Help: If you are unsure how to use a module, click this link for a more detailed explanation.
7. Permissions: This takes you to the Permissions area you just saw on the People screen. It enables you to decide who uses this module.
8. Configure: If there are any settings for this module, you can find them by clicking this link.

Configuration
Click the Configuration link on the administration menu. You can now see the screen shown in Figure 4.25.
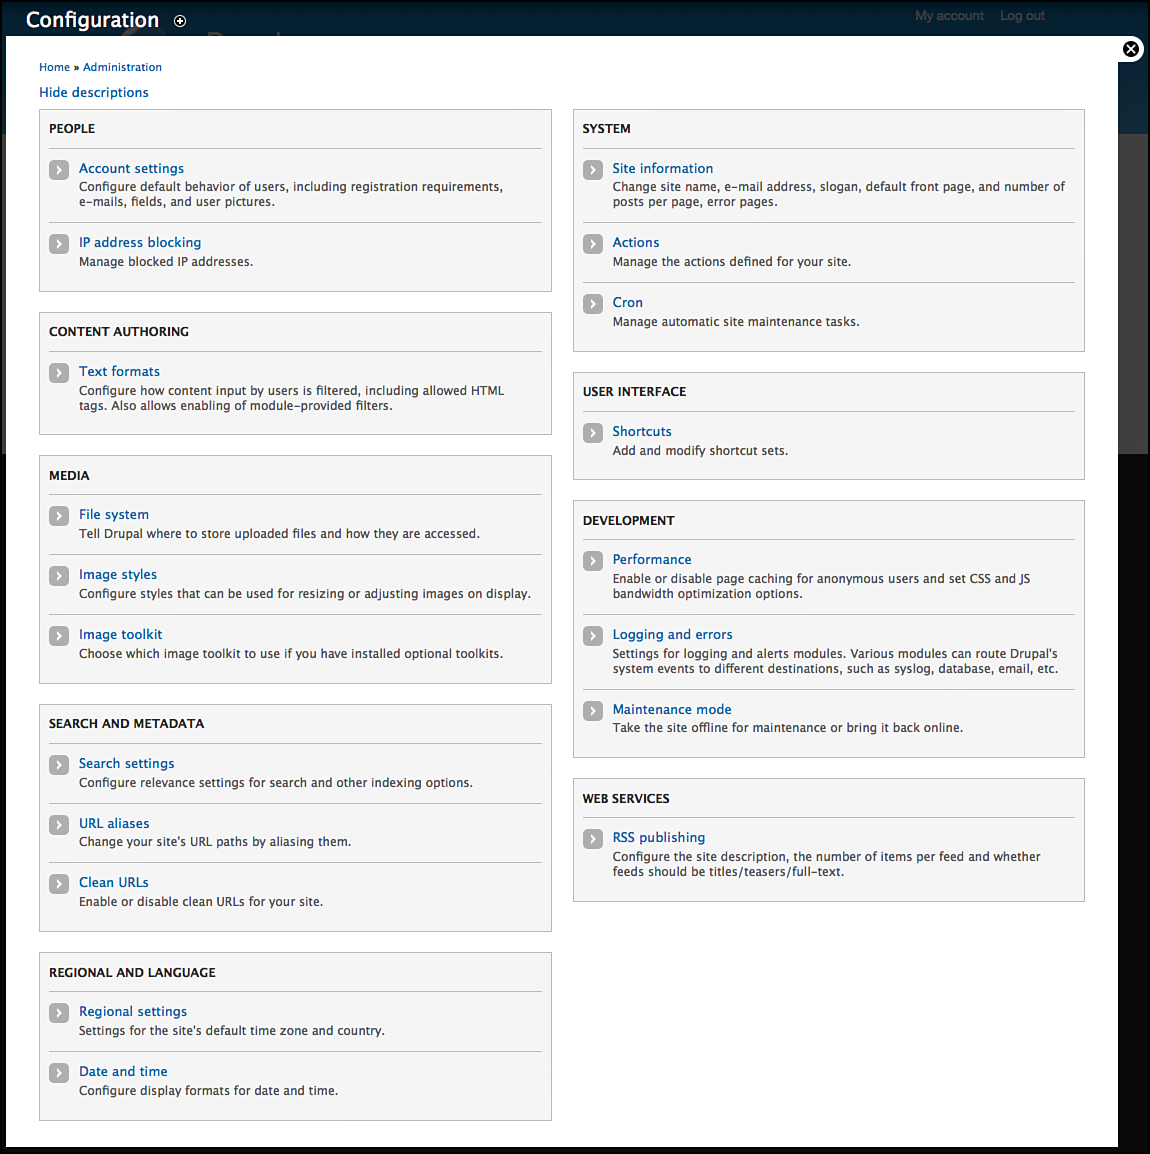
This area has the settings for the main features in your site. As you add more features to your site (and remember, you do that by adding modules), this area becomes larger.
Often, these settings are the same that you can get to from the Configure link (refer to Figure 4.24).
This book doesn’t have a whole chapter dedicated to this Configuration area, but you visit it throughout this book, often when you set up new features.
Now take a look at just one of these configuration options. Click the Shortcuts link, as shown in Figure 4.26.

Click List Links in the center of the next screen. You now see a screen, as shown in Figure 4.27. Notice that there are two links: Add Content and Find Content. These are the same two links that you can see in the gray area of your administration menu.
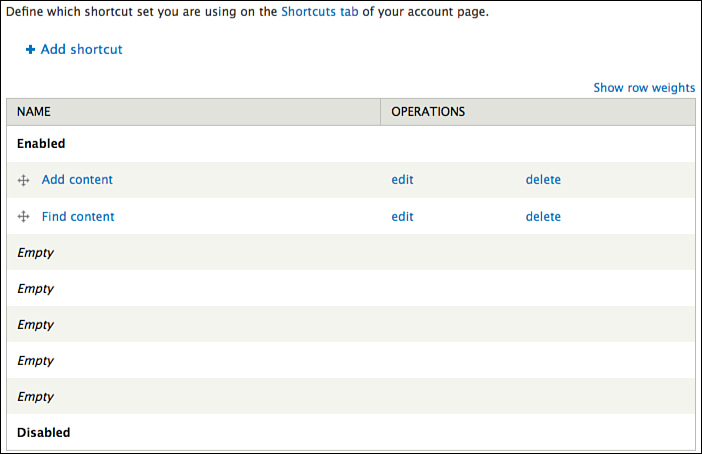
As you’ve seen, it can sometimes take two, three, or four clicks to reach some areas of your site. If you link to those areas from these Shortcuts, you can access those areas more easily and quickly.
Reports
Click the Reports link on the Administration menu. You now see the screen shown in Figure 4.28.

This area contains reports about the health of your site. Here, you can find out whether there are any problems with your site, whether your site needs updating, what people are searching for using your search box, and similar useful information. Chapter 14 explains more about this area.
Help
Click the Help link on the Administration menu. You can now see the screen shown in Figure 4.29.

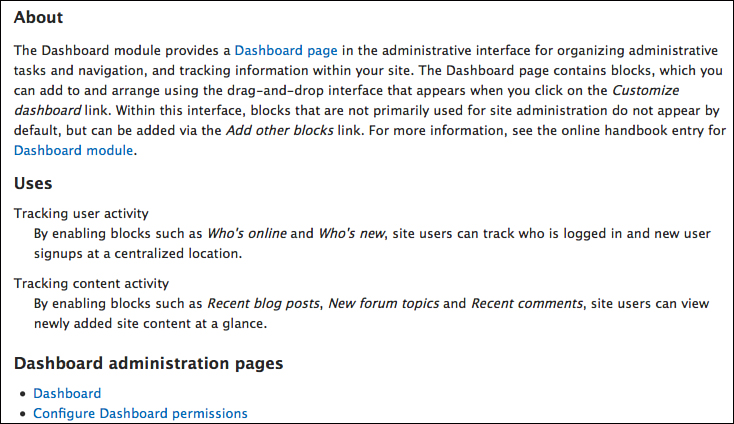
Now look at one example. Click the Dashboard link under Help topics, as shown in Figure 4.30.

You now see the screen shown in Figure 4.31 with an explanation of the Dashboard that you saw earlier in this chapter.
This Help area is something that can become more useful as you become more experienced. When you first use Drupal, some of the terminology here may be confusing. However, by the end of this book, you will hopefully understand the large majority of these terms.
Hello
Click the Hello link on the Administration menu, as shown in Figure 4.32.

You now see the screen shown in Figure 4.33. This is your own user profile.

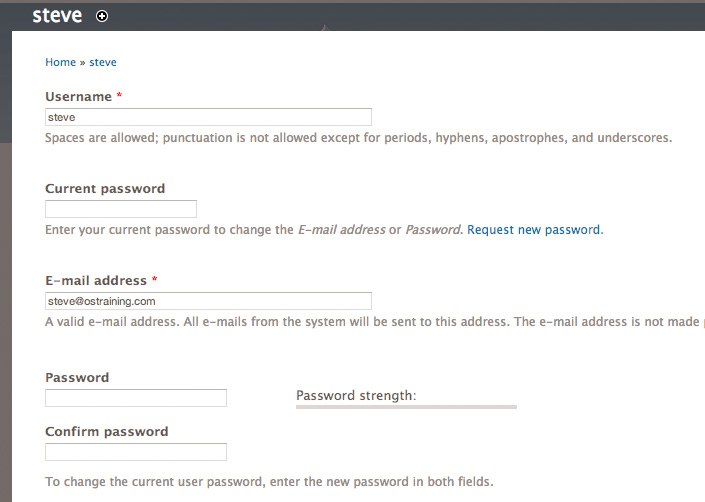
Click the Edit tab under your name, and you see the screen shown in Figure 4.34. From here you can edit your username and password. You can also change the email address that your site uses to send you notifications.
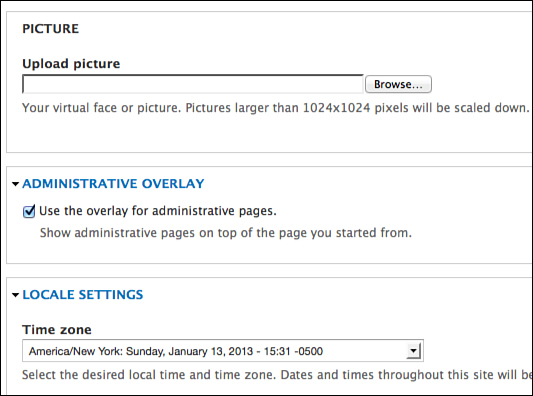
There are only two other settings that you should change for now, both of which are lower down on the screen. Those are both shown in Figure 4.35:
![]() Upload picture: You can click Browse and add an image to your profile.
Upload picture: You can click Browse and add an image to your profile.
![]() Locale settings: You can choose your time zone.
Locale settings: You can choose your time zone.
The Administration and Visitor Areas Explained
This chapter ends by showing you the difference between Drupal’s administration and visitor areas.
Log Out
This is the final link on the right side of the Administration menu. Go ahead and click that link. Your site now appears as shown in Figure 4.36; although, with some Drupal installations, there may be different text on this homepage. Regardless, this is what people see if they visit your site without an administrator username and password.

Now log in again. Use the User Login box on the left side, and enter the username and password that you created when installing the site. Your screen should now look like Figure 4.37.

Notice how similar the images are in Figures 4.36 and 4.37. This similarity is an important point because it can be confusing to beginners. It is also different from many other types of website software.
When using other software, the visitor area and the administrator area of your site are completely different. Other software often provides a Control Panel that has a distinctive look and feel. This is not true in Drupal.
In Drupal, the visitor area and the administration area are closely linked. Often, an ordinary user of your site will use the same login box as the administrator of your site. There are two infallible ways to tell that you are using the site as an administrator, not a visitor:
![]() You can see the black administration menu.
You can see the black administration menu.
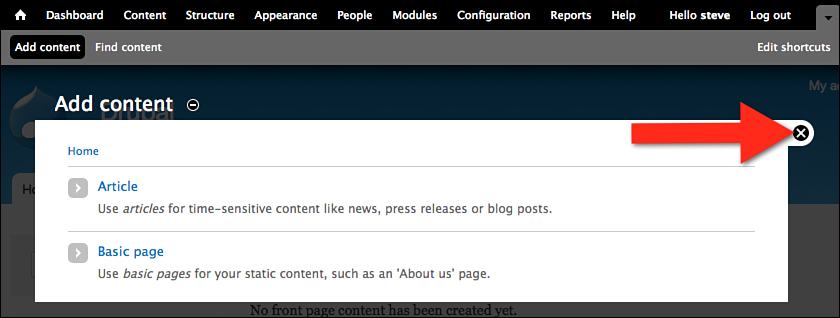
![]() The main part of your screen appears in the pop-up/overlay that you’ve used several times already. You can see the overlay in Figure 4.38. The black X mark enables you to close this overlay. Also, you can still faintly see the site behind the overlay.
The main part of your screen appears in the pop-up/overlay that you’ve used several times already. You can see the overlay in Figure 4.38. The black X mark enables you to close this overlay. Also, you can still faintly see the site behind the overlay.
When you start with Drupal, it’s sometimes confusing to understand what is visible to visitors and what is visible only to administrators. There are some ways around this.
The simplest solution is to have two browsers open. In one browser, you can log in as the administrator of your site. In the other browser, don’t log in and you can see your site as a visitor would.
Chapter 13 recommends a more advanced feature called Masquerade, which enables you to see your site through the eyes of any visitor.
What’s Next?
You’ve now had a tour of Drupal’s administration area. You’ve had a brief look inside all the important screens in your site. Now it’s time to start using Drupal.
As mentioned in Chapter 2, “Drupal Planning Explained,” we recommend that you use the workflow in Figure 4.39 to build your first Drupal sites. This workflow helps overcome much of the confusion that beginners face when building their first Drupal sites.
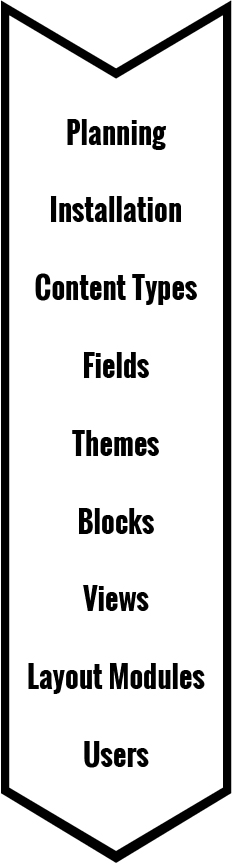
In Chapter 2 and Chapter 3, you covered the first steps in the Drupal workflow: planning and installation. In Chapter 5, you take the next step: content types.