
23. Workgroups
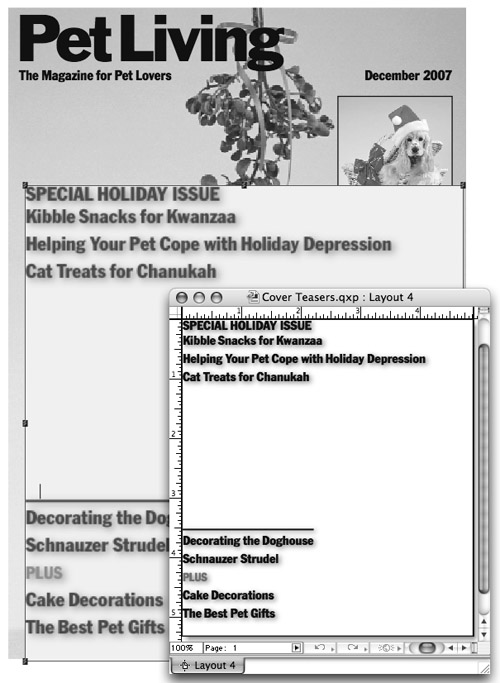
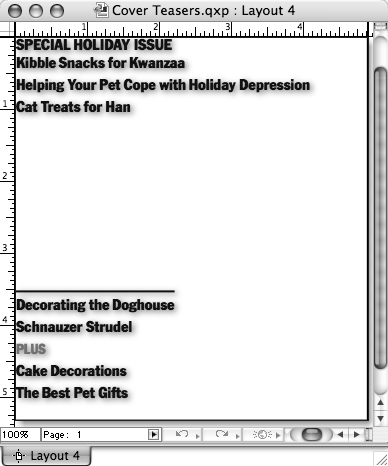
In this example, we created a Composition Zone for the magazine cover’s teaser lines. We can send it to an editor for edits, and then update it in the layout.
Collaborating in QuarkXPress
You don’t have to work in publishing long to discover two things. The first is that it’s easy to create layouts that will not print, cost too much to print, print incorrectly, or don’t meet design standards. The second thing you’ll learn is that it’s easy for content to become “trapped” inside a single file on one person’s computer. When that lovingly crafted text or carefully positioned picture changes, those changes have to funnel back through that single person, whether or not he or she has the time or skill to deal with it.
These two things are significant problems, considering that the ability to print and revise are essential for publishing. To address these two issues, QuarkXPress 7 provides two new features: Job Jackets and Composition Zones. Both features are incredibly powerful and—in true Quark fashion, where great power comes with great complexity—they are insanely complicated. As a result, in this QuickStart format, we simply introduce you to these features in the way you are most likely to encounter them.
Job Jackets are XML files based on the industry-standard Job Definition Format (JDF). Job Jackets contain “Job Tickets,” which in turn contain layout, color, style sheet, output, and other specifications for a particular job. By assigning a Job Ticket to a layout, you’ll start off on the right foot and have fewer output headaches.
A Composition Zone is all or part of a layout that you can share with another QuarkXPress user and which updates dynamically.
Working with Job Jackets
Due to the complexity of the interface and the specifications involved, it is unlikely that the average user will ever create a Job Jackets file. Rather, as the feature is intended, you’re likely to receive a Job Jackets file containing a Job Ticket template, which initiates a layout based on settings in the Job Jackets file. You can also link a project to an existing Job Ticket template, and you can check layouts against Job Tickets to ensure that the job is following its rules and specifications (this is sort of a sophisticated preflighting process).
To create a project from a Job Ticket
- First, you will receive a Job Jackets file
 from a print provider, production department, or other source. (Or, they may just tell you where to access the file on a server.)
A Job Jackets file looks like this. You can store it wherever you want for easy access.
from a print provider, production department, or other source. (Or, they may just tell you where to access the file on a server.)
A Job Jackets file looks like this. You can store it wherever you want for easy access. - Choose File > New > Project from Ticket.
- Click Browse, and then locate, select, and open the Job Jackets file.
- All the Job Tickets inside the Job Jackets file are listed
 . If you have been given instructions to use a specific one, select it. Otherwise, click Default Job Ticket.
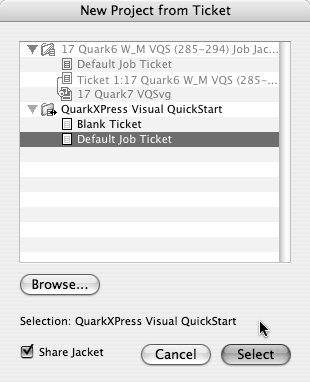
Choose File > New > Project from Ticket, then click Browse to locate a specific Job Jackets file. Click the Job Ticket you need, and then click Select.
. If you have been given instructions to use a specific one, select it. Otherwise, click Default Job Ticket.
Choose File > New > Project from Ticket, then click Browse to locate a specific Job Jackets file. Click the Job Ticket you need, and then click Select. - Click Select to create a new project containing a new layout based on the Job Ticket.
Note: Depending on what was specified in the Job Jackets file, the layout should be the right size and may contain the correct colors, style sheets, H&Js, and more for the layout ![]() . The Job Jackets feature, however, does not block you from making changes in QuarkXPress—whether they are appropriate or not. That’s the job of the File > Job Jackets > Evaluate Layout feature described on the next page.
. The Job Jackets feature, however, does not block you from making changes in QuarkXPress—whether they are appropriate or not. That’s the job of the File > Job Jackets > Evaluate Layout feature described on the next page.
![]() When you create a project from a Job Ticket, all the specifications you need can be built in. The Job Jackets feature is like a super template, not only providing what you need but helping you to stick to it.
When you create a project from a Job Ticket, all the specifications you need can be built in. The Job Jackets feature is like a super template, not only providing what you need but helping you to stick to it.
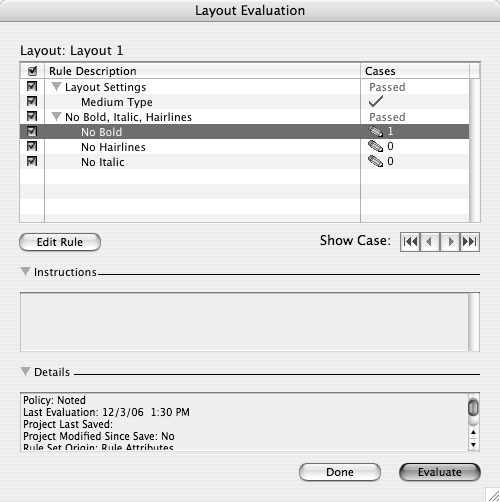
There’s no safety valve in the Job Jackets feature to stop you from creating trouble. For example, you can add spot colors to a CMYK job or introduce new fonts to a layout even if the Job Ticket says otherwise. QuarkXPress does provide some protection, however, in the form of the Evaluate Layout command which evaluates your layout to see if it adheres to the specifications in the Job Ticket. Evaluate the layout and act on this feedback to ensure that the layout outputs as intended.
To evaluate a layout
- Display the layout you want to evaluate.
- Choose File > Job Jackets > Evaluate Layout .
Choose File > Job Jackets > Evaluate Layout and click Evaluate to confirm that your layout conforms to the specifications in the Job Ticket.
- If you want to skip any rules listed in the scroll list, uncheck them. You’ll probably be checking against specifications provided to you, so you should leave them all checked .
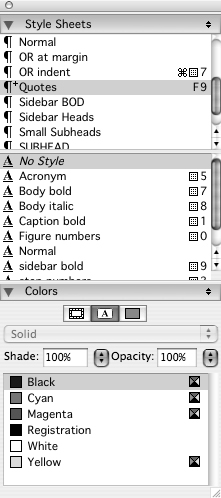
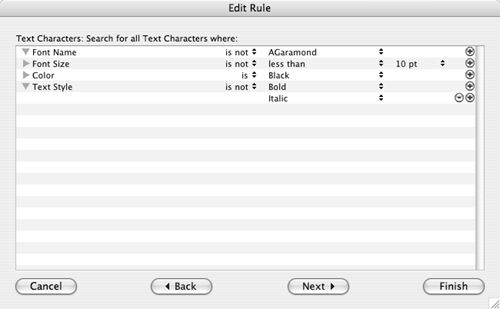
A rule for Text Characters might look something like this. In this case, we don’t want Adobe Garamond sneaking into the layout instead of ITC Garamond, so we create a rule that Font Name is not AGaramond. In addition, Font Size is not less than 10 pt is set to ensure that point sizes remain at 10 pt or larger. To make sure no colors are applied to text, we set Color is Black as a rule, and then to prevent the Bold and Italic type styles from sneaking in (because they often cause production errors), we created rules for Text Style is not Bold and Text Style is not Italic. Rules are created with Job Jackets in Utilities> Job Jackets Manager, but can be edited via the Evaluate Layout dialog box.
- Click Evaluate.
- A number in the Cases column indicates how many locations in the layout do not follow the rule. Click Show Case to see the page on which the rule is broken on. Your only option at this point, however, is to jot down what needs to be fixed—unfortunately, this isn’t an automatic repair feature.
- When you’ve finished reviewing broken rules, click Done. If you have multiple layouts in a project, be sure to evaluate each layout separately.
Tip
If you would like QuarkXPress to evaluate your layouts automatically, you can use Preferences to specify when. Choose QuarkXPress (Edit, in Windows) > Preferences > Job Jackets. In the Evaluate Layout area, check On Open, On Save, On Output, and/or On Close. These are all unchecked by default, but at a minimum you should check On Output to be sure your layouts are evaluated for printing.
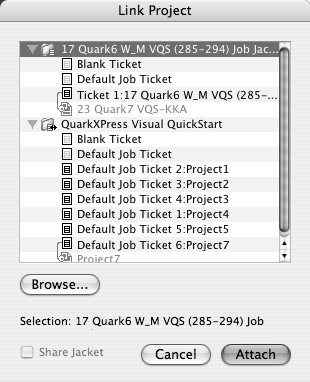
You can use the Link Project feature to retrofit legacy projects with Job Tickets.
To link a project to a Job Ticket
- Be sure you have the Job Jackets file you need—and you know where it is.
- Open the project you want to link to a Job Ticket. There is no need to display a specific layout as the Job Jackets file will attach to the entire project.
- Choose File > Job Jackets > Link Project.
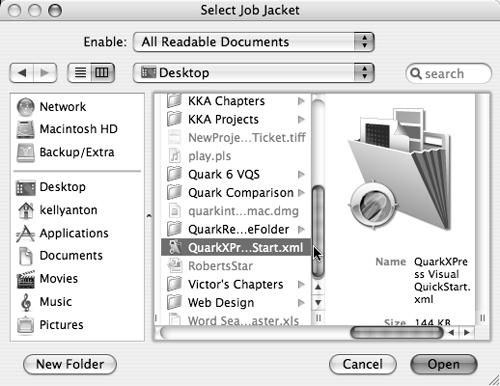
- In the Link Project dialog box , click Browse to navigate to the Job Jackets file.
Choose File > Job Jackets > Link Project to link a project to a Job Jackets file for the first time, to apply a different Job Jackets file, or to apply an updated version of the current Job Jackets file.
- Select the Job Jackets file or one of its Job Tickets and click Open .
Select a Job Jackets file on the desktop to link to the active project.
- Click Attach. When the alert displays, click OK.
Tip
When you link a project to a new Job Jackets file, nothing is lost from the current project file, but any new style sheets, colors, H&Js, and other specifications will be added.
Tip
As we said, the average user isn’t likely to be involved in creating Job Jackets and/or Job Tickets. They are more likely to be the recipient and user of such files. To get a glimpse into the process, however, choose Utilities > Job Jackets Manager, then click the Advanced Button. This will give you an idea how complex the process is!
Working with Composition Zones
Composition Zones provide a way to share pieces of a layout—even a single page—with members of a workgroup. You mark off an area as a Composition Zone, export it, and send it to another user. The other user works on this small version of a layout, sends it back to you, and you update it. You can work with Composition Zones in endless ways, including exporting an area of a page, selected items, or an entire layout. You can restrict Composition Zones to a single project or share them with multiple projects. And you can specify when changes to Composition Zones update.
To create a composition zone
- Choose the Composition Zones tool
 , then drag to specify a blank area on a page to be shared. Even if items are on the page, they won’t become selected; you’re simply defining an area.
or
If the items you want to share already exist, Shift-click to select the items or groups, then choose Item > Composition Zones > Create.
- With the new Composition Zone selected, choose Item > Share. The Shared Item Properties dialog box appears . Enter a descriptive name for the item in the Name field.
The Shared Item Properties dialog box lets you name, share, and export a Composition Zone.
- From the Availability menu, choose whether the Composition Zone is for This Project Only (for use with all the layouts in the project) or All Projects (for use with any layout in any project).
- To be able to access the Composition Zone from the project window, check Show Tab in Project Window.
- Optional: If you want to send the Composition Zone to another user (via e-mail, for example), click Make External and name the file. The Show Tab in Project Window checkbox disappears.
- Click OK.

To edit a Composition Zone
- If the Composition Zone is in the project you’re working on, click it and choose Item > Composition Zones > Edit or click its tab in the project window (that is, if you created a tab in the Shared Item Properties dialog box).
or
If the Composition Zone is external and you received it from another user, use File > Open to open it.
- The Composition Zone will open in its own project window like any other project . You can modify it, save, and close it like any other project file. If you are working on an external Composition Zone, be sure to send it back to the original designer if necessary.
![]() When you open a Composition Zone to edit, it looks just like a standard QuarkXPress project.
When you open a Composition Zone to edit, it looks just like a standard QuarkXPress project.
To link to a Composition Zone
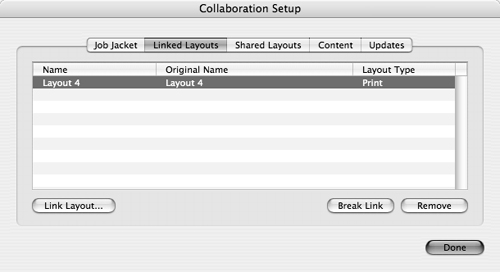
- If you create an external Composition Zone, other projects and layouts can link to and share its content. To link the active layout to a Composition Zone, choose File > Collaboration Setup.
- Click the Linked Layouts tab, and then click Link Layout .
To link a layout to an external Composition Zone and share its contents click Link Layout in the Linked Layouts pane of the Collaboraton Setup dialog box.
- Navigate to the Composition Zone file you want to link to, then click Open.
- Choose Window > Shared Content, then drag the Composition Zones into the layout.
To update a Composition Zone
If you’re working with an internal Composition Zone (one within the same project), it will update automatically each time you save changes to it. To control when it updates, use the Updates pane of the Collaboration Setup dialog box (File menu) ![]() .
.
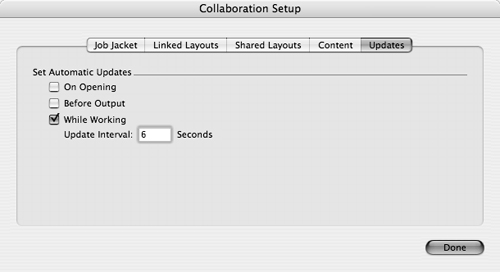
![]() The Updates pane in the Collaboration Setup dialog box (File menu) lets you specify how often Composition Zones update in the layout.
The Updates pane in the Collaboration Setup dialog box (File menu) lets you specify how often Composition Zones update in the layout.
If you’re working with an external Composition Zone, you can update it in a layout via Utilities > Usage > Composition Zones. This works the same as updating a picture file via the Pictures pane of the Usage dialog box.