
In this section we are going to illustrate how the System Administrator would go about adding a new field to the database. As an illustration, we are going to add a probability reference field that can be used to measure a predefined set of outcomes on an order to the Sales Order window.
- Find the context by Zooming to the Table from the Window. Open and find the Sales Order window in the Window, Tab, and Field menu item when logged in as System Administrator:

- Zoom from the window into the underlying Table and Column window. Order records are maintained in the database in the C_Order table:

- Next we refer the Column tab, and create a new column in the table (see the field naming conventions below). The new column must be as a System Element defined and hence we need to create a System Element prior to using it as a Column in the Table:

- Once the System Element has been defined, we set up the Column as follows:

- Create a new Reference key as follows:

Because this is a custom list, we choose a validation type of List Validation, and a value format of L, indicating that any letters are allowed. For a full list of these conventions, refer to the help documentation in the system by pressing F1.
- We then define the Reference key's list validation options as follows:
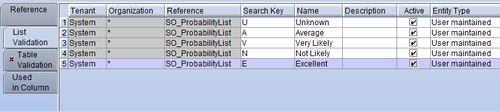
- The finalized column (and thus the ultimate window field) set-up is thus shown as follows:

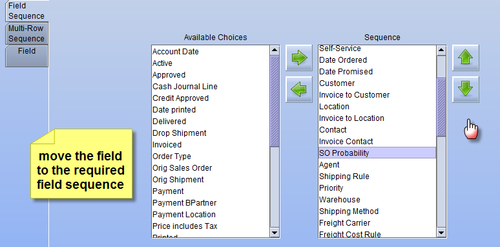
We finalize the set-up of the field by indicating:
- Field naming conventions: Compiere recommends that customer-specific table and database column names be prefixed by EXT_, XX_, or CUST_, or the four letter entity registered with Compiere, such as SAAC_. This would also apply to indexes and constraints. The reason for this is that these entities are ignored in the migration process.
- Length of field: Because we know that for this particular field there is going to be only one character we define a length of 1.
- Default logic: We assume U, based on our list being Unknown.
- Mandatory UI: Indicates that this field will be mandatory in the window, but not at database level.
- Updatable: Indicates that the field is editable.
- Always Updatable: Indicates that the field is always updatable, regardless of document status.


..................Content has been hidden....................
You can't read the all page of ebook, please click here login for view all page.