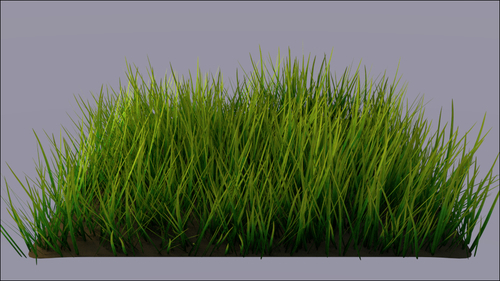
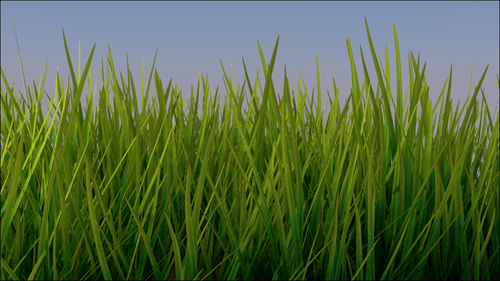
In this recipe, we will create a generic grass shader using grass leaves meshes instanced on a particle system, as shown here:
Start Blender and open the 1301OS_07_grass_start.blend file, where there is an already set scene with an emitter plane working as light source, an uneven plane to perform the ground, and several grass leaves objects grouped and instanced on the ground plane by a particle system.
Let's start by assigning a ground material to the ground plane and with the creation of the grass shader working on the grass blades meshes to be instanced:
- Select the ground plane and click on the New button in the Node Editor window's header or in the Material window to the right. Rename the material as
groundand set the Color value of the Diffuse shader to R 0.141, G 0.082, B 0.031. - Select one of the grass leaves objects and again click on the New button in the Node Editor window's header or in the Material window to the right. Rename the material as
grass. - Box-select (press B and drag with the left mouse button pressed) the other grass leaves object and then press Ctrl + L. In the Make Links pop-up menu select Material to assign the grass shader to all the selected objects.
- In the Material window, switch the Diffuse shader with a Mix Shader node. In the first Shader slot, select a new Mix Shader node and in the second one, a Glossy BSDF shader node.
- Go to the second Mix Shader node and in the first Shader slot, select a Translucent BSDF node and in the second one, a Diffuse BSDF shader node.
- Add a Texture Coordinate node (press Shift + A and go to Input | Texture Coordinate), a Mapping node (press Shift + A and go to Vector | Mapping) and an Image Texture node (press Shift + A and go to Texture | Image Texture). Connect the UV output of the Texture Coordinate node to the Vector input of the Mapping node and the output of the latter to the Vector input socket of the Image Texture node.
- Connect the Color output of the Image Texture node to the Color input sockets of the Translucent, Diffuse, and Glossy shader nodes. Click on the Open button on the Image Texture node, browse to the
texturesfolder, and load the imagegrass.png. - Add a new Image Texture node (press Shift + A and go to Texture | Image Texture). Connect the output of the Mapping node to the Vector input socket of the second Image Texture node and its Color output to both the Roughness input socket of the Glossy shader node and the Fac input socket of the second Mix Shader node.
- Click on the Open button on the second Image Texture node, browse to the
texturesfolder, and load thegrass_spec.pngimage. Set the Color Space to Non-Color Data. - Add a Bump node (press Shift + A and go to Vector | Bump), connect the Color output of the second Image Texture node to the Height input socket and the Normal output of the Bump node to the Normal input sockets of the Translucent, Diffuse, and Glossy shader nodes. Set the Strength value to
0.010.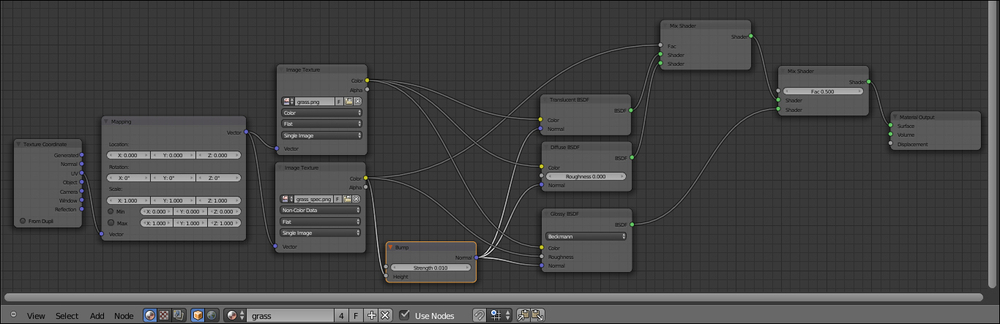
This is a very simple material. The translucent component is mixed with the diffuse component by the grass_spec.png texture, a gray-scale image acting as a stencil for the mixing factor and also as a very slight per-shader bump map. Then, the glossy component is mixed as well and the grass_spec.png image is used as its roughness factor.
Note that the color image map is connected to the Color input sockets of all the three shader nodes: Translucent, Diffuse, and Glossy. This is necessary to avoid white transparencies and specularity, and to obtain a more natural look.