
Lesson Files | Motion3_Book_Files > Lessons > Lesson_03 |
Media | Motion3_Book_Files > Media > Lesson_03 |
Time | This lesson takes approximately 60 minutes to complete. |
Goals | Convert a group from 2D to 3D |
Understand 3D space | |
Use the Heads Up Display to manipulate 3D objects | |
Manipulate layers using onscreen controls |
When most people think about 3D computer graphics, the character-animation wizardry of Pixar and other studios comes to mind. In fact, 3D also plays a major role in modern motion graphics, and most motion design exhibits a basic sense of depth.
The problem with 3D animation is that it traditionally requires a minor in theoretical mathematics, and a doctorate in fractal geometry wouldn’t go to waste.
The fundamental issue is that you’re trying to manipulate virtual 3D elements on a stubbornly 2D screen. As a result, dedicated 3D packages are notoriously difficult to learn and highly technical. The solution, as you have probably guessed, is Motion.
The Motion user interface rethinks 3D animation by providing intuitive ways to access and manipulate objects in 3D space. It borrows from traditional 3D design paradigms when they are useful but presents new, unique tools for grappling with the third dimension. Let’s dive in.
Although 3D space is present throughout Motion, all projects start their humble lives in a flat, two-dimensional state. Despite these initial appearances, each Motion layer is actually a 3D element just waiting to express its depth to the world.
Open Motion3_Book_Files > Lessons > Lesson_03 > Start.
Press F5 to open the Project pane. Press Shift-Z to set the Canvas to Fit in Window mode. (Or press Option-Z to scale to 100 percent if you have a large monitor that can comfortably display the entire image and the Layers tab.)
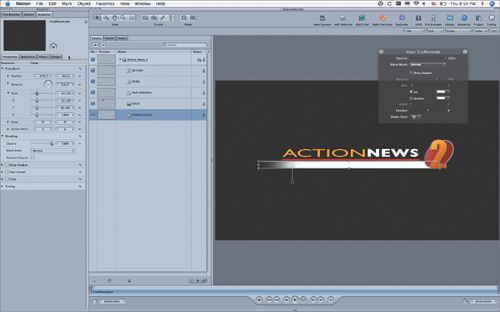
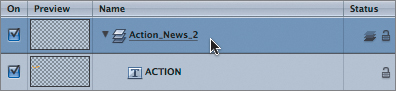
Here you have a basic, layered Motion file—nothing three dimensional about it. In the Status column, notice the icon to the right of Action_News_2.

This is the 2D/3D icon. It determines whether a group will be displayed as a 2D layer or as a set of layers in 3D space.

You’ve now converted the group from 2D to 3D and . . . things look exactly the same. That’s because all the layers of the group are still sitting on the same plane.
Think of a piece of paper with images drawn on it. The images are bound to the 2D surface of the paper, even though the piece of paper exists in our 3D world. Now, cut out the images with scissors and they’re each free to roam this grand 3D world of ours, independent of their neighbors or the paper.
At the moment, all of your images are sitting on the same “piece of paper.” You need to move them in 3D space to make them appear 3D.
Select the ACTION text layer by doing one of the following:
Click the layer in the Layers tab.
Click the text in the Canvas.
Press X, and then select the layer using Motion’s expose feature.
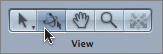
In the View tools at the top left of the Canvas, choose the Adjust 3D Transform tool.

If the Heads Up Display (HUD) is not already open, press F7 to open it.
The Adjust 3D Transform tool is uniquely designed to position, rotate, and scale layers in 3D. It works in conjunction with the HUD to help you manipulate project elements.
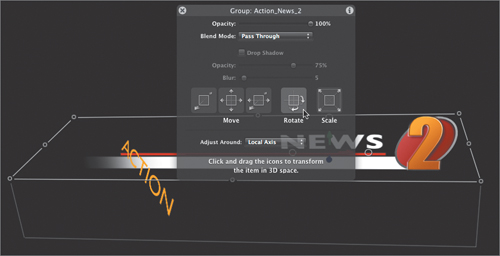
In the HUD, position the pointer over the Rotate control, and hold down the mouse button.

Drag the mouse from side to side and up and down, watching the results in the Canvas. Try to position the text so that it appears to lean toward the front of your computer’s display.

As you can see, the selected layer, ACTION, now can be manipulated in 3D.
In the Layers tab, select the Action_News_2 group.
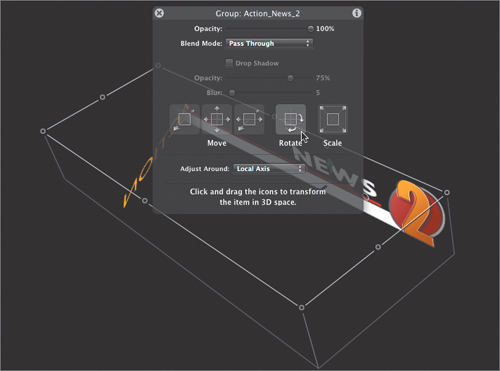
With the Adjust 3D Transform tool still chosen, in the HUD drag the Rotate control.
The Action_News_2 group is now represented by a rectangular prism-shaped bounding box. That’s because the layers inside the ACTION group now have depth.
Click the 2D/3D icon again to return the group to 2D.

The group turns flat again. But notice that the ACTION text is still rotated in perspective.

Previously, a 2D group was compared to a piece of paper. A better analogy for a 2D group is actually a TV screen. The TV can display all kinds of 3D scenes, but the screen itself is two-dimensional.
That’s what’s happening here. The ACTION layer is still rotated in 3D, but it’s displayed on a “flat TV screen”—the Action_News_2 group. If you rotate the group in 3D space now, the effect is just like rotating a TV screen. Perspective is displayed in the screen’s image, but the image itself is flat.
Click the 2D/3D icon again, and the group changes from a flat TV screen and once again becomes a true 3D container for the layers within it.
Before you go much further, it’s essential that you learn how three dimensions are described in a computer environment. Don’t panic—the math is simple. If you know the alphabet from A to Z, you’re good.
If you’ve previously worked in 2D, you’re used to using X and Y coordinates. The X coordinate identifies the left-to-right (horizontal) position of a point on the screen, while the Y coordinate locates the top-to-bottom (vertical) position. In Motion, coordinates of X = 0 and Y = 0 (0,0) place a point at the center of your composite. So, a position of 5,5 places a point 5 pixels to the right of center and 5 pixels above center. A position of -5,0 (X = -5, Y = 0) places a point 5 pixels to the left of center, and so on.
When working in three dimensions, you also need a value to describe a point’s position from front to back (depth). This is referred to as its Z coordinate.
If you look at Motion’s Inspector, you might be forgiven for thinking that points and objects only have X and Y values, because there’s no Z in sight.
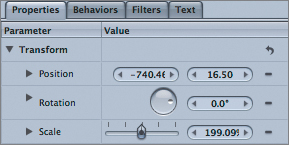
That’s because the Z coordinate is hidden, perhaps to avoid scaring those who are determined to believe that the motion graphics world is flat and not round. For the rest of you adventurous types, the Z coordinate is easily revealed.
In the Canvas, select the ACTION object; then, in the Properties tab of the Inspector, click the disclosure triangles to the left of Position, Rotation, and Scale.
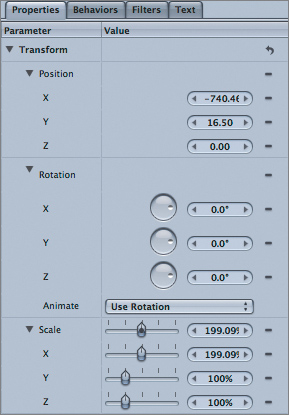
The Position, Rotation, and Scale areas now have three-dimensional coordinates: X, Y, and Z.
Position coordinates work in a simple way. Instead of just moving horizontally and vertically, you’re now moving in depth. So an object with Position parameters of X = 5, Y = 5, Z = 5 (5,5,5) is 5 pixels to the right of center, 5 pixels above center, and 5 pixels forward from center. An object with a position of X = -5, Y = 5, Z = -5 (-5,5,-5) is 5 pixels to the left of center, 5 pixels above center, and 5 pixels back from center.
Rotation is a little more confusing because it works about (around) the given axis.
For example, the Z-axis is the axis pointing forward and backward. Imagine a pencil pointing in the Z direction—that is, its tip disappears into the screen and the eraser points toward your face. If you were to roll that pencil between your thumb and forefinger, it would be rotating about the Z-axis.
With the ACTION object selected, in the Inspector adjust the Z Rotation parameter and observe the results in the Canvas. Leave the ACTION object at an angle, as shown in the figure below.

A rotation around X, then, will rotate an object about the horizon, like a jump rope with ends at the left and right of the Canvas; and a rotation around Y will rotate an object about the vertical, like a flag changing direction in the wind.
And that brings us to the confusing but important discussion of coordinate spaces.
Motion offers three modes for moving things: world, local, and view. If someone instructed you to walk 300 feet to the east from where you were standing, you could do so without confusion (assuming that you had a compass or GPS). However, if someone asked you to walk 300 feet to the right, the situation becomes less clear. Is that 300 feet to your right, or 300 feet to the right of the person giving the instructions? This little scenario illustrates the differences that arise between world, local, and view coordinates.
World coordinates never change. They’re the equivalent of compass directions. Tell a person to walk east, and he’ll walk east every time.
Local coordinates are always dependent on the position of the thing being moved. If you tell someone to walk to her right and she’s facing north, she’ll begin walking east. If she’s initially facing west, she’ll begin walking north. In both cases, locally she’s walking to the right, but each example results in different movements in world coordinates. depending upon that initial orientation.
Finally, view coordinates are always dependent upon the position of the observer. If you’re facing someone who turns and walks to his right, then he’ll actually begin walking to your left. From your point of view. he’s walking in a direction (left) that differs from his local direction (right).
A few quick exercises will clarify how this looks in Motion.
With the ACTION object still selected, in the View tools choose Adjust 3D Transform.
In the HUD, make sure that Adjust Around is set to Local Axis.

In the Canvas, you’ll see three arrows at the anchor point for the ACTION layer (you’ll learn more about these controls later in this lesson). The red, horizontal arrow is pointing along the length of the layer.

In the Canvas, position your pointer over the red arrow in the lower left corner of the ACTION layer. Drag the arrow left and right, and watch the results.
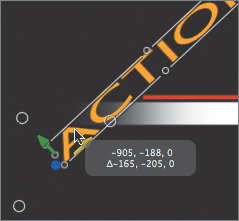
The ACTION layer moves along its local horizontal axis, not the true X-axis, which currently runs left to right.
In the HUD, set Adjust Around to World Axis.

Drag the red arrow left and right.
This time, the arrow moves the ACTION layer along the X-axis of the world. not the layer’s own horizontal axis.

It’s currently impossible to see a difference between the World and View modes. That’s because the Canvas is set to view the scene at its defaults, with X coordinates running left to right, Y coordinates top to bottom, and Z coordinates forward and backward. You need a different point of view to observe the difference between these modes. Adding a camera to the scene will provide that. (Later in this lesson, you’ll see that other views—such as Perspective—can also be used for this purpose.)
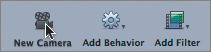
At the top of the Canvas, click the New Camera icon.
In the Inspector, set the Camera’s Rotation Y value to 45.0°.
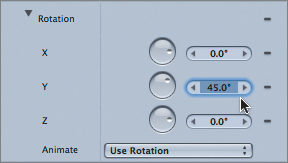
You’re now looking at the scene through a camera rotated 45 degrees from the original Canvas position.
Select the ACTION layer again and, in the HUD, set the Adjust Around parameter to View.

Toggle back and forth between the View and World settings.
Notice how the red arrow points to the right in the View setting but points in a different direction in the World setting. The View setting is now performing movements based on the camera’s point of view. Now that the camera has rotated 45 degrees horizontally, its perspective of left and right is different from the World coordinates.
View mode is great when you just want to move something from your current position to the right of the screen.
To switch back to the previous analogy, if the camera faces north, then telling it to “move right” and “move east” means the same thing. But after the camera turns 45 degrees (to face northeast), “move right” actually means “move southeast.” That’s what’s happening here. From the camera’s perspective, moving left to right is no longer the same as moving left to right along the world’s X-axis.
So to sum up: Local moves an object along its own, “personal” axes; world moves an object along the true world axes; and view moves them relative to the current view (that is, relative to the view you’re seeing through the Canvas).
Now, let’s begin learning how to move things around in 3D using the comprehensive controls included with Motion.
Creating a Soundstage for Perspective
Almost everyone who is new to 3D animation has a hard time keeping track of where he or she is. Even seasoned professionals can find themselves disoriented from time to time; you’ll occasionally find them making weird shapes with their fingers and tilting their heads to the side, trying to figure out what went wrong.
The problem usually comes down to a lack of reference. In a virtual world where 3D space is a black, infinite abyss and you can zoom from 30 virtual feet to 300 virtual miles instantly, it’s hard to stay oriented as you adjust layers and cameras without some available landmarks.
One solution is to build your own virtual soundstage. For those of you unfamiliar with film and video production, a soundstage is a closed environment used for shooting film and video. Everything that will be seen in the camera is contained within the four walls of the soundstage. By creating virtual walls in Motion, you can help keep track of which way you’re facing and where objects are located relative to each other.
A simple virtual soundstage has been included with the media for this lesson.
Create a project to match your desired format.
Navigate to Motion3_Book_Files > Lessons > Lesson_03. Drag the Soundstage Motion file into the Canvas.

Select the main Soundstage group, and then press F1 to view its Properties Inspector.
Adjust the scale to suit your project, and then adjust the opacity to make the walls as dim as possible, while still visible.
You can now use the walls and floor of this virtual soundstage to keep track of where you, your layers, and your camera are in the scene. What happens if your scene outgrows your soundstage? Just scale up the soundstage in the Properties tab of the Inspector again to suit.
Of course, remember to deselect the master Soundstage group when previewing or rendering your project.
Using the HUD is a great way to manipulate objects in 3D. Motion offers other methods, and you’ll look at each in turn; but first, a word about anchor points.
No doubt, in the last exercise you noticed that the ACTION layer pivoted from its lower left corner. That’s because its anchor point was set there. To make a layer rotate around a specific point, use the Adjust Anchor Point tool.
Close any open projects, then open Motion3_Book_Files > Lessons > Lesson_03 > AnchorChange.
Select the ACTION layer.
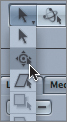
In the Toolbar, place the pointer over the Select/Transform tool. Choose the second option, the Adjust Anchor Point tool.
Tip
A quick alternate method for selecting this tool is to Control-click the object you’re editing in the Canvas; then, from the shortcut menu choose Anchor Point.
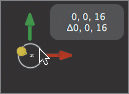
The odd little control that shows up in the lower left of the text is the anchor point. It has four sections to it: a vertical arrow (the Y direction), a horizontal arrow (the X direction), a depth knob (Z), and a free movement circle.

Drag the green and red arrows, and watch the result in the Canvas.
The green and red arrows constrain movement to the X- and Y-axes, respectively.
Drag inside the main circle (but not on the blue handle).
Dragging inside the circular area of the control moves the anchor point freely in both X and Y directions.
Drag the blue handle, carefully watching the tooltip that pops up.
The small blue handle adjusts the position of the anchor point on the Z-axis (depth). This is useful if you want a layer to orbit something, but for the most part you should leave this set to 0.
Press Shift-S to return to the standard Select tool.
The ACTION text will now rotate around its center, rather than the lower left edge.
Using the HUD is the easiest way to move project elements around in the Canvas.
Close all open projects, then open MovingIn3D.
Select the layer Solo2 (the number 2 with the oval background to the right of NEWS).
Select the Adjust 3D Transform tool. If the HUD isn’t visible, press F7 to display it.
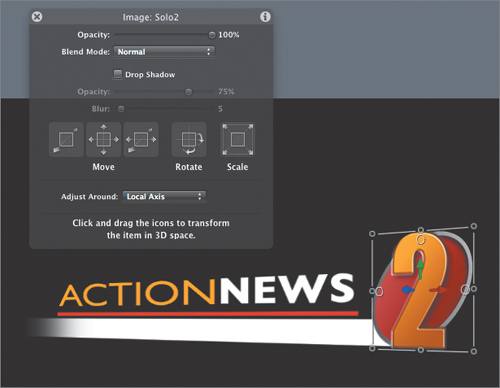
Make sure that Adjust Around is set to Local Axis.
It’ll be easier to see the function of the controls if you begin by adjusting layers by their local axes.
The Adjust 3D Transform HUD has five main controls: three Move controls, Rotate, and Scale.
Drag the Move Z control (on the left).

The layer Solo2 moves forward and backward along its local Z-axis (it moves locally in Z).
Drag the Move XY control (center) left to right and top to bottom. When you’re done, hold down the Command key and drag the control again.
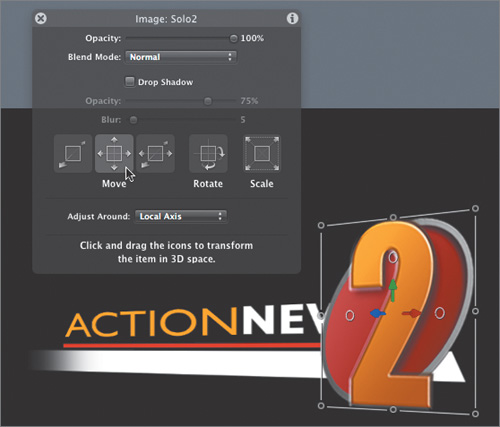
The layer moves up, down, left, and right along its local, 2D axes. (It moves locally in X and Y, but not in Z.) With the Command key held down, the movement will lock to the direction in which you first start dragging.
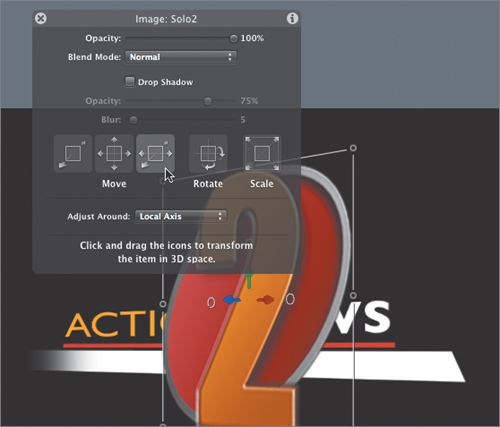
Drag the Move XZ control (right). When you’re done, hold down the Command key and drag the control again.
Drag the Rotate XYZ control. When you’re done, hold down the Command key and drag the control again.
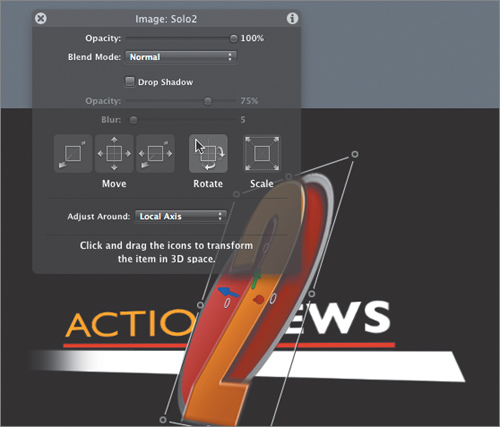
The layer rotates horizontally and vertically. (It rotates about the X- and Y- axes but not the Z-axis.) With the Command key held down, the layer will rotate about the Z-axis.
Drag the Scale control. When you’re done, hold down the Command key and drag the control again.

The layer scales up and down. With the Command key held down, the scale will be confined to the dimension in which you first start dragging.
Using the Scale control may give the impression that the Solo2 layer is moving forward and backward, but it’s actually just getting bigger and smaller; it still sits at the same distance (depth) from the camera.
There are additional fine-tuning options available. Hold down the Shift key to perform quick, coarse changes. Hold down the Option key to perform fine, precise changes.
Repeat the above steps, holding down the Shift or Control key while dragging the controls and observe the results in the Canvas.
In addition to the controls in the HUD, Motion includes onscreen controls for manipulating layers. These are instantly visible when a layer is selected and you are using the Adjust 3D Transform tool.
Choose the Adjust 3D Transform tool, if not already chosen, and make sure it’s set to Adjust Around Local Axis in the HUD.
Select Solo2.
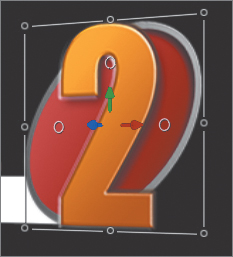
On the selected layer you’ll see three arrows and three hollow circles. You’ve already seen that dragging any of the three 3D axis handles (arrows) constrains movement to that direction, and that the 3D axis handles change depending on the Adjust Around mode that was chosen.
Drag the red, green, and blue arrows consecutively, and observe the results. Press Command-Z as necessary to return to the original position when you’re finished.
These onscreen controls also provide an easy method for rotating the layer.
Position the pointer over one of the hollow circles to display a rotation ring. Drag the ring to rotate it.

Each rotation handle (hollow circle) provides access to a rotation ring for one of the axes X, Y, or Z.
Hold down the Command key and drag the layer.

Holding down the Command key performs a free-form rotation in all directions.