![10. Setting Up Your Ableton Live [Mobile] Studio](https://imgdetail.ebookreading.net/cover/cover/design/EB9781598638196.jpg)
With an enlisted laptop ready to do battle and the necessary mobile-centric components in hand, you’re ready to set up your Ableton Live mobile studio. At the top of your to-do list is putting that laptop through an optimization boot camp, so to speak. Given the fact your laptop will more than likely be used in a performance environment, it’s imperative that it runs as best it can. So it’s important you take the steps listed in this chapter on top of the tweaks talked about in Chapter 3, “Setting Up Your Ableton Live [Home] Studio.”
After the technical side of things is taken care of, you’ll explore some important mobile-studio concepts, including what to put in your newly acquired super-cool mobile-studio bag. Before closing things down, there will be a compendium of power tips—some of which are coming to you straight from electronic-music pioneers Moldover and Elijah B Torn. And don’t forget: This book’s appendix, “What’s in YOUR Ableton Live Studio?” lists our two guest tipsters as well as other forward-thinking artists and the author’s own studio contents, enabling you to take a look into our Ableton Live studios.
When producing music on your laptop, you want your machine to run as best it can—maybe even more so than your home-studio desktop, because this will be the computer that will go on stage with you. And that, folks, is where you need it to be the other half of our Part 4 mantra: reliable. To help ensure your laptop’s reliability in the throes of performance, you’ll need to fine-tune your system with some smart optimizations.
Now, that’s not to say these suggestions cannot be applied to your home-studio computer. But let’s face it: Most of you reading this book probably will start out with a laptop that serves as both the home- and mobile-studio brain. That being said, do be sure to go back to Chapter 3 and apply all the suggested tweaks outlined there, including the following:
While the previous chapter made the case for springing for an Apple laptop, many of you will opt for a PC-type notebook nonetheless. Of course, they have their own pros and cons. Regardless, this section provides tips that apply to both platforms to ensure no one experiences any spinning balls of doom or blue screens of death. Let’s start with getting your Mac up to snuff.
It’s no secret Apple computers function exceptionally well with regard to audio production right out of the box. Even so, there are still settings you can adjust to make your system that much better. These start with some simple System Preference tweaks and progress to ones that call for outside help courtesy of third-party freeware. All in all, these tweaks are pretty harmless. Nonetheless, if at any time you feel uncomfortable performing them, stop.
Before you perform any tweaks to your laptop, it’s a good idea to have a backup of your entire system. A solid go-to solution for creating one is Carbon Copy Cloner, which is available for download for free (although donations are welcome and merited).
It doesn’t get much easier than repairing disk permissions, which is always a good idea when installing and/or uninstalling software—especially drivers. This is done through the Disk Utility program (Figure 10.1) that comes stock with OS X and can be accessed through the Utilities folder nested in the Applications folder or by simply pressing Cmd +U in the Finder. Once the program is launched, you choose your system drive in the left pane, click the First Aid button, and then click Repair Permissions. (No need to verify the operation; just fix ’em.)

Figure 10.1. A good first line of defense in combating abnormal software behavior and basically helping to keep things running smoothly is repairing disk permissions, which is done with little effort in the First Aid section in the Disk Utility application that comes stock with OS X.
Repairing permissions doesn’t take long, and it’s a good first-level task to perform when you’re experiencing weird software-related behavior in your system. Consider dragging the Disk Utilities program icon to the Dock so you can more easily reach for it as a first defense.
If you already have the Disk Utility program icon in your Dock, you may have noticed it was bouncing as the program was loading. This needless built-in effect can hamper performance. To shut down this animated effect (among other trivial additives) go to System Preferences and click on Dock, as shown in Figure 10.2. Once there, uncheck the Magnification and Animate Opening Applications options. If you want to take it a step further, go ahead and uncheck Automatically Hide and Show Dock while you’re at it, although doing so leaves the Dock displayed at all times, consuming precious screen real estate. To counteract that, try scaling back the Dock size.

Mac OS X comes with all kinds of useful keyboard shortcuts. Unfortunately, many of them overlap with common DAW keyboard commands. To avoid any keyboard collisions, go to System Preferences and open the Dashboard & Expose screen. To change any default shortcuts to their off state, choose the - option in each shortcut’s drop-down list. Next, go back to the main System Preferences screen by clicking Show All and then choose Spotlight. Be sure to uncheck the two keyboard-shortcut options at the bottom of the screen.
It’s not at all common to install third-party virus protection on a Mac of any kind, but some of you may feel the need. Hey, no one’s faulting you—better safe than sorry. But (here it comes), some of these programs take the liberty of automatically booting with this OS, resulting in the interruption of normal DAW operations. To counteract this, open System Preferences, click Accounts, and navigate to your account. Then, click Login Items, peruse the list that appears, and uncheck any items related to third-party virus protection. While you’re there, uncheck any other program that looks as if it doesn’t need to boot up with your computer, too—every little bit counts. From there, close out System Preferences and double-click your Macintosh HD folder, most likely sitting in the upper-right corner of your desktop, to open it. Click on the Library folder (see Figure 10.3), navigate to the Startup Items folder (type the first few letters for faster navigation), and check for other virus protection or other unnecessary items. If you uncover any, trash them, and promptly reboot your system to lock in the changes.

By changing your display color properties from millions to thousands in the Displays section of System Preferences, you can help back off the amount of the processing power sucked up by the video controller. Just open the Colors drop down and choose Thousands. If you’re eyeing the 256 Colors option and thinking you can save even more resources, don’t jump too fast; some programs will not be able to display their graphics properly with that setting selected. Plus, it looks pretty terrible.
To ease into the use of third-party apps to help free up some processing muscle through OS tweaks, start with ShadowKiller (see Figure 10.4). Its sole purpose is to eliminate the shadows displayed underneath open windows in OS X. (Didn’t even notice them, did ya?) Just visit http://www.unsanity.com and fish around for the version that’s right for your system. Known to improve performance especially on older-model Macs, this is a simple fix. After an easy installation that saves the haxie anywhere you choose (the Utility folder makes the most sense) it’s just a matter of clicking on the ShadowKiller icon to rid yourself of this needless graphic effect. Upon rebooting, you’ll notice the shadows return; if you want ShadowKiller to remain active, just add it to the list of login items that you checked out when tracking down unwanted virus-protection utilities.

While this next tip may not speed things up per se, it’s always a good idea to clear as much hard-drive space as possible, since laptop producers are always fishing for more storage. OS X installs with a few hundred megabytes (or more) of support files in all kinds of languages. Whatever tongue you speak, you most likely only need that one—or maybe two. To delete the rest—in my case, 1.8GB of support files—you’ll need to download a free utility called Monolingual (see Figure 10.5), which can be found at http://monolingual.sourceforge.net. Once the program is installed, the process is self-explanatory, although it does take a little while to complete. Since this is a one-time-only task, you can uninstall this app when it’s through. Unless you re-install the OS, you won’t need to do this again.

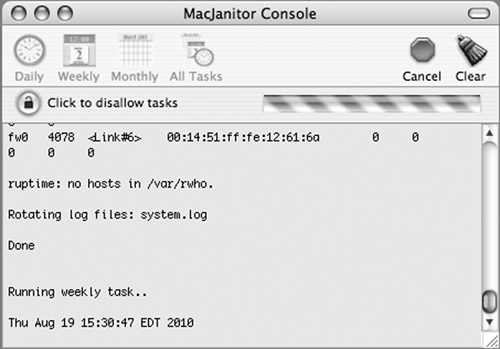
OS X contains a series of scripts that are designed for system maintenance to keep your computer lean and mean. Some are supposed to run automatically between 3 and 5 a.m., while others are meant to run on the weekend. If you often shut down your machine during those times or if you’re doing a gig, chances are the scripts are either not running or getting in the way. Using a freeware application such as MacJanitor by Brian Hill (see Figure 10.6) or System Optimizer X by MKD, you can initiate these tasks any time you feel the need, much like repairing disk permissions. Not only does this improve performance, it cuts down on the effects of the process when it’s running in the background during its scheduled times—something you can’t alter without more third-party software.
Even more so than Macs, PCs about to deploy into the audio-production battlefield need to be properly prepped. Although we live in a Windows 7 world, the optimizations throughout this section are based on Windows XP, as it’s a more proven OS and the one you’re likely to have installed on the laptop you’ve designated as your mobile studio engine. What’s presented here will definitely get you off to a good start, but be aware: These are just a few of the optimizations you can perform to enhance your Windows-based machine. Littered throughout the Internet are many more optimizations; if need be, get Googling and inform yourself of as many as you can. Be sure to keep a log of any tweaks you perform as you go; PC users are more likely to re-install the OS due to their susceptibility to viruses, which calls for the re-implementation of all these tweaks.
Take note of the navigational digging you’ll be doing to get to where you need to be in order to make adjustments—and, once you’re there, the seemingly more complex nature of the tasks, not to mention the reason they need to performed in the first place. Frankly, all this furthers the case for using Apple laptops for your Ableton Live mobile studio. OS X is just easier to deal with, more intuitive, not to mention more fun to look at. This section presents five tweaks that illustrate this point by involving some comical navigating, but they are smart tweaks nonetheless.
As stated in the Mac section, it’s always a good idea to have a backup of your system just in case you accidentally do something that results in a system freeze. A quick and easy solution in Windows is to use its native Backup utility, located in All Programs > Accessories > System Tools.
A solid way to start getting things to move more smoothly is to disable any applications running in the background. By default, Windows preloads applications and services from installed programs and deposits icons for them in the system tray. The goal is to both decrease load times and provide easy access to a variety of programs. While that should make sense, these partially launched applications are a CPU drain. Disabling them helps Windows allocate more resources to running applications. Windows will also load faster, because it won’t be pre-loading every application during startup.
You can uncover what’s going by opening Task Manager—just press Ctrl+Alt+Delete —and simply shut down any unwanted running programs by clicking the task and then clicking the End Task button. The downside to this approach is that Task Manager doesn’t display all running apps. Also, it’s only a temporary fix; you’ll be faced with the same problem when you reboot or restart. The better way to go is to prevent these programs from launching on their own at startup. To do this, use the System Configuration Utility, which you can launch by clicking the Start menu, choosing Run, and typing msconfig in the Run dialog box that appears and clicking OK (see Figure 10.7). Next, in the System Configuration Utility window, click the Startup tab to view a list of all programs that load each time you boot your machine (see Figure 10.8). You can uncheck any obvious items that look like they have nothing to do with audio production to free up some system muscle. Be sure to key in on the Command column for a better idea as to what you’re looking at. If in doubt, leave the program checked.


Once you’ve disabled those resource-hogging applications idling in the background, it’s time to even the playing field, so to speak. Windows XP is designed to give more of its resources to programs running in the foreground than ones running in the background —again, that makes sense, right? The problem is, applications like your audio interface drivers are running in the background! To do what you must, open the Control Panel, double-click the System icon to open the System Properties dialog box, and click the Advanced tab. From there, click the Settings button under Performance to open the Performance Options dialog box (see Figure 10.9). Once that’s in focus, click its Advanced tab, and click the Background Services option button under Processor Scheduling. This ensures background apps like your interface drivers will get the resources they need. While you’re there, make sure the Program option button in the Memory Usage section is also selected; then click OK.

Figure 10.9. Windows often calls for a series of not-so-obvious clicks (seven in all, counting the double-click to open the System Preferences dialog box) to navigate to crucial system properties that need your attention. If you stay focused, here in the Advanced tab of the Performance Options dialog box—which you accessed through the Advanced tab of the System Properties dialog box—is where you’ll end up at the end of your click journey.
If you’re knowledgeable about Windows OS features, you’ll most likely be aware of System Restore—a feature that enables you to literally turn back time and restore your computer to a previous state in the event some disaster were to befall it (e.g., virus infection, permanent deletion of family photos, etc.). To make this possible, Windows periodically sets restore points. Sounds sensible…what’s the catch?
When it comes to producing audio in your Ableton Live mobile studio, this will cause —you guessed it—problems. The process through which these restore points are generated is run automatically by default. If you happen to be running Live when XP decides to set a new restore point, the surge could cause a crash—which could be a bit of problem if you’re recording a take or worse, doing a gig. To disable System Restore, reopen the System Properties dialog box discussed in the previous section, click the System Restore tab, and select the Turn Off System Restore on All Drives checkbox. Problem solved, right? Nope—you just disabled a crucial backup feature in Windows. While there are ways to counteract your counteract, it just illustrates some of the frustrations Windows brings with it when it comes to digital audio production.
Another way to achieve improved performance is to set the minimum and maximum virtual memory paging file sizes to be the same. Going one more time to the System Properties dialog box via the Control Panel window and following the path clearly outlined in the previous sidebar, you should end up in the Advanced tab of the Performance Options dialog box. From there, click the Change button under Virtual Memory to open the Virtual Memory dialog box (see Figure 10.10). In the Paging Files Size for Selected Drive section, click the Custom Size option button and then enter the same value—for example, 768—in both the Initial Size and Maximum Size fields. Take note: In order for this to take effect, you must click Set, click this dialog box’s OK button, followed by two more OK button clicks, and then, then, restart Windows. The latter is an event that is often required for system changes at this level to take full effect, so get used to it.

Fact: When not plugged in, laptops run on batteries. In order to conserve battery energy, XP uses SpeedStep technology, which adjusts the maximum speed of the processor so that it only tops out at the most efficient rate. As clever as this may sound, the most efficient rate is not always the best for processing digital audio—meaning this tends to wreak havoc while your computer, especially in real time. Some indications that things are not adding up include unwanted noise, dropouts, and distortion. So, it goes without saying this feature needs to be disabled.
Because this is not something that can be adjusted in XP natively, you’ll need to download a free application called SpeedswitchXP (www.diefer.de/speedswitchxp), shown in Figure 10.11, to make it happen. After installing SpeedswitchXP and double-clicking its desktop shortcut, launch the applet by clicking its icon—look for the blue and green flag—from its System Tray icon. (Once you double-click the SpeedswitchXP desktop shortcut, the program stays open; from then on, you can simply launch the applet from the System Tray.) Then turn off all modes that enable any type of energy saving in both the On External Power and On Battery columns. To do so, choose Max Performance from the two drop-down lists in the CPU row and choose Never from each of the remaining drop-down lists in each column.

Figure 10.11. To adjust SpeedStep settings on your system, you’ll need to install SpeedswitchXP. Looking over the stats here, you can see some adjustments are needed especially in the On Battery column. Without these modifications, your audio-production flow will be interrupted with unwanted noise, dropouts, and distortion.
Once you have your laptop in the shape of an Olympian, you’re ready to make like Optimus Prime and roll out. Or are you? Just because you have much or all the gear outlined in the previous chapter and you have optimized your machine for audio production doesn’t mean you’re completely ready to go mobile. This section includes a collection of hard-earned knowledge that will hip you to what you couldn’t possibly know unless you’ve dragged a mobile studio around for a few years. While there will inevitably be scenarios that no one could possibly predict, this section serves as the heads up everyone always wishes they’d had when things go wrong.
When it comes to actually transporting your Ableton Live mobile studio in your newly acquired bag, there’s much to be taken with you. In addition to the core components, there will be plenty of ancillary items that you’ll be thankful you stowed away when the time comes, such as the following:
Any and every adapter you come across in your work. Make sure one is in your bag. Some must-haves are several ¼-to-⅛-inch adapters, a set of USB adapters to accommodate varying tip sizes, an FW 400 to 800, a ground-lift, and an iGo power adapter with whatever tips you need, including one for your cell phone and iPod.
All the basic audio and computer cables you normally use. Be sure to include an Ethernet cable!
A flash drive or two.
A power strip—preferably one that wasn’t $5 at Wal-Mart.
Writing utensils, including mechanical pencils with extra lead capsules and spare eraser tops, as well as pens with retractable ballpoints.
A Sharpie for writing on freshly burned CD/DVDs, not to mention signing autographs!
The earbuds that came with your iPod. It’s always good to have a last-resort backup when you forget both your mobile cans and your USB-powered monitors.
Lip balm—you’ll be so glad you did.
A portable laptop stand.
A small utility knife with useful tools.
A mini screwdriver with various interchangeable tips.
Spare strings for someone who plays guitar, even if it’s not you.
Twist ties. Grab every set that comes with a box of garbage bags.
A compact interface, for the times you forget the real thing.
A few dollars, which you religiously replace if you have to spend them.
When looking into hardware options for your Ableton Live mobile studio, keep wireless connectivity in mind. Going wireless brings all kinds of advantages, some of which are listed here. Some hardware options already discussed in this book that are wireless include the X-Tempo Pok foot controller (mentioned in Chapter 9, “The Shopping List v2.0”) and the Apple iPad (when loaded with controller apps such as TouchAble and TouchOSC).
Going wireless with controllers enables you to set up away from your laptop, which could help improve your overall look on stage. Face it: People bending over a laptop on stage looks as if they’re checking their e-mail.
Fewer cables to worry about means fewer cables to forget when packing that bag discussed in the previous section.
Every cable you don’t need frees up valuable USB ports, although this applies only to wireless scenarios like with the iPad, where the communication is through WiFi and not a USB dongle of some sort, like with the Pok.
Every cable on stage is a potential disaster. A cable might fail in the middle of a performance, which in some cases could be near impossible to pinpoint quickly—especially on a dark stage. And how about the tripping-hazard factor? If you like to move around with a controller in hand or attached to you, and you’re performing with others, you must always avoid straying too far and creating a trip wire for fellow performers (or yourself).
Before running out into the great outdoors with thousands of dollars worth of pro-level recording gear, keep these final tips in mind. They’re the ones that were, well, let’s just say “learned the hard way.” From making sure your mobile studio remains yours to taking precautions to prevent it from ceasing to exist before it boots up, it’s always good to have a heads up. This is not to say after reading this section you’re free and clear. The world is full of surprises, and unfortunately some of them may threaten your Ableton Live mobile studio.
Read these words carefully and then act on them: Insure your gear. Be it fate, Murphy’s Law, karma, whatever—stepping out of the confines of your acoustically treated, climate-controlled home studio puts your mobile studio at risk every time. Things can and will happen, such as theft, accidental damage, loss, etc. A good insurance policy not only safeguards you against financial loss, but also against something you can’t replace: time. If you have no backup plan for when disaster strikes, you’re grounded until you muster up the funds to replace whatever you lost. Spent a sizable amount of time and money assembling a gig bag that houses your entire system in a tight, convenient package? If that’s taken, your entire mobile studio could be gone in a flash, leaving you flatter than flat. Do the right thing and prepare for the worst. That way, if it happens—and let’s hope it doesn’t—it may not be that bad.
If you look on the side or rear of your laptop, audio interface, and/or other hardware peripherals you find a small, hollow cavern that may or may not be marked as shown in Figure 10.12. This is a Kensington lock port, and its sole purpose is to lock down your gear with a heavy-duty combination lock that’s attached to a hefty rubberized metal cable. It works, and it can be found on most every laptop manufactured since 2000. Look into obtaining Kensington cabling and use it. While most laptop cases are made of either plastic or thin metal, allowing for the Kensington lock to be ripped out, it’s still a worthy deterrent, as laptops and other gear showing damage at the K-slot would be a hard re-sell on the streets.

Having a mobile studio allows to pick up your production and change the scenery easily. This is great if you’re in a rut or you just want to get some inspiration from new surroundings. Keep in mind, though, that not everywhere is an ideal place to set up shop. In addition to the obvious annoyance you might pose to others, there’re places where you’re at risk of someone else harming your system (albeit by mistake). Setting up in crowded areas with minimal room—think your local Starbucks—would be unwise. Sure, the free WiFi is great, but it’s not like you’ll be using it; you’re supposed to be working. Plus, those types of joints are overflowing with kids running wild; in their frenzy, they may violently bump into your rig, get it caught on, say, a hoodie string, and drag it to its death, or just simply douse it with a Caramel Frappuccino—all of which would be bad. Very bad.
Chances are, there will come a time when you will need to load your mobile studio onto an airplane. Depending on the frequency, you may want to invest in flight cases. If it’s not all that often, or if such cases are out of your grasp for now, you can stuff it in a suitcase. Of course, there’re risks involved with this approach, but if done right you can save on the cost and the inconvenience of an extra bag.
When packing your rig, be sure to wrap each piece in some thick clothing, like a hoodie, and place it toward the middle of the case. If you still have the component’s original packaging and it form-fits to the unit, that may serve as yet another layer of protection. Use bed pillows as extra cushion by stuffing one on the bottom of the bag before you pack anything and one on top after you’re done packing, like a sandwich. As for the laptop, don’t even think about stowing that in the plane’s cargo area! In addition to the obvious pitfalls, it gets really cold in there. Not to worry; most airlines allow you a carry-on plus a personal bag that can fit under the seat in front of you. Make the personal bag a small laptop bag, and you’ll be fine.
Following is a list of quick tips that need no explanation. Some come directly from two leading electronic artists who know a thing or two about traveling and performing with an Ableton Live mobile rig: Moldover and Elijah B Torn.
Always use an outlet tester before plugging in your gear somewhere you’ve never been.
Never leave a dangling plug where you or someone else can trip over it.
Try not to set up your rig at a level where a loving dog’s wet nose can make contact.
Get a cover for your laptop’s keyboard for when you close it.
Periodically empty out your mobile studio bag.
Make use of Live’s Save and Collect All command and check your session without your external drives plugged in to make sure you won’t have missing samples when you get to a gig.
Save your sessions with all samples (see the preceding) as a hard copy on a flash drive or CD in case your laptop dies and you need to use someone else’s machine.
Sit down to eat away from your rig and do not place open soda containers anywhere near you while working.
Never let anyone put a drink down next to your rig on a gig.
Never put headphones on before completely turning on your system and checking hardware and software output levels.
New doesn’t always mean better. Try to work with what you have before upgrading.
Have at least three backups of your work and make sure one is home in a safe place.
Never let anyone you suspect is not smart use your mobile-studio laptop, no matter what they say. Trust your instincts.
Never leave your mobile studio in the car.
Things break. Have a backup plan and travel with a repair kit.
If you want to play big cities, make your rig light, rollable, and/or backpackable.
Use a bathroom scale to weigh your luggage for those 50- and 70-pound cutoffs.
Allow yourself enough time to get lost on the way to the venue, troubleshoot before sound check, and go to the bathroom.
Never install new freeware plug-ins or shareware apps on your computer before a show.
Less is more. Do you really need the flanger pedal for that one part on that one song?
Always make the music you want to make.
Now go make that music with your Ableton Live studio!