CHAPTER 2
Navigating The Windows 10 Interface
If you've been using previous versions of Windows for a while, you're no doubt familiar with the Windows desktop and how to work with Windows and Windows applications. If you've been using Windows 8.x, you'll find the transition to Windows 10 easy. If you've been using Windows 7 or earlier, however, you may find the Windows 10 interface very different. Gestures such as swipe, tap, tap and hold, slide, and so on may be foreign concepts. Fortunately, Windows 10 uses many of the same general gestures and actions you find on other touch-based devices. So, the Windows 10 interface should feel familiar to you.
If you don't have much experience with touch interfaces, this chapter gets you up to speed. You learn to navigate through the Windows 10 interface, use modern Windows apps, and even work with that familiar Windows desktop! Armed with some basic concepts, you'll be navigating the Windows 10 interface like a pro in no time.
If you've been using Windows 8.x for a while and are new to Windows 10, this chapter helps you understand the changes that Microsoft introduced in Windows 10. These changes make Windows 10 easier to use, particularly for those of us who missed the Start menu in Windows 8.
Introducing the Windows 10 Interface
The interface introduced in Windows 8 and fine-tuned in Windows 8.1 represented a shift toward touch-based interaction with the Windows operating system and applications, driven in large part by the growth of the tablet and handheld device markets. Although Windows 10 continues that touch-based focus, the Windows 10 interface is not only about touch; it's also about simplification and putting data and applications within easy reach. In addition, Microsoft has melded the positive aspects of the new interface with the Start menu familiar to users of Windows 7 and earlier versions.
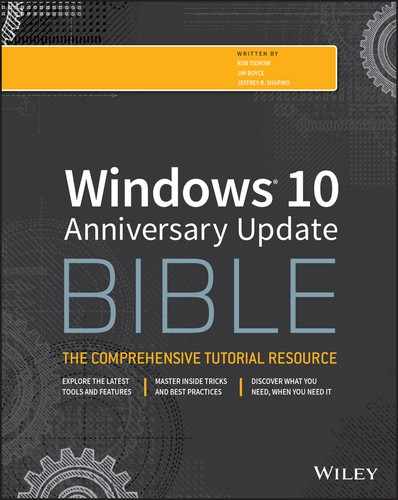
If you have configured Windows Hello on your device and it has a Windows Hello–compatible camera, Windows 10 tries to recognize you and log you on automatically. If not, Windows 10 displays the Windows 10 logon screen (see Figure 2.1), which you use to log in to the device. Although Chapter 3 explains how to log in and out of Windows, we cover it briefly here. Windows displays a list of user accounts available on the device (see Figure 2.1) with the most recently used account shown in the middle of the display. To log in with the most recently used account, just tap or click in the Password box, type the password for the account, and press Enter or tap the arrow key beside the Password box. Or, if you have created a PIN on the device or have a virtual smart card installed, you can click the corresponding icon below the password box and type the PIN. To use a different account, tap (touch or click) on a user in the list at the left corner of the display, enter the password for that user account, and then press Enter or tap (or click) the arrow icon to the right of the password field.
FIGURE 2.1 The Windows 10 Logon screen.
If the device is locked but your account is logged on, Windows displays the same logon screen shown in Figure 2.1. As when logging on, just type your password and then press Enter or tap the arrow key.
After you log in, you see the Windows 10 desktop, shown in Figure 2.2. The desktop should be familiar to you, regardless of which version of Windows you have used previously, because the desktop is a key feature of all previous versions of Windows. However, the Windows 10 desktop is a little different from the others.

FIGURE 2.2 The Windows Start menu and desktop.
The first difference is the Start menu. To open the Start menu, click the Windows button at the left edge of the taskbar. As shown in Figure 2.2, the new Windows 10 Start menu is a melding of the Start menu found in Windows 7 and the Start screen found in Windows 8.x. On the left are frequently used apps, settings, and folders, and on the right are tiles for apps. You can start an app just by clicking or tapping on its tile or in the list at the left of the Start menu.
Before we dig deeper into the Windows 10 interface and its elements, let's look at the gestures and actions you can use within the interface.
Working with Gestures and Mouse Actions
There are a handful of touch-based gestures you'll use with Windows 10, along with mouse-based alternatives for use on non-touch devices (or when you have a mouse connected to a touch device). The following list summarizes Windows 10 gestures, along with corresponding mouse actions:
- Tap/Left-click: Touch a finger to the object you want to select, and then remove your finger from the screen. With a mouse, left-click the object (point to it, click the left button, and then release the button).
- Tap and hold/Click and hold: Put a finger on the object you want to select, and hold your finger there. Tap and hold is typically followed by another gesture, such as sliding. For example, to relocate a tile on the Start screen, you tap and hold the tile, and after small buttons appear on the right corners of the tile, you can slide it to a new location. The equivalent mouse action for tap and hold is left-click and hold.
- Swipe: Slide your finger across the display, left, right, up, or down. For example, to view the tiles at the right side of the Start screen if they're off-screen, swipe from right to left.
- Slide (drag)/Click and drag: After you've selected an object, you can slide it on the display. Tap and hold to select the object, and then simply slide your finger across the screen to move the object. The mouse equivalent is to click and drag the object.
- Swipe from the edge of the screen inward: There are a handful of tasks you can accomplish by swiping from the edge of the display in toward the middle of the screen. For example, swiping from the left edge lets you switch between apps. Swipe from the right edge to display the Action Center. The mouse equivalent varies depending on the task. To view options for the app, right-click the app.
- Pinch: Place two fingers on the screen and move them apart or toward each other to zoom in or out, respectively.
Using the Start Menu
Now that you know some basic gestures and their corresponding mouse actions, you're ready to start navigating around the Windows 10 interface, starting with the Start menu, previously shown in Figure 2.2. Use any of these actions to open the Start screen:
- Press the Windows key on the keyboard.
- Use the mouse to place the cursor at the bottom-left corner of the screen, and then click the Start menu icon.
To move around the Start screen on a touch device, simply swipe the display up or down to view additional tiles. Then, tap a tile to open its associated app. You can also use the scroll wheel on the mouse to move through the Start menu.
You'll find that tiles on the Start menu can be live, meaning they can dynamically display information. For example, after you add an account to the Mail app, the app tile shows a preview of messages in your Inbox. The Weather tile is also live; it shows the current weather conditions (assuming your device is connected to the Internet). Other tiles show similar dynamic data. Figure 2.3 shows some examples of live tiles.

FIGURE 2.3 Live tiles on the Windows Start menu.
Using the Action Center
The Action Center (Figure 2.4), located at the right edge of the display in Windows 10, replaces the Charms bar found in Windows 8.x. To open the Action Center, click or tap the Notifications button on the taskbar just to the right of the time and date. Or, slide in from the right edge of the display.

FIGURE 2.4 Access settings with the Action Center.
Where the Charms bar gave you access to settings, devices, search, and a handful of other functions, the Action Center integrates many of those features with system notifications. For example, using the Action Center, you can quickly switch between tablet mode and regular mode, turn on or off airplane mode, and access display and other settings.
Using the Action Center is fairly intuitive. Some of the buttons on the Action Center pane function as toggle switches that turn functions on or off. Examples include tablet mode, airplane mode, and rotation lock. Other buttons open the Settings app to enable you to change settings. For example, if you click or tap VPN in the Action Center, The VPN page of the Settings app opens (see Figure 2.5).

FIGURE 2.5 The VPN page of the Settings app controls VPN connections and settings.
In addition to buttons for settings and modes, the Action Center shows system notifications, if any are present.
Working with Windows 10 Apps
If you're working on a traditional PC with Windows 10 installed, some (potentially many) of your apps will be “traditional” Windows apps. But, as more and more modern Windows apps are published, you'll no doubt have several favorites. On touch devices such as tablets and smaller handhelds, many of your apps will probably be modern Windows apps.
In general, working with a Windows app should be fairly intuitive. The gestures and actions you use to work with the Start menu and other Windows 10 screens are the same for apps. For example, to scroll up or down in the Maps app, just swipe up or down.
Rather than focus on specific modern Windows apps, this section of the chapter focuses on actions and methods you use in general to work with Windows apps.
Opening and using a Windows app
Opening a Windows app couldn't be any easier. Just open the Start menu, locate the app's tile, and tap or click the tile. If you're working on a non-touch device, and you have a mouse with a scroll wheel, you can use the wheel to scroll through the Start screen's tiles. Then, just click the tile for the app you want to open.
Unlike in Windows 8.x, which runs Windows apps only in full-screen mode, Windows 10 enables you to run apps in a window or full screen and change between full screen and windowed mode just as you can with a legacy desktop app. When Windows 10 is running in tablet mode, however, all apps run full screen. When running in a window, the apps display minimize, maximize, and close buttons just like a desktop app. Use these buttons to change the window state.
How you work in a Windows app depends entirely on the app, but relies on the standard touch gestures and mouse actions described earlier in this chapter.
Snapping apps on the screen
At first, it may seem that you can view and work with only one app at a time when running in tablet mode because all apps run full screen by default. But, you can actually snap two apps to the screen at once and easily switch between them. You can even view the desktop and any running apps there side-by-side with an app, or snap a legacy app beside a modern app.
To snap two apps to the screen, follow these steps:
- Open the two apps.
- Using the app's title bar, drag the app to the left or right side of the screen. Either action snaps the second app to the left or right of the screen. If the title bar isn't visible, slide down from the top of the display over the app to make the title bar visible.
Figure 2.6 shows two apps snapped side-by-side.

FIGURE 2.6 Two Windows apps snapped side-by-side.
You can snap a modern Windows app beside a legacy app, enabling you to see and work with a traditional Windows app on the desktop while also using a modern Windows app. For example, Figure 2.7 shows the Windows 10 Store app snapped beside Notepad.

FIGURE 2.7 Notepad and a Windows 10 app snapped side-by-side.
To snap the desktop and a modern Windows app, first switch out of tablet mode (if the device is not already in window mode). Then, open the app in a window. If you want to work with a desktop app, open it from the desktop or Start menu. With either app in the foreground, drag the title bar of the other app to the left or right side of the screen to dock the app. You can drag the edge of an app's window to resize it as needed.
Switching between apps
If you're an experienced Windows user, you'll be happy to learn that the methods you've used in the past to switch between apps are still available in Windows 10. For example, you can press Alt + Tab to view a list of running apps (see Figure 2.8) and select one to bring to the foreground. Continue pressing Alt + Tab until the desired app is highlighted; then release the keys to switch to that app. You can also press Windows + Tab or swipe in from the left edge to open the task view showing thumbnails of your running apps (see Figure 2.9). Click or tap on an app to bring it to the foreground.

FIGURE 2.8 Use Alt + Tab to switch between apps.

FIGURE 2.9 Use Windows + Tab to switch between apps.
Closing a modern Windows app
Closing a modern Windows app is easy, although you may not have figured it out on your own if Windows 10 is running in tablet mode. Just grab the app at the top and drag it down to the bottom of the display.
This method isn't very intuitive, but it's the easiest way to close a app. When using a mouse, move the cursor to the top of the app until the title bar appears; then click and drag the app by its title bar to the bottom of the screen. When using a touch device, swipe down from the top to the bottom of the screen. The app should close.
Getting to the Desktop
Unless Windows 10 is running in tablet mode, the desktop has the same prominence as in Windows 7, which means that if you aren't running any apps in full screen mode, you see the desktop. If you can't see the desktop, you can simply minimize apps until it is visible. Or, you can click the right edge of the taskbar (to the right of the Action Center button) to minimize all apps.
If Windows 10 is running in tablet mode, you can bring a desktop app to the foreground by tapping or clicking Task view in the taskbar and selecting the app. You can also use the Alt + Tab and Windows + Tab methods described previously in this chapter. If you truly need to view the desktop, for example to access a shortcut on the desktop, simply take the device out of tablet mode using the Action Center.
Using the Taskbar
The Windows taskbar remains a prominent fixture on the Windows 10 desktop and is visible even if you are running Windows 10 in tablet mode. The Windows taskbar deserves mention here, if for no other reason than that you probably want to pin apps to the taskbar so you can get to them quickly from the desktop.
Figure 2.10 shows the taskbar at the bottom of the desktop with a small selection of apps pinned to it. As in previous versions of Windows, you can open or switch to an app by tapping or clicking its icon on the taskbar.

FIGURE 2.10 The taskbar remains an important fixture in the Windows 10 interface.
You can pin legacy Windows apps and modern Windows apps to the taskbar, as well as app resources such as File Explorer. To pin an app to the taskbar, open the Start menu or search for the app in Search, right-click or tap and hold the app's tile, and in the app menu, tap or click Pin to Taskbar.
Wrapping Up
Windows 10 melds the best of the modern Windows interface with the familiar desktop interface. With the return of the Start menu, you can open apps in much the same way as in Windows 7 and earlier. If you've become enamored of the Start screen in Windows 8.x, the Windows 10 Start menu, whether running as a menu or full screen, provides essentially the same capabilities and look-and-feel as the Windows 8.x Start screen.
This melding of old and new is not limited to the Start menu. Windows 10 lets you run apps in either full screen or a window, just as you can with legacy apps. This capability makes it easier for people who haven't yet switched from Windows 7 or earlier to make the transition to the new Windows 10 interface.