
Introducing SQL Server 2000 Enterprise Manager
As you have just seen, the Query Analyzer is a very powerful tool. It has been greatly enhanced in SQL Server 2000 to be a SQL programmer's best friend. However, you still have the SQL Server Enterprise Manager, which is meant to be the primary graphical interface. There's very little that the Enterprise Manager can do that you can't accomplish from a T-SQL command in the Query Analyzer. However, using the Enterprise Manager is sometimes more convenient, especially when you are new to the SQL Server environment or to SQL programming.
Registering a Server
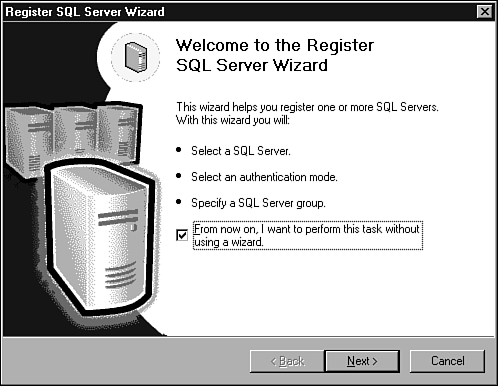
If you are using SQL Server on your computer, and it is the first time you have started the SQL Server Enterprise Manager, you might need to register the server with which you are working. If you are using the computer where SQL Server is installed, your local SQL Server computer name will be registered for you during the setup process. To register a server, expand the Microsoft SQL Servers option, and you should see the default group, SQL Server Group. Select the SQL Server Group and then from the Action menu, select New SQL Server Registration. The Register SQL Server Wizard appears as shown in Figure 1.16.
Figure 1.16. Registering a SQL Server by using the SQL Server Wizard.
I suggest that you choose not to use the wizard in the future because registering a SQL Server is one of the easiest tasks you can perform. Click Next to be presented with the default dialog box to register a SQL Server (see Figure 1.17).
Figure 1.17. The Registered SQL Server Properties dialog box.

Enter your computer name in the Server box (as shown in Figure 1.17), and then select the security mode you want to use. Select the SQL Server login option, and complete your SQL Server login credentials if you select to use SQL Server authentication. Now, click the OK button to configure your first registration for Enterprise Manager.
Seeing How Enterprise Manager Works
Close the Registered SQL Server Properties dialog by clicking the Cancel button, and you will see that your servers are already registered in the left pane of Enterprise Manager when you expand the SQL Server Group. Then expand each server (see Figure 1.18). You can tell when you are connected by the presence of the green circle with the white arrow in it. So, in Figure 1.18, you can see that I am connected to my default instance (Lowell1) and not connected to the Oracle instance. Recall that we generated an error message earlier today by asking for the Oracle server, but because it is not registered, we were unable to see it.
Figure 1.18. Enterprise Manager with your registered servers.

Within each server, the Databases folder lists the databases installed on your server. The Data Transformation Services folder shows any DTS packages that you have set up, as well as Meta Data Services packages. The Management folder shows the administrative management features of SQL Server. The Replication folder shows the replication configuration changes that you've made to your server. The Security folder enables you to configure security in SQL Server. The Support Services folder enables you to control other SQL Server–related services on your computer, such as the Distributed Transaction Coordinator and full-text search. Figure 1.19 shows an expanded view of each folder. Notice that when I highlight my server, information about that server is displayed as an HTML page on the right side of the screen.
Figure 1.19. The console display of the Enterprise Manager.

Now expand the Databases folder, and then highlight the Northwind database in the left pane. Notice how a new page then displays in the right pane, as shown in Figure 1.20. This is how Enterprise Manager works: Container objects are typically shown on the left and the contents of the container objects, or other information, are displayed on the right.
Figure 1.20. The Northwind database and its objects.

Some dialog boxes also open separate windows or dialog boxes for you to work with. For example, right-click the Northwind database folder on the left and select Properties from the pop-up menu. Notice that you are presented with a new dialog on top of Enterprise Manager (see Figure 1.21). Property sheets (dialogs with the descriptions of properties of an object) often appear as separate dialogs.
Figure 1.21. The properties of the Northwind database.

Click Cancel to dismiss the Northwind database's property sheet without making any changes. Another feature that's worth examining is the menu options. The options available will change depending on what you've highlighted. For example, you will see Figure 1.22 if you click the Tools menu with the Northwind database highlighted. Don't worry about these options; as a SQL programmer, you will not need to work with them. The database system administrator is the person who maintains these options.
Figure 1.22. Menu options in SQL Server Enterprise Manager.

To fully understand the Enterprise Manager would take at least another 30 to 40 pages. However, because you will mostly be using the Query Analyzer in this book, you can read up on the Enterprise Manager in Sams Teach Yourself SQL Server 2000 in 21 Days at a later date.