
To use a programming language, you must master the fundamentals. You need to understand the elements required to construct a working program, and learn how to use the development tools to build and run code. You also need to become familiar with the everyday features for representing information, performing calculations, and making decisions. This chapter will introduce these core features of the C# language.
We’ll be working in Visual Studio, the Microsoft development environment. There are other ways to build C# programs, but Visual Studio is the most widely used and it’s freely available, so we’ll stick with that.
Note
If you don’t have Visual Studio, you can download the free Express edition from http://www.microsoft.com/express/.
In the first part of this chapter, we’ll create a very simple program so that you can see the bare minimum of steps required to get up and running. We’ll also examine all of the pieces Visual Studio creates for you so that you know exactly what the development environment is doing for you. And then we’ll build some slightly more interesting examples to explore the C# language.
To create a new C# program, select the File→New Project menu option, or just use the Ctrl-Shift-N shortcut. This will open Visual Studio’s New Project dialog, shown in Figure 2-1, where you can pick the kind of program you want to build. In the Installed Templates list on the lefthand side, ensure that the Visual C# item is expanded, and inside that, select the Windows item—applications that run locally on Windows are the easiest to create. We’ll get into other kinds of programs such as web applications later in the book.

In the dialog’s center, select the Console Application template. This creates an old-fashioned command-line application that runs in a console window. It might not be the most exciting kind of program, but it’s the easiest to create and understand, so that’s where we’ll start.
You need to pick a name for your program—by default, Visual Studio
will suggest something unimaginative such as ConsoleApplication1. In the Name field near the
bottom of the dialog, type HelloWorld. (OK, so that’s equally
unimaginative, but at least it’s descriptive.) Visual Studio also wants to
know where you’d like to put the project on your hard disk—put it wherever
you like. It can also create a separate “solution” directory. That’s
something you’d do in a larger program made up of multiple components, but
for this simple example, you want the “Create directory for solution”
checkbox to be unchecked.
When you click the OK button, Visual Studio will create a new project, a collection of files that are used to build a program. C# projects always contain source code files, but they often include other types of files, such as bitmaps. This newly created project will contain a C# source file called Program.cs, which should be visible in Visual Studio’s text editor. In case you’re not following along in Visual Studio as you read this, the code is reproduced in Example 2-1. By the way, there’s no particular significance to the filename Program.cs. Visual Studio doesn’t care what you call your source files; by convention, they have a .cs extension, short for C#, although even that’s optional.
Example 2-1. The code in a freshly created console application
using System;
using System.Collections.Generic;
using System.Linq;
using System.Text;

namespace HelloWorld
{
    class Program
    {
        static void Main(string[] args)
        {
        }
    }
}
This program doesn’t do anything yet. To turn it into the
traditional first example, you’ll need to add one line of code. This will
go in between the two lines that contain the most-indented pair of braces
({ and }). The modified version is shown in Example 2-2, with the new line in
bold.
Example 2-2. The traditional first example, “Hello, world”
using System;
using System.Collections.Generic;
using System.Linq;
using System.Text;

namespace HelloWorld
{
    class Program
    {
        static void Main(string[] args)
        {
            Console.WriteLine("Hello, world");
        }
    }
}
This example is now ready to run. From the Debug menu select the Start Without Debugging item, or just press Ctrl-F5. The program will run, and because you’ve written a console application, a console window will open. The first line of this window will contain the text “Hello, world” and this will be followed by a prompt saying “Press any key to continue...” Once you’ve finished admiring the fruits of your creation, press a key to dismiss the window.
Warning
Don’t use Debug→Start Debugging or F5—this will run the application in Visual Studio’s debugging mode, which doesn’t keep the window open once the application has finished. That’s not helpful for this example, which will most likely run to completion and then close the window before you’ve had a chance to see the output.
Now that we have a complete program, let’s look at the code to see
what each part is for—all of the pieces are things you’ll deal with every
time you write in C#. Starting from the top, Program.cs has several lines beginning with
using:
using System;
using System.Collections.Generic;
using System.Linq;
using System.Text;
These using directives help the C# compiler
work out what external code this particular source file will be using. No
code is an island—to get any useful work done, your programs will rely on
other code. All C# programs depend on the .NET Framework class library,
for example: the one line of code we added to our program uses the class
library to display a message. Using directives can declare an intent to
use classes from any library—yours, Microsoft’s, or anyone’s. All the
directives in our example start with System, which indicates that we want to use
something from the .NET Framework. This text that follows the using keyword denotes a
namespace.
The .NET Framework class library is big. To make it easier
to find your way around the many services it offers, the library is split
into namespaces. For example, the System.IO namespace offers I/O
(Input/Output) services such as working with files on disk, while System.Data.SqlClient is for connecting to a SQL
Server database.
A namespace contains types. A type typically represents
either a kind of information or a kind of object. For example, there are
types that provide the core forms of information used in all programs,
such as System.String which represents
text, or the various numeric types such as System.Double or System.Int32. Some types are more complex—for
example, the System.Net.HttpWebRequest
class represents an HTTP request to be sent to a web server. A few types
do not represent any particular thing, but simply offer a set of services,
such as the System.Math class, which
provides mathematical functions such as Sin and Log,
and constants such as π or the base of natural logarithms,
e. (We will explore the nature of types, objects, and
values in much more detail in the next chapter.)
All types in the .NET Framework class library belong to a namespace.
The purpose of a using directive is to save you from typing the namespace
every single time you need to use a class. For example, in a file that has
a using System; directive you can just
write Math.PI to get the value of π,
instead of using the full name, System.Math.PI. You’re not required to write
using directives, by the way—if you happen to enjoy typing, you’re free to
use the fully qualified name. But since some namespaces get quite long—for
example, System.Windows.Media.Imaging—you can see how the
shorthand enabled by a using directive can reduce clutter
considerably.
You might be wondering why namespaces are needed at all if the first
thing we usually do is add a bunch of using directives to avoid having to
mention the namespace anywhere else.
One reason is disambiguation—some type names crop up in multiple places.
For example, the ASP.NET web framework has a type called Control, and so do both WPF and Windows Forms.
They represent similar concepts, but they are used in completely different
contexts (web applications versus Windows applications). Although all of
these types are called Control, they
are distinct thanks to being in different namespaces.
This disambiguation also leaves you free to use whatever names you
want in your own code even if some names happen to be used already in
parts of the .NET class library you never knew existed. Since there are
more than 10,000 types in the framework, it’s entirely possible that you
might pick a name that’s already being used, but namespaces make this less
of a problem. For example, there’s a Bold class in .NET, but if you happen not to be
using part of the library it belongs to (WPF’s text services) you might
well want to use the name Bold to mean
something else in your own code. And since .NET’s own Bold type is hidden away in the System.Windows.Documents namespace, as long as
you don’t add a using directive for that namespace you’re free to use the
name Bold yourself to mean whatever you
like.
Even when there’s no ambiguity, namespaces help you find your way
around the class library—related types tend to be grouped into one
namespace, or a group of related namespaces. (For example, there are
various namespaces starting with System.Web containing types used in ASP.NET web
applications.) So rather than searching through thousands of types for
what you need, you can browse through the namespaces—there are only a few
hundred of those.
Note
You can see a complete list of .NET Framework class library namespaces, along with a short description of what each one is for, at http://msdn.microsoft.com/library/ms229335.
Visual Studio adds four namespace directives to the Program.cs file in a new console project. The
System namespace contains
general-purpose services, including basic data types such as String, and various numeric types. It also
contains the Console type our program
uses to display its greeting and which provides other console-related
services, such as reading keyboard input and choosing the color of your
output text.
The remaining three using directives aren’t used in our example.
Visual Studio adds them to newly created projects because they are likely
to be useful in many applications. The System.Collections.Generic namespace contains
types for working with collections of things, such as a list of numbers.
The System.Linq namespace
contains types used for LINQ, which provides convenient ways of processing
collections of information in C#. And the System.Text namespace contains types useful for
working with text.
The using directives Visual Studio adds to a new C# file are there just to save you some typing. You are free to remove them if you happen not to be using those namespaces. And you can add more, of course.

The using directives are not the end of our simple program’s encounter with namespaces. In fact, the very next line of code after these directives is also concerned with namespaces:
namespace HelloWorld
{
    ...
}
While using directives declare which namespaces our code consumes,
this namespace keyword tells the
compiler what namespace we plan to provide—the types we write in our
programs belong to namespaces just like the types in the class
library.[3] Here, Visual Studio has presumed that we’d like to put our
code into a namespace named after the project we created. This is a common
practice, although you’re free to use whatever names you like for your
namespaces—there’s no requirement that the namespace name match the
program name.
Warning
The C# compiler will even let you put your own code into
namespaces whose names begin with System, but you should not do this (at least,
not unless you work for Microsoft and are adding types to some future
version of .NET’s class library). You’re likely to cause confusion if
you break the convention that System
namespaces contain .NET Framework types.
Notice that the namespace is followed by an open brace ({). C# uses braces to
denote containment—here, everything inside these braces will be in our
HelloWorld namespace. Since namespaces
contain types, it should come as no great surprise that the next line in
the file defines a type. Specifically, it defines a class.
The .NET Framework class library isn’t the only thing that gets to define classes—in fact, if you want to write any code at all in C# you must provide a type to contain that code. Some languages (such as C++) do not impose this constraint, but C# is an object-oriented (OO) programming language. We’ll explore OO concepts in the next chapter, but the main impact on our “Hello, world” example is that every bit of C# code must have a type that it calls home.
There are a few different ways to define types in C#, which we’ll get to in the next few chapters, but for the present simple example, the distinctions are not yet relevant. So we use the most common, a class:
class Program
{
   ...
}
Again, note the braces—as with the namespace contents, the class’s contents are delineated by a pair of braces.
We’re still not quite at the code yet—code lives inside a class, but
more specifically, it must live inside a particular method inside a class. A method is a
named block of code, which may optionally return some data. The class in
our example defines a method called Main, and once again we use a pair of braces to
show where it starts and ends:
static void Main(string[] args)
{
    ...
}
The first keyword here, static, tells C# that
it’s not necessary to create a Program
object (Program being the class that
contains this method, remember) in order to use this method. As you’ll see
in the next chapter, a lot of methods require an object, but our simple
example doesn’t need one.
The next keyword is void. This tells the
compiler that our method doesn’t return any data—it just does some work.
Many methods return information. For example, the System.Math class’s Cos method calculates the cosine of its input,
and since it doesn’t know what you want to do with that result, it
provides it as a return value—the output of the method. But the code in
this example is rather more proactive than that—it decides to show a
message on the screen, so there’s nothing for it to return.[4] On methods that return data, you’d write the type of data
being returned here, but since there’s nothing to return in this case, the
nothingness is denoted by the void
keyword.
The next part, Main, is the name of the
method. This happens to be a special name—the C# compiler will expect your
program to provide one static method called Main, and it’ll run that method when the program
is launched.
The method name is followed by a parameter list, which declares the
input the method requires. This particular example’s parameter list is
(string[] args), which says that it
expects just a single input and that the code will refer to it using the
name args. It expects this input to be
a sequence of text strings (the square brackets indicating that multiple
strings may be passed instead of just one). As it happens, this particular
program doesn’t use this input, but it’s a standard feature of the
specially named Main
method—command-line arguments are passed in here. We’ll return to this
later in the chapter when we write a program that makes use of
command-line arguments, but for now, our example doesn’t use it. So we’ll
move on to the final part of the example—the code inside the Main method that was the one part we added to
Visual Studio’s contributions and which represents the only work this
program does:
Console.WriteLine("Hello, world");This shows the C# syntax for invoking a method. Here we’re using a
method provided by the Console class,
which is part of the .NET Framework class library, and it is defined in
the System namespace. We could have
written the fully qualified name, in which case the code would look like
this:
System.Console.WriteLine("Hello, world");But because of the using System;
directive earlier, we can use the shorter version—it means the same thing,
it’s just more concise. The Console
class provides the ability to display text in a console window and to read
input typed by the user in an old-fashioned command-line application. In
this case, we’re invoking the class’s WriteLine method, passing
it the text "Hello, world". The
WriteLine method will write whatever
text we provide out to the console window.
Note
You’ll have noticed that the dot (.) is being used
to mean different things here. We can use it to delineate the namespace
name and the type name; for example, System.Console means the Console type in the System namespace. It can also be used to break
up a namespace name, as in System.IO.
Our example also uses it to indicate that we want to use a particular
method provided by a class, as in Console.WriteLine. And as you’ll see, the dot
turns up in a few other places in C#.
Broadly speaking, the dot signifies that we want to use something that’s inside something else. The C# compiler works out from context exactly what that means.
Although we picked over every line of code in this simple example, we haven’t quite finished exploring what Visual Studio did for us when we asked it to create a new application. To fully appreciate its work, we need to step out of the Program.cs source file and look at the whole project.
It’s rare for a useful program to be so simple that you would want all of its source code in one file. You may occasionally stumble across horrors such as a single file containing tens of thousands of lines of code, but in the interest of quality (and sanity) it’s best to try to keep your source code in smaller, more manageable chunks—the larger and more complex anything gets the more likely it is to contain flaws. So Visual Studio is built to work with multiple source files, and it provides a couple of concepts for structuring your programs across those files: projects and solutions.
A project is a collection of source files that the C# compiler
combines to produce a single output—typically either an executable program
or a library. (See the sidebar on the next page for more details on the
compilation process.) The usual convention in Windows is that executable
files have an .exe extension while
libraries have a .dll extension. (These
extensions are short for executable and
dynamic link library, respectively.) There isn’t a
big difference between the two kinds of file; the main distinction is that
an executable program is required to have an entry point—the Main function. A library is not something you’d
run independently; it’s designed to be used by other programs, so a DLL
doesn’t have its own entry point. Other than that, they’re pretty much the
same thing—they’re just files that contain code and data. (The two types
of file are so similar that you can use an executable as though it were a
library.) So Visual Studio projects work in much the same way for programs
and libraries.
Note
Some project types produce neither libraries nor executables. For example, there’s a project type for building .msi (Windows Installer) files from the outputs of other projects. So strictly speaking, a project is a fairly abstract idea: it takes some files and builds them into some kind of output. But projects containing C# code will produce either an EXE or a DLL.
A solution is just a collection of related projects. If you are writing a library, you’ll probably want to write an application that uses it—even if the library is ultimately destined to be used by other people, you’ll still want to be able to try it out for testing and debugging purposes, so it’s useful to be able to have one or more applications that exercise the library’s functionality. By putting all of these projects into one solution, you can work with the DLL and its test applications all at once. By the way, Visual Studio always requires a solution—even if you’re building just one project, it is always contained in a solution. That’s why the project’s contents are shown in a panel called the Solution Explorer, shown in Figure 2-3.

The Solution Explorer is usually visible on the righthand side of
Visual Studio, but if you don’t see it you can open it with the
View→Solution Explorer menu item. It shows
all the projects in the solution—just the HelloWorld project in this example. And it shows
all the files in the solution—you can see the Program.cs file we’ve been examining near the
bottom of Figure 2-3.
Farther up is an extra file we haven’t looked at, called AssemblyInfo.cs. If you
open this you’ll see that Visual Studio puts version number and copyright
information in that file—users will see this information if they view the
compiled output’s properties in Windows Explorer.
Note
You might find that on your system, the Solution Explorer doesn’t
show the Solution node that’s visible at the top of Figure 2-3, and just shows
the HelloWorld project. Visual Studio
can be configured to hide the solution when it contains just a single
project. If you don’t see the solution and would like to, select the
Tools→Options menu item, and in the
Options dialog that opens select the Projects and Solutions item. One of
the options will be the “Always show solution” checkbox—check this if
you want to see the solution in the Solution Explorer even when you’ve
got only one project.
Besides the C# source files, the Solution Explorer as shown in Figure 2-3 also has a References section. This contains a list of all the libraries your project uses. By default, Visual Studio populates this with a list of DLLs from the .NET Framework class library that it thinks you might find useful.
You might be experiencing déjà vu right now—didn’t we already tell
the compiler which bits of the library we want with using directives? This
is a common cause of confusion among developers learning C#. Namespaces are not libraries, and neither one is contained
by the other. These facts are obscured by an apparent connection. For
example, the System.Data library does
in fact define a load of types in the System.Data namespace. But this is just a
convention, and one that is only loosely followed. Libraries are often,
but not always, named after the namespace with which they are most
strongly associated, but it’s common for a library to define types in
several different namespaces and it’s common for a namespace’s types to be
distributed across several different libraries. (If you’re wondering how
this chaos emerged, see the sidebar below.)
The upshot is that the C# compiler cannot work out which libraries you want from your using directives, because in general it’s not possible to deduce which libraries are required from the namespaces alone. So a project needs to list which libraries it uses, and then individual source files in that project can declare which namespaces they are using. Visual Studio provides you with a set of references that it hopes will be useful, and for this very simple example, we’re not actually using most of them.
Note
Visual Studio notices when your code doesn’t use all of the libraries your project references, and automatically omits references to any unused libraries. This makes your binary slightly smaller than it would be if unnecessary references were left in.
You can add or remove references to suit whatever program you’re
building. To remove a reference, you can just select the library in the
Solution Explorer and press the Delete key. (As it happens, our program is
so simple that it depends only on the mandatory mscorlib library, so you could remove every DLL
shown, and as long as you also remove any unused using directives from the
source code, the program will still work.) To add a reference to a
library, you can right-click on the References item and choose the Add Reference menu item. We’ll explore all of this in more
detail in Chapter 15.
It’s almost time to move on from “Hello, world” and start to explore
more of the core language features, but first let’s recap what we’ve seen.
The one line of executable code in our program invokes the WriteLine method of the System.Console class to print a message. This
code lives inside a method whose special name, Main, marks it out as the method to run when the
program starts. That method is contained by a class called Program, because C# requires all methods to
belong to a type. This class is a member of the HelloWorld namespace, because we chose to follow
the convention of having our namespace match the name of the compiled
binary. Our program uses the using directives supplied by Visual Studio to
be able to refer to the Console class
without needing to specify its namespace explicitly. So if you take one
more look at the program, you now know what every single line is for. (It
is reproduced in Example 2-3,
with the unused using directives removed.)
Example 2-3. “Hello, world” again (with fewer using directives)
using System;

namespace HelloWorld
{
    class Program
    {
        static void Main(string[] args)
        {
            Console.WriteLine("Hello, world");
        }
    }
}
With the whole example in one place, you can see clearly that the
code is indented to reflect the structure. This is a common practice, but
it’s not strictly necessary. As far as the C# compiler is concerned, when
it comes to the space between elements of the language, there’s no
difference between a single space, multiple spaces or tabs, or even blank
lines—the syntax treats any contiguous quantity of whitespace as it would a single space.[5] So you are free to use space in your source code to improve
legibility. This is why C# requires the use of braces to indicate containment, and it’s also why there’s a
semicolon at the end of the line that prints out the message. Since C#
doesn’t care whether we have one statement of code per line, split the
code across multiple lines, or cram multiple statements onto one line, we
need to be explicit about the end of each instruction, marking it with a
; so that the compiler
knows where each new step of the program begins.
While we’re looking at the structure and layout of source code, we need to examine a language feature that is extremely important, despite having precisely no effect on the behavior of your code. C# lets you add text to your source file that it will completely ignore. This might not sound important, or even useful, but it turns out to be vital if you want to have any hope of understanding code you wrote six months ago.
There’s an unfortunate phenomenon known as “write-only code.” This is code that made some kind of sense to whoever wrote it at the time, but is incomprehensible to anyone trying to read it at a later date, even if the person reading it is its author. The best defense against this problem is to think carefully about the names you give the features of your code and the way you structure your programs. You should strive to write your code so that it does what it looks like it does.
Unfortunately, it’s sometimes necessary to do things in a nonobvious way, so even if your code is sufficiently clear that it’s easy to see what it does, it may not be at all clear why it does certain things. This tends to happen where your code meets other code—you might be interacting with a component or a service that’s idiosyncratic, or just plain buggy, and which works only if you do things in a particular way. For example, you might find that a component ignores the first attempt to do something and you need to add a redundant-looking line of code to get it to work:
Frobnicator.SetTarget("");
Frobnicator.SetTarget("Norfolk");
The problem with this sort of thing is that it’s very hard for someone who comes across this code later on to know what to make of it. Is that apparently redundant line deliberate? Is it safe to remove? Intrigue and ambiguity might make for engaging fiction, but these characteristics are rarely desirable in code. We need something to explain the mystery, and that’s the purpose of a comment. So you might write this:
// Frobnicator v2.41 has a bug where it crashes occasionally if
// we try to set the target to "Norfolk". Setting it to an empty
// string first seems to work around the problem.
Frobnicator.SetTarget("");
Frobnicator.SetTarget("Norfolk");
This is now less mysterious. Someone coming across this code knows why the apparently redundant line was added. It’s clear what problem it solves and the conditions under which that problem occurs, which makes it possible to find out whether the problem has been fixed in the most recent version of the offending component, making it possible to remove the fix. This makes it much easier to maintain code in the long run.
As far as C# is concerned, this example is identical to the one
without comments. The // character sequence
tells it to ignore any further text up to the end of the line. So you can
either put comments on their own line as shown earlier, or tack them onto
the end of an existing line:
Frobnicator.SetTarget(""); // Workaround for bug in v2.41Like most of the C-family languages, C# supports two forms of
comment syntax. As well as the single-line // form, you can write a comment that spans multiple lines, denoting the start with
/* and the end with */, for example:
/* This is part of a comment.
   This continues to be part of the same comment.
   Here endeth the comment. */
While comments can be very useful, many, sadly, are not. There are a couple of particularly common mistakes people make when writing comments, and it’s worth drawing attention to them so that you know what to avoid. Here’s the most common example:
// Setting target to empty string
Frobnicator.SetTarget("");
// Setting target to Norfolk
Frobnicator.SetTarget("Norfolk");
These comments just repeat what the code already said. This is clearly a waste of space, but it’s surprisingly common, particularly from inexperienced developers. This may be because they’ve been told that comments are good, but they have no idea what makes a good comment. A comment should say something that’s not obvious from the code and which is likely to be useful to anyone trying to understand the code.
The other common form of bad comment looks like this:
// Setting target to Norfolk
Frobnicator.SetTarget("Wiltshire");
Here, the comment contradicts the code. It seems like it shouldn’t be necessary to say that you shouldn’t do that, but it’s surprising how often you see this sort of thing in real code. It usually happens because someone modified the code without bothering to update the comment. A quick review of the comments after a code change is always worth doing. (Not least because if you’ve not paid enough attention to detail to notice that the comments are no longer accurate, chances are there are other problems you’ve not noticed.)
If you structure your comments in a certain way, Visual Studio is able to present the information in those comments in tool tips whenever developers use your code. As Example 2-4 shows, documentation comments are denoted with three slashes, and they contain XML elements describing the target of the comment—in this case, there’s a description of a method, its parameters, and the information it returns.
Example 2-4. XML documentation comments
/// <summary>
/// Returns the square of the specified number.
/// </summary>
/// <param name="x">The number to square.</param>
/// <returns>The squared value.</returns>
static double Square(double x)
{
    return x * x;
}
If a developer starts writing code to invoke this method, Visual
Studio will show a pop up listing all available members matching what
she’s typed so far, and also adds a tool tip showing the information
from the <summary> element of
the selected method in the list, as Figure 2-4 shows. You’ll see
similar information when using classes from the .NET
Framework—documentation from its class libraries is provided as part of
the .NET Framework SDK included with Visual Studio. (The C# compiler can
extract this information from your source files and put it in a separate
XML file, enabling you to provide the documentation for a library
without necessarily having to ship the source code.)

The <param> information
shows up as you start to type arguments, as Figure 2-5 shows. The
<returns> information doesn’t
appear here, but there are tools that can build documentation from this
information into HTML files or help files. For example, Microsoft
provides a tool called Sandcastle, available from http://www.codeplex.com/Sandcastle, which can generate
documentation with a similar structure to the documentation for
Microsoft’s own class libraries.

We’re moving on from “Hello, world” now, so this is a good time to
create a new project if you’re following along in Visual
Studio as you read. (Select File→New
Project or press Ctrl-Shift-N. Note that, by default, this will create a
new solution for your new project. There’s an option in the New Project
dialog to add the new project to the existing solution, but in this
case, let it create a new one.) Create another console application and
call it RaceInfo—the code is going to
perform various jobs to analyze the performance of a race car. Let
Visual Studio create the project for you, and you’ll end up with much
the same code as we had in Example 2-1, but with the
Program class in a namespace called
RaceInfo instead of HelloWorld. The first task will be to
calculate the average speed and fuel consumption of the car, so we need
to introduce the C# mechanism for holding and working with
data.
C# methods can have named places to hold information. These
are called variables, because the information they
contain may be different each time the program runs, or your code may
change a variable while the program runs. Example 2-5
defines three variables in our program’s Main method, to represent the distance traveled
by the car, how long it has been moving, and how much fuel it has consumed
so far. These variables don’t vary at all in this example—a variable’s
value can change, but it’s OK to create variables
whose value is fixed.
Example 2-5. Variables
static void Main(string[] args)
{
    double kmTravelled = 5.14;
    double elapsedSeconds = 78.74;
    double fuelKilosConsumed = 2.7;
}
Notice that the variable names (kmTravelled, elapsedSeconds, and fuelKilosConsumed) are reasonably
descriptive. In algebra it’s common to use single letters as variable
names, but in code it is a good practice to use names that make it clear
what the variable holds.
Warning
If you can’t think of a good descriptive name for a variable, that’s often a symptom of trouble. It’s hard to write code that works if it’s not clear what information the code is working with.
These names indicate not just what the variables represent, but also
their units. This is of no significance to the compiler—we could call the
three variables tom, dick, and harry for all it cares—but it’s useful for
humans looking at the code. Misunderstandings about whether a particular
value is in metric or imperial units have been known to cause some
extremely expensive problems, such as the accidental destruction of
spacecraft. This particular race team seems to use the metric system. (If
you’re wondering why the fuel is in kilograms rather than, say, liters,
it’s because in high-performance motor racing, fuel is typically measured
by weight rather than volume, just like it is in aviation. Fuel tends to
expand or contract as the temperature changes—you get better value for
your money if you refill your car in the morning on a cold day than in the
middle of a hot day—so mass is more useful because it’s a more stable
measure.)
All three of the variable declarations in Example 2-5 start with the keyword double. This
tells the compiler what kind of information the variable holds. For this
example, we’re clearly working with numbers, but .NET offers several
different numeric types. Table 2-1 shows the complete set,
and it may look like a bewildering assortment of options, but in
practice the choice usually goes one of three ways: int, double, or decimal, which represent integers,
floating-point, or decimal floating-point numbers, respectively.
Table 2-1. Numeric types
C# name | .NET name | Purpose |
|---|---|---|
|
| Whole numbers and a limited range of fractions, with a wide range of values thanks to “floating point.” Occupies 32 bits of space. |
|
| Double-precision version of float—same idea, but using 64 bits. |
|
| Non-negative integer. Occupies 8 bits. Represents values from 0 to 255. |
|
| Signed integer. Occupies 8 bits. Represents values from −128 to 127. |
|
| Signed integer. Occupies 16 bits. Represents values from −32,768 to 32,767. |
|
| Non-negative integer. Occupies 16 bits. Represents values from 0 to 65,535. |
|
| Signed integer. Occupies 32 bits. Represents values from −2,147,483,648 to 2,147,483,647. |
|
| Nonnegative integer. Occupies 32 bits. Represents values from 0 to 4,294,967,295. |
|
| Signed integer. Occupies 64 bits. Represents values from −9,223,372,036,854,775,808 to 9,223,372,036,854,775,807. |
|
| Nonnegative integer. Occupies 64 bits. Represents values from 0 to 18,446,744,073,709,551,615. |
(none) |
| Signed integer. Grows in size as required. Value range limited only by available memory. |
|
| Supports whole numbers
and fractions. Slightly less efficient than |
The int type (short
for integer) represents whole numbers. That’s
clearly no use for our example, because we’re dealing with numbers
such as 5.14, and the closest that an int can get to that value is 5. But programs
often deal with discrete quantities, such as the number of rows
returned by a database query or the number of employees reporting to a
particular manager. The principal advantage of an integer type is that
it’s exact: there’s no scope for wondering if the number is really 5,
or maybe just a number quite close to 5, such as 5.000001.
Table 2-1 lists nine types capable of
representing integers. The ninth, BigInteger, is a special case that we’ll get
to later. The other eight support four different sizes, with a choice
between the ability and inability to represent negative
numbers.
Unsigned numbers may seem less flexible, but they are
potentially useful if you need to represent values that should never
be negative. However, the unsigned integer types are not widely
used—some programming languages don’t support them at all, and so
you’ll find that the .NET Framework class library tends to use the
signed types even when the unsigned ones might make more
sense. For example, the Count
property available on most collection types is of type int—a signed 32-bit integer—even though it
does not make sense for a collection to contain a negative number of
items.
Note
Unsigned integers can also represent larger numbers than their signed equivalents. They don’t need to use up a bit to represent the sign, so they can use that to extend the range instead. However, this is something you should be wary of depending on. If you’re so close to the limits of a type’s range that one more bit makes a difference, you’re probably in danger of overflowing the type’s range in any case, and so you should consider a larger type.
Besides the signed/unsigned distinction, the various types offer different sizes, and a correspondingly different range of values. 32 bits is a popular choice because it offers a usefully wide range of values and is efficient for a 32-bit processor to work with. 64-bit types are used for the (fairly rare) occasions when you’re dealing with large enough quantities that a 32-bit representation’s range of a couple of billion is insufficient. 16-bit values are rarely used, although they occasionally crop up when having to deal with old programming interfaces, file formats, or network protocols.
The 8-bit byte type is
important because binary I/O (e.g., working with files or network
connections) is mostly byte-oriented. And for reasons of historical
convention, bytes buck the trend in that the unsigned type is used
more widely than the signed sbyte
type. But outside of I/O, a byte is usually too small to be
useful.
So in practice, int is the
most widely used integer type. The fact that C# even offers you all
these other choices can seem a little archaic—it harks back to the
time when computers had so little memory that 32-bit numbers looked
like an expensive choice. It gets this from its C-family connections,
but it does turn out to be useful to have this control when you need
to work directly with Windows APIs, as you’ll see in Chapter 19.
Notice that most of the types in Table 2-1 have two names. C# uses names such as
int and long, but the .NET Framework calls these
types by longer names such as System.Int32 and System.Int64. The shorter C# names are
aliases, and C# is happy to let you
use either. You can write this:
int answer = 42;
or this:
System.Int32 answer = 42;
or, if your C# source file has a using
System; directive at the top, you can write this:
Int32 answer = 42;
All of these are equivalent—they produce exactly the same
compiled output. The last two are equivalent simply because of how
namespaces work, but why does C# support a completely different set of
aliases? The answer is historical: C# was designed to be easy to learn
for people who are familiar with the so-called C family of languages,
which includes C, C++, Java, and JavaScript. Most of the languages in
this family use the same names for certain kinds of data types—most
use the name int to denote a
conveniently sized integer, for example. So C# is merely following
suit—it allows you to write code that looks like it would in other
C-family languages.
By contrast, the .NET Framework supports many different
languages, so it takes the prosaic approach of giving these numeric
data types descriptive names—it calls a 32-bit integer System.Int32. Since C# lets you use either
naming style, opinion is divided on the matter of which you should
use.[6] The C-family style (int, double, etc.) seems to be the more
popular.
Version 4 of the .NET Framework introduces an extra integer type
that works slightly differently from the rest: BigInteger. It does
not have a C-style name, so it’s known only by its class library name.
Unlike all the other integer types, which occupy a fixed amount of
memory that determines their range, a BigInteger can grow. As the number it
represents gets larger, it simply consumes more space. The only
theoretical limit on range is the amount of memory available, but in
practice, the computational cost of working with vast numbers is
likely to be the limiting factor. Even simple arithmetic operations
such as multiplication can become rather expensive with sufficiently
vast numbers. For example, if you have two numbers each with 1 million
decimal digits—each number occupies more than 400 kilobytes of
memory—multiplying these together takes more than a minute on a
reasonably well-specified computer. BigInteger is useful for mathematical
scenarios when you need to be able to work with very large numbers,
but in more ordinary situations, int is the most popular integer type.
Integers are all very well for countable quantities, but what if you need the ability to represent something other than a whole number? This is where floating-point types come in.
The double and float types both
offer the ability to support numbers with a fractional component. For
example, you can represent the value 1.5 with either of these types,
which you can’t do with any of the integer types. The only difference
between double and float is the level of precision available:
since floating-point numbers have a fixed size, they can offer only a
limited amount of precision. This means that they cannot represent
any fraction—the limited precision means
floating-point numbers can only represent most numbers
approximately.
A float offers about seven
decimal places of precision, whereas a double offers about 17. (Strictly speaking,
they offer 23 and 52 binary places of precision, respectively. These
are binary formats, so their precision does not correspond to an exact
number of decimal places of precision.) So the following code:
double x = 1234.5678;
double y = x + 0.0001;
Console.WriteLine(x);
Console.WriteLine(y);
prints out what you’d expect:
1234.5678
1234.5679
If instead we use the float type:
float x = 1234.5678f;
float y = x + 0.0001f;
Console.WriteLine(x);
Console.WriteLine(y);
we get this:
1234.568
1234.568
This often surprises new developers, but it’s normal, and is by no means unique to C#. If only a limited amount of space is available, you simply cannot represent all possible numbers with complete accuracy. Floating point, approximate as it is, is the standard way to represent noninteger numbers in most programming languages, and you’ll see this sort of inaccuracy anywhere.
Note
Notice that when modifying the code to use float instead of double, we added the letter
f to the end of the constants—0.0001f instead of just 0.0001, for example. This is because C#
treats a number with a decimal point as a value of type double, and if we try to store this in a
variable of type float, we risk
losing data due to the lower precision. Such code is treated as an
error, hence the need to explicitly tell C# that we know we’re
working with single-precision floating-point values, with the
f suffix. If you have a double you really would like to turn into
a float, and you are prepared to
tolerate the loss of precision, you can tell C# this with a
cast operator. For
example:
double x = 1234.5678;
double y = x + 0.0001;
float impreciseSum = (float) (x + y);
The (float) syntax here is
a cast, an explicit instruction to the compiler that we want to
convert the type. Since we are being explicit, the compiler does not
treat this as an error.
For a lot of applications, limited precision is not too big a
problem as long as you’re aware of it, but there’s a slightly subtler
problem that afflicts double and
float. They are both binary representations, because that’s the most
efficient way of packing precision into the space available. However,
it means that you can get some surprising-looking results when working
in decimal. For example, the number 0.1 cannot be represented
accurately as a finite-length binary fraction. (For much the same
reason that 1/9 cannot accurately be represented as a finite-length
decimal fraction. In either case, you end up with a recurring [i.e.,
infinitely long] number: 1/9 in decimal is 0.1111 recurring; 1/10 in
decimal is 0.1, but in binary it’s 0.00011001100110011 recurring.)
Take the following example:
float f1 = 0.1f;
float f2 = f1 + 0.1f;
float f3 = f2 + 0.1f;
float f4 = f3 + 0.1f;
float f5 = f4 + 0.1f;
float f6 = f5 + 0.1f;
float f7 = f6 + 0.1f;
float f8 = f7 + 0.1f;
float f9 = f8 + 0.1f;
Console.WriteLine(f1);
Console.WriteLine(f2);
Console.WriteLine(f3);
Console.WriteLine(f4);
Console.WriteLine(f5);
Console.WriteLine(f6);
Console.WriteLine(f7);
Console.WriteLine(f8);
Console.WriteLine(f9);
(We’ll see how to avoid such highly repetitive code when we get to loops later in the chapter, by the way.) This shows the following rather suspect output:
0.1
0.2
0.3
0.4
0.5
0.6
0.7
0.8000001
0.9000001
The inability to represent 0.1 accurately is not initially obvious, because .NET rounds the numbers when displaying them, masking the problem. However, as we keep adding numbers together, the inaccuracies add up and eventually start to become visible. As you can imagine, accountants don’t like this sort of thing—if those numbers happened to represent fund transfers measured in billions of dollars, having $0.0000001 billion ($100) suddenly appear out of nowhere every eight transactions would be considered a bad practice. This is why there’s a special numeric type just for working in decimal.
The decimal type (or
System.Decimal, as .NET calls it)
is superficially very similar to double and float, except its internal representation is
adapted to decimal representations. It can represent up to 28 decimal
digits of precision, and unlike the two binary floating-point types,
any number that can be written as a 28-digit (or fewer) decimal can be
represented completely accurately as a decimal variable. The value 0.1 fits
comfortably into 28 digits with room to spare, so this would fix the
problem in the previous example. The decimal type still has limited precision; it
just has less surprising behavior if you’re looking at all your
numbers in decimal.
So if you are performing calculations involving money, decimal is likely to be a better choice than
double or float. The trade-off is that it’s slightly
less efficient—computers are more at home in binary than decimal. For
our race information application, we don’t have any particular need
for decimal fidelity, which is why we’re using the double type in Example 2-5.
Getting back to that example, recall that we defined three variables that hold the distance our car has traveled, how long it took, and how much fuel it burned in the process. Here it is again so that you don’t have to flip back to it:
static void Main(string[] args)
{
    double kmTravelled = 5.141;
    double elapsedSeconds = 78.738;
    double fuelKilosConsumed = 2.7;
}
Now that we’ve looked at the numeric types, the structure of
these lines is pretty clear. We start with the type of data we’d like
to work with, followed by the name we’d like to use, and then we use
the = symbol to assign a value to
the variable. But assigning constant values isn’t very exciting. You
can get the computer to do more useful work, because you can assign an
expression into a variable.
An expression is a piece of code that produces a value of some kind. We’ve actually seen several examples already, the most basic being the numbers we’re assigning into the variables. So in our example, a number such as:
5.141
is an expression. Expressions where we just tell C# what value we want are called literal expressions. More interestingly, expressions can perform calculations. For example, we could calculate the distance traveled per kilogram of fuel consumed with the expression in Example 2-6.
The / symbol denotes
division. Multiplication, addition, and subtraction are done with *, +, and
-, respectively.
You can combine expressions together too. The / operator requires two inputs—the dividend and
the divisor—and each input is itself an expression. We were able to use
variable names such as kmTravelled
because a variable name is valid as an expression—the resultant value is just
whatever that variable’s value is. But we could use literals, as Example 2-7 shows. (A trap awaits the
unwary here; see the sidebar on the next page.)
Or we could use a mixture of literals and variable names to calculate the elapsed time in minutes:
elapsedSeconds / 60
or a multiplication expression as one of the inputs to a division expression to calculate the elapsed time in hours:
elapsedSeconds / (60 * 60)
(The parentheses ensure that we divide by 60 * 60. Without the parentheses, this expression would divide by 60, and then multiply by 60, which would be less useful. See the sidebar on the next page.) And then we could use this to work out the speed in kilometers per hour:
kmTravelled / (elapsedSeconds / (60 * 60))
Expressions don’t actually do anything on their own. We have described a calculation, but the C# compiler needs to know what we want to do with the result. We can do various things with an expression. We could use it to initialize another variable:
double kmPerHour = kmTravelled / (elapsedSeconds / (60 * 60));
or we could display the value of the expression in the console window:
Console.WriteLine(kmTravelled / (elapsedSeconds / (60 * 60)));
Both of these are examples of statements.
Whereas an expression describes a calculation, a statement describes
an action. In the last two examples, we used the same expression—a
calculation of the race car’s speed—but the two statements did different
things: one evaluated the expression and assigned it into a new variable,
while the other evaluated the expression and then passed it to the
Console class’s WriteLine method.
Note
An expression’s type matters. The examples we just looked at
involve numbers or numeric variables, and are of type double or int. Expressions can be of any type, though.
For example, ("Hello, " + "world") is
an expression of type string. If you
wrote an assignment statement that tried to assign that expression into
a variable of type double, the
compiler would complain—it insists that expressions are either of the
same type as the variable, or of a type that is implicitly convertible
to the variable’s type.
Implicit conversions exist for numeric types when the
conversion won’t lose information—for example, a double can represent any value that an
int can, so you’re allowed to assign
an integer expression into a double
variable. But attempting the opposite would cause a compiler error,
because doubles can be larger than the highest int, and they can also contain fractional
parts that would be lost. If you don’t mind the loss of information, you
can put a cast in front of the expression:
int approxKmPerHour = (int) kmPerHour;
This casts the kmPerHour (which
we declared earlier as a double) to
an int, meaning it’ll force the value
to fit in an integer, possibly losing information in the process.
A variable doesn’t have to be stuck with its initial value for its whole life. We can assign new values at any time.
The previous section showed how to assign an expression’s value into a newly declared variable:
double kmPerHour = kmTravelled / (elapsedSeconds / (60 * 60));
If at some later stage in the program’s execution new information
becomes available, we could assign a new value into the kmPerHour variable—assignment statements
aren’t required to declare new variables, and can assign into existing
ones:
kmPerHour = updateKmTravelled / (updatedElapsedSeconds / (60 * 60));
This overwrites the existing value in the kmPerHour variable.
C# offers some specialized assignment statements that can make for slightly more succinct code. For example, suppose you wanted to add the car’s latest lap time to the variable holding the total elapsed time. You could write this:
elapsedSeconds = elapsedSeconds + latestLapTime;
This evaluates the expression on the righthand side, and assigns the result to the variable specified on the lefthand side. However, this process of adding a value to a variable is so common that there’s a special syntax for it:
elapsedSeconds += latestLapTime;
This has exactly the same effect as the previous expression. There
are equivalents for the other mathematical operators, so -= means to subtract the expression on the
right from the variable on the left, *= does the same for multiplication, and so
on.
While we’re looking at how to update values, we should also look at the increment and decrement operators. If we want to maintain a lap count, we could add one each time the car completes a lap:
lapCount += 1;
The C programming language’s designers considered adding one to be a sufficiently important case to devise an even more special syntax for it, called the increment operator, which C# duly offers:
lapCount++;
There’s also a decrement operator, --,
which subtracts one. This example is a statement, but you can also use
the increment and decrement operators in the middle of an
expression:
int currentLap = lapCount++;
But be careful. The expression on the right of this assignment
statement means “evaluate the current value of
lapCount and then increment lapCount after getting
its current value.” So if lapCount
was 3 before executing this statement, currentLap would be 3 and lapCount would be 4 after executing it. If you
want to use the updated value, you put the increment (or decrement)
operator before its target:
int currentLap = ++lapCount;
You could write a program that consisted entirely of variable declaration, assignment, increment, and method invocation statements. However, such a program wouldn’t be very interesting—it would always execute the same sequence of statements just once in the same order. Fortunately, C# provides some more interesting statements that allow a program to make decisions that dynamically change the flow of execution through the code. This is sometimes referred to as flow control.
A selection statement selects which code path to execute
next, based on the value of an expression. We could use a selection
statement to work out whether the race car is likely to run out of fuel in
the next few laps, and display a warning if it is. C# offers two selection
statements: if
statements and switch statements.
To illustrate selection in action, we need to make a slight change to the program. Right now, our example hardcodes all of its data—the distance traveled, fuel consumed, and time elapsed are compiled into the code as literals. This makes selection statements uninteresting—the program would make the same decision every time because the data would always be the same. For the decision to be meaningful, we need to modify the program to accept input. Since we’re writing a console application, we can supply the necessary information as command-line arguments. We could run the program passing in the total distance, elapsed time, and fuel consumed, for example:
RaceInfo 20.6 312.8 10.8
We can write a modified version of the program that picks up these command-line values instead of hardcoding them, as shown in Example 2-8.
Example 2-8. Reading command-line inputs
static void Main(string[] args)
{
    double kmTravelled = double.Parse(args[0]);
    double elapsedSeconds = double.Parse(args[1]);
    double fuelKilosConsumed = double.Parse(args[2]);
}
There are a few interesting features to point out here before we add
a selection statement. First, recall from earlier that the Main method, our
program’s entry point, is passed a sequence of strings representing the
command-line arguments in a variable called args. This sequence is an
array, a .NET construct for holding
multiple items of a particular type. (You can make arrays of
anything—numbers, text, or any type. The string[] syntax indicates that this method
expects an array of strings.) In an expression, we can retrieve a
particular item from an array by specifying a number in square brackets
after the array variable’s name. So the first three lines in our method
here use args[0], args[1], and args[2] to get the first, second, and third
items in the array—the three command-line arguments in this case.
Note
C-family languages tend to number things from zero, and C# follows suit. This may seem a little idiosyncratic, but it makes sense to the computer. You can think of it as saying how far into the array you want to look. If you want to look at the thing right at the start of the array, you don’t need to go any distance at all, so an offset of zero gets you the first item. If you’re British, you’ll recognize this logic from floor numbering—the first floor in a building in Great Britain is not the one at street level; you have to go up one flight of stairs to get to the first floor.
Also notice the use of double.Parse. Command-line arguments are passed
as text, because the user can type anything:
RaceInfo Jenson Button Rocks
But our program expects numbers. We need to do something to convert
the strings into numbers, and that’s what double.Parse does: it expects the text to
contain a decimal number, and converts it into a double-precision
floating-point representation of that number. (If you’re wondering what it
would do if the text wasn’t in fact a number, it’ll throw an exception.
Chapter 6 explains what that means and how to
deal with it gracefully, but for now it means our program would crash with
an error.)
This example illustrates that method invocations can also be
expressions—the double type’s Parse method returns a value of type double, meaning we can use it to initialize a
variable of type double.
But that’s all by the by—the point here is that our program now gets
data that could be different each time the program runs. For example, a
race engineer in the pit lane could run the program with new distance,
timing, and fuel information each time the car completes a lap. So our
program can now usefully make decisions based on its input using selection
statements. One such statement is the if statement.
An if
statement is a selection statement that decides
whether to execute a particular piece of code based on the value of an
expression. We can use this to show a low-fuel warning by adding the
code in Example 2-9 at the end of our example’s
Main method. Most of the code
performs calculations in preparation for making the decision. The
if statement toward the end of the
example makes the decision—it decides whether to execute the block of
code enclosed in braces.
Example 2-9. if statement
double fuelTankCapacityKilos = 80;
double lapLength = 5.141;

double fuelKilosPerKm = fuelKilosConsumed / kmTravelled;
double fuelKilosRemaining = fuelTankCapacityKilos - fuelKilosConsumed;
double predictedDistanceUntilOutOfFuel = fuelKilosRemaining / fuelKilosPerKm;
double predictedLapsUntilOutOfFuel =
           predictedDistanceUntilOutOfFuel / lapLength;

if (predictedLapsUntilOutOfFuel < 4)
{
    Console.WriteLine("Low on fuel. Laps remaining: " +
        predictedLapsUntilOutOfFuel);
}
To test this, we need to run the program with command-line arguments. You could open a command prompt, move to the directory containing the built output of your project, and run it with the arguments you want. (It’ll be in the binDebug folder that Visual Studio creates inside your project’s folder.) Or you can get Visual Studio to pass arguments for you. To do that, go to the Solution Explorer panel and double-click on the Properties icon. This will open the project’s properties view, which has a series of tabs on the lefthand side. Select the Debug tab, and in the middle you’ll see a “Command line arguments” text box as shown in Figure 2-6.
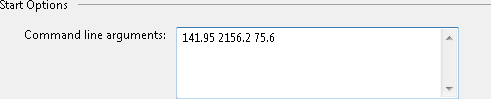
If you run the program with arguments corresponding to just a few
laps (e.g., 15 238 8) it won’t print
anything. But try running it with the following arguments: 141.95 2156.2 75.6. It’ll predict that the car
has about 1.6 laps of fuel remaining. The if statement in Example 2-9 tests the following expression:
predictedLapsUntilOutOfFuel < 4
The < symbol means “less
than.” So the code in braces following the if statement runs only if the number of
predicted laps of fuel is less than 4. Clearly, 1.6 is less than 4, so
in this case it’ll run that code, printing out the following:
Low on fuel. Laps remaining: 1.60701035044548
You need to use the right kind of expression in an if statement. In this case, we’ve performed a
comparison—we’re testing to see if a variable is less than 4. There are
only two possible outcomes: either it’s less than 4 or it isn’t. So this
expression is clearly different in nature to the expressions performing
mathematical calculations. If you were to modify the program so that it
prints the value of that expression:
Console.WriteLine(predictedLapsUntilOutOfFuel < 4);
it would display either True or
False. The .NET Framework has a
special type to represent such an either/or choice, called System.Boolean, and as with the numeric types,
C# defines its own alias for this type: bool.[7] An if statement
requires a Boolean expression. So if you try to use an expression with a
numeric result, such as this:
if (fuelTankCapacityKilos - fuelKilosConsumed)
the compiler will complain with the error “Cannot implicitly
convert type ‘double’ to ‘bool’.” This is its way of saying that it
expects a bool—either true or
false—and you’ve given it a number. In effect, that code says something
like “If fourteen and a half then do this.” What would that even
mean?
Note
The C language decided to answer that question by saying that
0 is equivalent to false, and
anything else is equivalent to true. But that was only because it
didn’t have a built-in Boolean type, so its if statement had to be able to work with
numeric expressions. This turned out to be a frequent cause of bugs in
C programs. Since C# does have a built-in bool type, it insists that an if statement’s expression is always of type
bool.
C# defines several operators which, like the < operator we used in Example 2-9, can compare two numbers to produce a Boolean
true/false answer. Table 2-2 shows these.
Some of these operators can be applied to non-numeric types too. For
example, you can use the == and
!= operators to compare strings. (You might expect the other comparison
operators to work too, telling you whether one string would come before
or after another when sorted alphabetically. However, there’s more than
one way to sort strings—it turns out that the method used varies based
on language and culture. And rather than have an expression such as
text1 < text2 mean different
things in different contexts, C# simply doesn’t allow it. If you want to
compare strings, you have to call one of the methods provided by the
String class that lets you say how
you’d like the comparison to work.)
Just as you can combine numeric expressions into more complex and
powerful expressions, C# provides operators that let you combine Boolean
expressions to test multiple conditions. The && operator
combines two Boolean expressions into a single expression that’s true
only if both conditions are true. In our race example, we might use this
to hide the low-fuel warning if we’re near the end of the race and the
car has enough fuel to make it to the finish line. Imagine that we added
an extra argument to pass in the number of remaining laps in the race,
and an additional variable to hold that value; we could write:
if ((predictedLapsUntilOutOfFuel < 4) &&
    (predictedLapsUntilOutOfFuel < remainingLapsInRace))
{
    Console.WriteLine("Low on fuel. Laps remaining: " +
        predictedLapsUntilOutOfFuel);
}
This has the same effect as the following slightly more verbose code:
if (predictedLapsUntilOutOfFuel < 4)
{
    if (predictedLapsUntilOutOfFuel < remainingLapsInRace)
    {
        Console.WriteLine("Low on fuel. Laps remaining: " +
            predictedLapsUntilOutOfFuel);
    }
}
Only if both conditions are true will the message be displayed.
There’s also a || operator. Like
&&, the || operator combines
two Boolean expressions, but will be true if either of them is
true.
The if statement
examples we’ve looked at so far just decide whether to execute some
optional code, but what if we want to choose between two actions? An
if statement can optionally include
an else section that runs if the
condition was false, as in this hypothetical post-race example:
if (weWonTheRace)
{
    Sponsors.DemandMoreMoney();
}
else
{
    Driver.ReducePay();
}
One type of if/else test comes up often enough that C-family languages have a special syntax for it: sometimes you want to pick between one of two values, based on some test. You could write this:
string messageForDriver;
if (weWonTheRace)
{
    messageForDriver = "Congratulations";
}
else
{
    messageForDriver = "You're fired";
}
Sometimes it’s more convenient to be able to put this inside an
expression. This can be done with the ternary operator, so called because
it contains three expressions: a Boolean test expression, the
expression to use if the test is true, and the expression to use if
the test is false. The syntax uses ? and : characters to
separate the expressions, so the basic pattern is
test ?
resultIfTrue : resultIfFalse.
We can collapse the previous if...else
example to a single assignment statement by using the ternary operator
in the expression on the righthand side of the assignment:
string messageForDriver = weWonTheRace ?
                            "Congratulations" :
                            "You're fired";
You don’t have to space it out like this, by the way—we put the two options on separate lines to make them easy to see. But some people like to use the ternary operator to condense as much logic as possible into as little space as possible; this is either admirable conciseness or impenetrable terseness, depending on your personal tastes.
You can string multiple if...else
tests together. To see how that might be useful in our example,
consider how in motor racing, incidents or weather conditions may
cause the race stewards to initiate certain safety procedures, such as
temporarily disallowing overtaking maneuvers while wreckage is cleared
from the track, releasing the safety car for the drivers to follow
slowly if the wreckage is particularly spectacular, or in extreme
cases “red-flagging” the race—a temporary complete halt followed by a
restart. Each of these has its own appropriate response, which can be
dealt with by a chain of if...else
if...else statements, as
shown in Example 2-10.
Example 2-10. Testing multiple conditions with if and else
string raceStatus = args[3];
if (raceStatus == "YellowFlag")
{
Driver.TellNotToOvertake();
}
else if (raceStatus == "SafetyCar")
{
Driver.WarnAboutSafetyCar();
}
else if (raceStatus == "RedFlag")
{
if (ourDriverCausedIncident)
{
Factory.OrderNewCar();
Driver.ReducePay();
if (feelingGenerous)
{
Driver.Resuscitate();
}
}
else
{
Driver.CallBackToPit();
}
}
else
{
Driver.TellToDriveFaster();
}While this works, there’s an alternative. This pattern of choosing one option out of many is sufficiently common that C# has a special selection statement to handle it.
A switch statement lets
you specify a list of expected values, and what to do for each value.
The values can be either strings or integral types. (Integral types
include int, short, etc.—you cannot switch on
floating-point numbers. Enumeration types, which are discussed in Chapter 3, are considered to
be integral types for the purposes of a switch statement.) We can use this to rewrite
Example 2-10 as shown in
Example 2-11.
Example 2-11. Testing multiple conditions with switch and case
string raceStatus = args[3];
switch (raceStatus)
{
case "YellowFlag":
    Driver.TellNotToOvertake();
    break;

case "SafetyCar":
    Driver.WarnAboutSafetyCar();
    break;

case "RedFlag":
    if (ourDriverCausedIncident)
    {
        Factory.OrderNewCar();
        Driver.ReducePay();
        if (feelingGenerous)
        {
            Driver.Resuscitate();
        }
    }
    else
    {
        Driver.CallBackToPit();
    }
    break;


default:
    Driver.TellToDriveFaster();
    break;

}
Note
The break keyword you can
see at the end of each case is
present mainly for consistency with other C-like languages. In C and
C++, if you leave off the break,
the code will “fall” out of one case through to the next. So if we
left off the break in the YellowFlag case, we’d end up telling drivers
not to overtake and then warning them about the safety car. This would
be a bug—and in general, you almost always don’t want fall-through.
It’s unfortunate that in C and C++ fall-through was the default. C#
changes this: if you want fall-through you must ask for it explicitly
by writing goto case "SafetyCar".
But despite fall-through no longer being the implicit default, you
still need to write the same break
statement as you would in other C-family languages when you don’t want
fall-through—if you leave it out you’ll get an error.
You might be wondering what is the point—this does exactly the
same as Example 2-10, so
why do we need a different syntax? As it happens, we don’t—there’s
nothing you can do with switch and
case that you can’t do with if and else. But switch and case offer one useful advantage: they make it
clear what we’re doing—we’re looking at a single expression (raceStatus) and we’re choosing one of a number
of options based on the value of that expression. A developer familiar
with C# can look at this code and understand the structure of the
decision-making process at a glance. With the previous example, you
would need to look at each else if
statement in turn to make sure it wasn’t doing something more
complex—chained else if statements
are more flexible than switch
statements, because each new link in the chain is allowed to test a
completely different expression, but that flexibility comes at the cost
of making it harder to understand the code. Sometimes a self-imposed
constraint can make code easier to read and maintain, and a switch statement is a good example of
that.
Selection statements make programs considerably more useful than they would otherwise be—they enable programs to make decisions. But our examples are still rather straightforward—they run just once, from start to finish, with the odd variation in the execution flow. The amount of work that is done is pretty trivial. So there’s another kind of statement that plays to a computer’s greatest strength: the ability to perform simple repetitive tasks many times over.
An iteration statement allows a sequence of other statements to be executed several times. (Repeated execution is also often known as a loop because, like the race car, the code goes round and round again.) This seems like it could be useful in our race data analysis—race cars usually complete many laps, so we will probably have multiple sets of data to process. It would be annoying to have to write the same code 60 times just to process all the data for a 60-lap race. Fortunately, we don’t have to—we can use one of C#’s iteration statements.
Imagine that instead of passing in timing or fuel information as command-line arguments, the data was in files. We might have a text file containing one line per lap, with the elapsed time at the end of each lap. Another text file could contain the remaining fuel at the end of each lap. To illustrate how to work with such data, we’ll start with a simple example: finding the lap on which our driver went quickest.
Since this code is a little different from the previous example,
start a new project if you want to follow along. Make another console
application called LapAnalysis.
To be able to test our code we’ll need a file containing the timing
information. You can add this to your Visual Studio project. Right-click
on the LapAnalysis project in the
Solution Explorer and select Add→New Item
from the context menu. (Or just press Ctrl-Shift-A.) In the Installed
Templates section on the left, select the General category under Visual C#
Items, and then in the central area select Text File. Call the file
LapTimes.txt and click Add. You’ll
need this file to be somewhere the program can get to. Go to the
Properties panel for the file—this is usually below the
Solution Explorer panel, but if you don’t see it, right-click on LapTimes.txt in the Solution Explorer and
select Properties. In the Properties panel, you should see a Copy to
Output Directory property. By default, this is set to “Do not copy”.
Change it to “Copy if newer”—Visual Studio will ensure that an up-to-date
copy of the file is available in the binDebug folder in which it builds your
program. You’ll need some data in this file. We’ll be using the
following—these numbers represent the elapsed time in seconds since the
start of the race at the end of each lap:
78.73
157.2
237.1
313.8
390.7
470.2
The program is going to read in the contents of the file. To do
this, it’ll need to use types from the System.IO namespace, so you’ll need to add the
following near the top of your Program.cs file:
using System.IO;
Then inside the Main method, use
the following code to read the contents of the file:
string[] lines = File.ReadAllLines("LapTimes.txt");The File type is in the System.IO namespace, and its ReadAllLines method reads
in all the lines of a text file and returns an array of strings (string[]) with one entry per line. The easiest
way to work through all these entries is with a foreach statement.
A foreach statement
executes a block of statements once for every item in a collection such
as an array. For example, this:
foreach (string line in lines)
{
    Console.WriteLine(line);
}
will display every line of text from the lines array we just built. The block to
execute each time around is, as ever, delimited by a { } pair.
We have to provide the C# compiler with two things at the start of
a foreach loop: the variable we’d
like to use to access each item from the collection, and the collection
itself. The string line part declares
the first bit—the so-called iteration variable. And
then the in lines part says that we
want to iterate over the items in the lines array. So each time around the loop,
line will contain the next string in
lines.
We can use this to discover the fastest lap time, as shown in Example 2-12.
Example 2-12. Finding the fastest lap with foreach
string[] lines = File.ReadAllLines("LapTimes.txt");
double currentLapStartTime = 0;
double fastestLapTime = 0;
foreach (string line in lines)
{
    double lapEndTime = double.Parse(line);
    double lapTime = lapEndTime - currentLapStartTime;
    if (fastestLapTime == 0 || lapTime < fastestLapTime)
    {
        fastestLapTime = lapTime;
    }
    currentLapStartTime = lapEndTime;
}
Console.WriteLine("Fastest lap time: " + fastestLapTime);
The currentLapStartTime begins
at zero, but is updated to the end time of the previous lap each time
around the loop—we need this to work out how long each lap took, because
each line of the file contains the total elapsed race time at each lap.
And the fastestLapTime variable
contains the time of the fastest lap yet found—it’ll be updated each
time a faster lap is found. (We also update it when it’s zero, which it
will be the first time we go around.)
This finds the fastest lap time—76.7 seconds in the example data
we’re using. But it doesn’t tell us which lap that was. Looking at the
numbers, we can see that it happens to be the fourth, but it would be
nice if the program could tell us. One way to do this is to declare a
new variable called lapNumber,
initializing it to 1 outside the loop, and adding one each time around,
to keep track of the current lap. Then we can record the lap number on
which we found the fastest time. Example 2-13 shows a modified version,
with the additional code in bold.
Example 2-13. Fastest lap including lap number
string[] lines = File.ReadAllLines("LapTimes.txt");
double currentLapStartTime = 0;
double fastestLapTime = 0;
int lapNumber = 1;
int fastestLapNumber = 0;
foreach (string line in lines)
{
    double lapEndTime = double.Parse(line);
    double lapTime = lapEndTime - currentLapStartTime;
    if (fastestLapTime == 0 || lapTime < fastestLapTime)
    {
        fastestLapTime = lapTime;
        fastestLapNumber = lapNumber;
    }
    currentLapStartTime = lapEndTime;
    lapNumber += 1;
}
Console.WriteLine("Fastest lap: " + fastestLapNumber);
Console.WriteLine("Fastest lap time: " + fastestLapTime);
If you’re trying this out, this might be a good opportunity to acquaint yourself with Visual Studio’s debugging features—see the sidebar below.
Example 2-13 works well
enough, but there’s an alternative iteration statement you can use for
this sort of scenario: a for
statement.
A for statement is a
loop in which some variable is initialized to a start value, and is
modified each time around the loop. The loop will run for as long as
some condition remains true—this means a for loop does not necessarily have to involve
a collection, unlike a foreach loop.
Example 2-14 is a simple loop that counts
to 10.
Example 2-14. Counting with a for loop
for (int i = 1; i <= 10; i++)
{
    Console.WriteLine(i);
}
Console.WriteLine("Coming, ready or not!");
The for keyword is followed by
parentheses containing three pieces. First, a variable is declared and
initialized. Then the condition is specified—this particular loop will
iterate for as long as the variable i
is less than or equal to 10. You can use any Boolean expression here,
just like in an if statement. And
finally, there is a statement to be executed each time around the
loop—adding one to i in this case.
(As you saw earlier, i++ adds one to
i. We could also have written
i += 1, but the usual if arbitrary
convention in C-style languages is to use the ++ operator here.)
Note
Earlier we recommended using variable names that are long enough
to be descriptive, so you might be raising an eyebrow over the use of
i as a variable name. There’s a
convention with for loops where the
iteration variable just counts up from zero—short
variable names such as i, j, k,
x, and y are often used. It’s not a universal
convention, but you’ll see it widely used, particularly with short
loops.
We’re using this convention in Example 2-14 only because you will come across it sooner or later, and so we felt it was important to show it. But it’s arguably not an especially good way to write clear code, so feel free to choose more meaningful names in your own code.
We could use this construct as an alternative way to find the fastest lap time, as shown in Example 2-15.
Example 2-15. Finding the fastest lap with for
string[] lines = File.ReadAllLines("LapTimes.txt");
double currentLapStartTime = 0;
double fastestLapTime = 0;
int fastestLapNumber = 0;
for (int lapNumber = 1; lapNumber <= lines.Length; lapNumber++)
{
    double lapEndTime = double.Parse(lines[lapNumber - 1]);
    double lapTime = lapEndTime - currentLapStartTime;
    if (fastestLapTime == 0 || lapTime < fastestLapTime)
    {
        fastestLapTime = lapTime;
        fastestLapNumber = lapNumber;
    }
    currentLapStartTime = lapEndTime;
}
Console.WriteLine("Fastest lap: " + fastestLapNumber);
Console.WriteLine("Fastest lap time: " + fastestLapTime);
This is pretty similar to the foreach example. It’s marginally shorter, but
it’s also a little more awkward—our program is counting the laps
starting from 1, but arrays in .NET start from zero, so the line that
parses the value from the file has the slightly ungainly expression
lines[lapNumber - 1] in it.
(Incidentally, this example avoids using a short iteration variable name
such as i because we’re numbering the
laps from 1, not 0—short iteration variable names tend to be associated
with zero-based counting.) Arguably, the foreach version was clearer, even if it was
ever so slightly longer. The main advantage of for is that it doesn’t require a collection,
so it’s better suited to Example 2-14
than Example 2-15.
C# offers a third kind of iteration statement: the
while loop. This
is like a simplified for loop—it has
only the Boolean expression that decides whether to carry on looping,
and does not have the variable initialization part, or the statement to
execute each time around. (Or if you prefer, a for loop is a fancy version of a while loop—neither for nor foreach does anything you couldn’t achieve
with a while loop and a little extra
code.) Example 2-16 shows
an alternative approach to working through the lines of a text file
based on a while loop.
Example 2-16. Iterating through a file with a while loop
static void Main(string[] args)
{
    using (StreamReader times = File.OpenText("LapTimes.txt"))
    {
        while (!times.EndOfStream)
        {
            string line = times.ReadLine();
            double lapEndTime = double.Parse(line);
            Console.WriteLine(lapEndTime);
        }
    }
}
The while statement is well
suited to the one-line-at-a-time approach. It doesn’t require a
collection; it just loops until the condition becomes false. In this
example, that means we loop until the StreamReader tells us we’ve reached the end of
the file.[8] (Chapter 11 describes the use of
types such as StreamReader in
detail.) The exclamation mark (!) in
front of the expression means not—you can put this
in front of any Boolean expression to invert the result. So the loop
runs for as long as we are not at the end of the
stream.
Note
We could have used a for loop
to implement this one-line-at-a-time loop—it also iterates until its
condition becomes false. The while
loop happens to be a better choice here simply because in this
example, we have no use for the variable initialization or loop
statement offered by for.
The approach in Example 2-16 would be better
than the previous examples for a particularly large file. The code can
start working straight away without having to wait for the entire file
to load, and it will use less memory because it doesn’t build the array
containing every single line—it can hold just one line at a time in
memory. For our example lap time file with just six lines of data, this
won’t make any difference, but if you were processing a file with
hundreds of thousands of entries, this while-based example could provide noticeably
better performance than the array-based examples.
Warning
This does not mean that while is faster than for or foreach. The performance difference here is
a result of the code working with the file in a different way, and has
nothing to do with the loop construct. In general, it’s a bad idea to
focus on which language features are “fastest.” Performance usually
depends on the way in which your code solves a problem, rather than
which particular language feature you use.
Note that for and while loops might never execute their contents
at all. If the condition is false the first time around, they’ll skip
the loop entirely. This is often desirable—if there’s no data, you
probably want to do no work. But just occasionally it can be useful to
write a loop that is guaranteed to execute at least once. We can do this
with a variation on the while loop,
called the do while loop:
do
{
    Console.WriteLine("Waiting...");
}
while (DateTime.Now.Hour < 8);
The while keyword and condition
come at the end, and we mark the start of the loop with the do keyword. This loop always executes at least
once, testing the condition at the end of each iteration instead of the
start. So this code will repeatedly show the message “Waiting...” until
the current time is 8:00 a.m. or later. If it’s already past 8:00 a.m.,
it’ll still write out “Waiting...” once.
It can sometimes be useful to abandon a loop earlier than
its natural end. In the case of a foreach loop, this might mean stopping before
you’ve processed every item in the collection. With for or while loops, you get to write the loop
condition so that you can stop under whatever conditions you like, but
it can sometimes be more convenient to put the code that makes a
decision to abandon a loop somewhere inside the loop body rather than in
the condition. For these eventualities, C# provides the break keyword.
We saw break already in a
switch statement in Example 2-11—we used it to say
that we’re done with the switch and
want to break out of that statement.
The break keyword does the same thing
in a loop:
using (StreamReader times = File.OpenText("LapTimes.txt"))
{
    while (!times.EndOfStream)
    {
        string line = times.ReadLine();
        if (line == "STOP!")
        {
            break;
        }
        double lapEndTime = double.Parse(line);
        Console.WriteLine(lapEndTime);
    }
}
This is the loop from Example 2-16, modified to stop
if it comes across a line in the input file that contains the text
“STOP!” This breaks out immediately, abandoning the rest of the loop and
leaping straight to the first line of code after the enclosing loop’s
closing brace. (In that case, this happens to be the enclosing using statement’s closing brace, which will
close the file handle.)
Note
Some people regard this use of break as bad practice. It makes it harder to
understand the loop. When a loop contains no break statements, you can understand its
lifetime by looking at the while
(or for, or foreach) part. But if there are break statements, you need to look at more
of the code to get a complete understanding of when the loop will
finish.
More generally, flow control that jumps suddenly out of the middle of a construct is frowned upon, because it makes it much harder for someone to understand how execution flows through a program, and programs that are hard to understand tend to be buggy. The computer scientist Edsger Dijkstra submitted a short letter on this topic in 1968 to an academic journal, which was printed under a now infamous heading, “Go-to statement considered harmful”. If you’re interested in iconic pieces of computing history, or if you’d like a detailed explanation of exactly why this sort of jumpy flow control is problematic, you can find the original letter at http://www.cs.utexas.edu/users/EWD/ewd02xx/EWD215.PDF.
To recap what we’ve explored so far, we’ve seen how to work with variables to hold information, how to write expressions that perform calculations, how to use selection statements that decide what to do, and how to build iteration statements that can do things repeatedly. There’s one more basic C# programming feature we need to look at to cover the most important everyday coding features: methods.
As we saw earlier, a method is a named
block of code. We wrote a method already—the Main method that runs when our program starts.
And we used methods provided by the .NET Framework class library, such as
Console.WriteLine and File.ReadAllLines. But we haven’t looked at how
and why you would introduce new methods other than Main into your own code.
Methods are an essential mechanism for reducing your code’s complexity and enhancing its readability. By putting a section of code into its own method with a carefully chosen name that describes what the method does, you can make it much easier for someone looking at the code to work out what your program is meant to do. Also, methods can help avoid repetition—if you need to do similar work in multiple places, a method can help you reuse code.
In our race car example, there’s a job we may need to do multiple times: reading in numeric values from a file. We did this for timing information, but we’re going to need to do the same with fuel consumption and distance. Rather than writing three almost identical bits of code, we can put the majority of the code into a single method.
The first thing we need to do is declare the method—we need to pick
a name, define the information that comes into the method, and optionally
define the information that comes back out. Let’s call the method
ReadNumbersFromFile,
since that’s what it’s going to do. Its input will be a text string
containing the filename, and it will return an array of double-precision
floating-point numbers. The method declaration, which will go inside our
Program class, will look like
this:
static double[] ReadNumbersFromFile(string fileName)
As you may recall from the discussion of Main earlier, the static keyword indicates that we do not need an
instance of the containing Program type
to be created for this method to run. (We’ll be looking at nonstatic
methods in the next chapter when we start dealing with objects.) C#
follows the C-family convention that the kind of data coming out of the
method is specified before the name and the inputs, so next we have
double[], indicating that this method
returns an array of numbers. Then we have the name, and then in
parentheses, the inputs required by this method. In this example there’s
just one, the filename, but this would be a comma-separated list if more
inputs were required.
After the method declaration comes the method body—the statements
that make up the method, enclosed in braces. The code isn’t going to be
quite the same as what we’ve seen so far—up until now, we’ve converted the
text to numbers one at a time immediately before processing them. But this
code is going to return an array of numbers, just like File.ReadAllLines returns an array of strings.
So our code needs to build up that array. Example 2-17 shows one way of
doing this.
Example 2-17. A method for reading numbers from a file
static double[] ReadNumbersFromFile(string fileName)
{
    List<double> numbers = new List<double>();
    using (StreamReader file = File.OpenText(fileName))
    {
        while (!file.EndOfStream)
        {
            string line = file.ReadLine();
            // Skip blank lines
            if (!string.IsNullOrEmpty(line))
            {
                numbers.Add(double.Parse(line));
            }
        }
    }
    return numbers.ToArray();
}
This looks pretty similar to the example while loop we saw earlier, with one addition:
we’re creating an object that lets us build up a collection of numbers one
at a time—a List<double>. It’s
similar to an array (a double[]), but
an array needs you to know how many items you want up front—you can’t add
more items onto an existing array. The advantage of a List<double> is that you can just keep
adding new numbers at will. That matters here because if you look closely
you’ll see we’ve modified the code to skip over blank lines, which means
that we actually don’t know how many numbers we’re going to get until
we’ve read the whole file.
Once you’re done adding numbers to a list, you can call its
ToArray() method to get
an array of the correct size. This list class is an example of a
collection class. .NET offers several
of these, and they are so extremely useful that Chapters 7, 8, and 9 are
related to working with collections.
Notice the return keyword near the
end of Example 2-17. This
is how we return the information calculated by our method to whatever code
calls the method. As well as specifying the value to return, the return keyword causes the current method to exit
immediately, and for execution to continue back in the calling method. (In
methods with a void return type, which
do not return any value, you can use the return keyword without an argument to exit the
method. Or you can just let execution run to the end of the method, and it
will return implicitly.) If you’re wondering how the method remembers
where it’s supposed to go back to, see the sidebar on the next
page.
With the ReadNumbersFromFile
method in place, we can now write this sort of code:
double[] lapTimes = ReadNumbersFromFile("LapTimes.txt");
double[] fuelLevels = ReadNumbersFromFile("FuelRemainingByLap.txt");It doesn’t take a lot of effort to understand that this code is reading in numbers for lap times and fuel levels from a couple of text files—the code makes this aspect of its behavior much clearer than, say, Example 2-12. When code does what it says it does, you make life much easier for anyone who has to look at the code after you’ve written it. And since that probably includes you, you’ll make your life easier in the long run by moving functionality into carefully named methods.
Note
This idea of moving code out of the middle of one method and into a separate method is very common, and is an example of refactoring. Generally speaking, refactoring means restructuring code without changing its behavior, to either simplify it, make it easier to understand and maintain, or avoid duplication. There are so many ways to refactor code that whole books have been written on the topic, but this particular refactoring operation is so useful that Visual Studio can automate it. If you select some code and then right-click on the C# editor window, it offers a Refactor→Extract Method menu item that does this for you. In practice, it’s not always that straightforward—you might need to restructure the code a little first, before you’re in a position to factor out the pieces you’d like to move into a method. Example 2-17 had to work slightly differently from any of the previous examples to package the code into a reusable method. But while it may require some work, it’s a useful technique to apply.
In this chapter, we looked at some of the most important concepts involved in the everyday writing of C#. We saw how to create and run projects in Visual Studio. We saw how namespaces help us work with the .NET Framework class library and other external code, without getting lost in the thousands of classes on offer. We used variables and expressions to store and perform calculations with data. We used selection statements to make decisions based on input, and iteration statements to perform repetitive work on collections of data. And we saw how splitting your code into well-named methods can enhance the reusability and readability of your code. In the next chapter, we’ll step outside the world of methods and look at C#’s support for object-oriented programming.
[3] Strictly speaking, you can leave out the namespace, in which case your types will end up in the so-called global namespace. But this is considered a poor practice—you’ll normally want your own code to reap the same benefits that class libraries get from namespaces.
[4] This is the essential difference between the so-called functional and procedural approaches to coding, by the way. Code that just performs a computation or calculation and returns the result is called “functional” because it’s similar in nature to mathematical functions such as cosine, and square root. Procedural code tends to perform a sequence of actions. In some languages, such as F#, the functional style dominates, but C# programs typically use a mixture of both styles.
[5] With the odd exception: in a string constant such as the “Hello, world” text in this example, whitespace is treated literally—C# presumes that if you put, say, three spaces in some text enclosed in double quotes, you really want three spaces.
[6] Whenever more than one way of doing something exists in a programming system, a schism inevitably forms, offering the opportunity for long and pointless arguments over which is “better.”
[7] The Boolean type is named after George Boole, who invented a branch of mathematical logic that uses just two values: true and false. His system is fundamental to the operation of all digital electronics, so it’s a shame that C# doesn’t see fit to spell his name properly.
[8] You’ll have noticed the using keyword on the line where we get
hold of the StreamReader. We use
this construct when it’s necessary to indicate exactly when we’ve
finished with an object—in this case we need to say when we’re done
with the file to avoid keeping operating system file handles
open.