
As mentioned earlier, Glance is a mandatory service, and without this service, Nova (compute service) will not know where to pick its images from. We will install Glance on the controller node itself. The following diagram explains its architecture:

Glance has two components: glance-api and glance-registry. As the name suggests, glance-api provides the API calls required to retrieve and store the images, while glance-registry handles more of the backend functions regarding where the images are stored.
Let's start with the installation of Glance. Its installation follows similar steps to those used for Keystone in the previous chapter. We will use the following checklist to have all the information ready:
|
Name |
Info |
|---|---|
|
Access to the Internet |
Yes |
|
Proxy needed |
No |
|
Proxy IP and Port |
Not Applicable |
|
Node name |
|
|
Node IP address |
172.22.6.95 |
|
Node OS |
Ubuntu 14.04.1 LTS |
|
Glance password |
|
|
Glance repository |
Local disk |
|
Disk partition info |
|
|
Glance Keystone password |
|
|
Glance port |
9292 |
Log in to the MySQL instance (MariaDB) installed in the previous chapter using the root password that we created:
mysql –u root –p
Enter the password:dbr00tpassword
Once in the database, execute the following command:
create database glance;
This will create an empty database called Glance. Let's now set up the Glance database user credentials:
GRANT ALL PRIVILEGES ON glance.* TO 'glance'@'localhost' IDENTIFIED BY 'g1anc3pwd';
GRANT ALL PRIVILEGES ON glance.* TO 'glance'@'%' IDENTIFIED BY 'g1anc3pwd';
Access to the glance database is allowed from all the hosts denoted by %. However, as previously mentioned, we need to provide explicit permissions for localhost, hence the two lines.
You can quickly verify that the database has been created by typing the following command:
show databases;
You should see the following output:

Tip
You will notice that you can see the Keystone and Glance databases along with the system databases; this is because you are logged into the root account. If you use the Glance account, you will not be able to see the Keystone database.
In order to verify that, after exiting the client, execute the following command:
mysql –u glance –p
When prompted for the password, enter g1anc3pwd. Execute the show databases; command and you will see only the schema and the Glance database.
As a final step in the installation, let's use the package manager to install the components of Glance:
sudo apt-get install glance python-glanceclient
This will install the two components used by Glance. By default, the service comes with its SQL lite database like Keystone; hence, after installing and configuring it, we will delete the database.
While performing the initial configuration of the Glance service, we will do the following:
- Create a Glance user in Keystone
- Create a Glance service in Keystone
- Create a Glance endpoint in Keystone
- Modify the configuration file
- Populate the Glance database
We will need to use the admin user that we created in the previous chapter in order to perform Keystone functions.
We will create a user with the name glance and the password g1anc3keypwd:
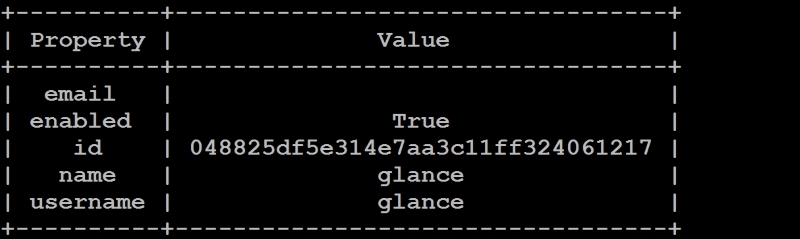
keystone --os-tenant-name firsttenant --os-username admin --os-password h33l0world --os-auth-url http://oscontrollernode:5000/v2.0 user-create --name glance --pass g1anc3keypwd
This will create the Glance user in the Keystone in the first tenant, as seen in the following screenshot:
As we can see, the command is too long and hence confusing. Therefore, we will export the common variables so that the Keystone command line becomes easier. Execute the following commands to export the variables:
export OS_TENANT_NAME=firsttenant
export OS_USERNAME=admin
export OS_PASSWORD=h33l0world
export OS_AUTH_URL=http://OSControllerNode:5000/v2.0
After executing the commands, the Keystone commands will be simpler, as seen in the subsequent configurations.
Next, we will create a service tenant, which will be used to interact with different services. This is a one-time process. We could ignore and proceed; however, it is a good practice, so let's follow it:
keystone tenant-create --name service --description "Service Tenant"
We will map the Glance user we just created to this tenant as an administrative role, by using the following command:
keystone user-role-add --user glance --tenant service --role admin
We will follow the exact same steps as we followed in the previous chapter, and since we have exported the environment variables, we can use the command without passing the various parameters:
keystone service-create --name glance --type image --description "OpenStack Image Service"
This will create the service in the Keystone, as can be seen in the following screenshot:

The endpoint helps other services discover Glance. We will need the ID of the Glance service we created in the previous step. Execute the following command:
keystone service-list
Copy the UID of the glance service, in our case 8d85877e169b40aa82aefdf23df74012. We also need to remember that the default port for Glance is 9292.
keystone endpoint-create
  --service-id 8d85877e169b40aa82aefdf23df74012
  --publicurl http://OSControllerNode:9292
  --internalurl http://OSControllerNode:9292
  --adminurl http://OSControllerNode:9292
  --region dataCenterOne
You should see something like the following screenshot:

Once we have the Keystone commands out of the way, we will have to modify the Glance configuration file located in /etc/glance/glance-api.conf.
We will need to modify five sections in the file, as follows:
- Under the
[default]section, we will set up the verbose logging for testing and we will set up the notification driver to NO Operation (NOOP). We will set up the RabbitMQ configuration based on our common settings:notification_driver = noop verbose = True rabbit_host = OSControllerNode rabbit_port = 5672 rabbit_use_ssl = false rabbit_userid = guest rabbit_password = rabb1tmqpass default_store = file.
- Under the
[database]section, we change the connection variable as follows:connection = mysql://glance:[email protected]/glanceThis change will ensure that Glance now points to the MySQL we set up instead of pointing at SQLite database. There will be another configuration statement currently pointing to the SQLite database in the configuration file; comment that line.
- Under the
[keystone_authtoken]section:auth_uri = http://OScontrollerNode:5000/v2.0 identity_uri = http://OScontrollerNode:35357 admin_tenant_name = service admin_user = glance admin_password = g1anc3keypwd
This section provides URLs to retrieve the tokens from Keystone.
- Under the
[paste_deploy]section, we will set the flavor to Keystone:flavor = keystoneThis sets up glance to use Keystone for authentication.
- Under the
[glance_store]section, we specify where we will store the images (:1mentions the order of directories if multiple of them are used):filesystem_store_datadir = /glance/images/:1
We have to make the same changes in the Glance registry configuration, with the exception of the [glance_store] section. The configuration file is located at /etc/glance/glance-registry.conf.
Let us now create the directory where we store the images:
sudo mkdir –p /glance/images/
sudo chown –R glance:glance /glance/images/
We will now remove the database that came with Glance:
rm -f /var/lib/glance/glance.sqlite
Then, we will finally restart the Glance components (both API and registry):
sudo service glance-api restart
sudo service glance-registry restart
There is no better way to validate an installation than to put it in action, so we will go ahead, download a KVM image from the Internet, and upload it to the Glance service.
Let us first check that there are no images in the current Glance, by executing the following command:
glance image-list
You should see the following output:

As you can see there are no images in Glance. We can download any qcow2 format image, which can be used for KVM or qemu and then upload it. Let us download a CirrOS image. CirrOS is a minimal distribution which was created for the sole purpose of testing a cloud environment; hence we will use the image.
Let us navigate to a folder, say, our home folder, using the cd ~ command. We will download the image by using the wget command:
wget http://download.cirros-cloud.net/0.3.3/cirros-0.3.3-x86_64-disk.img
This will download a 13 MB file, which can be used in Nova once we get there.
Once the download is complete, we can upload it to the glance registry using the following command:
glance image-create --name "CirrosTest" --file /var/cirros-0.3.3-x86_64-disk.img --disk-format qcow2 --container-format bare --ispublic True --progress
You should see the following result:

Once the image is uploaded, we can verify it by using the glance image-list command, as seen in the following screenshot:

This validates that we are able to push the image to the Glance service. This service will provide the images to Nova, so you may consider putting in different images in the qcow2 format for the KVM.
Tip
Glance is responsible for providing images to the different hypervisors, so it will store images in any format that the hypervisor will accept. In the case of multihypervisor deployments (which is beyond the scope of this book), Glance will hold different images for different hypervisors. KVM also supports raw images, so those can also be used.