
OneNote Lesson 2: Getting Started with OneNote 2013

In this lesson, you will learn how to create and manage Notebooks, insert Sections, Section Groups, and Pages. You will also insert several types of content to your Notebook, from text to multimedia.
What you’ll learn in this lesson:
- • Creating, managing, and saving Notebooks
- • Inserting new Sections, Section Groups, and Pages
- • Inserting several different file types into your Notebook
- • Copying and pasting content in a Notebook
Starting up
You will work with files from the OneNote02lessons folder. Make sure that you have loaded the OfficeLessons folder onto your hard drive from www.digitalclassroombooks.com/Office2013. If you need further instructions, see “Loading lesson files” in the Starting up section of this book.
Managing Notebooks
Now that you’re familiar with the OneNote working environment and have explored a Notebook, you will create one. Throughout this lesson, you will see how a OneNote Notebook can store and manage information in various formats, including web page text and graphics, document files, spreadsheets, and multimedia.
Creating a new Notebook
To create a new notebook:
1 Open the OneNote program by clicking Start > All Programs > Microsoft Office > Microsoft OneNote.
2 On the File Ribbon tab, click New. To store the Notebook locally, click Computer under New Notebook.

Creating a Notebook in Backstage view.
3 Type My First Notebook in the Notebook Name field. Click Create in a different folder, navigate to the OneNote02lessons folder, and click Create.
4 Click the Create Notebook button.

The new Notebook appears in the Normal (Notebook) view.
When the new Notebook opens, the Title bar at the top of the screen reads, Untitled page - OneNote. Most Microsoft Office programs display the document filename in the Title bar. However, OneNote is focused on the Page, so the Page name appears in the title bar at the top of the OneNote window, not the Document name.
 Sometimes, previously used Notebooks are present in the Notebook pane. If you want to close a Notebook, open the Notebook pane, right-click the Notebook you want to close, and select Close This Notebook.
Managing Sections
Once your new Notebook is created, you can add Sections and Pages to it. At this point, you should give the overall design of your new Notebook some thought and planning.
As explained in the previous lesson, remember that Sections are created by the Notebook author to organize specific points in the notebook file, and that Sections are made up of pages. You can re-organize Page and Sections after you have already added them. Since you created a Section in the previous chapter, you will now create a new Section in a new notebook.
Creating new Sections
To create a Section:
1 In the Section tab row, click the rightmost tab that displays a small black plus sign. This button is found directly to the right of the New Section 1 tab.
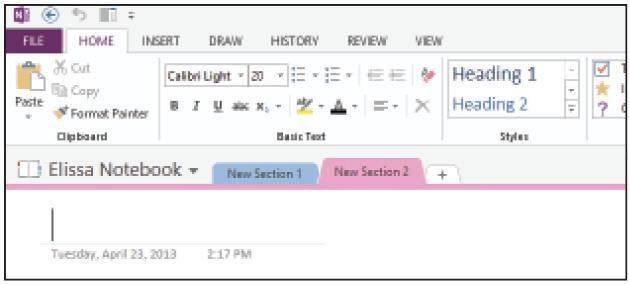
Click the tab that displays a small plus sign found to the right of the New Section 1 tab.
2 Repeat step 1 three times so the new Notebook has four Sections. Next, you’ll change the names of these sections.
Renaming a Section in OneNote
To rename a Section:
1 Double-click the New Section 1 tab. It becomes highlighted.
2 Type Set List and press Enter to rename the tab.
3 Repeat these steps on the next three tabs and name them Song Ideas, Gigs, and Gear.
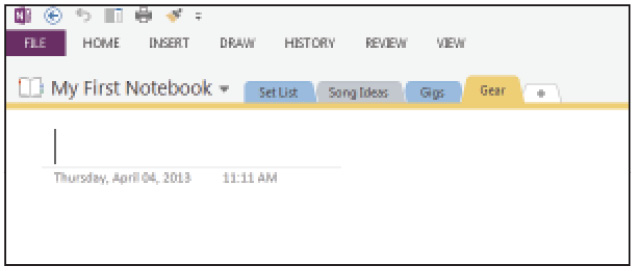
Each new Section contains a default Page, currently named Untitled Page.
 If there are too many tabs across the Section row, some will be hidden. Click the down-arrow (
![]() ) to show the rest of the sections.
) to show the rest of the sections.
Grouping Sections
Your Notebook might include several Sections that are related in some way. You can group those Sections to make them easier to manage into Section Groups. The value of Section grouping becomes more apparent as the number of Groups increases to fill the Section tab row.
Creating Section groups in a OneNote project
To create Section groups:
1 On the Section tab row, right-click the area to the right of the tabs and to the left of the Search text field.
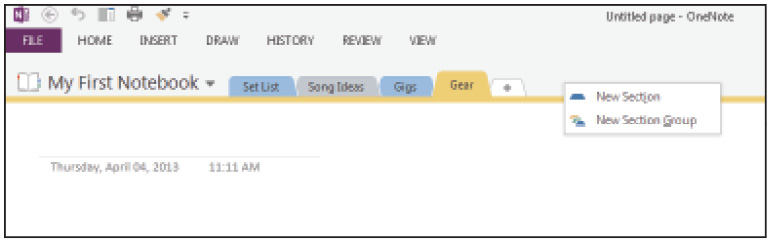
Creating a new Section group.
2 In the drop-down menu, click New Section Group. The New Section Group title appears highlighted.
3 Type Song Stuff and press Enter.

The new Section group appears.
 You can also rename a Section Group by right-clicking the Section Group, selecting Rename, typing the new name over the top of the old one, and pressing Enter.
To add a Section to a group:
Once you have created a Section Group, you can add an existing Section tab to the Group by dragging it over the top of the Group.
1 Click the Set List Section tab and drag it to the newly created Song Stuff group. The Set List Section disappears inside the Song Stuff Section Group.
2 Your view changes to show the Song Stuff Section Group in the Contents pane; the Set List Section appears in the Section tabs pane below the Ribbon buttons.
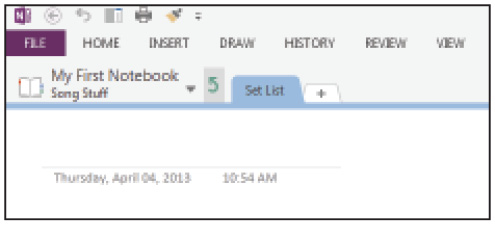
The new Section group appears with the Set List Section showing in it.
 If you are viewing a Section Group and would like to go back to the previous Section view or Parent Group, click the arrow (
 ![]() ). Navigate to parent section group button and click the arrow to return to the top level Section.
). Navigate to parent section group button and click the arrow to return to the top level Section.
3 Click the back arrow (![]() ) to return to the parent section group.
) to return to the parent section group.
4 Repeat steps 1 and 2 to add the Gigs Section to the Song Stuff group.
 To move a Section from a group, drag it to the arrow button to the left of the Section tabs, rest it over the arrow until the Parent Group appears, and drop it back with the existing Sections or in a different Section Group on the right side of Section tab area.
Saving a Notebook
OneNote doesn’t have a Save button on the Ribbon like other Microsoft Office programs do. This is because OneNote automatically saves your work whenever you close a Section or Notebook, and constantly while you take notes.
Saving a copy of a Notebook
Although OneNote continually saves your work, you can always manually save a copy of your Notebook, Page, or Section to a different location. In this example, you will save a copy of your Notebook.
To save a copy of the currently open Notebook:
1 Choose the File and select Export in the Backstage view.

Export tab in the Backstage view.
2 Under Number 1, Export Current, click Notebook.
3 Under Number 2, Select Format, click OneNote Package.
4 Click the Export button.
5 In the Save As dialog box, navigate to the OneNote02lessons folder.
6 In the File name box, type Music Project and click Save.
Don’t close the file; you will use it in the next section.
Next, you’ll learn to manage Pages, which will hold your content.
Managing Pages
OneNote allows you to create multiple Pages within a Section to make it more versatile. If a Page becomes too large, you can break it up into Subpages.
Adding and renaming Pages
The easiest way to create a new Page is to press Ctrl+N. You can also create pages for the Section you are in by clicking Add Page at the top of the Pages pane on the right side of the screen. In the following exercise, you will learn how to add a new page by adding a page to the section labeled Gear.
To add a Page:
1 From the Section pane on the top of the Contents page, click Gear.
2 Click the Add Page button (![]() ) at the top of the Pages pane on the right. A new untitled page appears in the Pages pane.
) at the top of the Pages pane on the right. A new untitled page appears in the Pages pane.
3 In the Contents pane, the cursor is blinking in the Page Name text box; type Bass Gear. Notice that the Page name also appears in the Page pane on the right side of the screen.

As you type the name in the Page Name text box in the Contents pane, it instantly appears in both the OneNote title bar and the Pages pane.
4 Create another page in the same Gear section, and call it Microphones.
To rename a Page:
1 In the Pages pane, right-click the page named Bass Gear. A context menu appears.
2 In the context menu, choose Rename; in the Content pane where it currently says Bass Gear, type Extension Cords to replace the name. Press Enter to finish.
Inserting content into Notebook Pages
OneNote Notebooks have a very flexible structure that you can change as needed and use to collect and organize content of various types, in the following ways:
- • Direct text entry (such as typing)
- • Copying and pasting
- • Creating a drawing using a mouse, touchpad, or electronic pen
- • Adding audio and video notes
- • Inserting web content
The following sections explain how to add content in all of these different ways.
Direct text entry (typing)
To insert content by typing:
1 Click anywhere on the Microphone page and start typing Two Microphones & Two Jacks
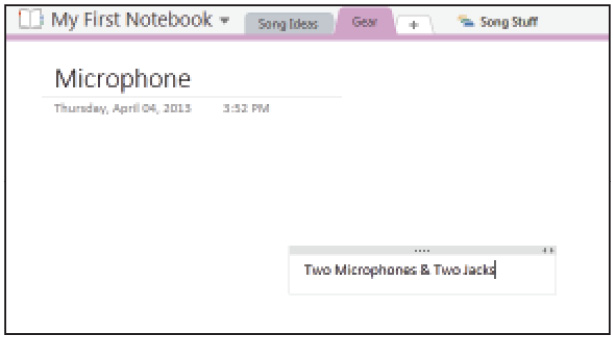
Typed text appears inside a constantly expanding container.
2 Select the text you just typed on the Microphone page, and from the Home Ribbon tab, choose Bold to apply a Bold font style to the text; using the Font Color button, select a dark purple color.
3 Click outside the note container when you have finished typing and formatting.
4 Move the container by clicking and dragging its border and moving it anywhere on the page.
Copying and pasting
To insert content by copying and pasting:
1 Navigate to the OneNote02lessons folder, and open the Microsoft Word file titled Music Schedule.
2 Select all the text in the file by dragging or using the keyboard shortcut Ctrl+A. Copy the text to the clipboard either by pressing Ctrl+C on your keyboard, or by selecting the text with your mouse, right-clicking, and selecting Copy.
3 Paste the text onto the Microphone Page in OneNote by right-clicking to display the Paste options.

Pasting in OneNote Page by selecting a Paste option.
4 Select the first Paste option, Keep Source Formatting.
The Paste options available are:
- • Keep Source Formatting: maintains the selected text’s original font, size, and style.
- • Merge Formatting: adopts the standard formatting used by OneNote.
- • Keep Text Only: removes any non-text items, such as images, and pastes text only.
- • Picture: inserts copied/cut image files.
Creating a drawing using a mouse, touchpad, or electronic pen
As with a paper-based Notebook, text isn’t always sufficient to convey meaning, so drawing a map or figure may be necessary. You can use your computer’s mouse, touchpad, or electronic pen to draw pictures and illustrations in OneNote.
To create a drawing:
1 Choose the Song Ideas Section and the Untitled page, and then click the Draw tab, located in the middle of the Ribbon.
2 Click the drop-down arrow to the right of the drawing tools to view more options.
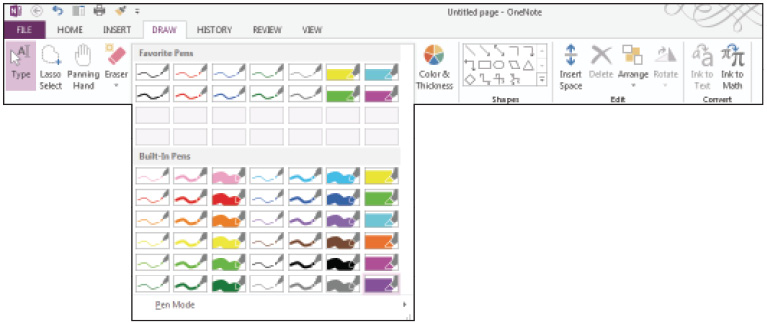
Several drawing tools are available on the Drawing Ribbon tab.
3 Select the Dark Blue Pen (1 mm) from the Built-In Pens section in the Tools group.

Dark Blue 1 mm drawing Pen selected from the Built-In Pens section of the Tools group.
4 Draw anywhere on the page by clicking and dragging the mouse to create a drawing.
5 On the far right of the Draw tab, click Select Objects or Type Text button ( ![]() ). Click your graphic in the Contents pane, press and hold the mouse button, and drag the graphic around your entire graphic. Release your mouse pointer.
). Click your graphic in the Contents pane, press and hold the mouse button, and drag the graphic around your entire graphic. Release your mouse pointer.
6 A dashed line borders your entire graphic. Drag your graphic to another location on the page.
Inserting audio and video notes
You can add audio and video to Notebooks, along with text and graphics. OneNote also includes the ability to record audio, such as a melody, an odd pronunciation, or other sounds.
To record audio:
1 Choose the Set List Section located in the Song Stuff Section Group, and name the Untitled page, Melodies. Next, you will place an audio note on the Melodies page.
2 From the Recording group on the Insert tab, click Record Audio and begin humming or singing your favorite tune.
3 When you are finished, click the Stop button in the Playback group.
4 A Melodies text box appears with the time and date that the tune was recorded listed near the bottom.

After you click the Record Audio button, OneNote opens to the Audio & Video Playback Context Ribbon tab.
 It is not easy to tell when OneNote is recording. Look for the elapsed time on the Audio & Video Playback Context Ribbon tab in the middle of the Playback group. If it is changing, OneNote is recording.
5 Double-click the melodies icon to play it (or click Play in the Audio & Video Playback tab).
Another powerful tool available in OneNote is the ability to record and store video files. The process for recording video in OneNote is very similar to recording audio.
To record video:
1 Choose the Gigs section and name the Untitled page Movements. Next, you will place a video on the Movements page.
2 From the Recording Group on the Insert tab, click Record Video. An icon for the video file appears on the page.
You can see what your camera is recording. However, if you click Pause, it’s not obvious that recording has stopped, since you continue to see the camera’s video feed.
3 Click Stop in the Playback group to end the recording.

The Audio & Video Playback Context tab appears, displaying playback control.
4 Double-click the icon on the Movements icon to play your video, or click Play in the Audio & Video Playback tab.
Inserting web content
You might want to add content from the Web into your OneNote Notebook. The procedure is straightforward, but you will need an internet connection and a web browser to get to your web content.
To insert a screen (web) clipping:
1 From your web browser, open the web page www.UsuallyNormal.com and scroll down to a photo of the band. You will insert this image into the OneNote Notebook.
2 Return to OneNote and the current Notebook and click the Microphone Page located in the Gear section. You’ll insert the clipping here.
3 Click anywhere on the page and type important info about the band.

Insert Screen Clipping button highlighted on the Insert Ribbon tab.
4 Click the Insert Ribbon tab and select Screen Clipping from the Images group. The screen shows the currently opened website with a faded screen.
5 In the browser window of the band website, click the top-left corner of the image, drag to the bottom-right corner, and release the mouse button.

The screen clipping now appears in your OneNote Notebook.
 Notice that OneNote also inserts a date and timestamp under the inserted screen clipping.
There might be times when you’d like to add an entire web page in your OneNote Notebook. This activity will only work using the browser Microsoft Internet Explorer.
To insert an entire web page:
1 Toggle back to Internet Explorer where you still have www.usuallynormal.com still open. Right-click close to the bottom of the menu and select Send to OneNote.
2 In the Select Location in OneNote window, click My First Notebook, Song Stuff Section Group, and then the Gigs Section. Click OK.
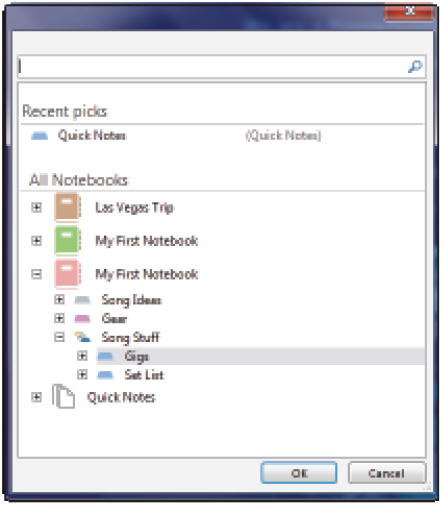
The Selection Location in OneNote dialog box appears in the Internet Explorer Window.
OneNote places the website on a new page in the Gigs Section of the Notebook.

The web page appears as a new Page in your OneNote Notebook. (Note that its appearance in OneNote and in Internet Explorer might differ slightly.)
3 You don’t need to save your file; OneNote automatically saves it.
Self study
1 Insert some shapes to a Notebook Page using the Draw Ribbon tab and the Shapes Group buttons. Use the Select & Type feature and the Lasso Select feature. Notice the differences between them.
2 Create a new Notebook with two or three Sections, each with two or three pages. Add some content. Notice how little time it takes to do this.
3 Create a drawing from the Drawing Ribbon tab and use at least three drawing tools.
Review
Questions
1 True or false? A group of Notebooks is called a Section.
2 True or false? You can record both audio and video from within OneNote and have it playback from the Notebook.
3 True or false? All text copied from an external source is always pasted as text only (that is, without formatting).
Answers
1 False. A group of Pages is called a Section.
2 True. You can record both audio and video files from the OneNote software and play it back from the Notebook.
3 False. You can choose from one of three Paste options, depending on the final formatting that you want.