
Excel Lesson 7: Working with Excel 2013 Templates

In this lesson, you will learn how to work with and save worksheet templates. In addition, you will learn how to create your own templates, protect cells and worksheets, and assign password protection to workbook files.
What you’ll learn in this lesson:
- • Opening a worksheet template
- • Saving a worksheet as a template
- • Protecting workbooks and worksheets
- • Assigning password protection to files
- • Hiding formulas and other cells from view
Starting up
You will work with files from the Excel07lessons folder. Make sure that you have loaded the OfficeLessons folder onto your hard drive from www.digitalclassroombooks.com/Office2013. If you need further instructions, see “Loading lesson files” in the Starting up section of this book.
Excel templates
A template is a worksheet that contains formatting, data, and other standard worksheet elements saved as a boilerplate. Excel offers a set of professionally-designed worksheet templates that you can use over and over again. Among the default templates offered by Excel are calendars, budgets, sales reports, and financial statements.
You can also search through the thousands of templates available from Office.com. When you use the Search tool, Excel displays a long list of categories from which to choose.
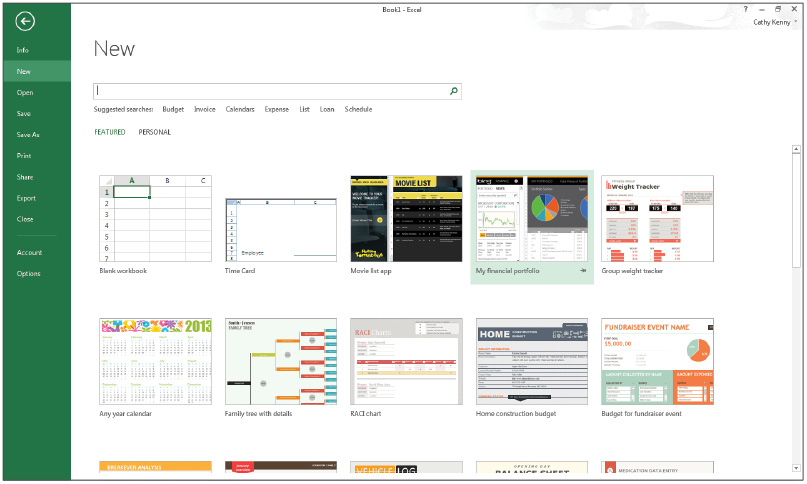
The Backstage view displays a number of predesigned templates when you choose the File > New command. When you click a template, Excel displays a preview of the template. To choose it, click Create. Excel then opens a copy of the template file.
Worksheet templates offer fill-in-the-blank functionality.
Opening a template
To open a template:
1 Open Excel or choose File > New if you already have Excel open. Excel displays a number of templates from which you can choose.
2 In the Search for online templates text box, type generic family budget and select the only result.

Preview a template file before you open it.
3 In the resulting window, click Create. Excel opens a new workbook file with the selected template.

The Generic Family Budget template collects data for a family budget.
4 Keep this file open; you will use it to practice saving a workbook as a template.
Working with templates
When you create a new workbook based on a template, Excel does not open the original template file, but a copy of it. Sample data, explanatory text, and setup worksheets can also be contained within the file to offer guidelines on how to work with the template.
 Caution: When working with template files, use care when you encounter formulas. Do not delete or otherwise disrupt formulas, since the data in your worksheet could become unreliable.
The Generic Family Budget template contains three separate worksheets: Dashboard, Budget, and Setup. Within each sheet are a series of text boxes and explanatory text detailing how to work with the various elements in the file.

The Generic Family Budget template contains three separate sheets that explain how to work with the file.
Saving a workbook as a template
If you have an existing workbook that you use on a frequent basis, you can save the file as a template. When you do, the template appears under the Personal templates page of the Office Backstage.
Workbooks saved as template files are stored in the default personal templates directory (C:users<user name>DocumentsCustom Office Templates.)
1 Using the budget file you created in a previous exercise, choose File > Save As.
2 Select Computer under the Save As section and click Browse. Navigate to the Custom Office Templates folder.

Save a workbook as a template so that you can use it over and over again.
3 Select Excel Template from the Save as type drop-down menu.
4 Type Miller Family Budget in the file name box and click Save.
5 Choose File > Close to close this file.
Opening a custom template
After saving a worksheet as a template, you can select your custom template from the Personal tab of the New Office Backstage.
1 Choose File > New.
2 Click the Personal tab and then click the Miller Family Budget template.

Saved templates appear under the Personal tab of the New Backstage.
3 Choose File > Save As and select Computer.
4 Click Browse and navigate to the Excel07lessons folder.
5 In the Save As Type box, select Excel Workbook; name the file Miller_Budget_work.
6 Click Save.
 Once you’ve opened a template from the Personal page, Excel displays it with the rest of the templates on the File New page. You do not need to switch to the Personal page every time you want to use it.
Protecting workbooks
When you create a new workbook based on a template, Excel allows you to freely edit the file. You can customize the template to suit your personal needs by changing formats, adjusting categories, and entering your own data. When you create templates to be shared with other users, you can use a variety of protection methods to prevent the template from experiencing unintentional damage.
By protecting workbooks, you can prevent other users from accidentally deleting important formulas or worksheets. Protecting a workbook is especially useful when working with templates, because this can help prevent accidental deletions or misuse.
You can protect workbooks at the file level or at the worksheet level. There are three levels of password protection in Excel: password protection to open a file, password protection to change data, or password protection for changing the file’s structure, such as adding, deleting, or hiding worksheets.
There are three other levels of protection in Excel: workbook, worksheet, and specific cells. When you enable workbook protection, Excel greys out the menu items that are not available in protected mode. You can also assign a password that users would be required to enter in order to disable worksheet protection.
|
Workbook protection levels |
|
|
Protection |
Description |
|
Workbook |
Prevents users from altering the structure of the workbook, including adding or deleting sheets and displaying hidden worksheets. You can also prevent users from changing the size or position of worksheet windows. |
|
Sheet |
Prevents users from making changes to a worksheet. You can specify the elements that users are allowed to change. |
|
Cells |
Cells are locked by default in a protected worksheet. Users cannot edit, insert, delete or formats cells. You can unlock cells that users are able to edit. |
Enabling workbook protection
To enable workbook protection:
1 Open any Excel file.
2 Choose Protect Workbook from the Review tab.
3 Select Structure in the Protect Structure and Windows dialog box.

Prevent users from making changes to the structure of a workbook by turning on workbook protection.
4 Click OK. When a workbook is protected, the Protect Workbook tool in the Ribbon remains selected.
5 Close the file. You can choose not to save it.
Adding password protection
When you protect a workbook at the Workbook level so that the workbook’s structure can’t be modified, you can add an additional layer of protection by assigning a password. When you do, users are unable to turn off workbook protection unless they have the password.
 Make sure you write down the password, since you will be unable to retrieve a forgotten password by means other than the slip of paper you wrote it on.
1 Open any Excel file.
2 From the Review tab, choose Protect Workbook.
3 Select Structure in the Protect Structure and Windows dialog box.
4 In the Password text box, type sesame, and then click OK.

Add a password to your workbooks to prevent users from turning off workbook protection.
5 In the Confirm Password dialog box, retype sesame, and then click OK to assign the password.
Disabling workbook protection
To disable workbook protection:
1 Using the file from the previous exercise, choose Protect Workbook from the Review tab.
2 In the Password text field of the Unprotect Workbook dialog box, type sesame, and then click OK.
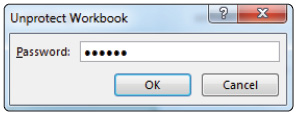
Enter the password to disable workbook protection.
Protecting a file
To protect a file:
1 Using the file from the previous exercise, click File > Save As.
2 From the Save As section, choose Computer, and click Browse.
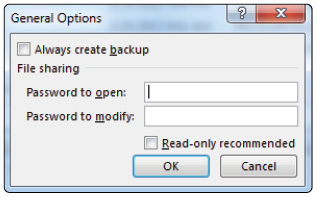
3 In the Save As dialog box, click the Tools drop-down list, and click General Options.

Prevent users from opening or modifying a workbook by assigning a password to the file.
4 Type sesame in the Password to open box.
5 Type sesame1234 in the Password to modify box.
Add a password to your workbooks to prevent users from turning off workbook protection.
6 Click OK and click Save to the save the workbook with a password.
Protecting worksheets
Within a workbook, you can protect a worksheet so that users cannot make any changes to the sheet. When you assign sheet protection, every cell in the sheet is locked unless you unlock specific cells. You can also provide users with a certain level of rights so they can work with data in the sheet. For instance, you can specify that users can insert columns, but are not allowed to delete them.
1 Using the file from the previous exercise, choose Protect Sheet from the Review tab.
2 Make sure that Protect worksheet and contents of locked cells is selected.
3 In the Allow all users of this worksheet to area, select Format Cells and Sort, and then click OK.
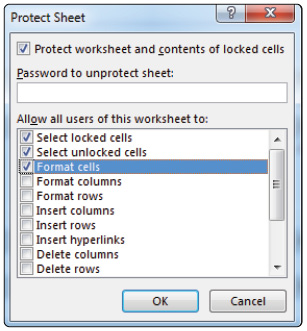
Indicate the specific tasks that users are allowed to and are not allowed to perform with worksheet protection.
Protecting worksheets with passwords
By protecting your worksheets with a password, you can control who can be allowed to turn off worksheet protection to gain access to certain sections. Any user who does not know the password will not be able to access the protected worksheets.
1 Using the file from the previous exercise, choose Unprotect Sheet from the Review tab and then choose Protect Sheet.
2 In the Password to unprotect sheet box, type sesame, and then click OK. Reenter sesame in the Confirm Password dialog box.

Use passwords to prevent users from disabling worksheet protection.
Unlocking cells in a protected worksheet
When you protect a sheet, every cell in the sheet is locked unless you specify otherwise. By unlocking a specific range of cells, the worksheet remains protected, but users are allowed to enter data. You can add an additional layer of preventative measures by assigning a password to the range of cells. That way, only those with the password can enter data in the unlocked cells.
Unlocking cells
Cells must be unlocked prior to enabling worksheet protection.
1 Using the file from the previous exercise, choose Unprotect Sheet from the Review tab. Then type sesame when prompted for the password.
2 On the Budget worksheet, click in cell C5 to select the Starting Balance amount. Press and hold the Ctrl key, and then select range C13:N17.
3 From the Review tab, choose Allow Users to Edit Ranges.
4 In the resulting dialog box, click New.
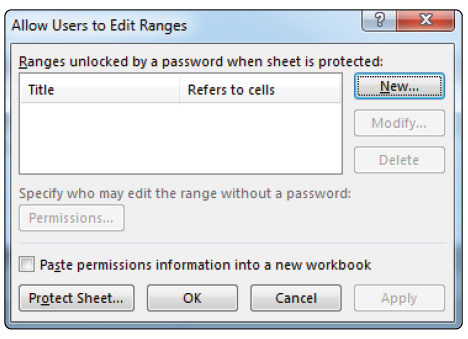
Select a range of cells that users are allowed to edit in a protected sheet.
5 In the Title, type Income, and then click OK.
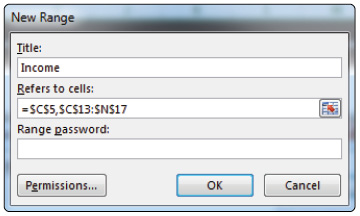
Assign a range name to the range of unprotected cells.
6 Click OK in the Allow Users to Edit Ranges dialog box.
Protecting ranges with passwords
To protect ranges with passwords:
1 Using the file from the previous exercise, choose Allow Users to Edit Ranges from the Review tab.
2 From the list of named ranges, choose Income, and then click Modify.
3 In the Range Password box, type sesame, and then click OK.

Add a password to a specific range of unprotected cells in your workbooks to prevent unauthorized users from entering data.
4 In the Confirm Password dialog box, retype sesame, and then click OK and OK again to assign the password.
5 Choose Protect Sheet from the Review tab. Type sesame in the Password to Unprotect Sheet text box and click OK.
Entering data in a locked cell
To enter data in a locked cell:
1 Using the file from the previous exercise, click in cell C13.
2 Type 3; Excel displays the Unlock Range dialog box.
3 In the text box, type sesame, and then click OK.
4 Type 3000 in cell C13.
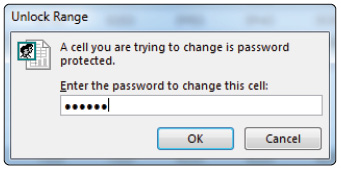
Before you can enter data in a locked cell, you must enter the password.
Hide and protect formulas
Another method of protecting data in worksheet templates is to hide important formulas from view in the cell or formula bar. When you hide formulas, the result of the formula appears in the cell, and the formula gets updated as the data changes, but users are prevented from viewing or editing the contents of the formula. When you hide a formula, you can also choose to lock the cell so it cannot be edited.
1 Using the file from the previous exercise, choose Unprotect Sheet from the Review tab and type sesame when prompted for the password.
2 Select range C6:N9; from the Home tab, choose Format, and then select Format Cells.
3 Click the Protection tab and select Locked and Hidden.

Hide worksheet formulas from view in a protected worksheet so the formula itself is not displayed, just the result.
4 Click OK. From the Review tab, choose Protect Sheet, and click OK to turn on worksheet protection.
5 Choose File > Save and File > Close to save and close the file.
Searching for templates
In addition to the templates that ship with Excel 2013, you can search through the hundreds of templates available at Office.com. The template library, accessible via the File > New command, displays a number of categories from which you can choose.
1 Choose File > New.
2 In the Search box, type Budget, and then press Enter.

Search thousands of online templates at Office.com.
3 Click Simple Budget, and then click Create.
4 Choose File > Save, select Computer, and click Browse.
5 Point to the Excel07lessons folder, type excel07_budget and click Save.
6 Choose File > Close to close the worksheet
You’ve now completed this lesson. In the next lesson, “Advanced Data Analysis,” you will learn how to work with data tables and pivot tables.
Self study
1 Open the template file Generic Family Budget and move to the Setup tab. Enter your family name and the year 2013 in cell B1. Switch to the Budget tab and enter a Starting Balance of 2000.
2 Enter the Wages & Tips amounts for the upcoming year.
3 Password protect the file so that a password is required to modify the data in the file.
Review
Questions
1 What is a worksheet template?
2 Can an existing workbook file be saved as a template for future use?
3 What are the three types of protection that can be added to an Excel workbook file?
4 How do you unlock a range of cells in a protected worksheet?
5 How do add password protection to a workbook?
Answers
1 A worksheet template is a predesigned worksheet that contains the data, formatting, and formulas you want to use in every worksheet. When you save a workbook as a template, the information in the template is automatically entered into the worksheet each time you open a copy of the template.
2 Yes, any existing workbook can be saved as a template. To do so, choose File >Save As, select Computer and then click Browse. In the Save As dialog box, select Excel Template from the Save as Type list, enter a name for the template, and click Save.
3 The three types of protection that can be added to an Excel workbook file are: protection at the workbook level, which prevents users from making changes to the structure of the workbook; at the worksheet level, which allows you to indicate the specific actions that can be used in a worksheet; and at the range level, which allows you to select a range of cells that can be unlocked and altered.
4 To unlock a range of cells in a protected worksheet, select the range to unlock, and then choose Allow Users to Edit Ranges from the Review tab. Select New, and type a name for the range of cells. Click OK twice.
5 To add password protection to a workbook, choose File > Save As, select Computer under the Save As section, and then click Browse. In the Save As dialog box, click the Tools drop-down list and click General Options. Type the password in the Password to open box and click OK.