For most of us, a calendar is a basic tool for organizing our lives, both at work and at home. With the calendar in Microsoft® Office Outlook® 2007, you can schedule regular appointments, all-day and multiday events, and meetings. You can view your schedule almost any way you want. In addition, you can share your calendar with others, which is a big help when scheduling organizational activities.
This chapter first describes the calendar and explains how to work with the basic Calendar folder view. Then you’ll learn how to schedule and work with appointments and events. You’ll also find information about the more advanced view options for the calendar and about how to share your calendar and free/busy information and view different time zones.
Both this chapter and the next focus on the features available in the Office Outlook 2007 Calendar folder. This chapter covers appointments and events; the following chapter discusses meetings and resources.
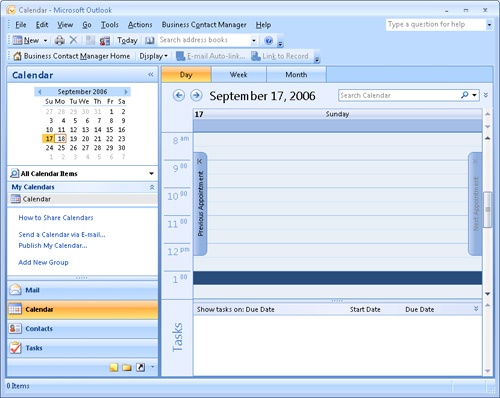
The Outlook 2007 Calendar folder provides a central location for storing vast amounts of information about your schedule. Figure 20-1 shows a basic one-day view of a calendar. You see this view when you first click the Calendar icon in the Navigation Pane to open the folder. This example calendar contains no appointments yet, and no tasks are listed in the Daily Task List.
The Outlook 2007 calendar can contain three types of items: appointments, events, and meetings.
An appointment, which is the default calendar item, involves only your schedule and time and does not require other attendees or resources. The calendar shows appointments in the time slots corresponding to their start and end times.
When an appointment lasts longer than 24 hours, it becomes an event. An event is marked on the calendar not in a time slot, but in a banner at the top of the day on which it occurs.
An appointment becomes a meeting when you invite other people, which requires coordinating their schedules, or when you must schedule resources. Meetings can be in-person meetings established through Outlook 2007 meeting requests. (Meetings can also be set up online using Microsoft Office Live Meeting, which is a separate application.) In this chapter and in Chapter 21, we’ll look at meeting requests in Outlook 2007.
Note
For in-depth information about meetings initiated in Outlook 2007, see Chapter 21. For information about online meetings, see "Using Microsoft Office Live Meeting" in Chapter 39.
You can create an appointment in any of these ways:
Choose File, New, Appointment.
When the Calendar folder is open, click the New button on the Standard toolbar.
When any other Outlook 2007 folder is open, click the arrow next to New on the toolbar, and then choose Appointment.
Click a time slot on the calendar, and simply type the subject of the appointment in the time slot.
Note
For detailed information about creating appointments and using the appointment form, see "Working with One-Time Appointments" later in this chapter.
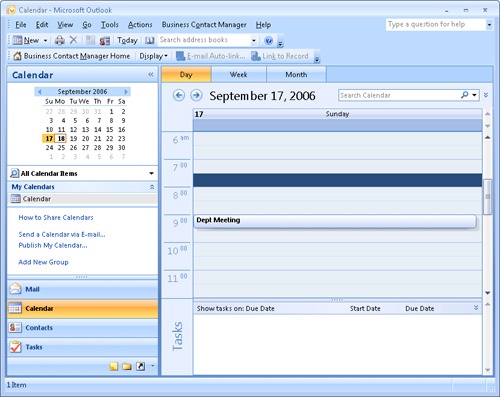
When you choose a calendar display of 14 or fewer days, the Time Bar appears, displaying 30-minute time increments by default. Figure 20-2 shows the Time Bar set to 30-minute increments, with a 30-minute appointment on the calendar.
You can set the Time Bar to display different time increments. To do so, begin by right-clicking the Time Bar to display the shortcut menu shown in Figure 20-3.

If you want to change the time scale to 10 minutes, select 10 Minutes; subsequently, the 30-minute appointment takes up three time intervals instead of one, as shown in Figure 20-4.

To choose a 60-minute interval, right-click the Time Bar, and then select 60 Minutes; Figure 20-5 shows the result. Note that when an appointment takes up less than a full Time Bar increment, as in this example, the scheduled time of the appointment is displayed as a ScreenTip when you hover the mouse pointer over the appointment subject on the calendar.
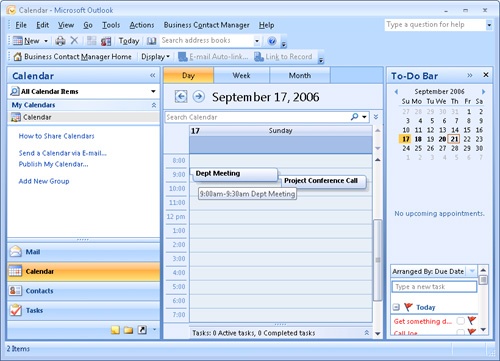
Figure 20-5. The Time Bar is set to 60-minute intervals and the time is displayed when you hover the mouse pointer over the appointment.
Outlook 2007 places appointments side by side on the calendar when they are scheduled in the same time interval (as shown in Figure 20-5).
The Date Navigator is shown as a small calendar at the top of the Navigation Pane. It has several important uses. For example, you can use it to select the day to view on the calendar—in effect, jumping from one date to another. When you click a day in the Date Navigator, Outlook 2007 displays that day according to how you have set the view (by using the Day, Work Week, or Week tabs:
In Day view, the selected day is displayed.
In Work Week view (five days by default—configurable by choosing Tools, Options, Calendar Options), Outlook 2007 displays the week containing the day that you clicked in the Date Navigator.
In Full Week view (seven days), the calendar switches to a one-day view for the date you click.
Note
When the To-Do Bar is displayed, the Date Navigator appears at the top of the To-Do Bar. When you close the To-Do Bar, the Date Navigator moves to the top of the Navigation Pane.
By clicking the right and left arrows next to the month names in the Date Navigator, you can scroll forward and backward through the months.
Note
For more information about the Day, Work Week, Week, and Month views, see "Setting the Number of Days Displayed" on the facing page.
Another use of the Date Navigator is to denote days that contain scheduled items. Those days appear in bold type; days with no scheduled items appear as regular text. This allows you to assess your monthly schedule at a glance.
Last, you can use the Date Navigator to view multiple days on the calendar. In the Date Navigator, simply drag across the range of days you want to view; those days will all appear on the calendar. For example, Figure 20-6 shows what happens when you drag across three days in the Date Navigator. You can also view multiple consecutive days by clicking the first day and then holding down the Shift key and clicking the last day. To view multiple nonconsecutive days, click the first day that you want to view and then hold down the Ctrl key and click each day that you want to add to the view.

The To-Do Bar replaces the old Microsoft Outlook TaskPad and offers an easy way of working with tasks from the Calendar folder. The To-Do Bar is not turned on by default, but it can be enabled using the To-Do Bar command on the View menu. The To-Do Bar displays existing tasks from the Tasks folder and also allows you to add new tasks. Adding a new task is as simple as clicking in the Task List area of the To-Do Bar and typing the task subject. Double-click the task item to open the task form if you’d like to add more details. When you create a task in the To-Do Bar, Outlook 2007 automatically adds it to the Tasks folder.
One of the main advantages of having the To-Do Bar in the Calendar folder is that it enables you to assess your schedule and fit in tasks where appropriate. When you drag a task from the Task List to the calendar, an appointment is added. When you double-click the appointment, the appointment form appears, with the task information filled in. You need only set the schedule information for the appointment and save it to the calendar (as explained in "Working with One-Time Appointments" on the next page).
You can set the number of days displayed in the calendar in several ways. One way is to use the Date Navigator, as discussed earlier. The easiest way, however, is to use the appropriate tab in Calendar view. To select the number of days to view, click the Day, Week, or Month tab.
When the calendar displays 14 or fewer days, the days are shown side by side with the Time Bar (as shown earlier in Figure 20-6, for example). Figure 20-7 shows the calendar with seven days displayed.

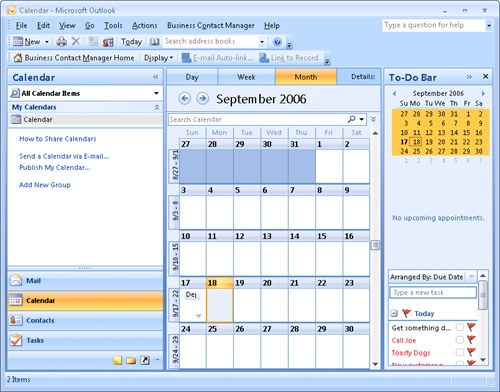
When you click the Month tab in Calendar view, the view is different from the view you see when you select more than seven days in the Date Navigator. However, the Date Navigator and the To-Do Bar can optionally appear in Month view, as shown in Figure 20-8. This behavior is different from earlier versions of Microsoft Outlook, which do not include the Date Navigator or To-Do Bar in Month view.